


Building a drone from scratch is little different from building a robot from scratch; it means selecting individual components, assembling them manually, and configuring the flight software yourself. This guide focuses on a practical quadcopter build using commonly available parts rather than vague theory or prebuilt kits.
The instructions below assume a beginner-to-intermediate skill level and prioritize compatibility, reliability, and ease of repair.
Bill Of Materials (Required Parts)
Every scratch-built drone requires the following core components. These parts work together and must match in voltage, size, and protocol support.
- Frame: 5-inch carbon fiber quadcopter frame (X layout)
- Motors: 4× brushless motors (2207 or 2306 size, 1700–2450KV depending on battery)

- ESC: 4-in-1 ESC rated 45A or higher
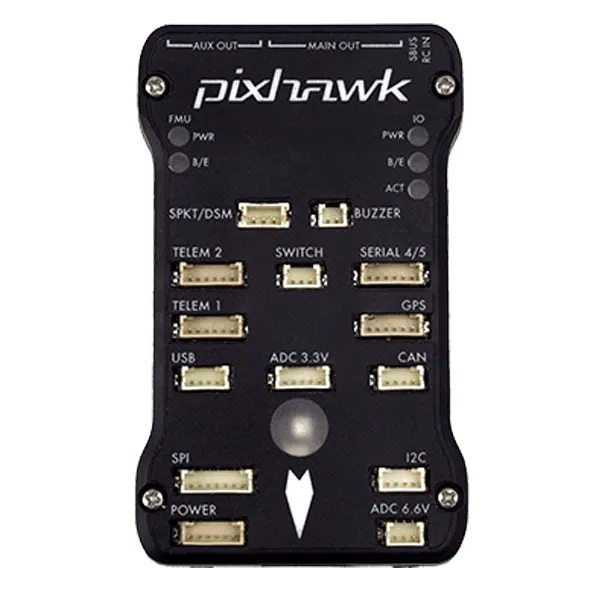
- Flight Controller: F7-based controller compatible with Betaflight
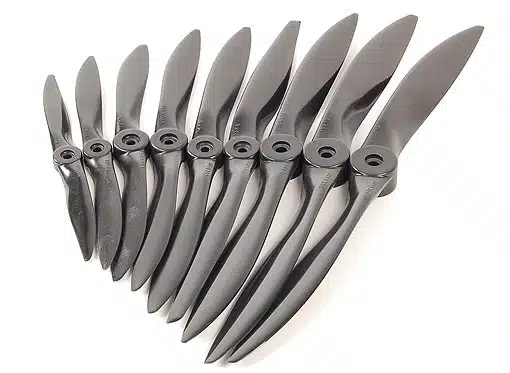
- Propellers: 5-inch tri-blade props (two CW, two CCW)
- Battery: 4S or 6S LiPo battery (1300–1500mAh recommended)
- Radio Receiver: ExpressLRS or Crossfire receiver
- Transmitter: Any compatible RC radio controller
- Battery Connector: XT60 or XT30
Optional But Common Add-Ons
- FPV camera
- Video transmitter (VTX)
- FPV antenna
- GPS module
- Buzzer for locating the drone
Frame Selection And Design
Most beginners should start with a pre-designed carbon fiber frame rather than attempting a custom design. Carbon fiber provides strength, vibration resistance, and crash durability.
If designing a frame yourself, you must account for motor mounting hole patterns, arm thickness, and center-stack spacing. Custom frames typically require CAD software and CNC cutting or 3D printing, which adds complexity.
Assembling The Frame
Frame assembly creates the foundation for all electronics. Accuracy here directly affects flight stability.
- Attach arms to the bottom plate using supplied hardware
- Install standoffs evenly to prevent frame twist
- Mount the top plate loosely until electronics are installed
Motor And ESC Installation
Motors provide lift and directional control, while the ESC regulates their speed. Placement and wiring cleanliness matter.
- Mount motors to each arm using thread-lock on screws
- Solder motor wires to the ESC pads
- Secure the ESC to the frame with soft mounting if available
Power System Wiring
The power system distributes battery voltage to the ESC and onboard electronics. Incorrect wiring can permanently damage components.
- Solder the battery connector to the ESC power pads
- Ensure correct polarity before connecting a battery
- Use heat shrink tubing to insulate exposed joints
Flight Controller Installation
The flight controller interprets sensor data and pilot input. Orientation and vibration isolation are critical.
- Mount the flight controller with soft grommets
- Align the arrow on the board with the front of the frame
- Connect ESC signal wires to the correct motor outputs
Receiver And Radio Setup
The receiver allows communication between your transmitter and the drone.
- Connect the receiver to a UART on the flight controller
- Enable Serial RX in the firmware configuration
- Bind the receiver to your transmitter
FPV System Installation (Optional)
An FPV system enables real-time video transmission from the drone.
- Mount the camera with a forward-facing tilt
- Wire the VTX to regulated power and video pads
- Install the antenna before powering the system
Software Setup And Calibration
Firmware configuration ensures safe and predictable flight behavior.
- Install Betaflight Configurator
- Calibrate the accelerometer on a level surface
- Verify motor order and direction
- Assign arming and flight mode switches
Troubleshooting Common Problems
- Drone flips on takeoff: Motor order or direction is incorrect
- No receiver input: UART or protocol mismatch
- Excessive vibration: Loose frame hardware or unbalanced props
- Video noise: Ground loop or insufficient VTX filtering
Tips
- Remove propellers during all bench testing
- Label motor positions before soldering
- Start with default PID settings
- Use a smoke stopper for first power-up
FAQ
Is building a drone cheaper than buying one?
In most cases, no. Building provides customization and repair knowledge rather than cost savings.
Do I need to program the flight controller?
Yes. Basic firmware configuration is required before flight.
Can beginners build drones without soldering?
No. Soldering is essential for reliable power and signal connections.
Summary
- A scratch-built drone uses individual components, not kits
- Component compatibility matters more than brand
- Proper wiring and calibration prevent crashes
Conclusion
This guide provides a realistic, hands-on approach to building a drone from scratch using proven components and methods. By following these steps, you gain full control over your hardware, understand how repairs work, and avoid the limitations of prebuilt systems.


Discussion (1)
This has to be one of the most clickbait articles I’ve come across in a while “how to build a drone from scratch a step by step guide”. You gave a vague overview, no Bill of Materials, no STL files, no recommendations for where to find frame designs, or how to design a frame from scratch (which would kinda be a pain). 0/10