


You can build a simple DIY projector without a magnifying glass using basic household materials. This homemade smartphone projector uses a box, a lens replacement, and a dark interior to enlarge your phone’s screen onto a wall. The setup works best in a dark room and gives you a budget-friendly way to create a large-screen experience without buying a commercial projector.
This guide uses common items and a simple lens replacement to keep the build affordable. Once assembled, your DIY projector can display movies, photos, and games from your phone. Follow each section carefully to get the best possible picture from your homemade projector.
Materials You Will Need
- Sturdy cardboard box
- Clear plastic lens from old reading glasses, VR goggles, or a camera filter (lens substitute)
- Utility knife or scissors
- Black paint or dark fabric for the inside of the box
- Ruler or measuring tape
- Duct tape or strong adhesive
- Smartphone stand or cardboard phone holder
- Charging cable for your phone
Steps To Make A DIY Projector Without Magnifying Glass
Prepare The Box
Start by shaping the box to support your lens substitute and ensure the interior stays dark enough for a clear projection.
- Choose a box large enough to hold your phone with room for the lens area.
- Mark two openings: one for the lens and one for your phone holder.
- Cut the openings cleanly using a utility knife.
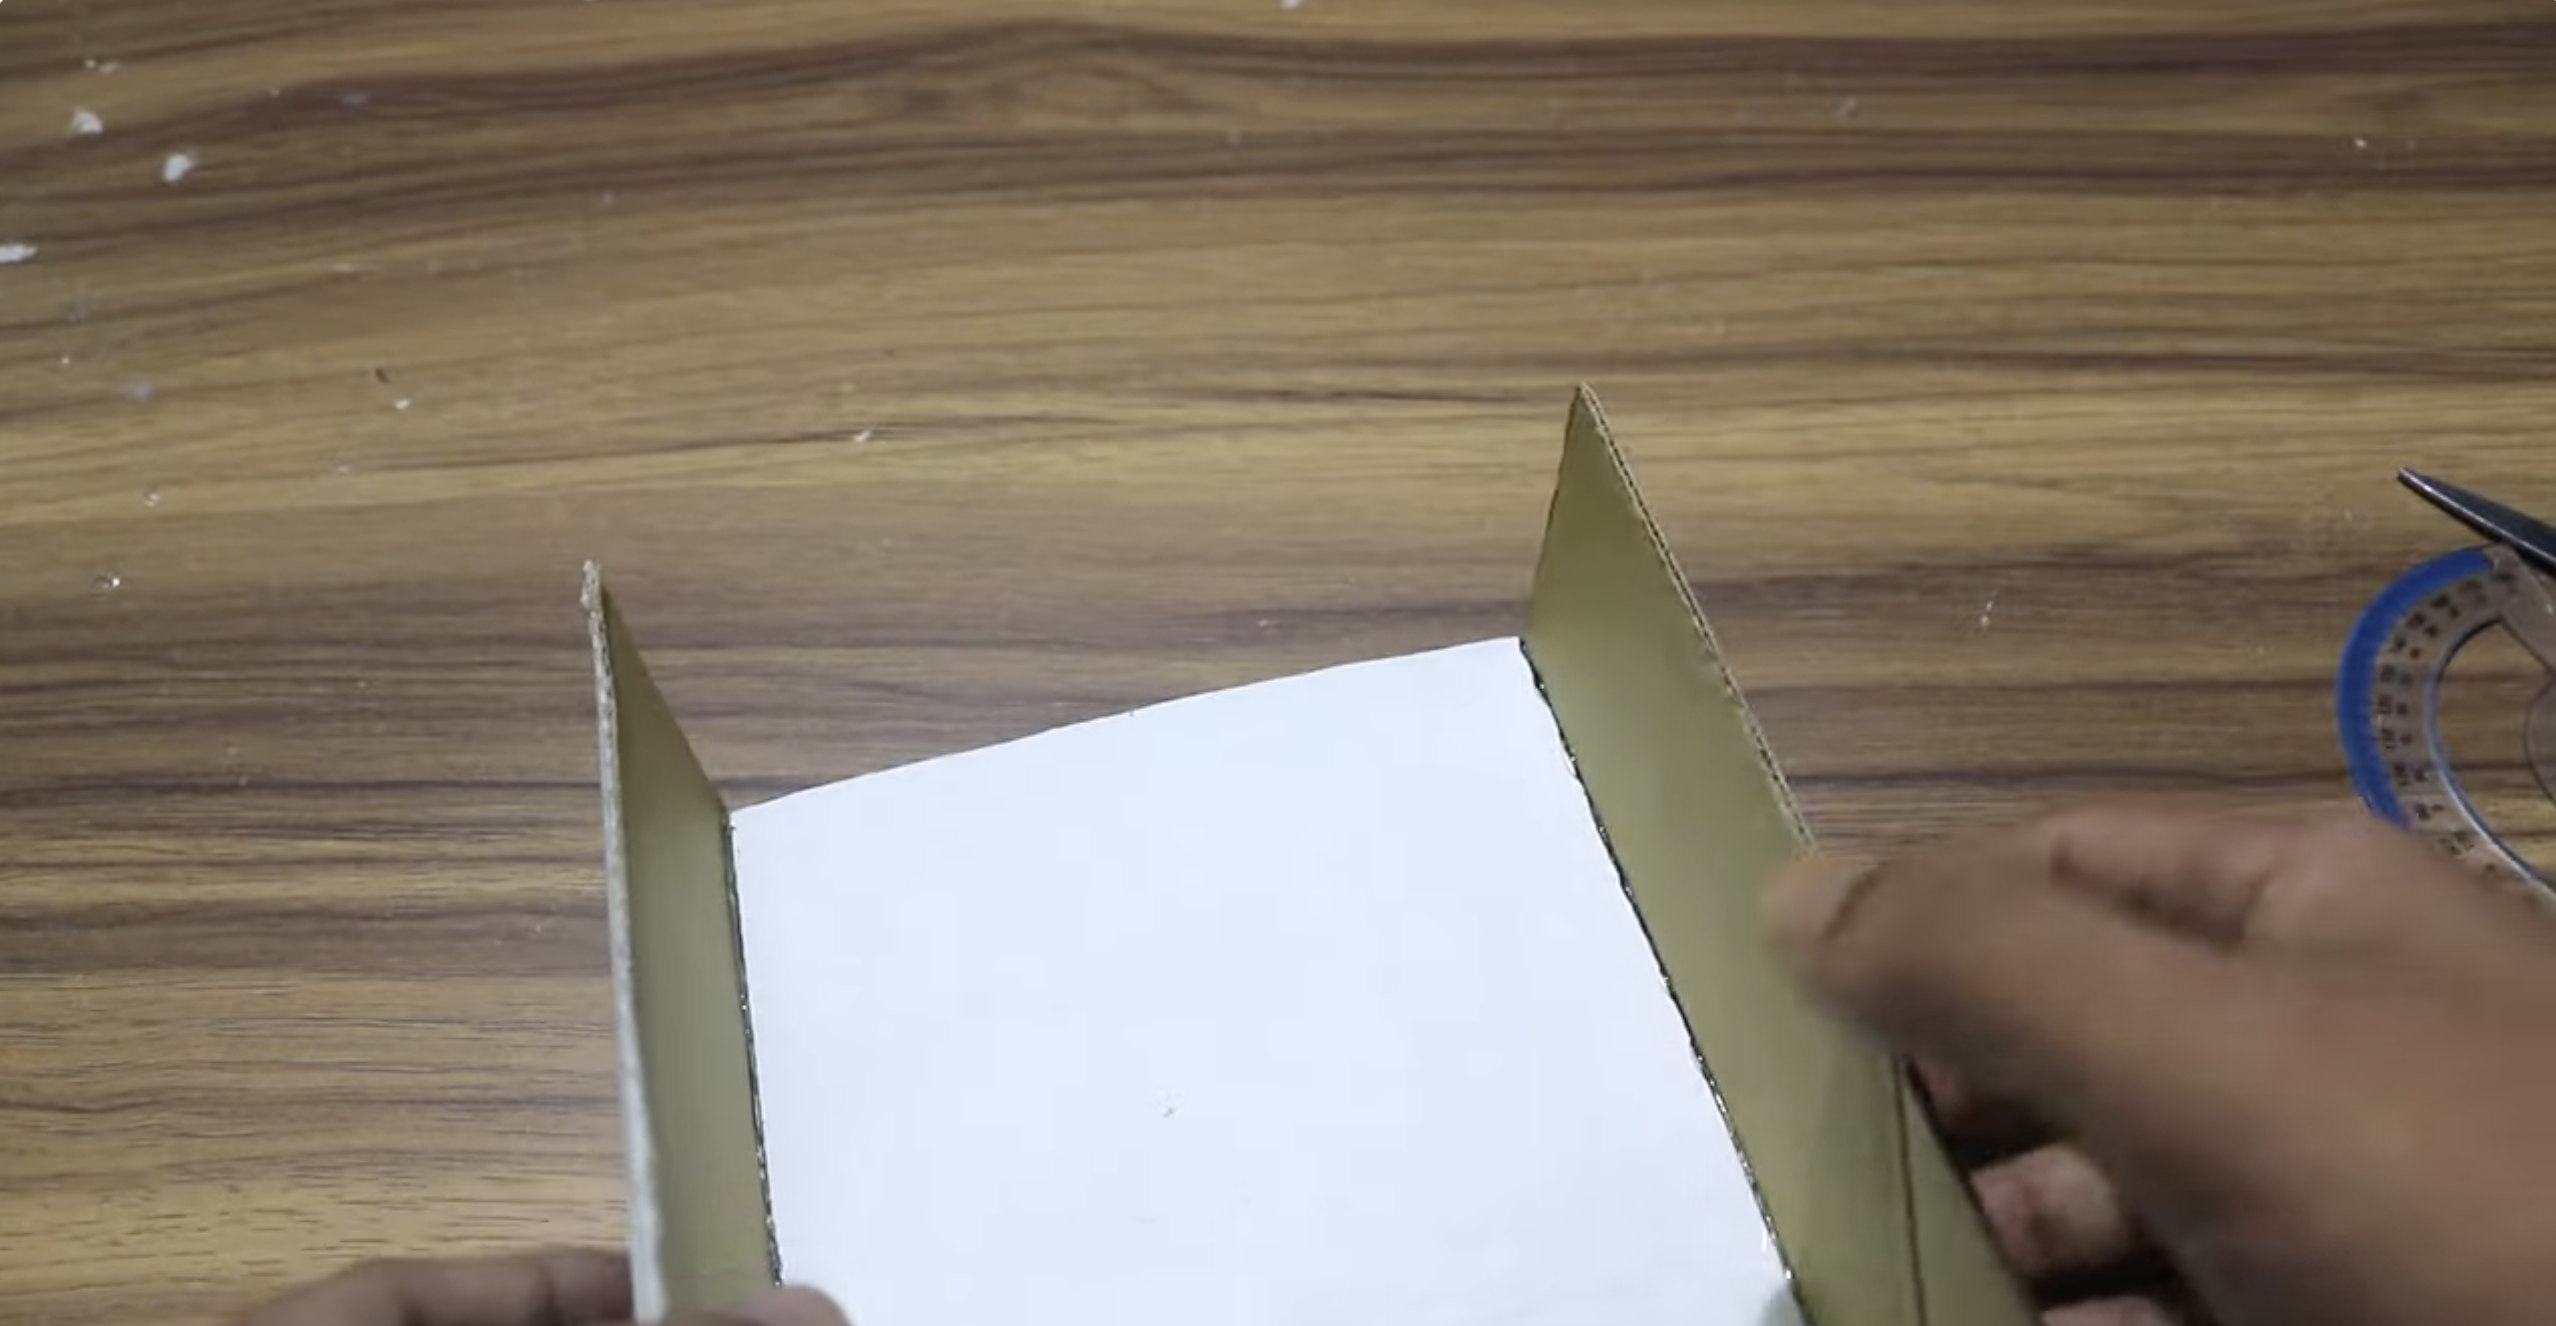
- Paint the inside of the box black or line it with dark fabric to reduce light reflection.
Create The Lens Opening
Your lens substitute needs a precise opening so the image can pass through clearly.
- Place the lens substitute against the box where the opening will sit.
- Trace its outline with a pencil to guide your cut.
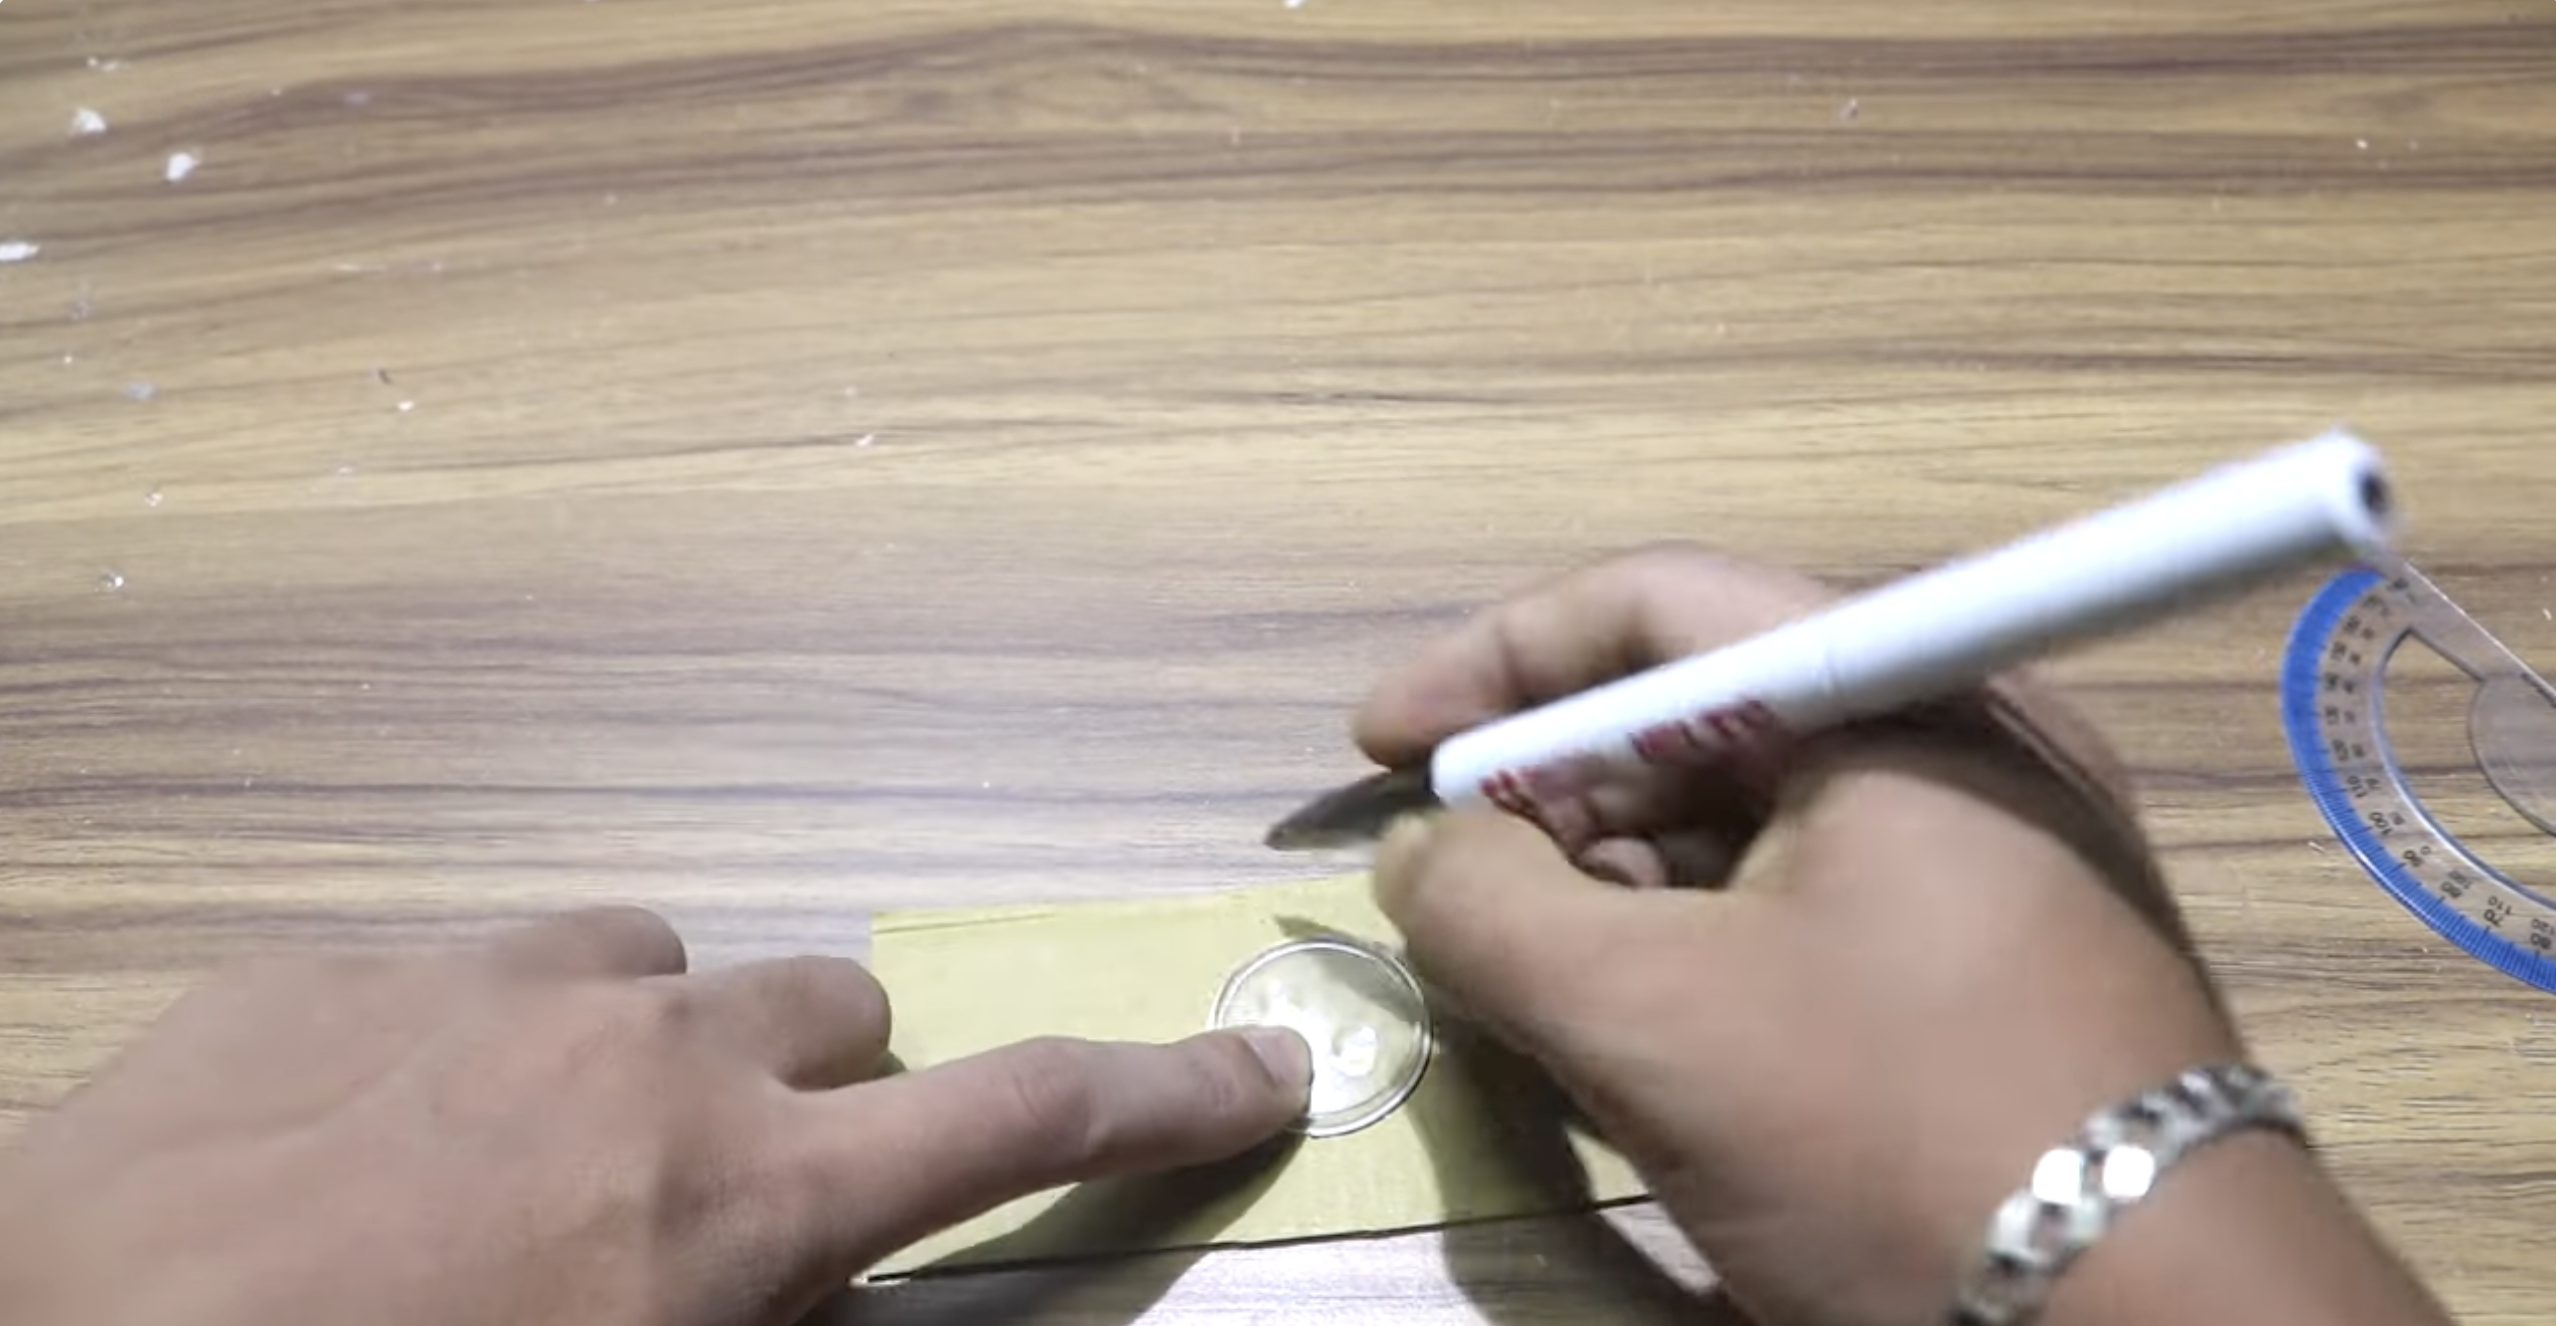
- Cut along the traced line carefully.

- Test the fit and adjust the hole so the lens sits snugly without gaps.
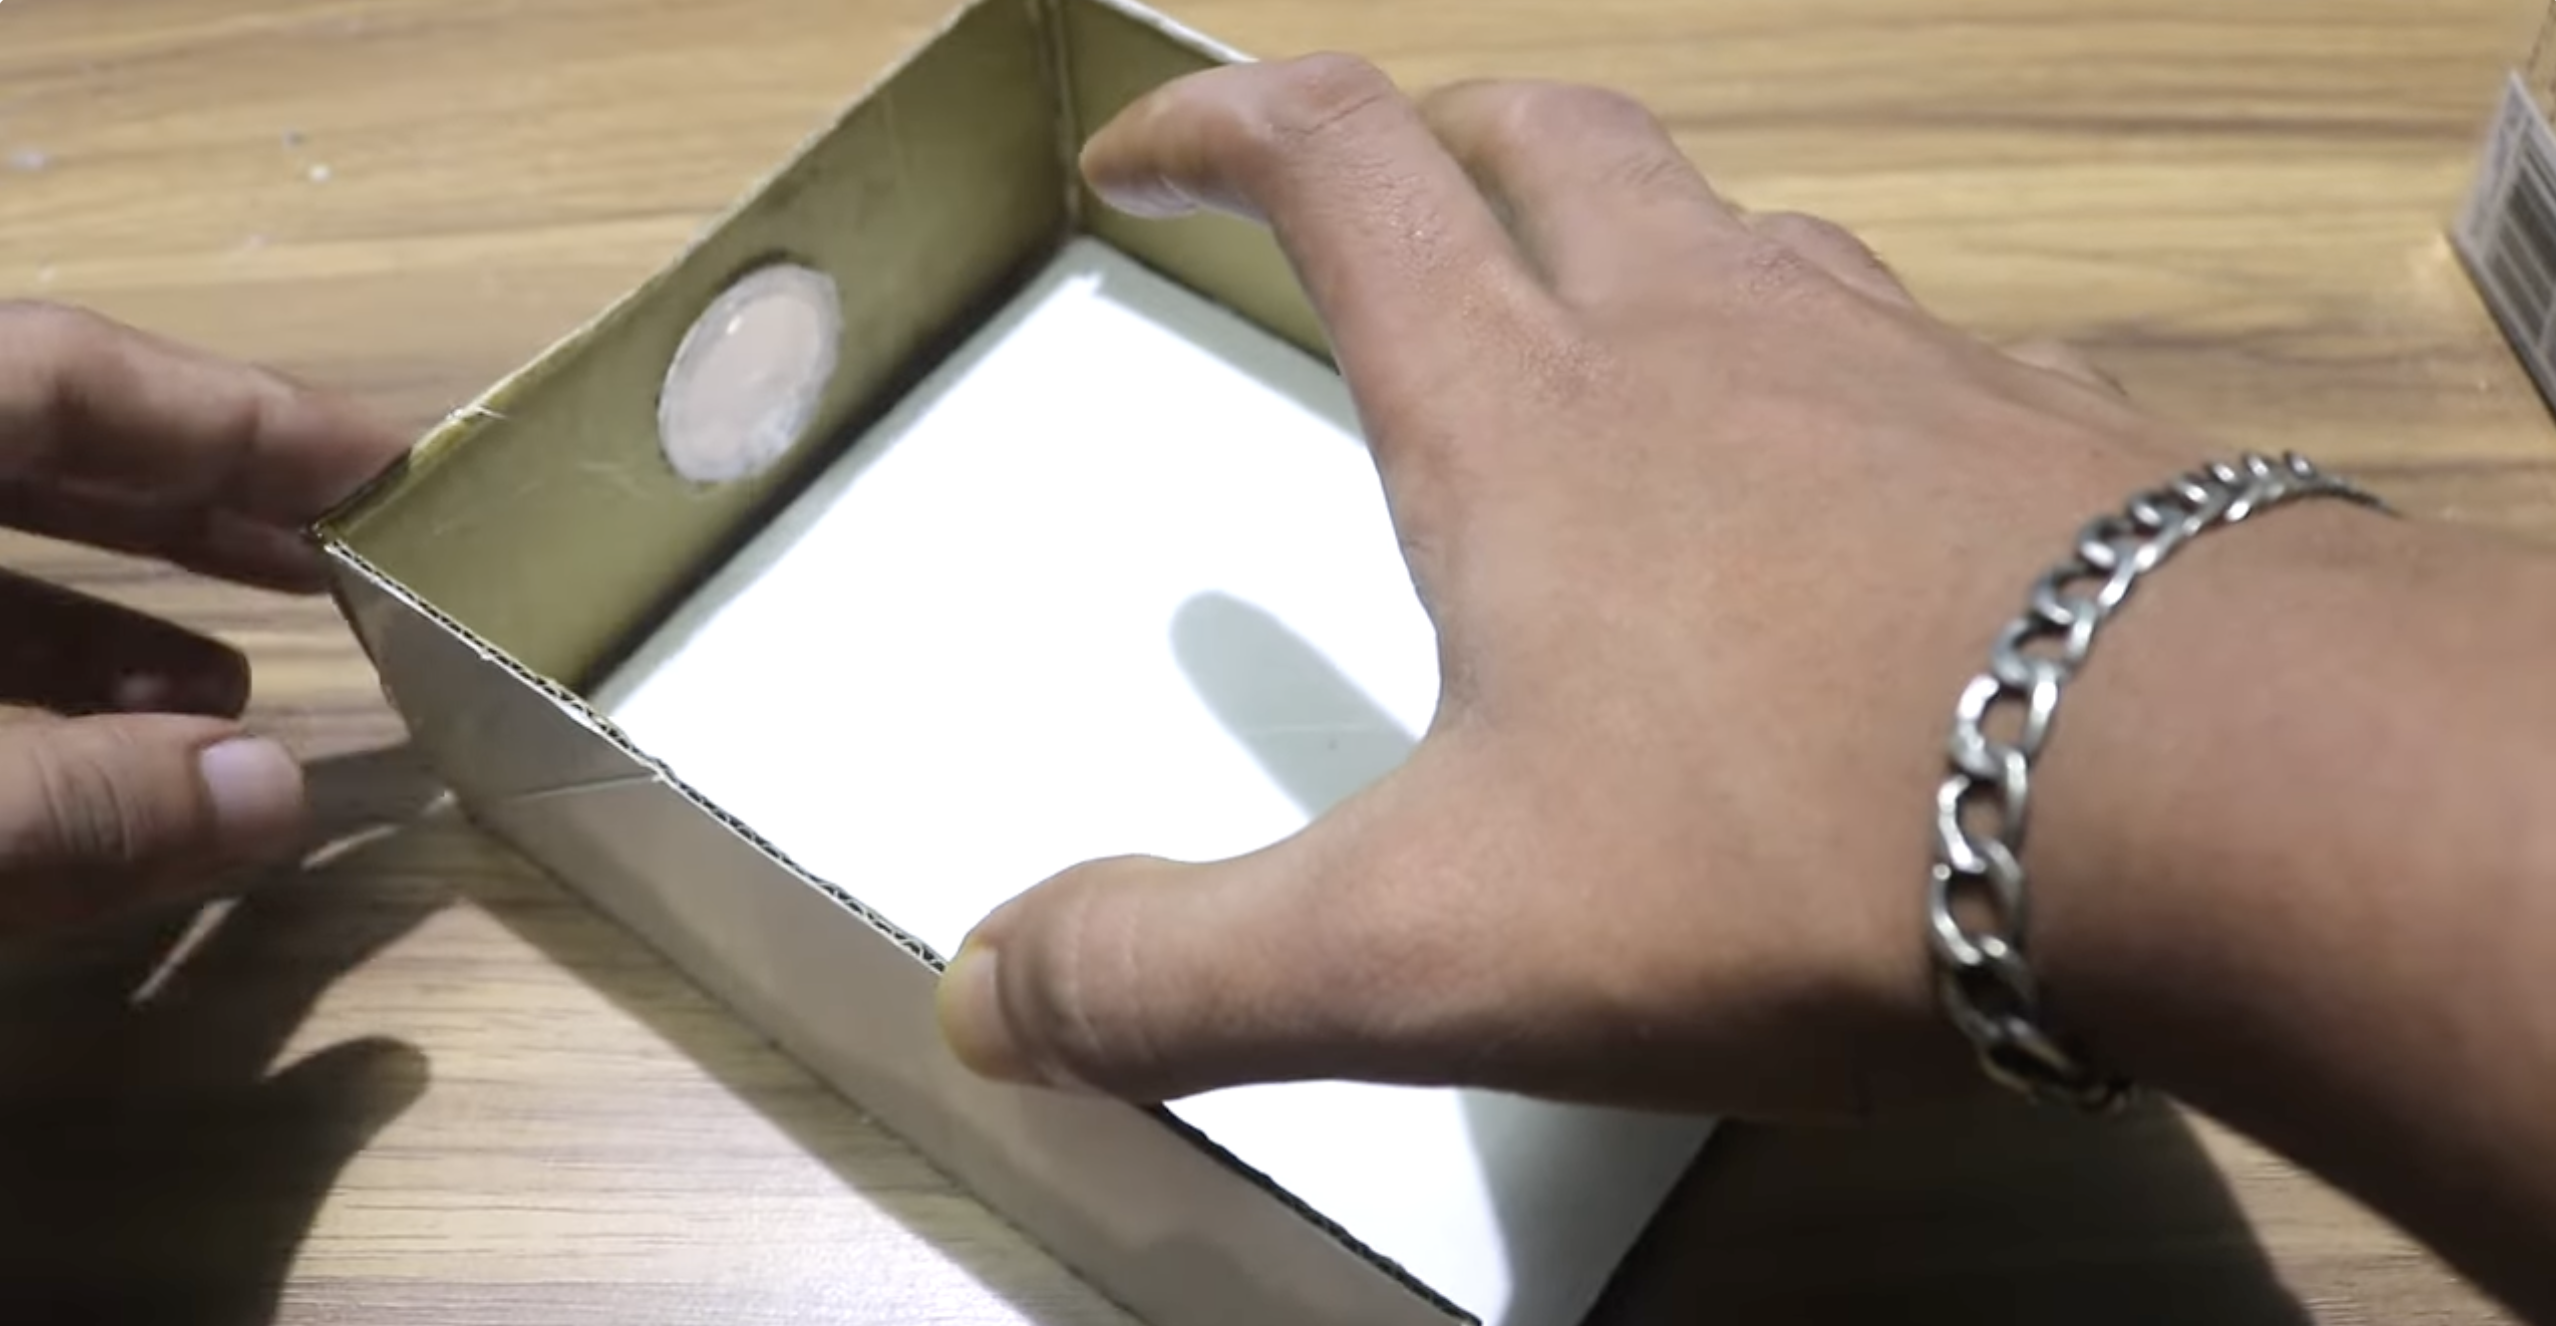
Build The Lens Holder
The lens holder keeps the lens aligned and stable while allowing small focus adjustments.
- Cut a strip of cardboard wider than the lens opening.
- Fold it lengthwise so it forms a flexible control surface.
- Secure the strip inside the box around the lens opening using tape.
- Center the lens substitute on the strip so it aligns with the hole.
- Attach it with tape while leaving slight room for forward/backward adjustments.
Secure The Lens
Once aligned, the lens must stay firmly in place so your image stays sharp.
- Position the lens so it sits level and centered with the opening.
- Seal all edges with tape to block stray light from bleeding through.
- Clean the lens surface to remove fingerprints or dust.
Add The Smartphone Holder
The phone must remain steady behind the lens so the projected image does not shift.
- Place the phone holder inside the box aligned with the lens opening.
- Test-fit your phone to confirm the camera sits directly behind the lens area.
- Secure the holder firmly so it does not move during projection.
- Add small felt pads to prevent scratches on your device.
Adjust The Focus
Small movements of your phone or lens help sharpen the image on your wall.
- Dim the room and place the projector facing a blank wall.
- Open a bright image or video on your phone.
- Move the phone closer to or further from the lens until the image becomes clear.
- Secure all internal parts once you find the best projection distance.
Test The Projection
Finalize your setup by checking brightness, clarity, and alignment.
- Darken the room for maximum image contrast.
- Adjust the projector’s distance from the wall to resize the picture.
- Fine-tune focus until the edges appear sharp.

- Ensure your phone remains charged during projection.
Troubleshooting Common Problems
- Image Appears Upside Down: Rotate your phone screen in settings or flip the phone’s orientation.
- Image Looks Blurry: Adjust the phone-to-lens distance slowly until focus improves.
- Projection Is Too Dim: Move the projector closer to the wall or increase phone brightness.
- Image Has Light Leaks: Seal all remaining box gaps with black tape or fabric.
- Picture Is Distorted: Ensure the lens sits flat and centered against the opening.
Tips
- Use the brightest phone you have, since DIY projectors rely on phone brightness alone.
- Keep the lens clean for the sharpest possible image.
- Use a white, smooth wall or a projector sheet for better clarity.
- Play high-contrast videos for clearer projection results.
- Stabilize the projector using books or a small stand to prevent vibrations.
FAQ
Can A DIY Projector Work Without A Magnifying Glass?
Yes. You can use clear lenses from old glasses, VR goggles, or camera filters as substitutes. These focus light similarly to basic magnifiers.
How Bright Will The Projection Be?
Brightness depends on your phone's screen. DIY projectors do not include bulbs, so use them in dark rooms for best results.
Why Is My Image Fuzzy?
This usually happens when the phone and lens are not at the correct focal distance. Adjust both until the picture becomes sharp.
Can I Use This For Movies?
Yes. It works for videos, photos, and games, but image quality will not match commercial projectors.
Summary
- You can make a DIY projector without magnifying glass using a cardboard box and a simple lens substitute.
- Darkening the interior and aligning the lens correctly improves image clarity.
- Focus adjustments depend on the distance between your phone and the lens.
- This setup works best in dark rooms and is ideal for casual movie nights.
Conclusion
This DIY projector is an easy way to create a large-screen experience using basic materials. With careful alignment and a dark room, you can project videos and images without buying a magnifying glass or a commercial projector. The project encourages creativity and gives you a simple way to explore homemade optics while enjoying a bigger display from your smartphone.
Once you get the hang of adjusting focus and distance, you can upgrade the build with better lenses, sturdier materials, or improved holders. It’s a flexible DIY project that anyone can assemble and expand over time.


Discussion (0)
Be the first to comment.