
 Published on 11.04.2026
Most people think of antivirus software when they think about stopping malicious programs. But Windows 11 has a built-in tool that goes further than that. AppLocker lets you decide exactly which executable files are allowed to run on your PC, and which ones are not. Instead of reacting to threats after they happen, you set the rules in advance. If a program is not on your approved list, it simply does not run. This guide explains what AppLocker is, how it works, and how to use it to allow or block executable files in Windows 11.
What Is AppLocker?
AppLocker is an application control feature built into the Local Security Policy in Windows 11. It lets you create rules that determine which programs, scripts, installers, and other files can run on your system, and for which users or groups those rules apply.
It is designed primarily for IT administrators managing shared or business environments, but it is equally useful for power users who want tighter control over what runs on their personal machine. A parent locking down a family PC, a small business owner standardizing software across employee machines, or a security-conscious individual blocking programs from risky locations like the Downloads folder can all benefit from it.
AppLocker works by enforcing a whitelist or blacklist approach. When you enable executable rules and create your own, Windows checks every executable against your rules before allowing it to run. Anything not explicitly allowed is blocked by default. Anything you explicitly deny is blocked regardless of where it lives.
One important thing to know before you start. AppLocker is available on Windows 11 Pro, Enterprise, and Education editions. It is not available on Windows 11 Home. You also need to be signed in as an administrator to create or change AppLocker rules.
Understanding AppLocker Executable Rules
Before diving into the steps, it helps to understand what AppLocker actually looks at when it evaluates an executable file.
AppLocker executable rules technically apply to any portable executable file, not just files ending in .exe or .com. Even if someone renames a file to change its extension, AppLocker can still identify and block it based on its actual file structure.
When you create a rule, you choose one of three conditions to base it on. A publisher condition identifies a file by its digital signature, which is the most reliable option because it remains consistent even when the file is updated. A path condition identifies a file or folder by its location on the file system, which is simpler to set up but easier to work around. A file hash condition generates a cryptographic fingerprint of the specific file, which is the most precise option but requires updating the rule every time the file is updated.
Each rule can either allow or deny. Allow rules let the specified file run for the specified users. Deny rules block it. Rules can apply to everyone on the machine or to specific users and groups, which gives you fine-grained control over who can run what.
Before You Create Rules: Enable the Application Identity Service
AppLocker depends on a Windows background service called the Application Identity service. If this service is not running, AppLocker rules will not be enforced. Before you do anything else, make sure it is enabled and set to start automatically.
- Press Windows key + R, type cmd, and press Ctrl + Shift + Enter to open an elevated Command Prompt.
- Type the following command and press Enter: sc config AppIDSvc start= auto && net start AppIDSvc
- Close the Command Prompt when it finishes.

This sets the service to automatic and starts it immediately. You only need to do this once. From this point on, AppLocker will enforce your rules every time Windows starts.
How to Set Up AppLocker and Create Executable Rules
Step 1: Open Local Security Policy
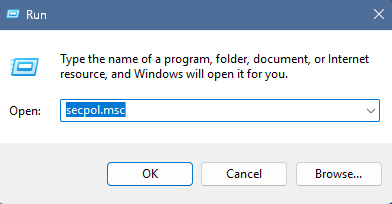
Press Windows key + R, type secpol.msc, and press Enter. This opens the Local Security Policy window. In the left panel, expand Application Control Policies and then click on AppLocker.
Step 2: Enable Rule Enforcement
Click the Configure rule enforcement link on the right side of the window. In the Enforcement tab, find the Executable rules section and check the box next to Configured. Make sure the dropdown next to it is set to Enforce rules, not Audit only. Click OK.
This is the step that actually activates AppLocker for executable files. Without it, any rules you create exist but do nothing.
Step 3: Create Default Rules for Packaged Apps
Before adding your own rules, you need to protect Microsoft Store apps from being accidentally blocked. In the left panel, expand AppLocker and right-click on Packaged app Rules. Click Create Default Rules. If you already see a rule called All signed packaged apps in the list, you can skip this step.
Step 4: Create Default Rules for Executable Files
This is a critical step that most people miss. Right-click on Executable Rules in the left panel and click Create Default Rules. This adds three baseline rules that allow Windows system files and Program Files to run normally. Without these defaults, AppLocker will block everything on your system including core Windows components, which will make your PC unusable.
After creating default rules, your Executable Rules list should show entries allowing files in Windows, Program Files, and Program Files (x86) to run for everyone.
Step 5: Create Your Own Allow or Block Rule
Now you can add the specific rule you actually want. Right-click on Executable Rules and click Create New Rule. A wizard will open.
On the Before You Begin screen, click Next.
On the Permissions screen, choose whether this rule will Allow or Deny the file from running. Select the user or group you want the rule to apply to. The default is Everyone, which means all accounts on the machine. If you want to apply it only to a specific user or group, click Select and search for them by name.
On the Conditions screen, choose how you want AppLocker to identify the file. Publisher is the most reliable for named applications. Path is useful for blocking entire folders like Downloads or Temp. File hash is the most precise for a specific version of a file. Click Next after making your selection.
Fill in the details for your chosen condition. For a path rule, enter the folder or file path. You can use environment variables like %USERPROFILE%\Downloads* to block all executables in the Downloads folder for the current user. For a publisher rule, browse to the file and AppLocker will extract the publisher information automatically. For a file hash, browse to the file and AppLocker will generate the hash.
On the Exceptions screen, add any exceptions if needed. For example, you might block an entire folder but want to allow one specific file inside it. Click Next.
Give the rule a name that makes it easy to identify later and click Create. If AppLocker prompts you to create default rules at this point, click Yes if you have not already done so.
Practical Examples of What You Can Block
Blocking executables from the Downloads folder is one of the most useful things you can do with AppLocker. A large proportion of malware infections start with a user downloading and running something they should not. Creating a deny rule for the path %USERPROFILE%\Downloads* blocks any executable from that folder from running, which significantly reduces the risk of accidental infections.
You can also block specific applications by name or publisher. If you want to prevent anyone on a shared PC from running a specific game, a browser, or any other program, a publisher or file hash rule targeted at that application will stop it reliably.
For shared family computers, creating rules that apply only to a specific user account lets you lock down one account without affecting your own. Standard user accounts become much more controlled, while the administrator account retains full access.
What Happens When AppLocker Blocks a File
When a user tries to run a file that AppLocker has blocked, Windows shows a message saying the app has been blocked by your system administrator. The program does not open. There is no workaround available to a standard user without administrator access.
As the administrator, you can review which files have been blocked by opening Event Viewer, navigating to Applications and Services Logs, then Microsoft, then Windows, then AppLocker. The logs there show you exactly which files were blocked and which rule triggered the block. This is especially useful when testing new rules to make sure they are working as intended without catching legitimate files by accident.
Important Things to Know Before You Rely on AppLocker
AppLocker is a strong layer of defense but it is worth being clear about what it is and is not. Microsoft describes it as a defense-in-depth security feature rather than a standalone security solution. A determined attacker with administrator access to a machine can disable or work around it. It is most effective as a layer on top of other security practices, not as a replacement for them.
The default rules created in Step 4 are path-based, which means any file placed inside the Windows or Program Files directories can run. If someone with administrator access installs something into Program Files, AppLocker will not block it. For tighter control, you can supplement path rules with publisher or hash rules for specific applications.
If you ever need to remove all AppLocker rules and start fresh, you can right-click on AppLocker in the Local Security Policy and choose Clear Policy, or use the secpol.msc interface to delete individual rules. Be careful when doing this on a system where AppLocker is actively enforcing rules, since removing the default rules without disabling enforcement first can cause problems with running applications.
Final Thoughts
AppLocker is one of those Windows 11 features that sits quietly in the background, completely unknown to most users, but genuinely powerful for the people who take the time to set it up. For parents managing shared family computers, small businesses standardizing what software can run, or security-conscious individuals who want to add a meaningful layer of protection without third-party software, it delivers real value. Setting it up correctly takes about fifteen minutes, and once it is running, it works silently in the background without any ongoing effort.
Frequently Asked Questions
Is AppLocker available on Windows 11 Home?
No. AppLocker is only available on Windows 11 Pro, Enterprise, and Education editions. It is not included in Windows 11 Home. If you are on the Home edition and need application control, you would need to upgrade your Windows edition or use a third-party tool.
What happens if I forget to create default rules before enabling AppLocker?
If you enable AppLocker enforcement without creating the default executable rules first, AppLocker will block all executable files on your system including core Windows components. This can make your PC unusable. Always create default rules before enforcing AppLocker policies.
Can AppLocker block programs for one user but not another?
Yes. Each AppLocker rule can be targeted to a specific user account or security group. This means you can block a program for a standard user account while leaving it fully accessible for the administrator account or other users.
Which rule condition should I use: publisher, path, or file hash?
Publisher is the most reliable for most situations because it is based on the digital signature and remains consistent across updates. Path is the easiest to set up for blocking entire folders like Downloads. File hash is the most precise but requires updating the rule whenever the file is updated. For general use, publisher rules offer the best balance of reliability and maintenance.
How do I know if AppLocker is actually blocking something?
Open Event Viewer and navigate to Applications and Services Logs, then Microsoft, then Windows, then AppLocker. The logs there record every file that AppLocker has blocked along with which rule triggered the action. This is the most reliable way to verify that your rules are working correctly.


Discussion (0)
Be the first to comment.