

Do you want to learn how to split your screen across two monitors in Windows? The Snap feature can enhance your productivity on all modern versions of Windows. Furthermore, Windows 10 and Windows 11 allow you to use Snap to split the screen on dual monitors both with the mouse and the keyboard. In this guide, I’ll show you how to snap app windows side by side on a setup with multiple displays, whether you’re using Windows 10 or Windows 11:
NOTE: This guide outlines the differences between using Snap in Windows with a single monitor versus multiple monitors. To learn more about Snap and Snap layouts, check our tutorials on how to split screen and view apps side by side in Windows 10 or how to use Snap to split screen on Windows 11, depending on your Windows version.
 A transparent overlay appears over the section where you dragged the window
TIP: If you need some help connecting multiple displays, here’s how to connect an external monitor to a laptop with Windows 10.
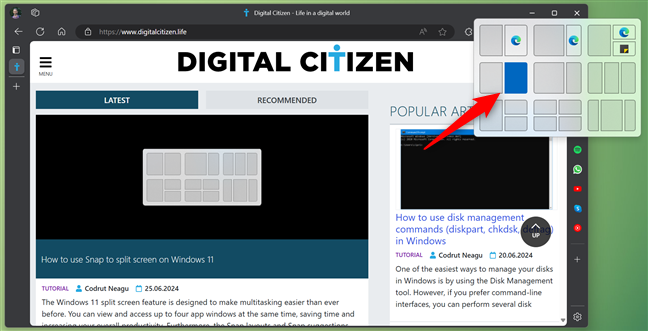
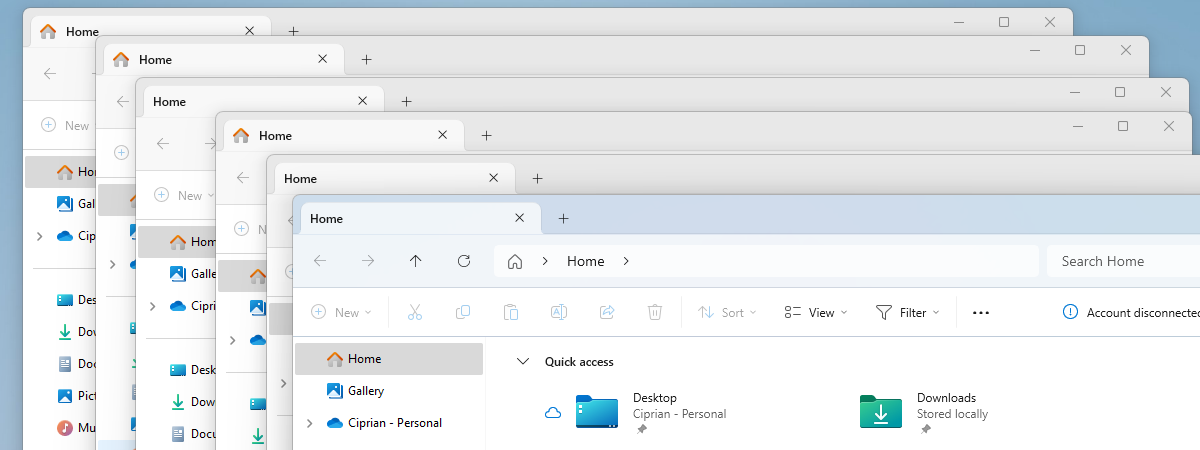
If you have Windows 11, you also have the alternative to hover your mouse over the maximize button in the top-right corner of a window to see the Snap layouts and Snap suggestions available for it. Click or tap the position for your window within the layout you prefer.
A transparent overlay appears over the section where you dragged the window
TIP: If you need some help connecting multiple displays, here’s how to connect an external monitor to a laptop with Windows 10.
If you have Windows 11, you also have the alternative to hover your mouse over the maximize button in the top-right corner of a window to see the Snap layouts and Snap suggestions available for it. Click or tap the position for your window within the layout you prefer.
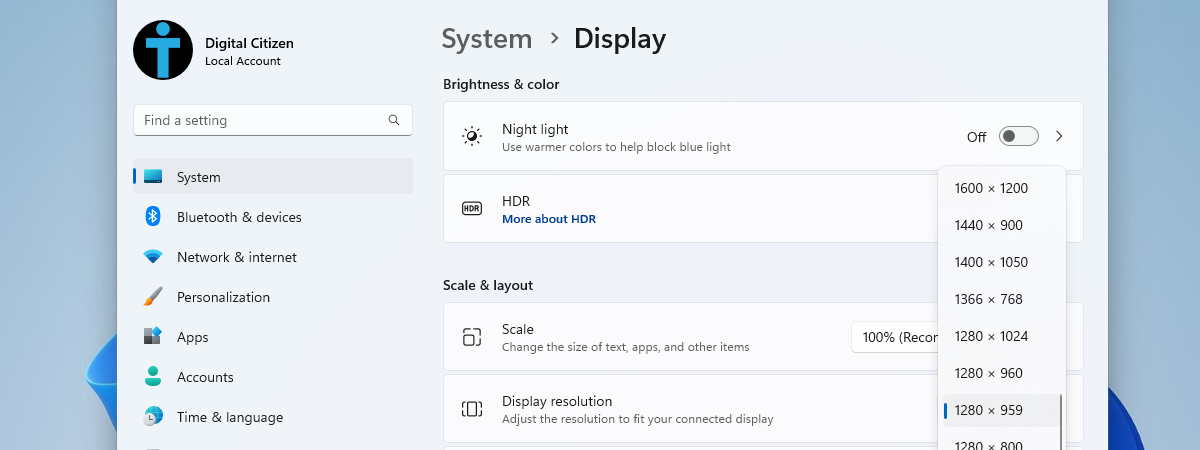
 Click or tap on the desired position for your window in the preferred layout
As soon as you decide on a section to place your window, Snap Assist will display the remaining apps in other available areas. Click or tap the ones you want for each layout section.
Click or tap on the desired position for your window in the preferred layout
As soon as you decide on a section to place your window, Snap Assist will display the remaining apps in other available areas. Click or tap the ones you want for each layout section.
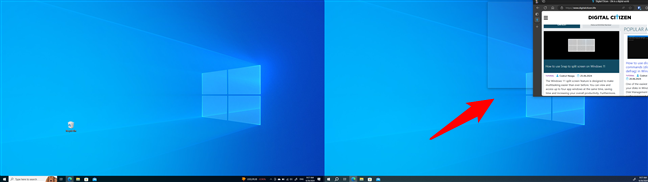
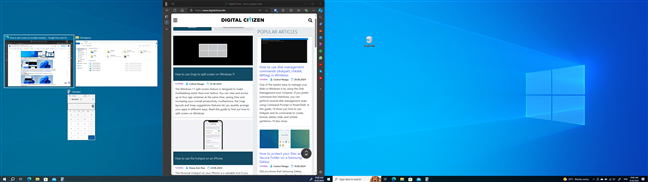
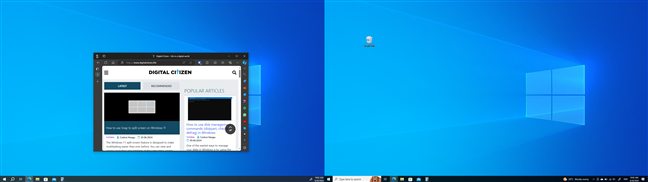
 The window we want to snap is shown on the right monitor
If you press Windows + Left arrow on your keyboard, the window snaps to the left of the main display.
The window we want to snap is shown on the right monitor
If you press Windows + Left arrow on your keyboard, the window snaps to the left of the main display.
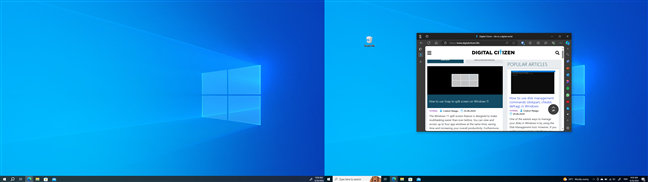
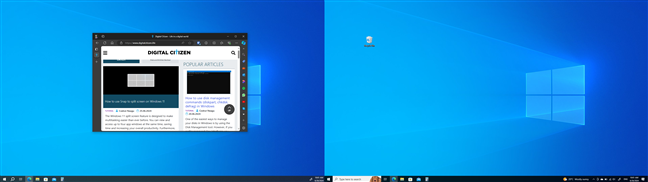
 Snap the window to the left half of the main screen
Using the Windows + Left arrow keyboard shortcut once more will snap the Edge window to the right side of the left monitor, effectively moving the window from one monitor to the other.
Snap the window to the left half of the main screen
Using the Windows + Left arrow keyboard shortcut once more will snap the Edge window to the right side of the left monitor, effectively moving the window from one monitor to the other.
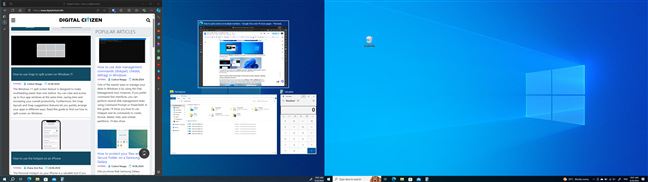
 Snap the window to the right half of the secondary monitor
TIP: Did you know that you can create a multi-screen setup using your TV? Depending on your Windows version, follow the steps in one of these guides to make it happen: How to wirelessly connect and project to a TV from Windows 10 or How to wirelessly connect and project to a TV from Windows 11.
Pressing Windows + Left arrow again moves the app window to its original position, but on the secondary (left) display.
Snap the window to the right half of the secondary monitor
TIP: Did you know that you can create a multi-screen setup using your TV? Depending on your Windows version, follow the steps in one of these guides to make it happen: How to wirelessly connect and project to a TV from Windows 10 or How to wirelessly connect and project to a TV from Windows 11.
Pressing Windows + Left arrow again moves the app window to its original position, but on the secondary (left) display.
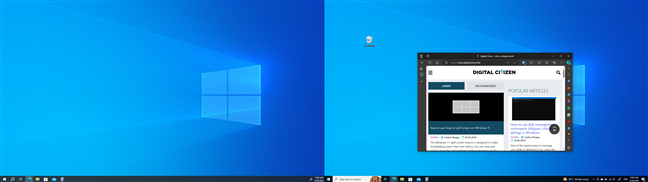
 Move the window to its original position, but on the secondary screen
You can now use the Windows + Left arrow shortcut again to move the app window to the left half of the secondary monitor.
Move the window to its original position, but on the secondary screen
You can now use the Windows + Left arrow shortcut again to move the app window to the left half of the secondary monitor.
 Snap the window to the left half of the secondary monitor in Windows 11
Don’t forget that you can also press the Windows + Up arrow or Windows + Down arrow after snapping a window if you want to position it to the upper or lower corner of either screen.
Snap the window to the left half of the secondary monitor in Windows 11
Don’t forget that you can also press the Windows + Up arrow or Windows + Down arrow after snapping a window if you want to position it to the upper or lower corner of either screen.
 The Edge window is shown on the right monitor
Pressing Windows + Shift + Left arrow on the keyboard moves the window to the secondary display in the same position.
The Edge window is shown on the right monitor
Pressing Windows + Shift + Left arrow on the keyboard moves the window to the secondary display in the same position.
 Move the window to the same position on the secondary monitor
Using Windows + Shift + Right arrow moves the window back to the original display. This works the same way if a window is already snapped, allowing you to skip some of the steps in the previous chapter.
Move the window to the same position on the secondary monitor
Using Windows + Shift + Right arrow moves the window back to the original display. This works the same way if a window is already snapped, allowing you to skip some of the steps in the previous chapter.
How to split screen with two monitors using the mouse
Snapping a window using the cursor with multiple displays is not much different from the regular way of splitting the screen in Windows. Click or tap a window’s title bar, then drag and drop it to either a corner or to the left or right edge of any display. A transparent overlay will show you where the window will be placed.How to split screen on dual monitors using the keyboard
Splitting the screen on multiple monitors is easy once you get the basics of snapping windows with keyboard shortcuts. Depending on your setup, you can use Windows + Left arrow or Windows + Right arrow to move an app window across monitors. For example, let’s say you have a Microsoft Edge window open on the main screen, on the right. The secondary display is on the left.How to quickly move a window from one monitor to another using keyboard shortcuts
An essential keyboard shortcut for multi-monitor setups is Windows + Shift + Left/Right arrow. This keeps the active window’s position while switching it between displays. For example, let’s take the same Microsoft Edge window I opened earlier on my main monitor, physically located on the right side.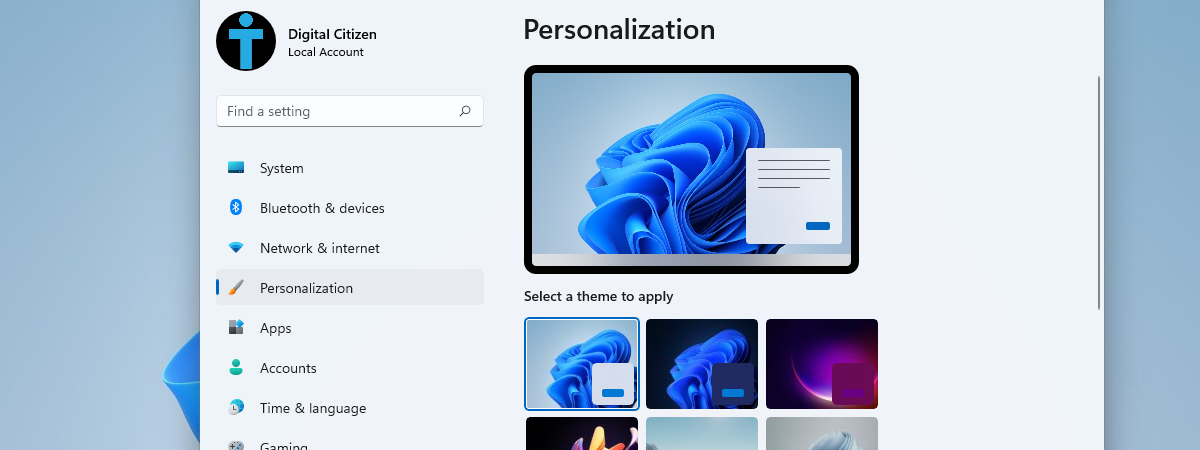
Discussion (42)
Thank you for this!
Windows + Up and Windows + Down allow me to Maximize and minimize a window from either of my monitors respectively, however the WIndows + Left and Windows + Right wont do anything. Is there feature in my display settings that I have to toggle in order to fix this?
Found the issue. Had to toggle the “Snap Windows” switch in the “multitasking” section of the “Systems” settings
thanks alot!
This was so awesome… I’ve been dying to know how to do this forever, and it’s so easy, using the keyboard…. THANK YOU THANK YOU THANK YOU
Happy to help. 😉
Thank you!! That was extremely helpful!
Nicely described, but I can’t get the divider bar to work (resize both windows) when using multiple monitors.
Thank you so much, I knew there had to be a simple/good solution to snapping with multiple monitors.
I wish I found this article a couple years ago. I have been snapping to one side then trying to drag to the side location on multiple screens
That’s why you should subscribe to us and read our tutorials. You will learn many new things.
Thank you so much1
OMG THX BRO
Amazing, really handy. Thanks so much for posting this.
Thank you, thank you, thank you!
I needed this for a long time! Thanks!
“when working with multiple screens. The trick is that you need to use the keyboard instead of the mouse: the shortcuts for snapping windows side by side are the Windows + Left/Right keys.”
I came for this detail, stayed for the rest of the article. Thanks Ciprian!
–AlanB
This is very very useful. Thanks a lot 😀
Incredibly helpful. Thanks so much for sharing this.
Incredibly useful- thank you!
Just did this, and it works! 😀 Thanks a lot, i’ve been wondering how to do this for a while. 5/5.
i googled, found this here, exactly what i was looking for. well listed up, thank you for the effort!
Thank you !
Still helpful even years later. Cheers
Thanks mate! Very useful!!
Four years old, yet I just looked this up trying to figure out how to do snap on a dual-monitor setup. Thanks!
THANKS! 🙂
OMG you are a savior. My productivity is going to be exponential. Great and easy to read article!
Something as simple as that, yet no mention anywhere in the Microsoft “help”!
Wow… that’s great! I knew it could be done, just needed to find the right guru.
thanks man, that was really helpful.
Do you know a way to get this done if I have three screens configured as one? I need to compare content often but if I snap left it takes a screen and a half instead of only one. Thanks!
I always wondered how Snap with Multiple monitors. Now I know. Thanks!
Happy to help! Don’t hesitate to visit us from time to time or maybe subscribe to our weekly newsletter. You get only one email/week with a summary of everything we publish during that week.
That’s what I was looking for. Thank you!
Great, thanks!!!!!!
Thank you very much for this tip! I use snap everyday, so I was frustrated that I didn’t have that feature after adding a monitor.
I’m glad we helped. 😉
Thank you so much. That helped a lot!!
Awesome thanks alot!
This is great. Ever since I put in a second monitor I hated losing Snap and now I have it back.
Glad to be able to help!