While, at its core, Windows 10 is similar to Windows 8 and Windows 7, it is also very different from older operating systems like Windows XP. Most desktop apps developed for Windows 8 or Windows 7 should run in Windows 10. On the other hand, it's unlikely that apps developed for Windows XP would work well or at all on Windows 10. If you are dealing with an older program, that either crashes or misbehaves on Windows 10, and you simply must use it, you can try running it using Windows 10's compatibility settings. Here is how you can use them to work with classic programs that weren't designed to function in Windows 10:
Although compatibility settings are a great way of making older programs functional in Windows 10, it doesn't mean that you should apply them to any outdated software. We strongly advise against applying compatibility settings when it comes to programs like old antivirus/security programs or disk management utilities. For instance, if you use compatibility settings on software dealing with security products, you run into the risk of those programs not working properly and, as such, they might not protect you as they should. On the same note, using compatibility settings on disk software also entails risk, because you don't want out-of-date programs handling something as important as your hard drives. For instance, a disk utility that runs in compatibility mode can do unexpected things like corrupting your hard drive's master boot record.
How to run the Program Compatibility Troubleshooter
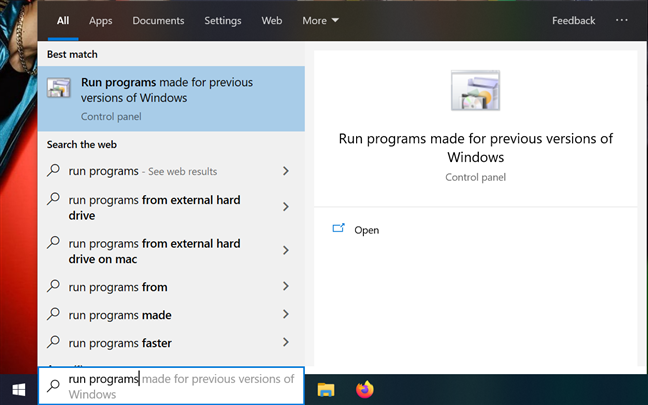
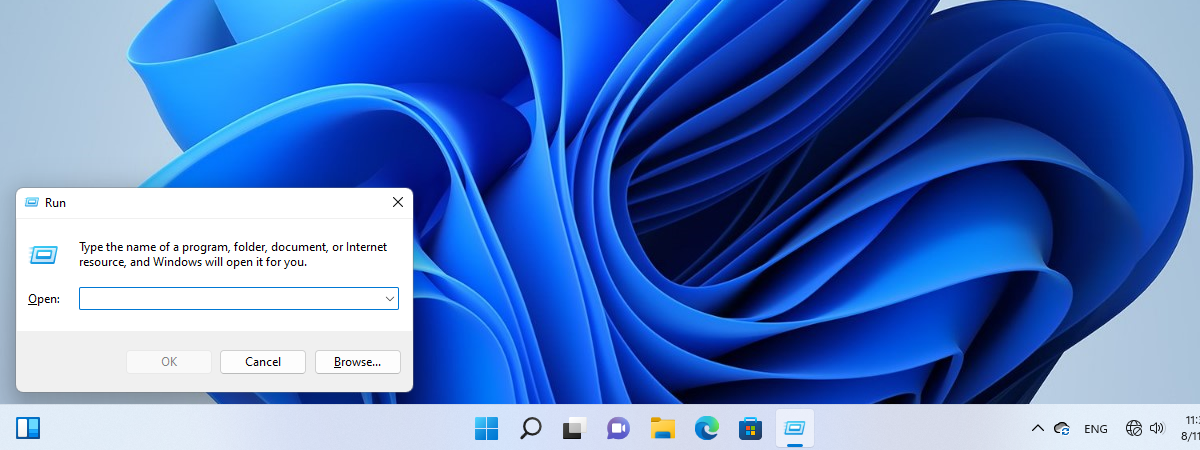
The "Program Compatibility Troubleshooter" wizard is a built-in tool that helps you apply compatibility settings to older software that doesn't work as it should on your Windows 10 computer. One way to open it is by typing "run programs" in the taskbar's search field, and then clicking or tapping on "Run programs made for previous versions of Windows."
Access Run programs made for previous versions of Windows
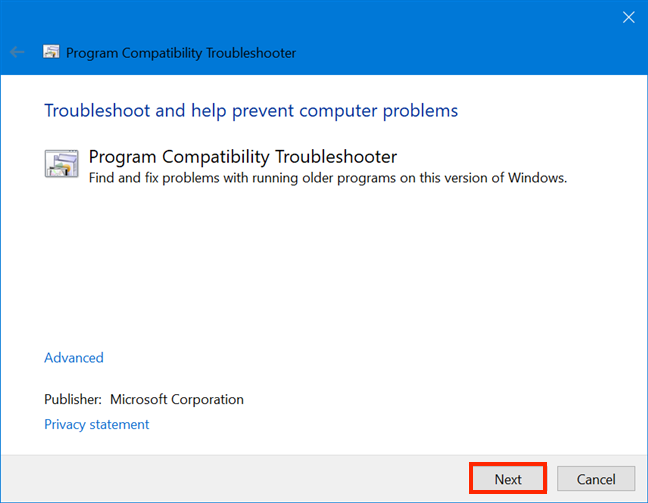
The wizard launches, letting you know what it does. Click or tap on Next and wait for a few moments, while the program is detecting possible issues.
Press Next to start detecting issues
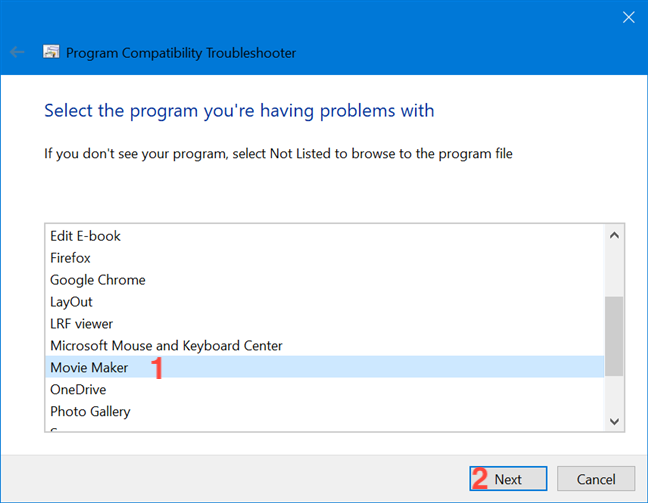
In the next window, scroll through the list and select the program you want to run using compatibility settings. If you can't find the program, choose Not listed, and you have the option to browse to its location. We decided to use the beloved "Windows Movie Maker" for this tutorial, so we chose Movie Maker. After making your selection, click or tap on Next.
Select your outdated program from the list
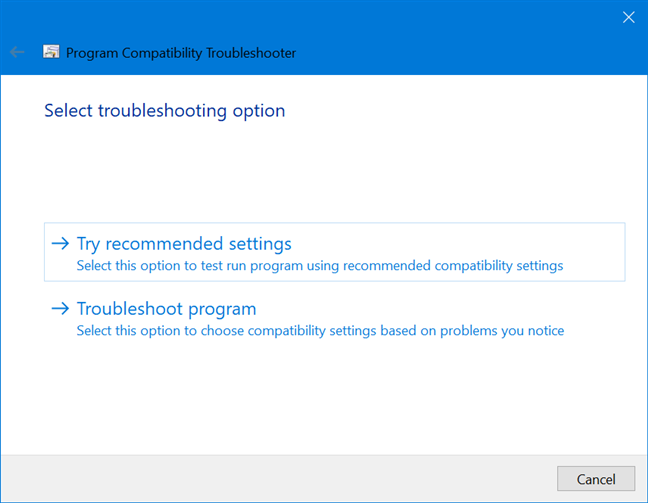
After taking a few more moments to deal with any issues, the "Program Compatibility Troubleshooter" lets you choose how to apply the compatibility settings, offering you two options: "Try recommended settings" and Troubleshoot program. We are going to walk you through both of them.
The wizard offers two different options
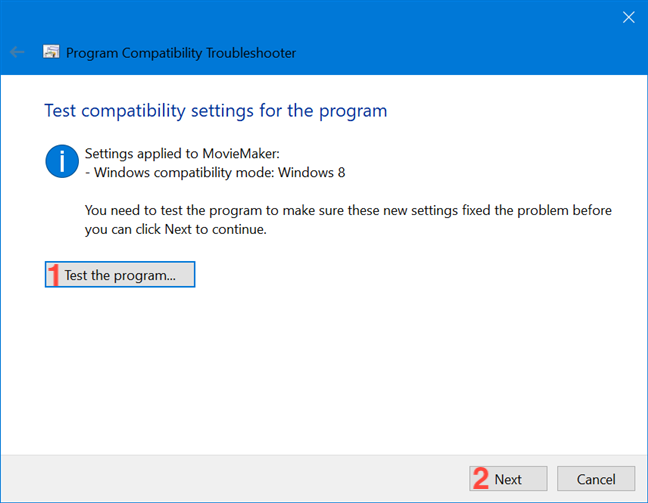
If you choose to "Try recommended settings," the wizard applies the compatibility mode that was automatically selected by Windows 10 - in our case, Windows 8.
The only option is to "Test the program" to see if it now works, since you are not allowed to continue until you do. When you are done checking whether your issues persist, return to the "Program Compatibility Troubleshooter" and click or tap Next.
After testing your program, press Next
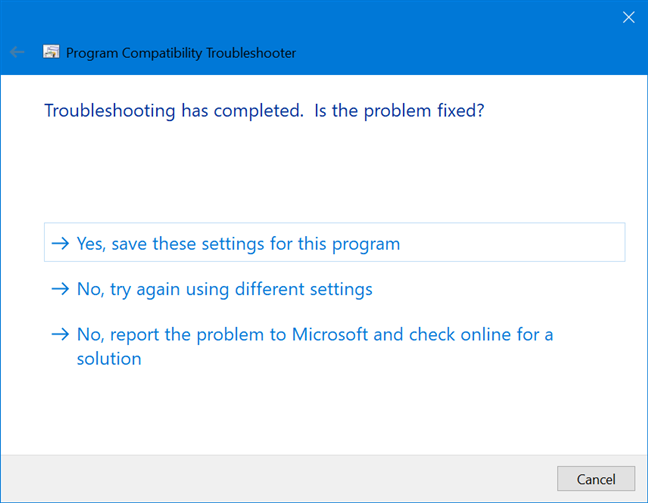
The wizard then asks you if the problem is fixed. If everything worked well, you can save the compatibility settings and close the wizard. If you decide to try different settings, Windows 10 is out of recommendations, and it automatically takes you to the sets of questions in Troubleshoot program in an attempt to narrow down the problem, as illustrated a bit further down. As the third option, you can report the problem to Microsoft and search for a solution online.
Choose an option based on the results of your test
Choosing to Troubleshoot program, from the "Select troubleshooting option" screen, walks you through a series of questions designed to help Windows 10 understand what issues are stopping the program from functioning correctly. Choose any options that apply and click or tap on Next.
Check the boxes next to the problems you notice
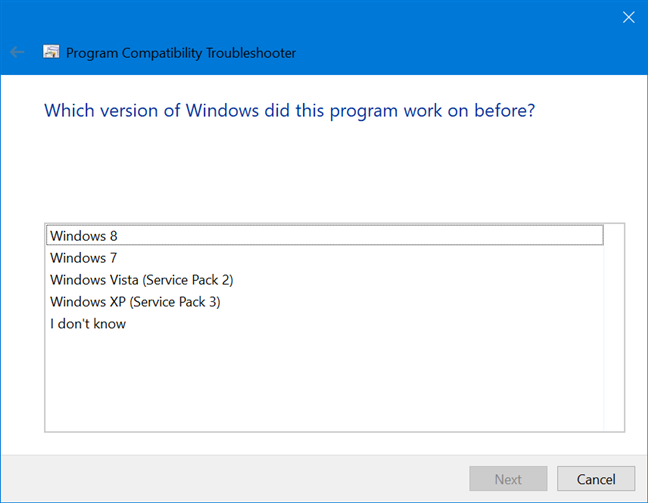
Depending on your answer, you might get a second screen, asking you to select which version of Windows the program worked on before. After selecting an answer, click or tap on Next.
Select the previous Windows version the program worked on
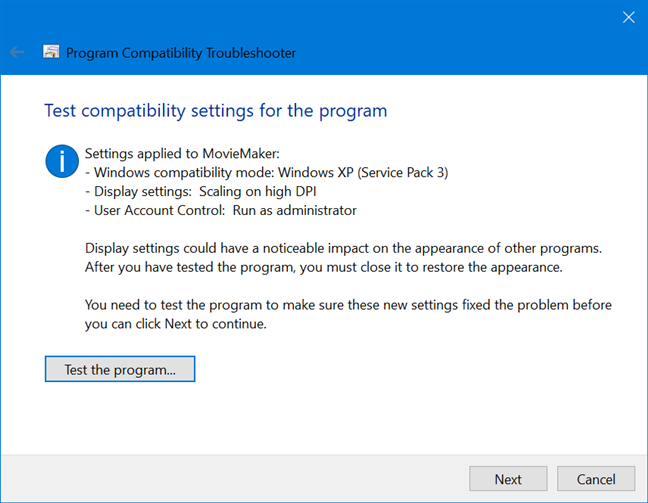
Based on your answers, Windows 10's "Program Compatibility Troubleshooter" can set the appropriate compatibility settings that are needed by your old program in order to function. We decided to act utterly clueless in our experiment with the Movie Maker, choosing both the "I don't see my problem listed" and the "I don't know" options during the wizard's Q&A. As a result, Windows 10 applied several settings to the program, as seen below.
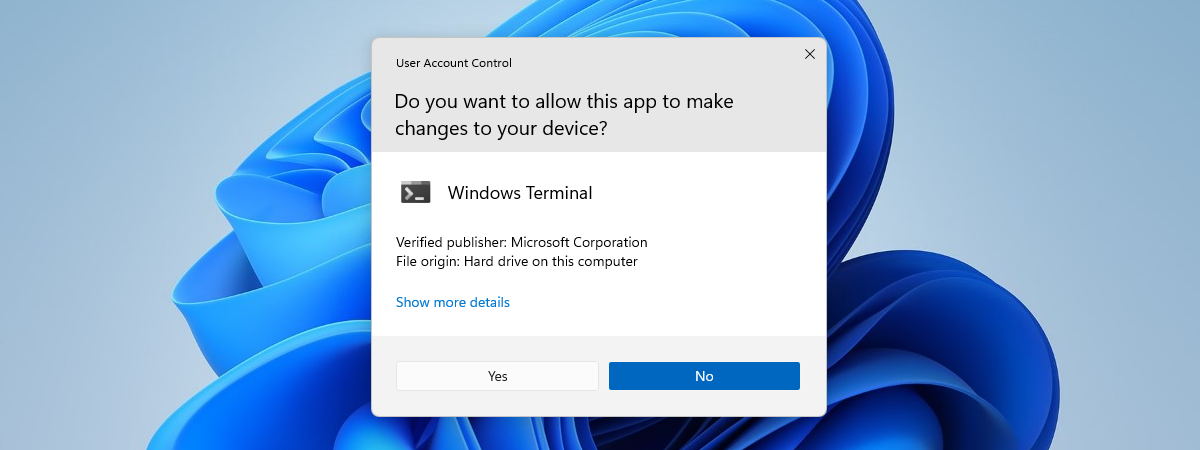
Review the changes and click or tap "Test the program," as you can't proceed otherwise. If the settings applied require the program to "Run as administrator" (as ours did), the UAC pops up. When you are done testing the program, return to the "Program Compatibility Troubleshooter" and click or tap Next.
Press Next to give feedback about the settings
The wizard then asks you if the problem is fixed. If everything worked well, you can save the compatibility settings, and you are taken to another screen, where you can give feedback, view detailed information, and close the troubleshooter. If not, you can go back and try different settings, or you can report the problem to Microsoft and search for a solution online.
Let the troubleshooter know the status of your problem
The Program Compatibility Troubleshooter should be able to help you apply the appropriate compatibility settings to just about any old desktop app. However, if the wizard didn't fix your problem, or if you prefer doing things the "traditional" way, you can also change compatibility settings manually. Read the following section of this tutorial to see how.
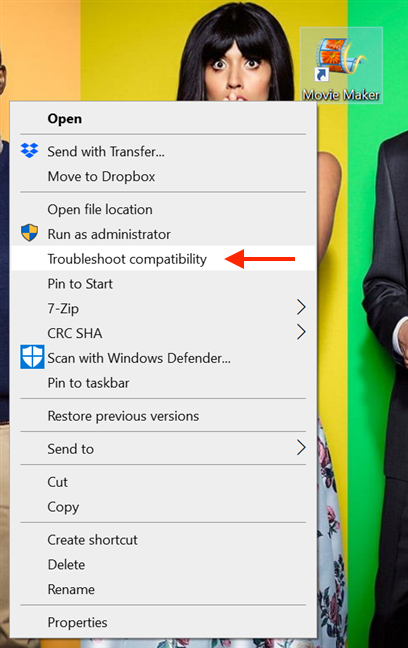
TIP: An easier way to open the "Program Compatibility Troubleshooter" wizard is by right-clicking or pressing-and-holding the executable file or the shortcut of your classic program - in our case, "Windows Movie Maker." Then, in the contextual menu, click or tap on Troubleshoot compatibility.
Press Troubleshoot compatibility to start the Program Compatibility Troubleshooter
When you open the wizard this way, you no longer need to select your program from a list, and you skip to selecting one of the two troubleshooting options available. The same thing happens when opening the "Program Compatibility Troubleshooter" from a program's Properties. To learn how to access it that way, continue reading.
How to manually change compatibility settings for old programs
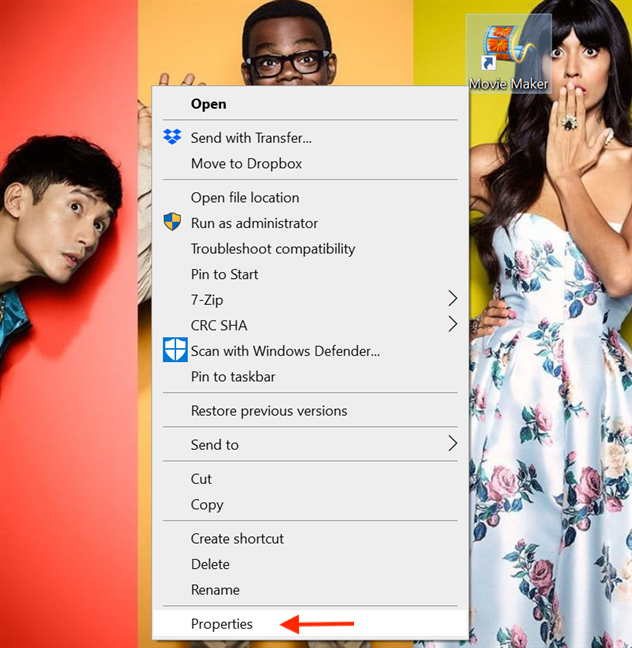
Start by opening the Properties of your old program. Right-click or press-and-hold on its executable file or its shortcut and then, in the contextual menu, click or tap on the last option: Properties.
Press Properties from the contextual menu
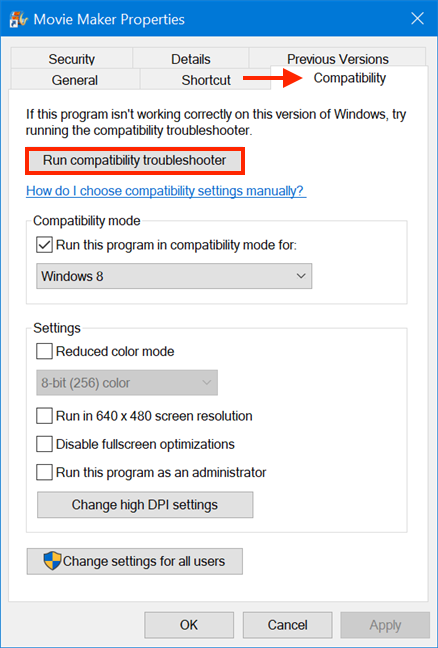
In your program's Properties window, go to the Compatibility tab. The first option opens the "Program Compatibility Troubleshooter," a tool that we already covered at length in the previous section of this tutorial.
You can also access the Program Compatibility Troubleshooter from Properties
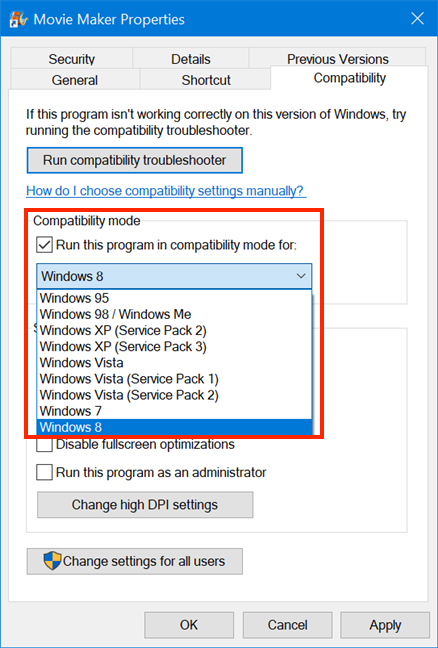
Next, there's a section called Compatibility mode. This runs your classic program using settings from earlier versions of Windows. Check the box in this section, if you know that your old program was designed to work with a specific version of Windows, and then select it from the list in the drop-down menu, visible when clicking or tapping the arrow.
Choose the Windows version your program worked with
The next section from the Compatibility tab is called Settings, and it contains other compatibility settings that you can apply to your classic program to make it function properly, even if it wasn't designed to work on Windows 10. There are five compatibility Settings available:
The options available in Settings
"Reduced color mode" sets Windows 10 to only use a limited set of colors in your old program. Some older programs were designed to use fewer colors than today's apps. You can set your old program to run either in "8-bit (256) color" or in "16-bit (65536) color".
"Run in 640 x 480 screen resolution" runs your old program in a small window with a 640x480 resolution. You should try this compatibility setting if your old program's graphics appear jagged or don't render properly.
"Disable fullscreen optimizations" should be checked if you want your program to stop running in fullscreen mode. This could improve performance for your classic software, offering a better overall experience.
"Run this program as an administrator" is pretty straightforward, making sure that your classic program is always run as administrator. Earlier versions of Windows were designed to run programs by default with administrator permissions, so some older programs require administrative privileges in order to function correctly.
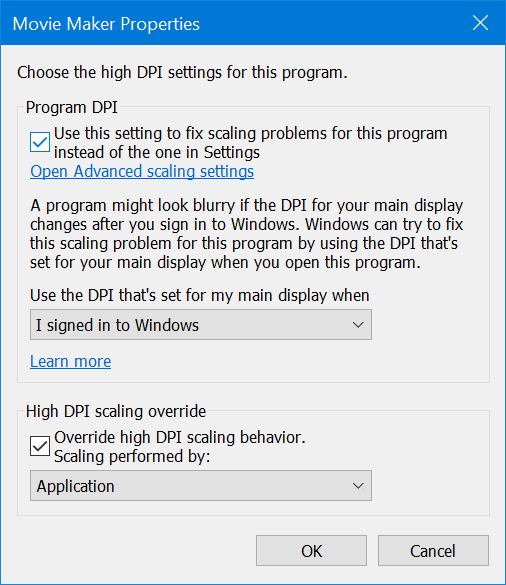
"Change high DPI Settings" is useful, especially if you are using a high-resolution screen, like a 4K display. Clicking or tapping on it opens a new window, where you can "Choose the high DPI settings for this program," if your program isn't displayed correctly on a computer or device with a high-DPI display.
Pressing Change high DPI Settings opens a new window
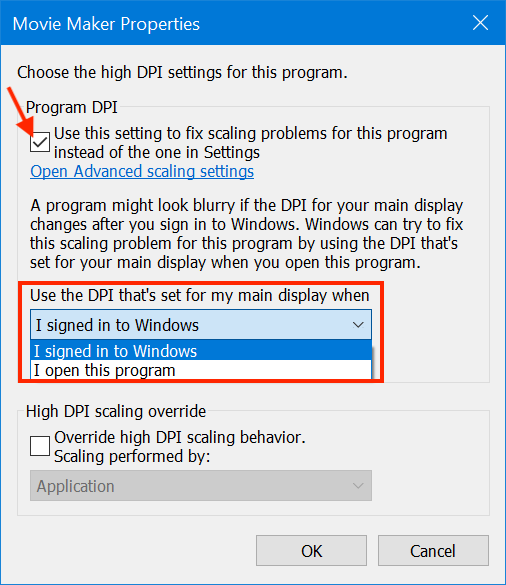
In case there are multiple displays connected to your Windows 10 computer or device, or if your display configuration changes, some desktop apps might appear blurry. By default, Windows 10 tries to fix apps on your main display to stop them from appearing blurry, so it scales them when your display settings change. This automatic resizing can affect the way the user interface of your old program is rendered. For more stable DPI settings for your program, check the box next to the option to "Use this setting to fix scaling problems for this program instead of the one in Settings" from the Program DPI section. This enables a drop-down menu, which you can open by pressing the arrow under the "Use the DPI that's set for my main display when" option. Choose between the default setting of having your program keep the DPI of the main display when you signed in to Windows 10, and using the DPI set for your main display at the time you opened the program.
Choose the DPI settings for your program
In this section, you also have a link to "Open Advanced scaling settings," in case you want to open the Settings app and stop Windows 10 from fixing all apps by resizing them based on the main display DPI.
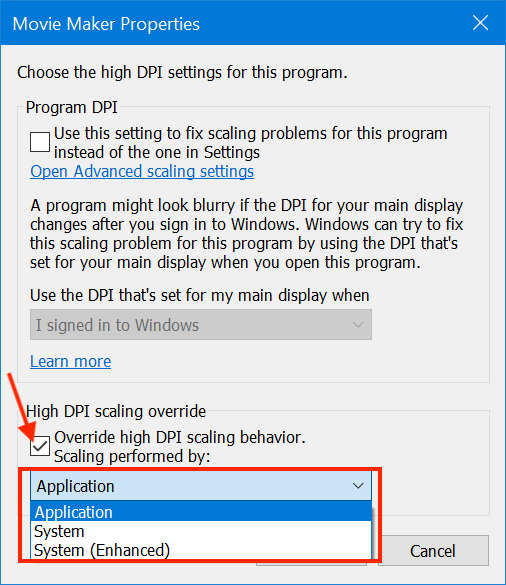
In the "High DPI scaling override" section, if you choose to "Override high DPI scaling behavior," you enable a drop-down menu with three settings for scaling. The default option is Application, and it disables DPI scaling for your classic program entirely, using only the developer's setting. The System option uses Windows 10's default behavior when it comes to scaling, as it lets Windows override the program's DPI settings, which is more likely to make the program appear blurry. If you choose System (Enhanced), a more intelligent, enhanced scaling is used, which should yield better results with crisp text on high-DPI displays. Unfortunately, this last setting is only available for programs based on GDI (Windows Graphical Device Interface).
Set the scaling behavior for a blurry program
When you are done, click or tap OK to return to the previous screen.
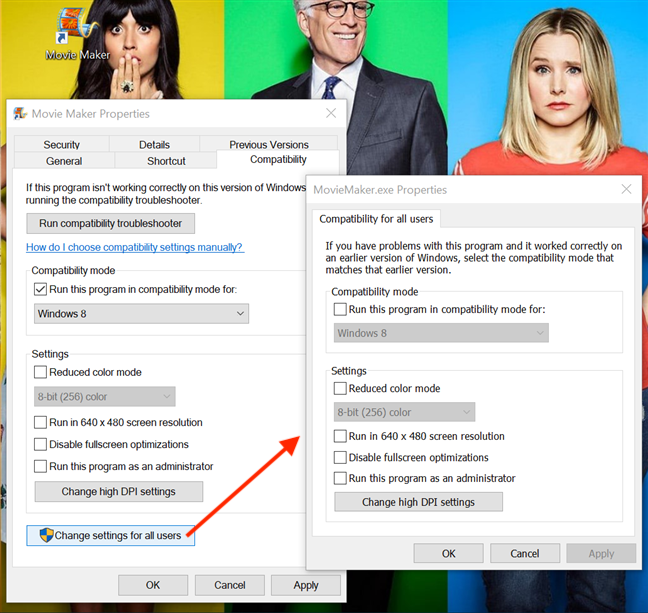
All the manual compatibility settings illustrated in this section of the tutorial are applied to your program for the current user only, if you click or tap OK or Apply. It is possible to enable them for all users. Here is how:
The final compatibility option from the Compatibility tab is a button that lets you "Change settings for all users." Click or tap on it to open a new window and manually select the compatibility settings to be applied to your old program for all the user accounts on your Windows 10 computer. The compatibility settings are the same as the ones we illustrated in this section.
Pressing the Change settings for all users option reveals a window with the same options
When you're done fiddling with the compatibility settings of your old program, don't forget to click or tap on either the Apply or OK button to save them.
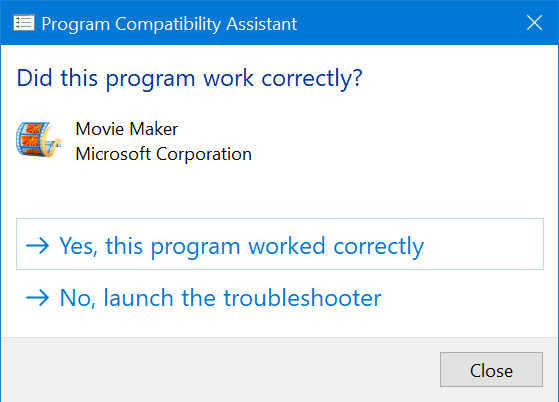
TIP: After changing your old program's compatibility settings, either through the "Program Compatibility Troubleshooter" or manually, you can relaunch it and use it, hopefully with better results. The first time you close the program, the "Program Compatibility Assistant" pops up, asking you if the program worked correctly. Selecting Yes closes the assistant, while No launches the troubleshooter to try once again to fix your problem(s).
Windows 10 asking for feedback on your new compatibility settings
What old programs are you still using?
Even if you have a new computer running Windows 10, that does not necessarily mean that you can no longer use older programs that weren't designed for this newer operating system. Windows 10 is helpful in this regard, providing both the "Program Compatibility Troubleshooter" and a series of manually configurable settings that you can use to make your old programs function again. We hope these compatibility settings do the job for you, and you are happy using your classic program. We're interested in learning about our reader base, so, before you close this tab, please let us know which (g)oldie program you are trying to use and why.
I have a 2003 version of Office Pro, which was installed on a Windows XP desktop that died a few months ago. I’d like to install it on a Windows 10 Pro desktop I upgraded from Windows 7 Pro, since I have a number of Access and Excel files that I’m comfortable using. Two questions: 1) Will Win 10 allow me to install the software from the program disc; and 2) Is there a security risk in using it if I can get it running? Thanks.


Discussion (1)
I have a 2003 version of Office Pro, which was installed on a Windows XP desktop that died a few months ago. I’d like to install it on a Windows 10 Pro desktop I upgraded from Windows 7 Pro, since I have a number of Access and Excel files that I’m comfortable using. Two questions: 1) Will Win 10 allow me to install the software from the program disc; and 2) Is there a security risk in using it if I can get it running? Thanks.