As we have already explained, Skype is going to discontinue the "Modern" Skype app and make its users migrate to the Skype for desktop app. This action is an attempt to simplify the your user experience with the help of a single application that works with either a keyboard and mouse or a touchscreen. This tutorial continues our series of articles about the Skype for desktop app and is aimed at making your transition between the two versions of this VoIP application more pleasurable. So read on to understand how to easily manage all aspects of your Skype account and user profile.
NOTE: This tutorial about using the Skype for desktop app applies to both Windows 8.1 and Windows 10. That being said, we will be explaining how to manage your Skype profile with the help of screenshots taken in Windows 10.
How To Manage Your Profile Information In The Skype For Desktop App
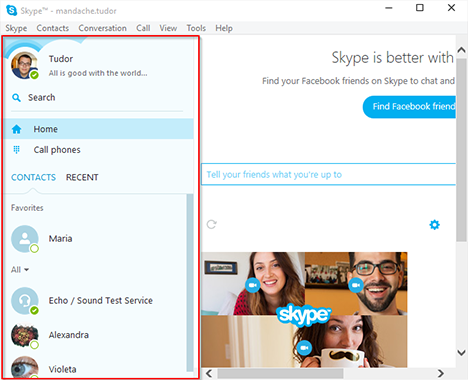
The refreshed UI of the Skype for desktop app features a sidebar on the left side of the window, which contains all your regularly used Skype features.
Skype, Windows, app, how to, use, manage, profile, privacy, settings
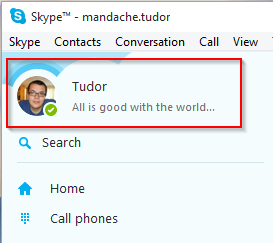
On the top area of this sidebar you will find the Status Bar, where you can see your profile picture, display name and mood message.
Skype, Windows, app, how to, use, manage, profile, privacy, settings
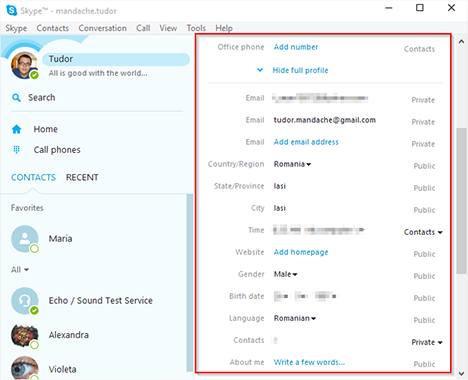
If you click or tap on your display name, you will see all your profile details in the right column.
Skype, Windows, app, how to, use, manage, profile, privacy, settings
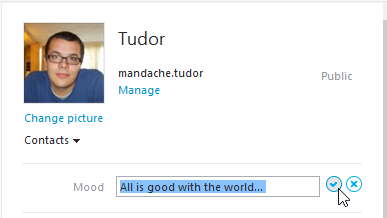
You can change your mood by clicking or tapping the Mood box and entering a message that will be visible for all your contacts.
Skype, Windows, app, how to, use, manage, profile, privacy, settings
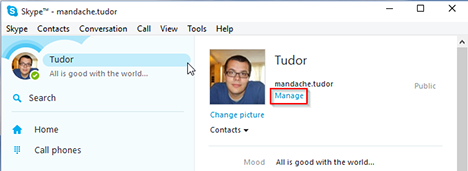
You can also change some advanced account settings by clicking or tapping the Manage button. This action will take you to a secure area of the Skype website, where you can manage your account.
Skype, Windows, app, how to, use, manage, profile, privacy, settings
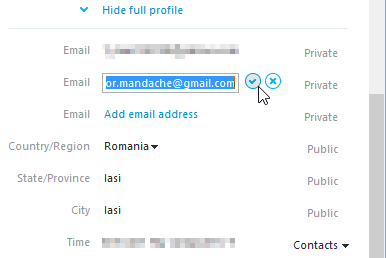
In the profile details area you can, also, add extra information about yourself. To see what you have already shared, you have to press the Show full profile. In the newly opened menu you will see what information is shared and with whom. Of course, you can also remove any information you do not want to share publicly.
Skype, Windows, app, how to, use, manage, profile, privacy, settings
The information you provide can be included in one of these three categories: Public (everybody with a Skype account can see it), Contacts Only (information available only for people in your contacts list) or Private (no one can see this, except you). If the text of these options is greyed out, then you cannot control who sees it. Still, you can change or delete this information simply by clicking or tapping on the displayed text. If you see a small black arrow besides the information visibility option, then you can change the setting by simply clicking or tapping on it.
Skype, Windows, app, how to, use, manage, profile, privacy, settings
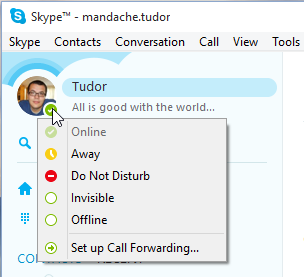
Going back to the Status bar, we have to tell you that here it is possible to change the visibility of your profile. This is the so called status setting which lets your contacts know if you are online and available for a conversation or a call. You can manually change the setting by clicking or tapping on the status icon next to your profile picture and then choosing the desired status from the list.
Skype, Windows, app, how to, use, manage, profile, privacy, settings
There are 5 options with different status icons that you can use:
Online - When you choose this option, you will be visible to all your contacts and it means that they can contact you anytime.
Away - It tells your contacts that you are signed in to Skype but you are not at your computer momentarily. This option can be selected manually or you can set Skype to automatically set it after a specified idle time.
Do Not Disturb - This status shows that you are online but unwilling to have conversations. Your contacts will be able to call you, but Skype is not going to use sounds to alert you (the mute option).
Invisible - Your contacts will not be able to see when you're online, but you can see them and use Skype as usual.
Offline - this status appears automatically if you are not signed in to Skype. Alternatively, you can manually set your status to Offline, but this means that you cannot send messages or make (and also receive) calls.
How To Change Your Profile Picture In Skype For Desktop
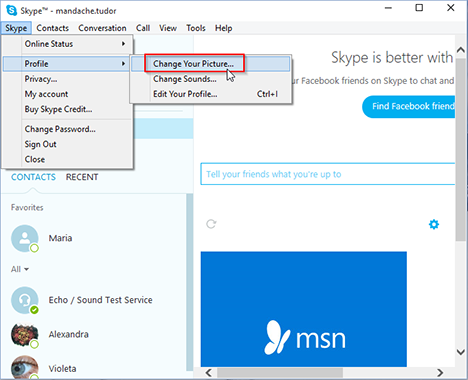
If you did not add a profile picture when you installed Skype for desktop or if you want to change your current profile picture, you can easily do this with the help of a few clicks. There are two ways of doing this: either you choose a picture saved on your computer or take a fresh one with your webcam.
To access any of these options, you have to go to the Menu Bar and then follow this path Skype -> Profile -> Change Your Picture.
Skype, Windows, app, how to, use, manage, profile, privacy, settings
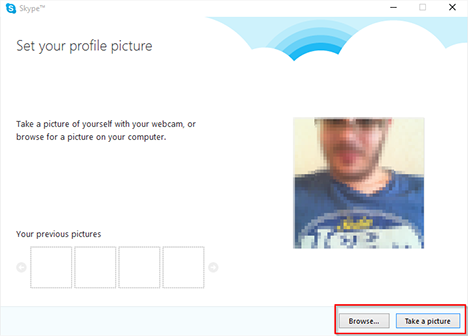
In lower right corner of the Set your profile picture window, you will find two different buttons: Browse... and Take a picture.
Skype, Windows, app, how to, use, manage, profile, privacy, settings
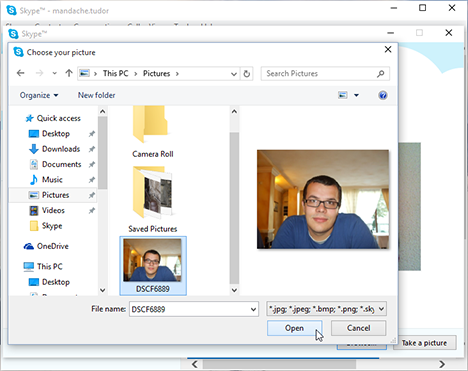
To add a picture that is already saved on your computer, click or tap on the Browse... button and then search for the picture you want to use in the directory tree. Be careful as Skype for desktop only accepts the following formats:.jpg,.jpeg,.bmp, and.png. Also, the picture you have just chosen will be resized automatically to fit in Skype's default picture size. If you do not like the way your picture looks, you should know that you can also manually set its size before selecting it.
Skype, Windows, app, how to, use, manage, profile, privacy, settings
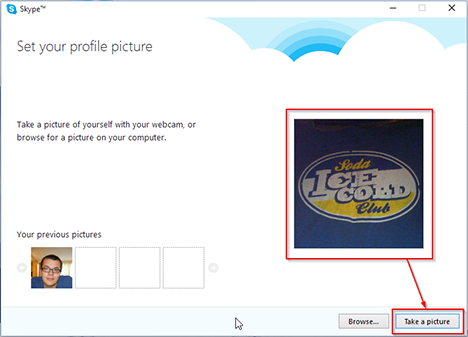
Changing your profile picture with a fresh image taken with your webcam is even simpler. You'll have to follow the path mentioned above: Skype -> Profile -> Change Your Picture, and then open the Set your profile picture window. First, you have check if your camera is working properly by looking at the small square area on the right side of the newly opened window, where you should see yourself live. Then, if all is well, you just have to click or tap on the Take a picture button.
Skype, Windows, app, how to, use, manage, profile, privacy, settings
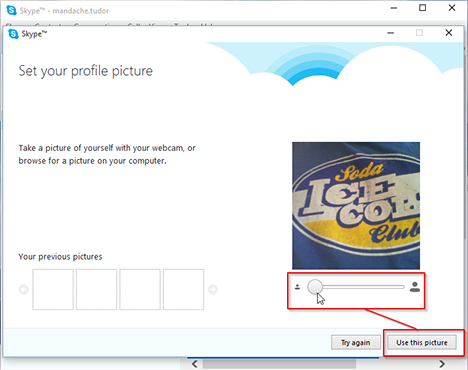
If you like the picture you have just taken, press the Use this picture button and your profile picture is changed instantly. If it does not suit your needs, retake the picture by clicking or tapping on the Try again button and then again on the Use this picture button.
Skype, Windows, app, how to, use, manage, profile, privacy, settings
And that's it, everybody can see your updated profile picture.
How To Manage The Privacy Settings Of Your Account In The Skype For Desktop App
The last part of this tutorial aims to help you make your Skype account more secure. If you value your privacy then ensuring that you have the best settings configured on the Skype for desktop app is a must.
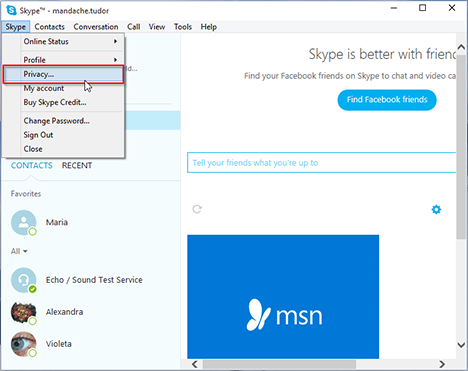
To access the privacy settings of your Skype account you have to go to the Menu Bar in the Skype for desktop app and then follow this path: Skype -> Privacy.
Skype, Windows, app, how to, use, manage, profile, privacy, settings
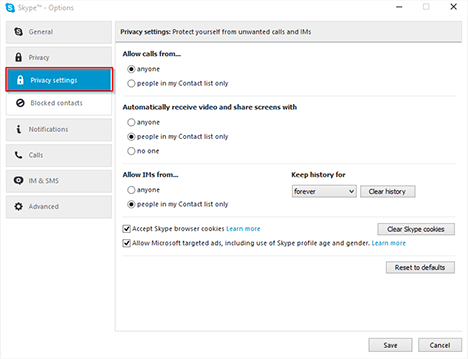
This action will take you to the Privacy settings panel from the Skype Options window.
Skype, Windows, app, how to, use, manage, profile, privacy, settings
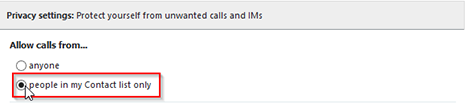
Here, you can control who will be able to contact you through a Skype to Skype call and avoid receiving any annoying or unwanted calls. To do this go to the first section of the Privacy Settings, labelled Allow calls from..., and click or tap on the people in my Contacts list only option if you want a tighter grip on you privacy.
Skype, Windows, app, how to, use, manage, profile, privacy, settings
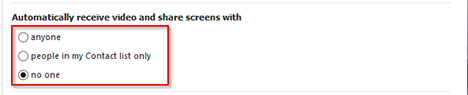
Another privacy feature that can be managed is related to who can send you video or share their screen with you. In the section labelled Automatically receive video and share screens with, you will be able to increase your privacy level by using one of these advanced choices: the mid level privacy option people in my Contact list only or the tightest privacy option no one. Still, all that this option does is to not open the shared video directly when you accept a video call and ask you again if you really want to allow this.
Skype, Windows, app, how to, use, manage, profile, privacy, settings
You can also control who is able to send you instant messages. This section of the Privacy Settings allows you to limit the people who can start an IM conversation with you. To do so, you have to select the people in my Contact list only option in the section labelled Allow IMs from....
Skype, Windows, app, how to, use, manage, profile, privacy, settings
Finally, you can also enforce your opinion about online profiling and advertisements. If you clear the Accept Skype browser cookies check box you will disable any profiling actions, but also lose some of the personalized services from Skype. The last one of the privacy settings you can manage allows you to choose if you want to be involved in Microsoft's targeted ad network or not. If this situation is a privacy issue for you, simply clear the Allow Microsoft targeted ads, including use of Skype profile and gender check box.
Skype, Windows, app, how to, use, manage, profile, privacy, settings
Conclusion
Now you know every important thing on how to manage your Skype account in the Skype for desktop app. We hope this tutorial will help you surpass any problems you might encounter when you migrate your account to the desktop version of Microsoft's VoIP application. Please feel free to use the comments box below to tell us if you have already used this version of Skype and what do you think about it.


Discussion (0)
Be the first to comment.