Windows 10 offers an easy way of changing the start location for File Explorer. However, it only gives you two starting locations to choose from: Quick access and This PC. But what if you want File Explorer to start in another location? What if you'd like your File Explorer to start in your OneDrive folder , your Dropbox folder, one of your Libraries or any other folder from your Windows 10 computer or device? Unfortunately, there is no easy way to do that in Windows 10. Because of that, we started to scour for possible solutions. In the end, we managed to find one hack that works well. Read on to learn how you can set Windows 10's File Explorer to start in any location you want:
NOTE: If you want to change the start location for File Explorer to one of the default choices you have in Windows 10 - Quick access or This PC - we recommend you to read this guide: How To Set The Start Location For File Explorer In Windows 10.
Step 1. Create a shortcut to the starting location that you want to use
First of all, decide where you want File Explorer to start in: whether you want it to start in OneDrive , your Libraries or any other folder from your Windows 10 computer or device. Once you've made up your mind, create a shortcut for that location, on your d esktop . If you need help on how to create shortcuts, check this article: How to create shortcuts for apps, files, folders and web pages in Windows.
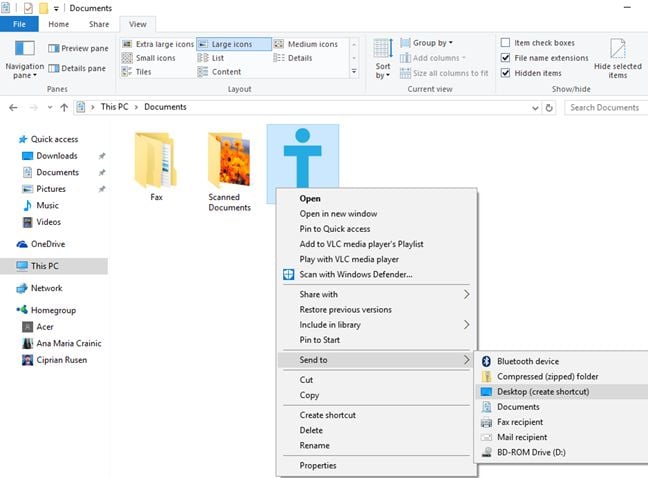
For this guide, we used a folder named Digital Citizen , that is found in our Documents library. One quick way to create a shortcut to this folder is to right click or press and hold on it and then choose: "Send to -> Desktop (create shortcut)".
The shortcut is now created and found on the desktop.
Step 2. Rename the shortcut you created to File Explorer
We now have a shortcut to the Digital Citizen folder on the desktop. Similarly, you should have a shortcut to the location you chose. Select the shortcut you just created, press F2 on your keyboard or right click and choose Rename. Then, start renaming the selected shortcut to File Explorer. When done, press Enter or click away from the shortcut, somewhere on your desktop.
Later in this guide you will see why you have to rename your shortcut to File Explorer.
Step 3. Open the folder which stores the items that are pinned to the taskbar
The existing File Explorer shortcut that is pinned to the Windows 10 taskbar is stored into a special folder that you need to open.
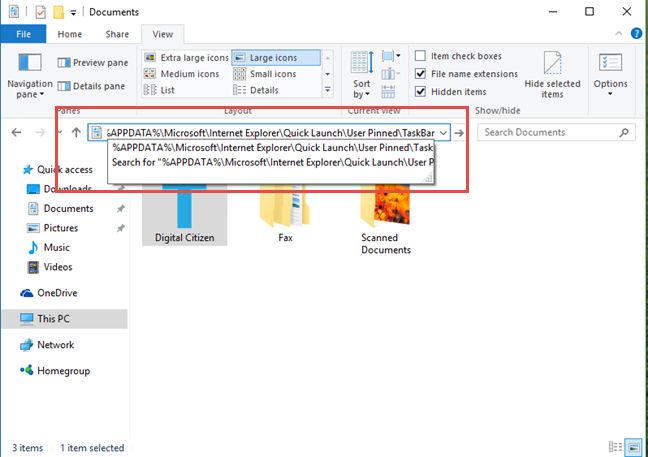
In order to do that, open File Explorer and copy & paste this path in its address bar and press Enter on your keyboard: %APPDATA%MicrosoftInternet ExplorerQuick LaunchUser PinnedTaskBar
In this folder you should see all the shortcuts you have on your taskbar, including File Explorer.
NOTE: Before going ahead with step number 4, we recommend that you make a backup of the File Explorer shortcut that you found in this folder and store it somewhere else. Later, you might want to use it to restore the default startup folder for the File Explorer shortcut on the Windows 10 taskbar.
Step 4: Replace the default File Explorer shortcut with the one you created
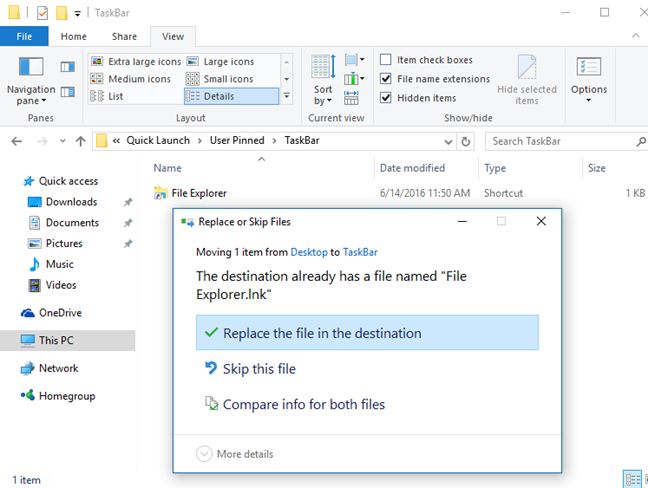
Replace the File Explorer shortcut found inside " %APPDATA%MicrosoftInternet ExplorerQuick LaunchUser PinnedTaskBar " with the one you created at step 1, by using Copy and Paste or Cut and Paste. When you are asked to confirm the replacement, press "Replace the file in the destination".
The folder where Windows 10 stores the shortcuts found on the taskbar now contains your custom File Explorer shortcut which will make this app start in the folder you wanted.
Step 5: Close all File Explorer windows and restart it
All that remains is for you to close all the File Explorer windows that you have opened. Then, start File Explorer using the shortcut from the Windows 10 taskbar. You will see that it starts using the folder you wanted.
Caveats to our hack and how to solve them
While our hack works, it has the following shortcomings that you should be aware of:
- It works only for the File Explorer shortcut that is found on the Windows 10 taskbar. If you use other shortcuts found in other places, like in the Start Menu , File Explorer will start using its default start location. It won't start using the location you selected.
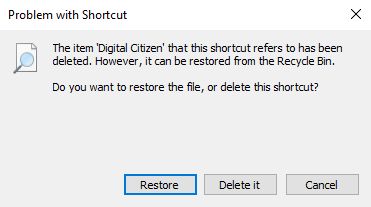
- You should not delete the folder/location that you selected for the File Explorer startup. If you do that, Windows 10 informs you that there is a problem with the shortcut and choose whether you want to restore the item that was deleted or delete the shortcut from the taskbar.
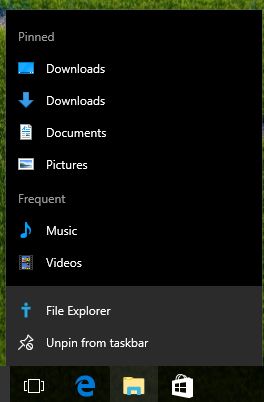
- If the startup location you selected has a custom icon, then you will see that icon instead of the default File Explorer icon in the right-click menu of the File Explorer shortcut from the taskbar.
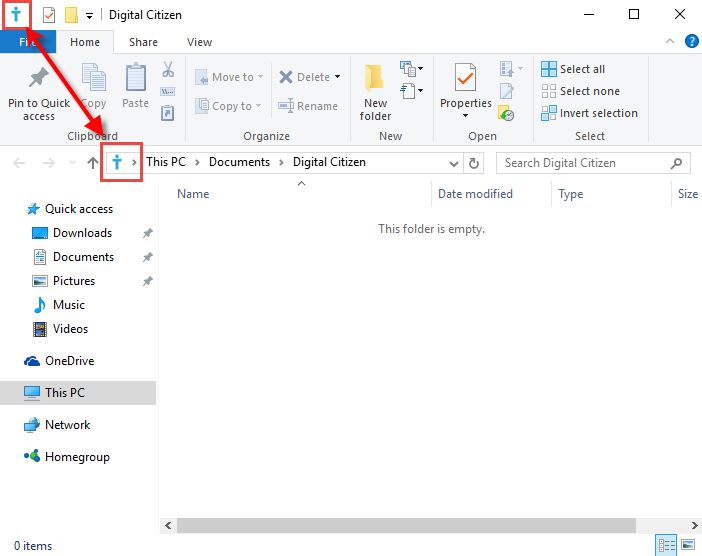
The custom icon will show up also in the top left corner of the File Explorer app window or in the address bar, as in the screenshot below.
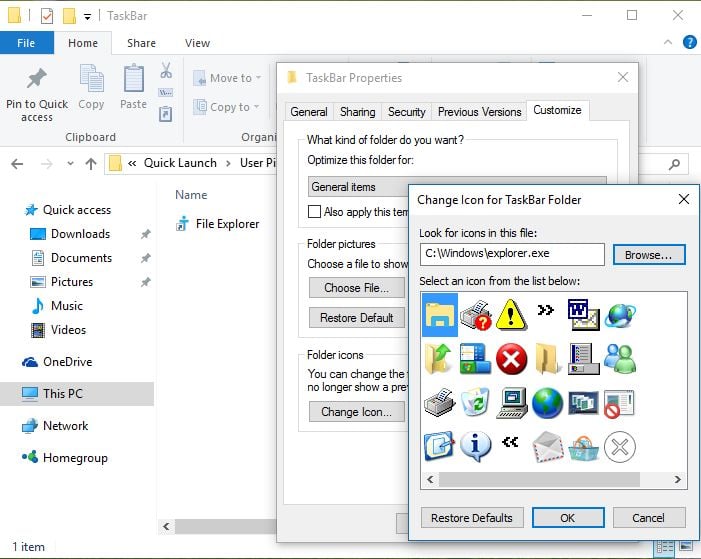
If you want the File Explorer icon back, you need to edit the properties of the custom File Explorer shortcut you created at step 1 and use the default icon found in "C:Windowsexplorer.exe". To learn how to change the icon of a shortcut, read this guide: How To Change the Icon of Any Shortcut in Windows.
Conclusion
Even if Windows 10 only offers two choices when it comes to the start location you can set for File Explorer , that doesn't mean you cannot bypass its default settings. However, the procedure we showed you in this article is nothing more than a hack, so if you know of other, better ways of setting the start location for File Explorer to anything you want, don't hesitate to share them with us, in the comments form below. We bet that there are many other people out there who would want to know them .


 11.10.2016