


One of the most efficient ways to access your favorite apps, files, folders, and web pages is through shortcuts. That is why, in spite of the clutter, many of us choose to have lots of shortcuts on our desktops. This tutorial shows you how to create all kinds of shortcuts in Windows 11 and Windows 10. We cover shortcuts for files, apps, folders, and websites:
 Open the right-click menu to create a shortcut
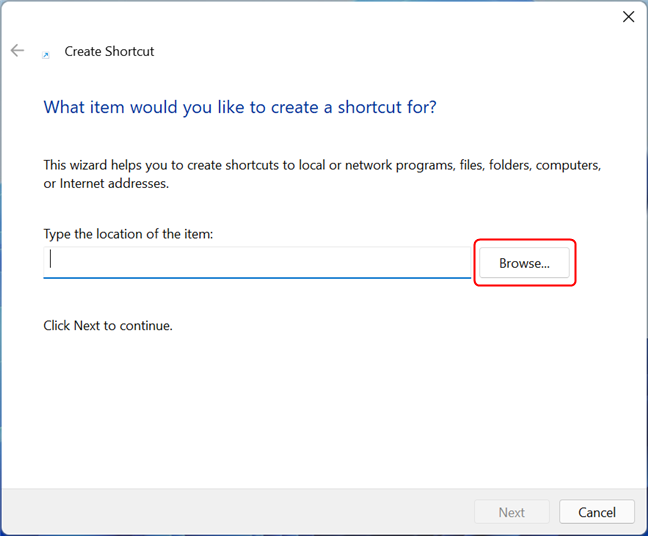
The Create Shortcut wizard opens. Type the location of the item you want to create a shortcut to, or, if you don’t know the exact path, click or tap on Browse.
Open the right-click menu to create a shortcut
The Create Shortcut wizard opens. Type the location of the item you want to create a shortcut to, or, if you don’t know the exact path, click or tap on Browse.
 Click or tap on Browse or enter the path of the file
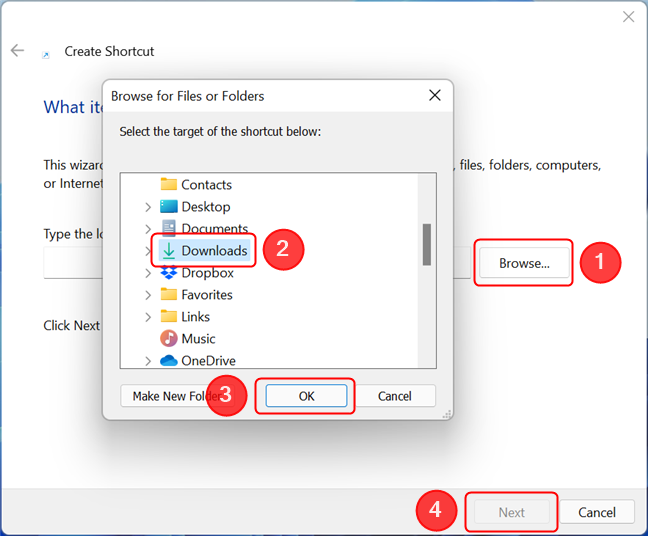
A pop-up window asks you to "Select the target of the shortcut below." Navigate to the app or file you want to create a shortcut to, and then click or tap OK. We wanted to create a shortcut to Mozilla Firefox, so we had to navigate to "This PC > Windows (C:) > Program Files > Mozilla Firefox > firefox". In the Create Shortcut wizard, you can see that the item's location has been filled in automatically based on your selection. Click or tap Next to continue.
Click or tap on Browse or enter the path of the file
A pop-up window asks you to "Select the target of the shortcut below." Navigate to the app or file you want to create a shortcut to, and then click or tap OK. We wanted to create a shortcut to Mozilla Firefox, so we had to navigate to "This PC > Windows (C:) > Program Files > Mozilla Firefox > firefox". In the Create Shortcut wizard, you can see that the item's location has been filled in automatically based on your selection. Click or tap Next to continue.
 Navigate to the app or file you need a shortcut to
TIP: If you're creating a shortcut to an app, make sure to choose the app's executable file and not some ancillary file.
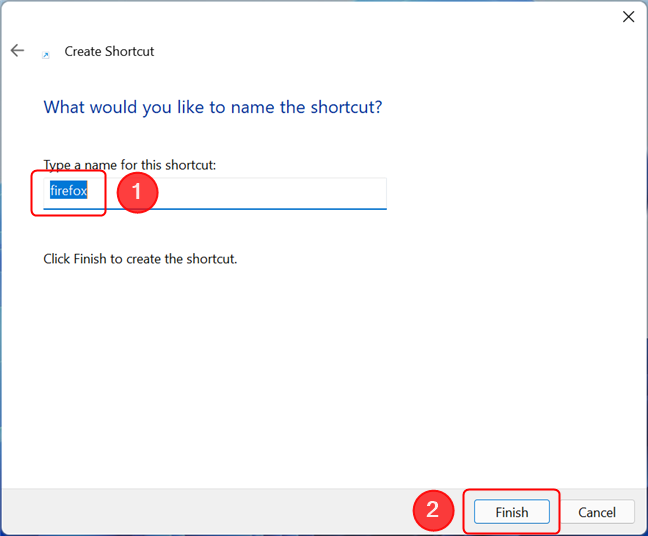
Now you can change the name of your shortcut or leave the default one. When you are done, click or tap on Finish.
Navigate to the app or file you need a shortcut to
TIP: If you're creating a shortcut to an app, make sure to choose the app's executable file and not some ancillary file.
Now you can change the name of your shortcut or leave the default one. When you are done, click or tap on Finish.
 Press Finish to complete the process
The shortcut is now available on your desktop.
Press Finish to complete the process
The shortcut is now available on your desktop.
 Creating a folder shortcut is no different from creating one to an app or a file
All you need to do next is choose a name for your folder shortcut and then click or tap on Finish.
Creating a folder shortcut is no different from creating one to an app or a file
All you need to do next is choose a name for your folder shortcut and then click or tap on Finish.
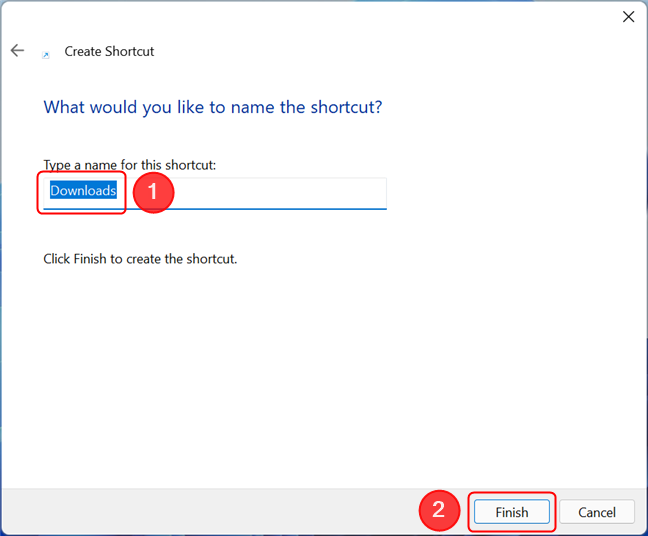 Pressing Finish completes the process and places the shortcut on your desktop
The shortcut should now be available on your desktop.
Pressing Finish completes the process and places the shortcut on your desktop
The shortcut should now be available on your desktop.
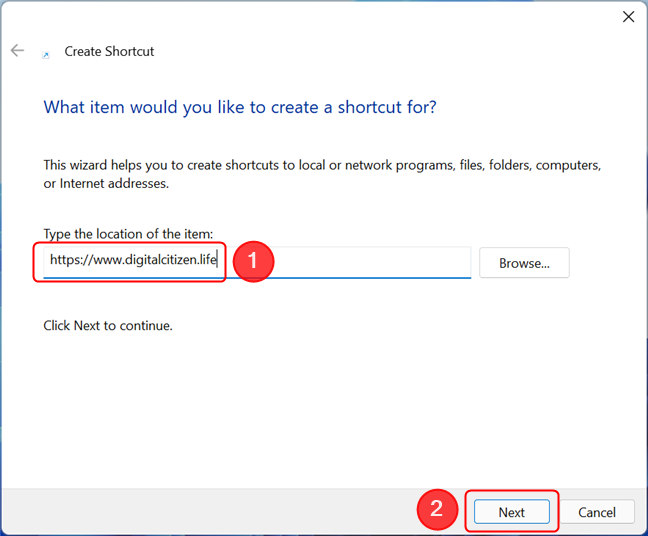 Type in the address of the site you need a shortcut to
The default name for your shortcut is "New Internet Shortcut," so you might want to change it to something else to avoid confusion. When you are done, click or tap on Finish.
Type in the address of the site you need a shortcut to
The default name for your shortcut is "New Internet Shortcut," so you might want to change it to something else to avoid confusion. When you are done, click or tap on Finish.
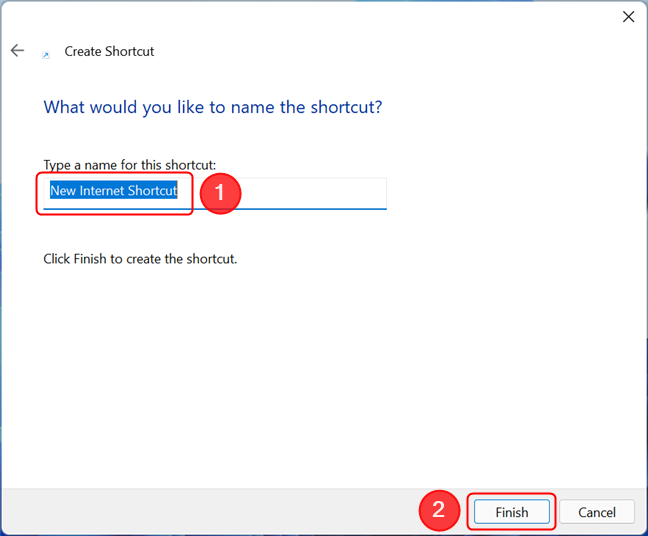 Choose a name and press Finish to save the shortcut to your desktop
The first time you use a web page shortcut, Windows asks in a pop-up window how you want to open the file. Click or tap on your preferred web browser, make sure to check the option to "Always use this app" and press OK.
Choose a name and press Finish to save the shortcut to your desktop
The first time you use a web page shortcut, Windows asks in a pop-up window how you want to open the file. Click or tap on your preferred web browser, make sure to check the option to "Always use this app" and press OK.
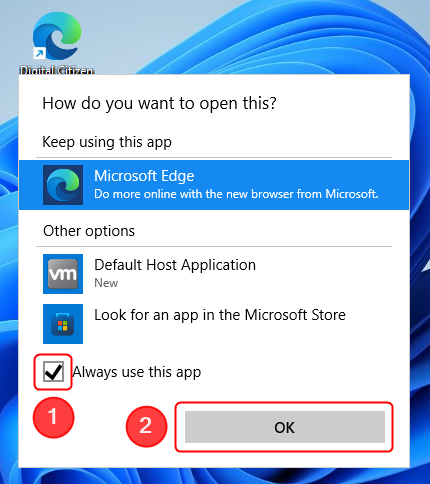
 After selecting your preferred browser, check the box next to Always use this app, then press OK
This opens the target link of your shortcut in your default browser. At the same time, the icon for the shortcut is replaced by a variation of the icon used by your default web browser. The same icon (and the same browser) is used for all the shortcuts to web pages you create from now on.
TIP: To learn how to change a shortcut's icon, read How to change the icon of any shortcut in Windows.
After selecting your preferred browser, check the box next to Always use this app, then press OK
This opens the target link of your shortcut in your default browser. At the same time, the icon for the shortcut is replaced by a variation of the icon used by your default web browser. The same icon (and the same browser) is used for all the shortcuts to web pages you create from now on.
TIP: To learn how to change a shortcut's icon, read How to change the icon of any shortcut in Windows.
 Go to All apps in the Start Menu
Find the item you are looking for in the All apps list. Then, click or tap on it, but do not release. Hold down the mouse button or keep your finger on the screen, and drag the item to the desktop. When the text Link appears next to your cursor, you can drop the item anywhere on your desktop to create a shortcut.
Go to All apps in the Start Menu
Find the item you are looking for in the All apps list. Then, click or tap on it, but do not release. Hold down the mouse button or keep your finger on the screen, and drag the item to the desktop. When the text Link appears next to your cursor, you can drop the item anywhere on your desktop to create a shortcut.
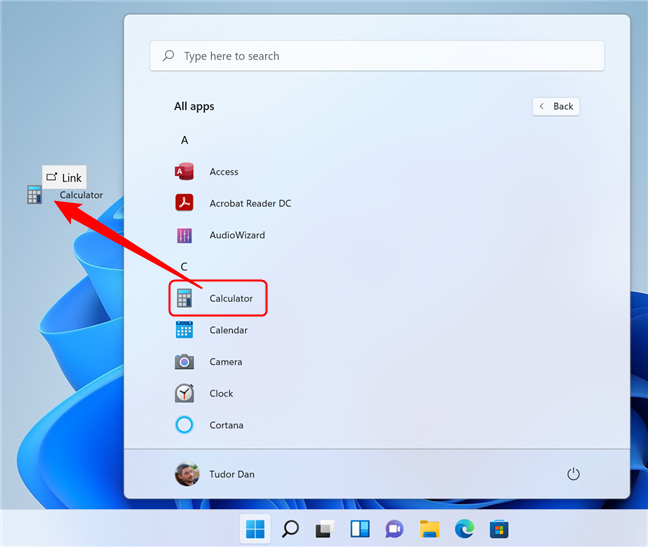
 Drag and drop an item from the list to create a shortcut
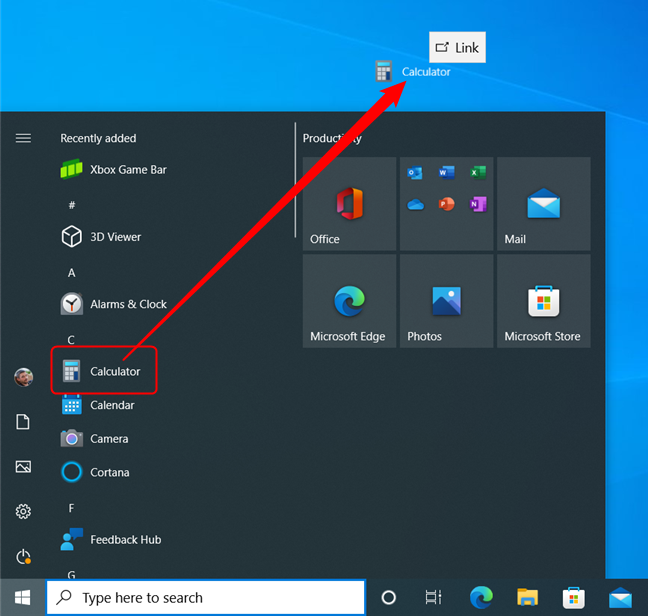
 Drag a Start Menu item to the desktop to create a shortcut in Windows 10
Alternatively, you can also grab any of the shortcuts and tiles from the right side of the Start Menu the same way, and you can drag and drop them on the desktop with the same results.
Drag a Start Menu item to the desktop to create a shortcut in Windows 10
Alternatively, you can also grab any of the shortcuts and tiles from the right side of the Start Menu the same way, and you can drag and drop them on the desktop with the same results.
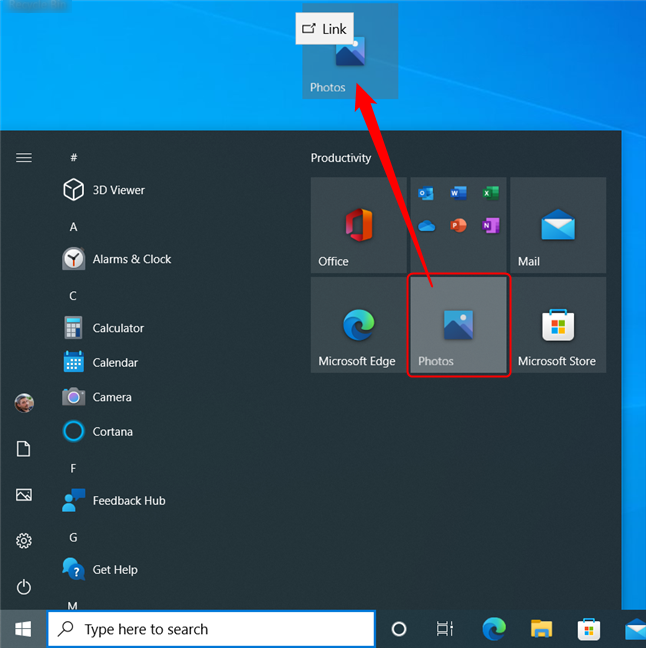
 Drag and drop a tile or a shortcut to your desktop
In all these cases, dragging and dropping creates a new shortcut, leaving the original shortcut or tile in its place.
Drag and drop a tile or a shortcut to your desktop
In all these cases, dragging and dropping creates a new shortcut, leaving the original shortcut or tile in its place.
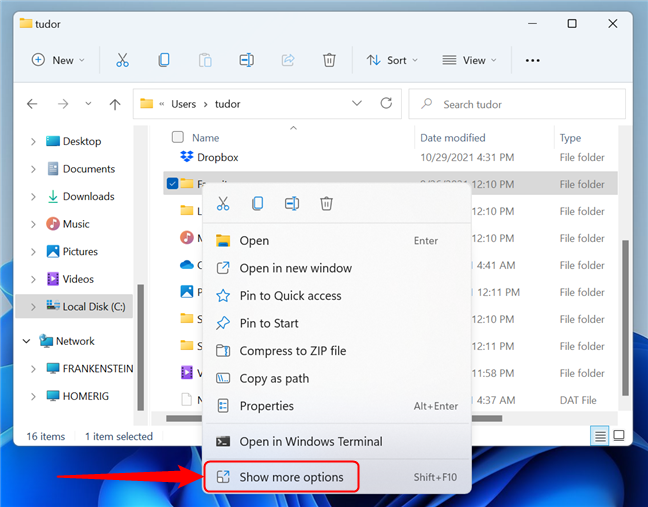
 Right-click the item, then press Show more options
The classic right-click menu appears. Tap or hover over the Send to option, and then click or tap on "Desktop (create shortcut)."
Right-click the item, then press Show more options
The classic right-click menu appears. Tap or hover over the Send to option, and then click or tap on "Desktop (create shortcut)."
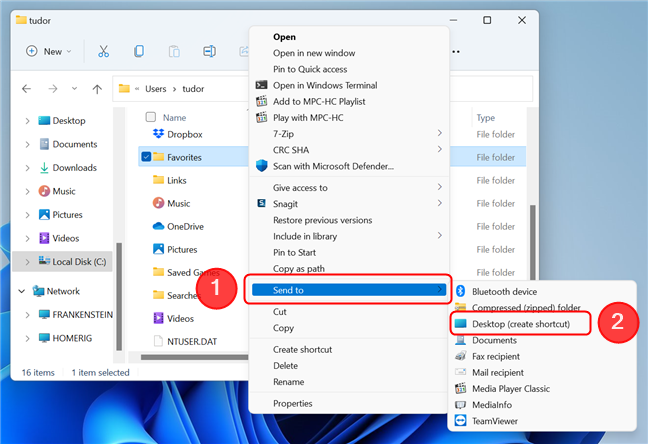
 Choose Desktop from the Send to menu to create a shortcut
A shortcut is created on the desktop, pointing to the item you have selected. The classic right-click menu also has a Create shortcut option you can click or tap.
Choose Desktop from the Send to menu to create a shortcut
A shortcut is created on the desktop, pointing to the item you have selected. The classic right-click menu also has a Create shortcut option you can click or tap.
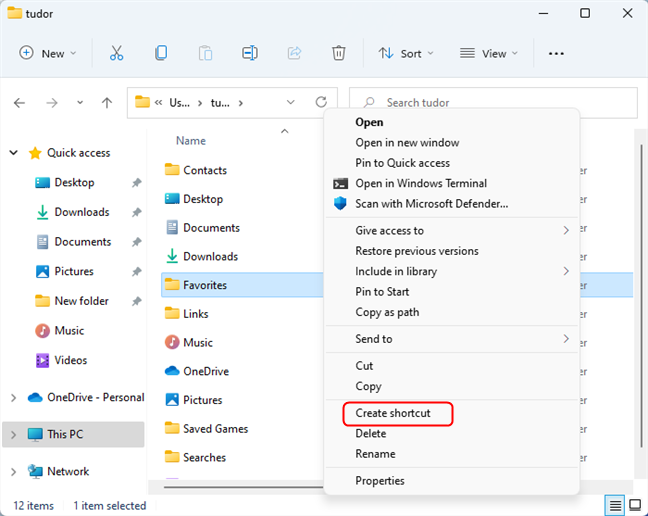
 Press Create shortcut from the right-click menu
Unlike the other option, a shortcut to the selected item is created in the same folder as the original file, and you can move that shortcut to another location.
NOTE: In Windows 10, the method is almost identical to the one for Windows 11. The only difference is that when right-clicking an item, the classic right-click menu appears right away, so there’s no need to press Show more options.
Press Create shortcut from the right-click menu
Unlike the other option, a shortcut to the selected item is created in the same folder as the original file, and you can move that shortcut to another location.
NOTE: In Windows 10, the method is almost identical to the one for Windows 11. The only difference is that when right-clicking an item, the classic right-click menu appears right away, so there’s no need to press Show more options.
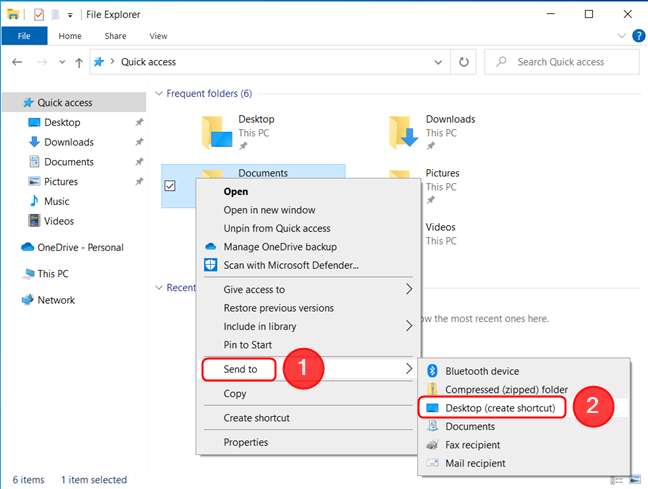
 In the right-click menu, hover over Send to, then press on Desktop (create shortcut)
How to create shortcuts to desktop apps and files in Windows
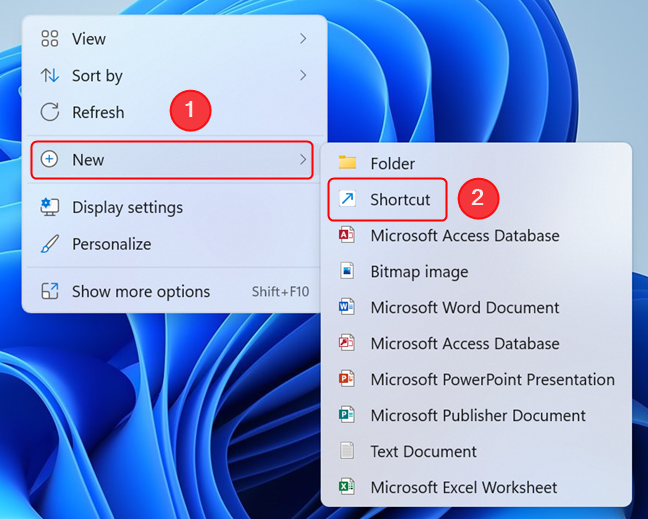
This method works both for Windows 11 and Windows 10. To create a shortcut, right-click or press-and-hold on a free area on your desktop. This opens the right-click menu. Tap or click the New option to reveal another menu, and then click or tap on Shortcut.How to create shortcuts to folders in Windows
Shortcuts to folders are created the same way as the ones to apps and files. First, right-click or press-and-hold on a free area on your desktop to open a contextual menu. Go to New and click or tap on Shortcut to open the Create Shortcut wizard. Once here, either type the location of the folder in question, or click or tap on Browse to navigate to it. Select the folder you want to create a shortcut to, and then press OK. Click or tap on Next when you are returned to the Create Shortcut wizard.How to create shortcuts to web pages in Windows
Unsurprisingly, in Windows 11 and Windows 10, the process of creating a shortcut to a web page starts precisely the same way as the one for files and folders. Open the Create Shortcut wizard by first right-clicking or pressing-and-holding a free desktop area, and then clicking or tapping on the Shortcut option from the New menu. In the wizard, type in or copy and paste the web address of the page you are trying to create a shortcut to. Then, click or tap on Next.How to create shortcuts to Start Menu items in Windows
Windows allows users to create shortcuts for all the items listed in the Start Menu. The methods for Windows 11 and Windows 10 are slightly different, so let’s start with Windows 11.Create shortcuts to Start Menu items in Windows 11
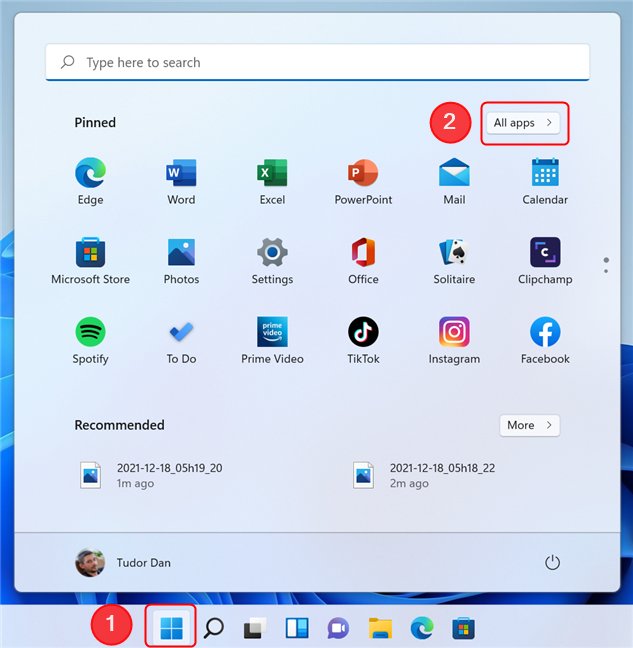
To begin, open the Start Menu by pressing the Windows key on your keyboard or the Start button on the taskbar. Next, press All apps.Create shortcuts to Start Menu items in Windows 10
Open the Start Menu by pressing the Windows key on your keyboard or the Start button on the taskbar. Find the item you are looking for in the apps list, then drag and drop it to the desktop.How to create shortcuts to files and folders using their right-click menu in Windows
You can also use the options in an item's right-click menu to create a shortcut to it. Since the items in the Windows 11 right-click menu are arranged differently and involve an additional step, let’s first focus on it. Open File Explorer, navigate to the location of the file or folder you want to create a shortcut to, and then right-click or press-and-hold on it to open its contextual menu. Next, press Show more options.
Discussion (20)
Have to say, some of the methods seem a little long-winded. The way I have done it for years is to right click and hold on the item, be it a file or folder, drag it to the desktop and then let go. A small menu will appear, “copy here”, “move here” or “create shortcut here”. Select what you want (shortcut in this case), re-name if necessary (highlight, if using single mouse clicking and use F2) and there you go!
Thanks! That was an easy trick and it really helped!
I am having a problem with the shortcut wizard in that often it only shows “Desktop” and then my userID under it (missing “ThisPC” and all the other items showing in your final screen capture of the wizard above).
I suspect that means corrupted User folders, but am not sure. It is such a pain to set up a new user, transfer all the user folders (except files/folders starting with “NT”) from the corrupted user folder to the new one, deleting the older user folder then renaming the new user folder to the name used previously in the old folder.. It is even worse if the corrupted folders are those used by the “Live” account (the one stored in the cloud by Microsoft).
Does anyone know of an easier way around this?
You can use KrojamSoft FilesSearch Tool, it helped me out on many cases. Hope this helped you out!
I need to pin a printer to my Windows 7 Pro taskbar
that will allow me to right-click it and see the same
context-menu appear that appears when I click the
printer in “Devices and Printers”.
How to do that?
Please help!
Thanks!
How dou put a folder on a windows 8.1 desktop that you can put shortcuts in. Also sould be able to assign an appropriate icon to the folder. This Iis easy with allprevious versions but I cant find a way to do it with W8.
Hi Marte Brengle,
How can I create shortcut for this special folder?
Internet Options Shell:::{A3DD4F92-658A-410F-84FD-6FBBBEF2FFFE}
Thanks,
VT
Unfortunately, there is no way to create shortcuts for special folders in Windows. But you can try to use TaskLayout to open any system folders with your custom hotkey.
@Marte,
thank you for your answer.
Modifying the registry in order to launch any command from any folder shouldn ‘t be too hard, but can you tell me what procedure has to be launched for invoking the standard Windows ‘Make Shortcut’ pop-up window ?
Thank you for your feedback,
Koen Andries
I’m sorry, that’s gone beyond what I know. You might check on the Microsoft web site to see if they have your answer.
A question :
when I want to create a shortcut to a webpage in a given folder, I click “New” –> “Shortcut” in the right-click menu from that folder. Unfortunately, the option “Shortcut” is often absent in the right-click menu from a folder.
Is there a way I can get the option “Shortcut” in the right-click menu from ANY folder ?
Your answer would be of great help to me.
Here is an article from the How-To Geek explaining how to add things to the right-click menu in Windows 7 (the URL says Vista but it’s been updated).
https://www.howtogeek.com/howto/windows-vista/add-any-application-to-the-desktop-right-click-menu-in-vista/
You’re right! Thanks for adding that great tip.
The best and fastest way is to copy the source and click Paste shortcut instead of Paste. 🙂
Thank you! I didn’t know about this. It truly is the best!
I’ve had to pleasure to read many of your tutorials. They are well done & very helpful — this one included!
I’ll keep on reading them !
Thanks
heyy.. its really look like all the old stuff which everyone are well familiar with…
it will be better if add new innovative things…
Tutorial on Creating Shortcut. That’s really for someone’s grandma…. According to me The new generation knows all these things
There are two reasons for this tutorial:
1. It can help some people. Plus, the part about shortcuts to web pages is not that widely known.
2. It fits in well in a series of articles we want to publish in the future.
I agree Sir,
“Create Shortcut” is described on many websites in many posts. But it is difficult for new users that how to create shortcuts? Thanks to you and 7tutorials that they will easily learn how to create shortcuts.