




Razer Synapse is Razer’s official software for customizing its gaming peripherals. It lets you fine-tune lighting, macros, and performance to get the most out of your Razer mouse, keyboard, or headset.
This guide explains how to install, upgrade, or reinstall Razer Synapse on both Windows and macOS — including troubleshooting steps and what’s new in the latest version.
What Is Razer Synapse and Why You Need It
Razer Synapse acts as a central hub for all your Razer devices. You can customize Chroma RGB lighting, adjust DPI, create macros, and sync your settings through the cloud.
It supports most Razer products and works on Windows 10/11 and macOS 12 or later. You’ll need a stable internet connection to download and log in.
Razer Synapse 3 vs Synapse 4
Roku offers several streaming players designed to fit different needs and budgets. Here’s a quick look at what you can expect to find at Walmart this year.
Roku Express: Priced at about $28.00. It supports HD streaming and comes with a simple remote. This is the cheapest way to start streaming and is best for budget users who just want the basics.
Roku Express 4K+: Usually around $34.82. This model supports 4K Ultra HD, HDR, and includes a voice remote. It’s a great pick if you want 4K quality without spending much more. Ideal for budget 4K streaming.
Roku Streaming Stick 4K: Around $34.99. It’s compact, supports Dolby Vision, and has long-range Wi-Fi. This is a good everyday streamer if you want portability and smooth 4K playback.
Roku Streaming Stick 4K+: About $42.00. It adds a rechargeable voice remote with personal shortcuts and private listening. Best for people who want hands-free control and don’t want to hunt for batteries.
Roku Ultra: Around $92.40. This is the high-end box with Ethernet, USB playback, and Dolby Vision / Dolby Atmos support. It’s built for home theater setups and has the fastest performance plus the most premium features.
Note: Prices can shift based on Walmart promotions. Big sales like Black Friday often drop certain Roku models by up to 20%.
💡 Tip: Synapse 4 is backward-compatible with most Synapse 3 devices.
How to Install Razer Synapse on Windows
Follow these quick steps to get Synapse running on your PC.
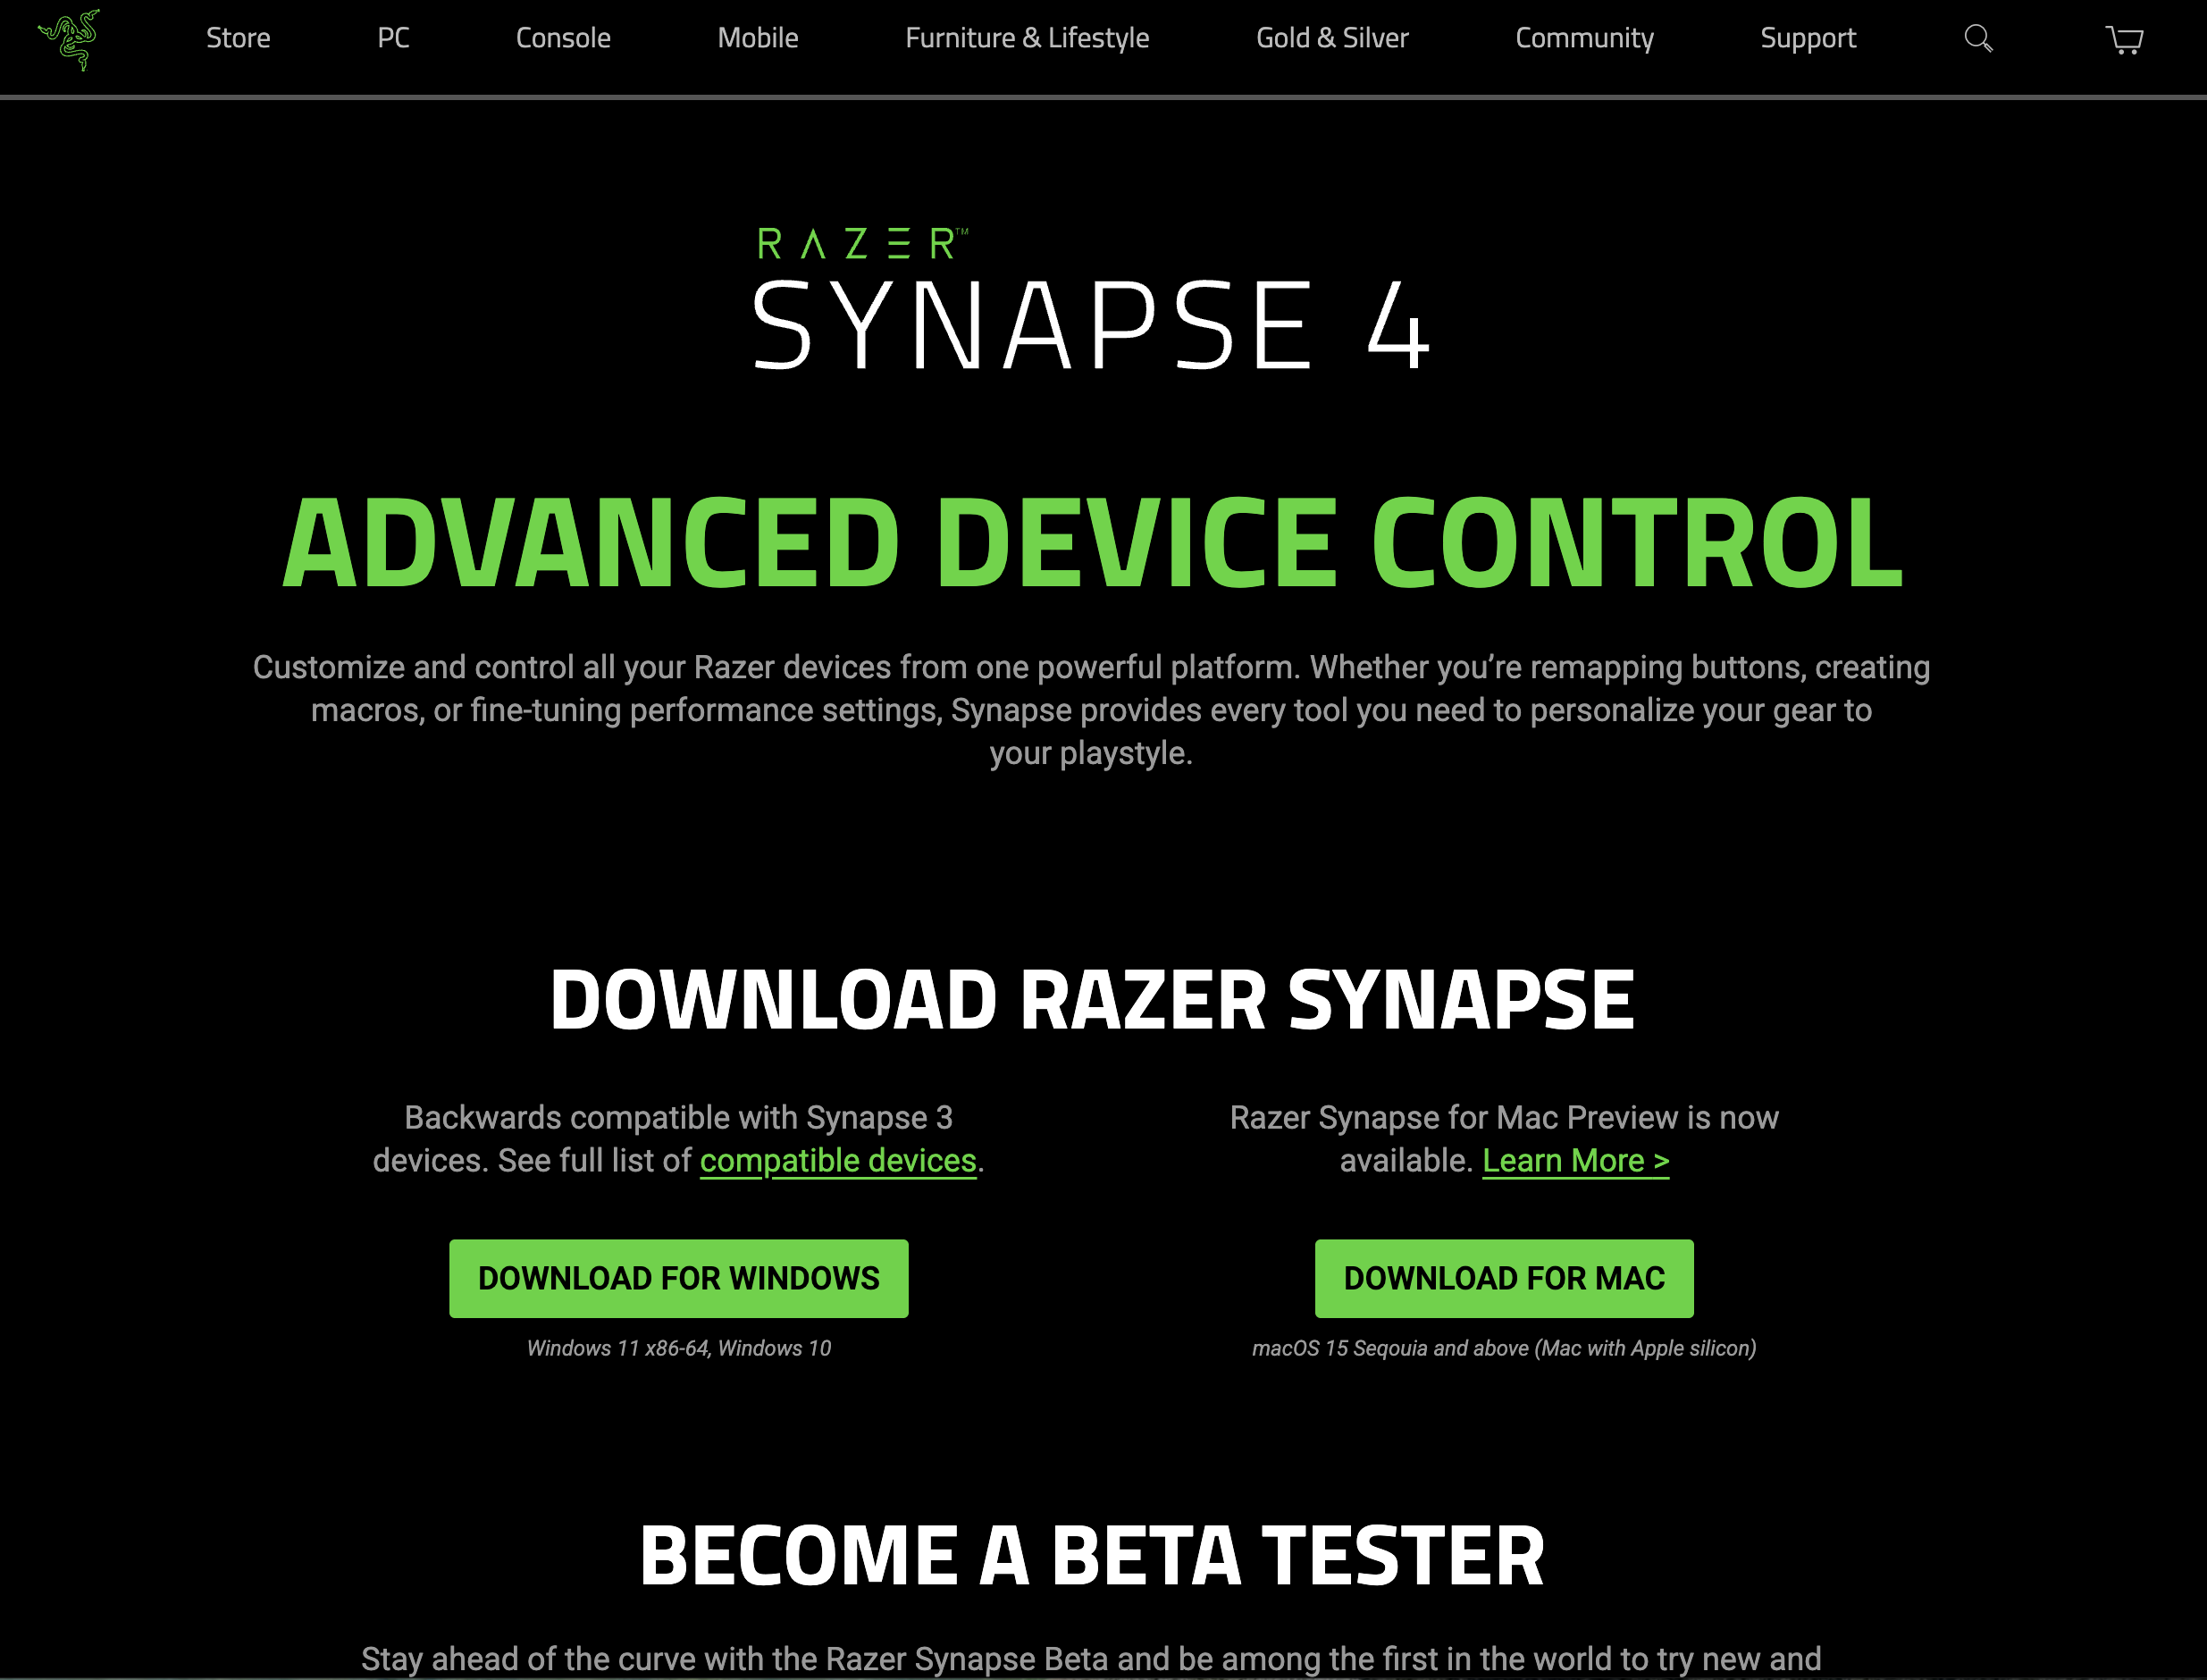
Step 1: Visit the Official Page
Go to razer.com/synapse. Click Download Now under Synapse 4 and save the installer file.
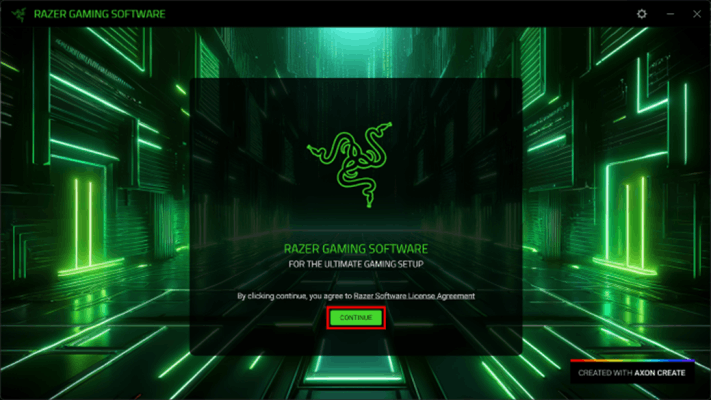
Step 2: Accept Software License Agreement
Open your Downloads folder. Right-click the file → Run as Administrator → click Yes if prompted. Check the box for the Razer Software License Agreement, then click continue.
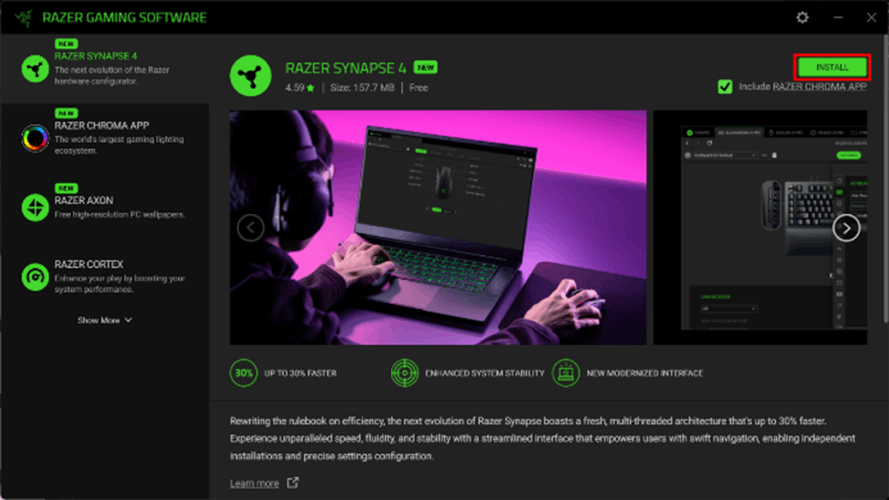
Step 3: Follow the Installation Wizard
Click Install and wait for the progress bar to finish. When complete, click Launch Razer Synapse.
Step 5: Sign In or Create a Razer ID
Log in to continue installation and sync settings across devices, or continue as a Guest for local use. It will automatically launch after installation.

How to Install Razer Synapse on macOS
The Mac version has extra permission steps.
Step 1: Download the macOS Installer
Visit the official Razer Synapse for Mac page and click Download Now. Open the .dmg file and drag Razer Synapse into Applications.
Step 2: Approve the Installation
Enter your Mac password or Touch ID to allow changes.
Step 3: Enable Permissions
Go to System Settings → Privacy & Security → Extensions. Allow Razer’s drivers and restart if asked.
Step 4: Launch and Log In
Open Razer Synapse from Applications and sign in with your Razer ID.
How to Upgrade or Update Razer Synapse
Razer Synapse usually updates automatically when you launch it. To check manually:
- Open Synapse → click the gear icon ⚙️ → select Check for Updates.
- Or, download the newest version directly from the official site; installing it over your current copy will upgrade it.
How to Perform a Clean Reinstall (Windows)
If Synapse won’t open or update properly, do a clean reinstall:
- Back up your profiles via Synapse → Settings → Export.
- Open Control Panel → Programs → Uninstall a Program.
- Remove all Razer software.
- Restart your PC.
- Reinstall the latest version from razer.com/synapse.
Troubleshooting Common Issues
Installer Won’t Run
- Right-click the installer → Run as Administrator.
- Temporarily disable antivirus.
- Ensure Windows Update is current.
Razer Devices Not Detected
- Re-plug USB cables.
- Update drivers in Device Manager → Human Interface Devices.
- Try a different USB port.
Installer Freezes or Crashes
C:\Program Files (x86)\Razer
C:\ProgramData\Razer
Then restart and reinstall.
FAQs
Is Razer Synapse free?
Yes, the software is free for all Razer device owners.
Can I use Synapse offline?
Yes, after login, it can work offline with saved profiles.
Does Synapse 4 support older devices?
Most Synapse 3 peripherals are fully supported.
How do I uninstall Razer Synapse?
On Windows: Control Panel → Uninstall a Program.
On Mac: drag the app to Trash.
Conclusion
Installing or upgrading Razer Synapse ensures your Razer devices perform at their best. Follow the correct process for your system, Windows or macOS, to unlock new features, improved speed, and smarter customization tools. With Synapse 4, your gaming setup is faster, more connected, and easier to control than ever.

Discussion (0)
Be the first to comment.