21.06.2019
Android smartphones have a USB port that you can use to charge them, but also to transfer files such as pictures or documents to your computer. Although the steps you need to take to do that are rather simple and intuitive, there are a few things to which you should pay attention. If you want to make sure that you do everything by the book when you connect your Android smartphone to your Windows 10 PC, read this guide. It applies to all Android smartphones, no matter which company made them (Samsung, Huawei, OnePlus, Nokia, ASUS). Let's get started:
NOTE: To write this tutorial, we used a Huawei P10 lite running Android 8.0.0. Although your Android smartphone might be using a different version of Android or Samsung or another manufacturer may make it, everything we are showing should look and act similarly on your smartphone too.
How to connect your Android smartphone to your Windows 10 PC, using a USB cable
Find a proper USB cable for connecting the smartphone to the PC. If you still have the original cable that you got with your Android smartphone, use that one. Plug the USB cable into your Windows 10 computer or laptop. Then, plug the other end of the USB cable into your Android smartphone.
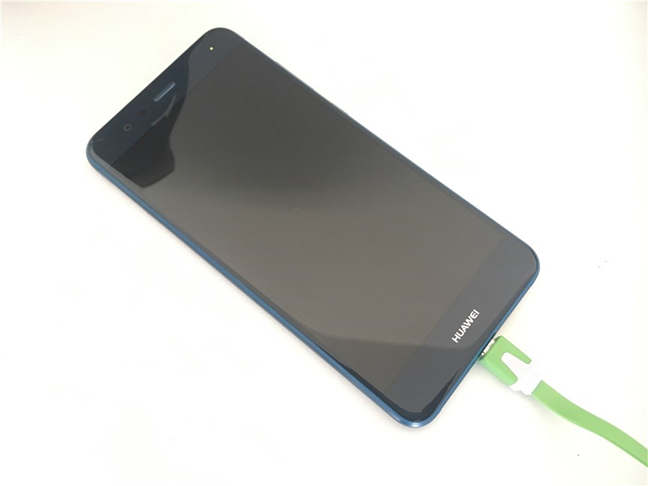
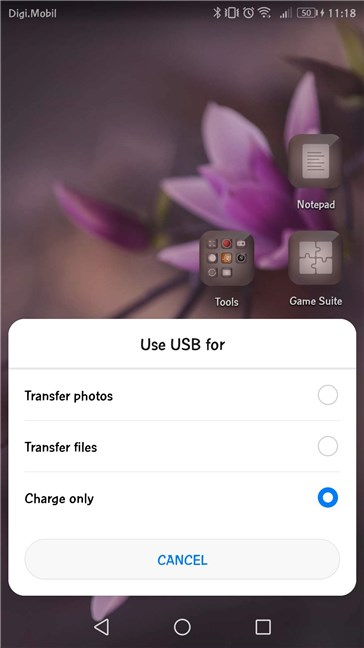
Once you do, your Windows 10 PC should immediately recognize your Android smartphone and install some drivers for it, if it hasn't them already. Your smartphone should also ask you what kind of USB connection you want: Charge only, Transfer files, or Transfer photos.
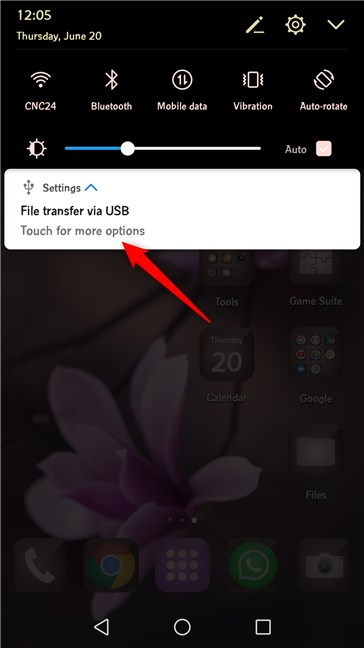
If your Android smartphone does not ask you about the USB connection, you should be able to trigger this dialog from the notifications drawer. Swipe from the top of the screen and tap the Settings notification.
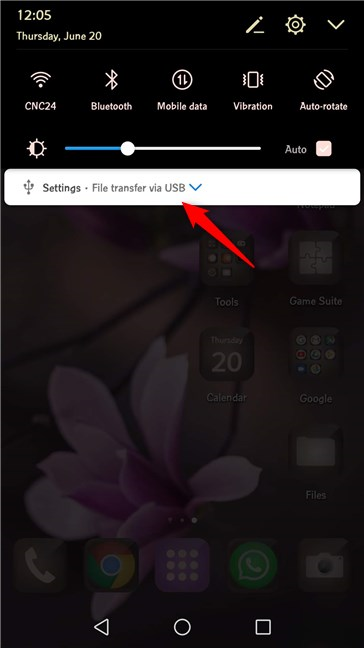
Tap once more to open USB dialog, for more options.
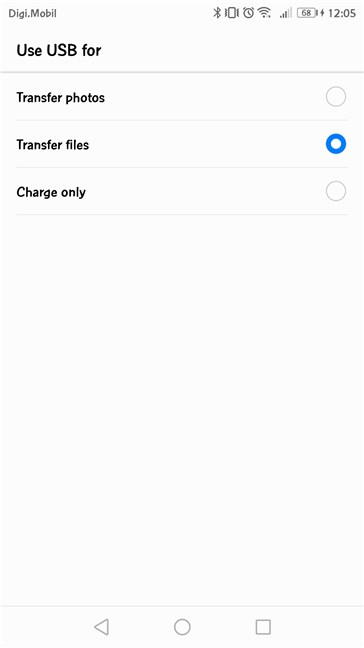
The "Use USB for" dialog is shown. The only difference is that this time it is shown on the entire screen, instead of in a popup window.
Let's see now what each USB connection does:
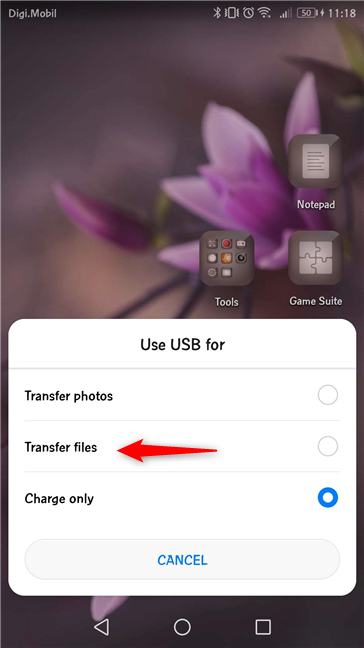
1. Transfer files between your Android smartphone and your Windows 10 PC, using a USB cable
If you want to transfer files to or from your Android smartphone, select the "Transfer files" option.
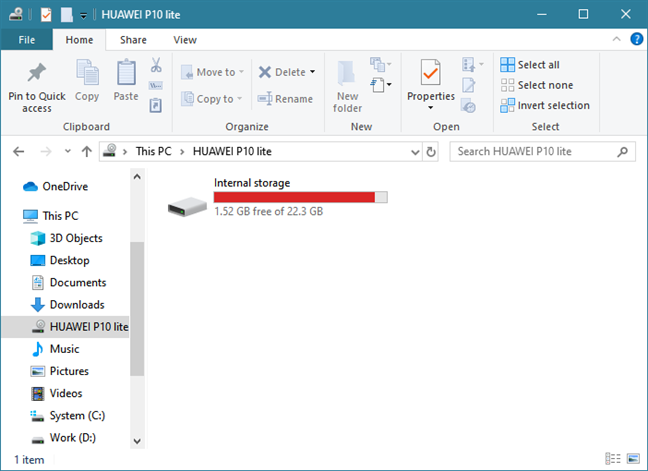
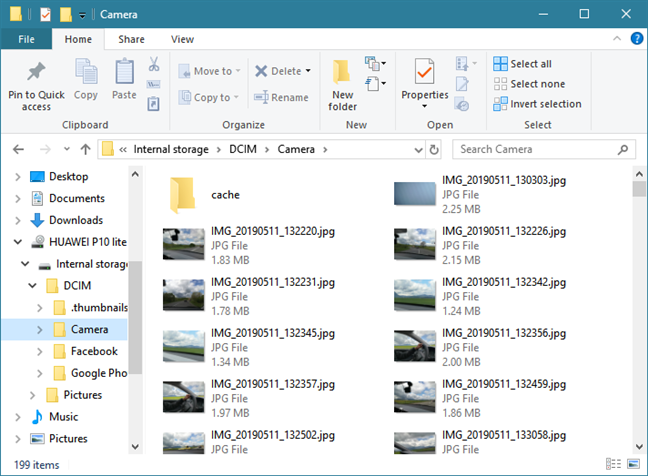
Then, on your Windows 10 PC, open File Explorer or any other file manager you prefer. In the This PC section, you should see a new device that bears the name of your Android smartphone. Double-click or double-tap on it.

Then, you should find one or two drives. The first one's the internal memory of your Android smartphone. If you get two drives, the second is the SD memory card in your smartphone.
Double-click or double-tap on the drive from which you want to transfer data. This gives you access to all the folders and files on your phone, so you can start transferring the files you wanted, to or from your Windows 10 PC.
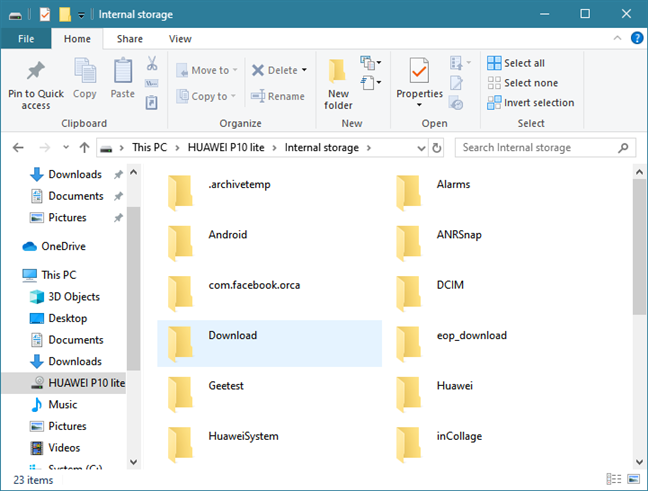
Cut, copy, and paste the files you want, from your smartphone to your PC, as you usually do with the files and folders found in Windows 10.
2. Transfer photos and videos between your Android smartphone and your Windows 10 PC, using a USB cable
Similarly, you can also choose to Transfer photos, on your Android smartphone. The name of this option is a bit misleading because it lets you transfer photos and videos.
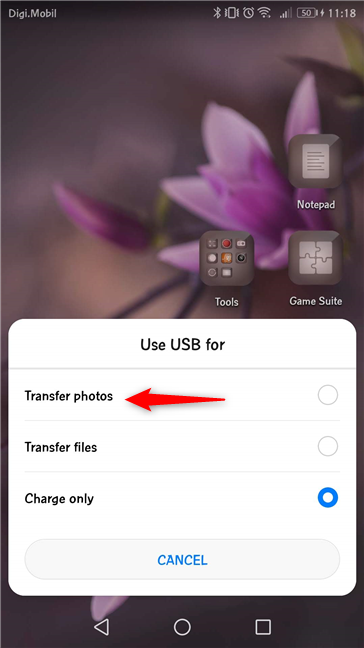
The Transfer photos option is the same as the Transfer files one but only shows you the DCIM and Pictures folders that contain the images and videos on your Android smartphone. You only see these folders in File Explorer.
Cut, copy, and paste your pictures and videos as you wish, to your Windows 10 PC.
NOTE: If you want to transfer pictures wirelessly, between your Android smartphone and Windows 10 PC, read: Send files from an Android smartphone to Windows 10, with Bluetooth.
3. Charge your Android smartphone from your Windows 10 PC
If all you want from your Windows 10 PC is to charge your Android smartphone, in the "Use USB for" dialog, choose the Charge only option.
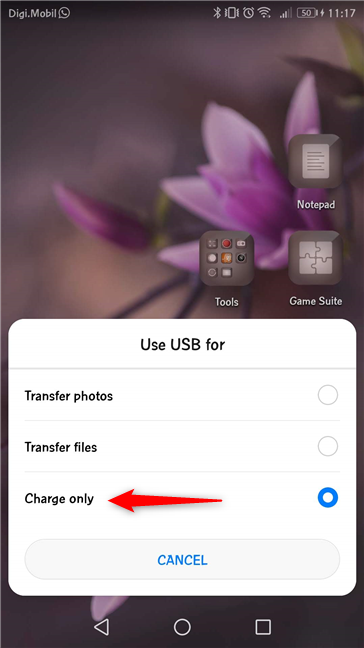
This option makes your Windows 10 computer or device provide electricity to your smartphone. That is the only thing it does. The PC does not identify the smartphone as a device with which it can communicate and transfer data.
Did you manage to connect your Android smartphone to your Windows 10 PC?
It is not that complicated to use a USB cable to connect your Android smartphone to your Windows 10 computer. It is just a matter of choosing what you want to do and then use File Explorer to transfer all kinds of files and images. If you have any questions or problems with this process, comment below and let's discuss.