Many computers use processors with built-in integrated graphics that help them provide basic video features. However, some PCs also have dedicated video cards that are used for more demanding apps and games. Usually, Windows 10 automatically switches between graphics cards, depending on the apps you are using and the games you’re playing. However, sometimes, you might want to force a particular app or game to use the discrete video card or the built-in integrated graphics. So how do you force a game to use a dedicated graphics card? In Windows 10, you can do this directly from the Settings app without having to search through Nvidia’s or AMD’s apps for the right settings. Here's how:
Why would you want to change what graphics card a game uses? Why change the GPU used by specific apps?
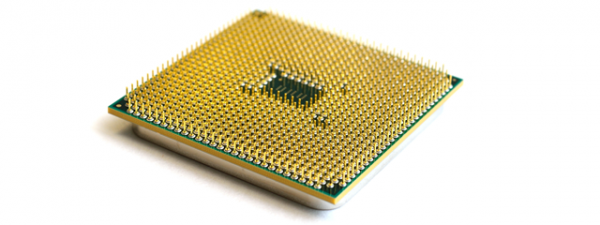
Some desktop PCs and most laptops have integrated graphics cards, which is a short way of saying that their processors have built-in video chips. However, integrated graphics are not powerful enough to manage demanding apps and games that require a lot of graphical power. That’s why many computers also have dedicated video cards, which use graphics chips usually manufactured by either Nvidia or AMD. The dedicated video cards are a lot more powerful, but they are also more power-hungry than the integrated graphics.
Graphics preference: Power saving or High performance
To balance performance versus power usage, computers must be able to use the right graphics option for every app and game you run. If the integrated graphics is powerful enough for Paint 3D, that is what your computer should use. However, if you want to play the latest 3D video game on Steam, it should switch to using the much more powerful Nvidia or AMD video card.
Usually, the switch between the two graphics options is done automatically by your graphics drivers. However, sometimes, you might want to specify by yourself whether an app or game should use the integrated graphics or the discrete video card on your computer.
Now let’s see how to change what graphics card a game uses (or an app):
Step 1. Open the graphics settings in Windows 10
Start by opening the Settings app. A quick way to do that is to click or tap on its button on the Start Menu.
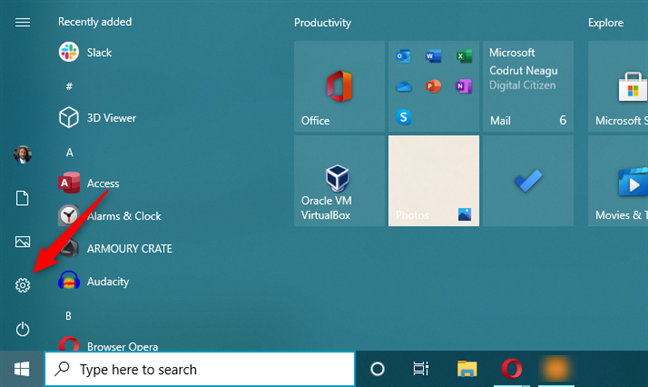
Open Settings in Windows 10
In the Settings app, click or tap on System.
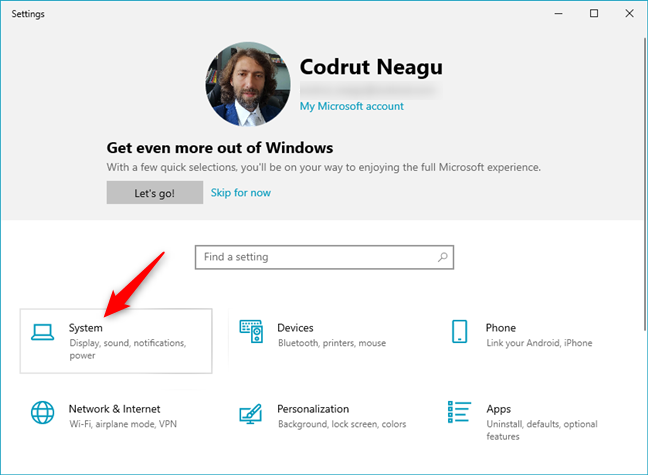
The System category in Windows 10's Settings
If the Display page is not already shown, make sure you open it by selecting it on the left side of the window.
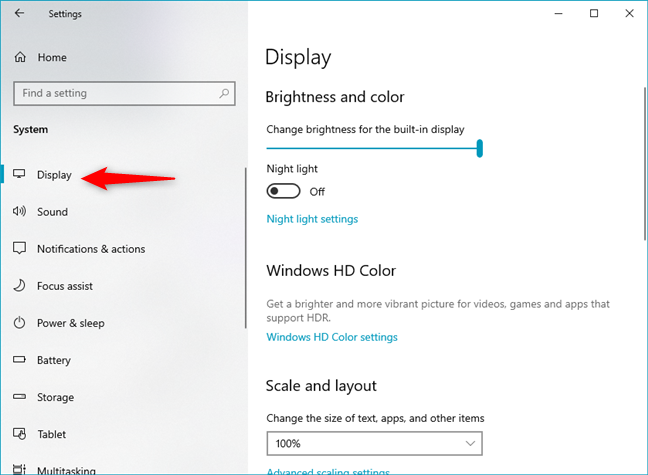
The Display settings from Windows 10
On the right side, scroll until you see a link called “Graphics settings.” You should find it between “Multiple displays” and “Sleep better.” Then, click or tap on “Graphics settings.”
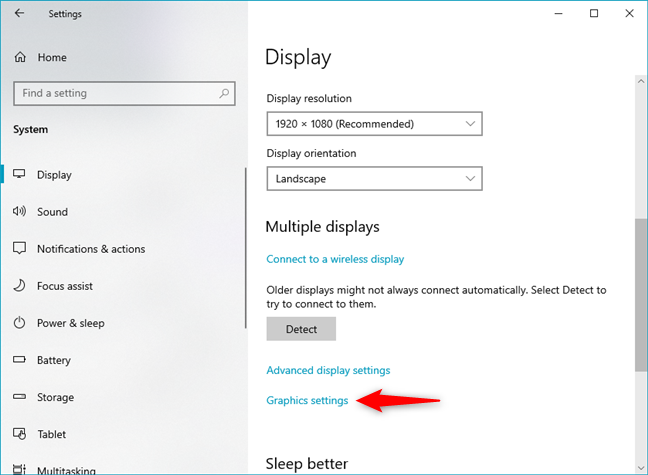
Open Graphics settings
Now the “Graphics settings” page should be displayed. On it, Microsoft explains what you can do in a clear manner: “Choose between better performance or battery life when using an app. You might need to restart the app for your changes to take effect.”
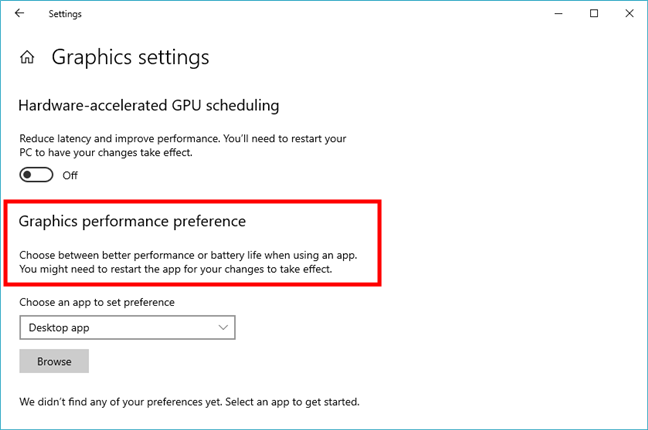
Graphics performance preference
TIP: If you don’t know which video cards you have inside your laptop or PC read: 2 ways to find your exact graphics card model without opening your PC.
Step 2. Select the type of application or game for which you want to change the graphics card that’s being used
To configure a particular application or game, you must first choose its type: “Desktop app” or “Microsoft Store app.” If you want to configure an application or game that you installed from the Microsoft Store, choose the “Microsoft Store app.” Otherwise, choose the “Desktop app” option. If you want to change what graphics card a game uses, the latter option (Desktop app) is usually the one you need to select.

Choose the type of game or app that you want to configure
Step 3. Choose the app or game for which you want to change the graphics card
If you chose to configure a “Desktop app,” you should see a Browse button. Click or tap on it to navigate through your Windows 10 computer and select the executable file of the app or game.
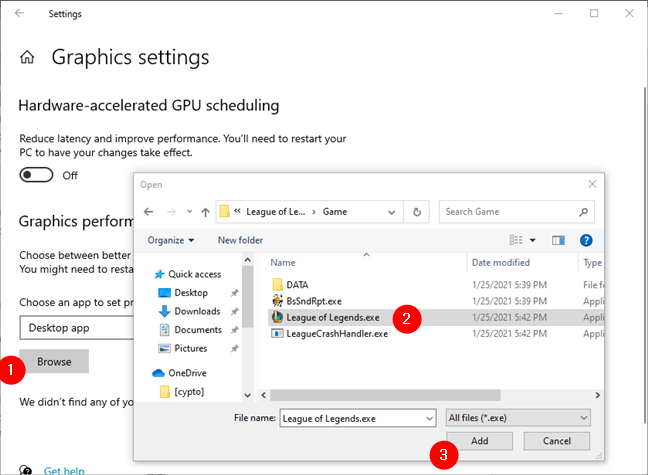
Selecting a game for which to force the graphics card used
After you press the Add button, the application or game is added to the list of apps for which you can set what graphics card is used.
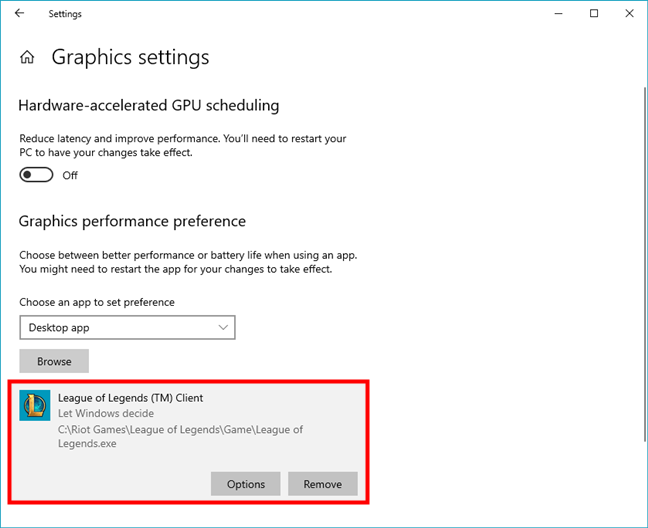
The game was added to the list
If you chose to configure a “Microsoft Store app,” you get a second selection field called “Select an app.” Click or tap on it.

Select an app
You can now see a list of all the apps and games you have installed from the Microsoft Store.
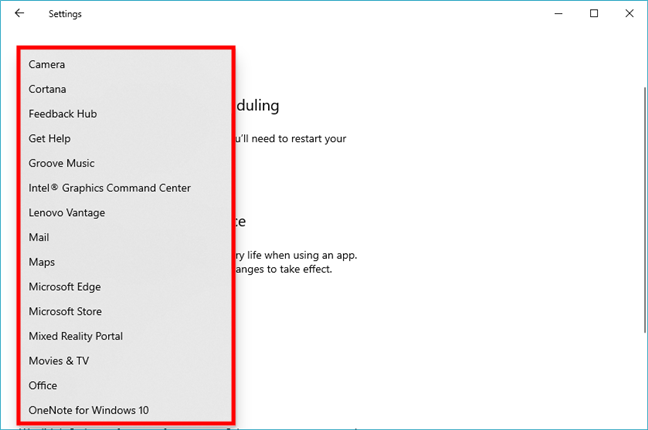
List of Microsoft Store apps
Click or tap on the Microsoft Store app that you want to configure, and then press the Add button beneath it.
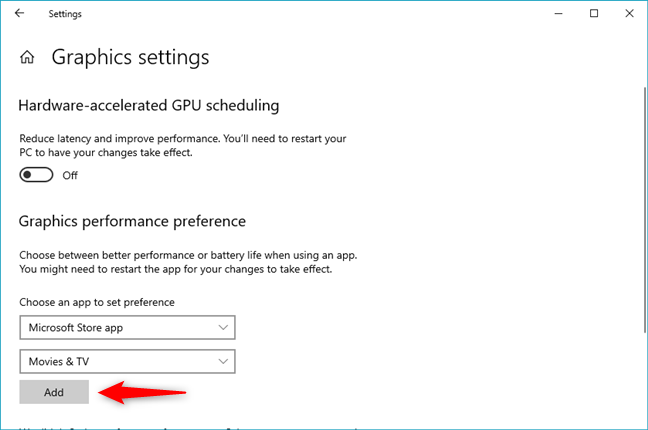
Add a Microsoft Store app for which to force the graphics card used
After you press the Add button, the app or game you selected is added to the list of apps for which you can manage graphics preferences.
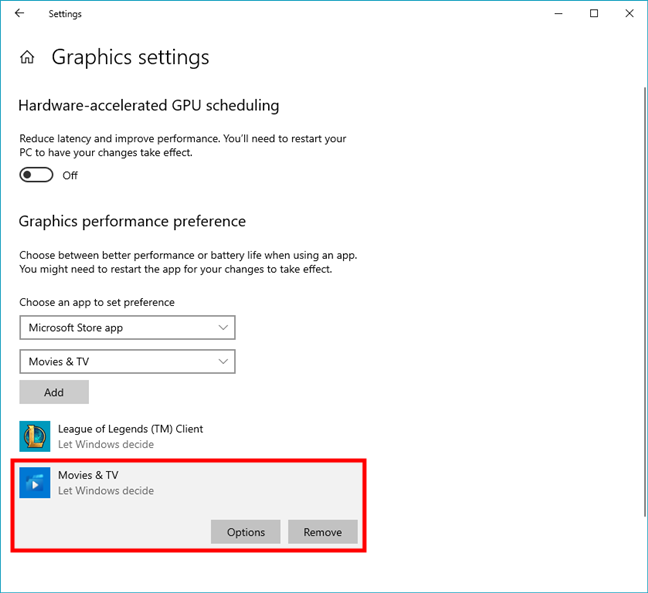
The Microsoft Store app was included in the list
Step 4. How to change what graphics card a game or app uses
In the list of manageable apps and games, click or tap on the app or game that you want to configure. Then, click or tap on its Options button.
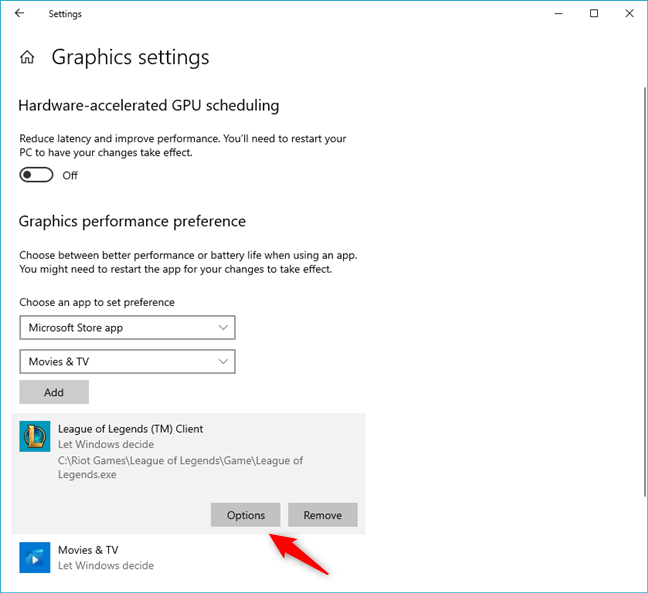
To force the use of a specific graphics card for a game, press Options
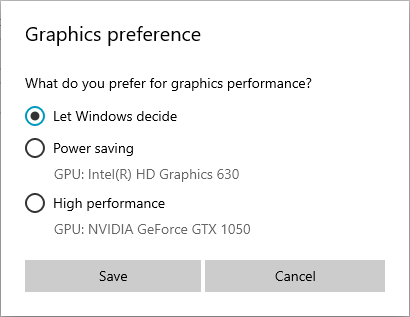
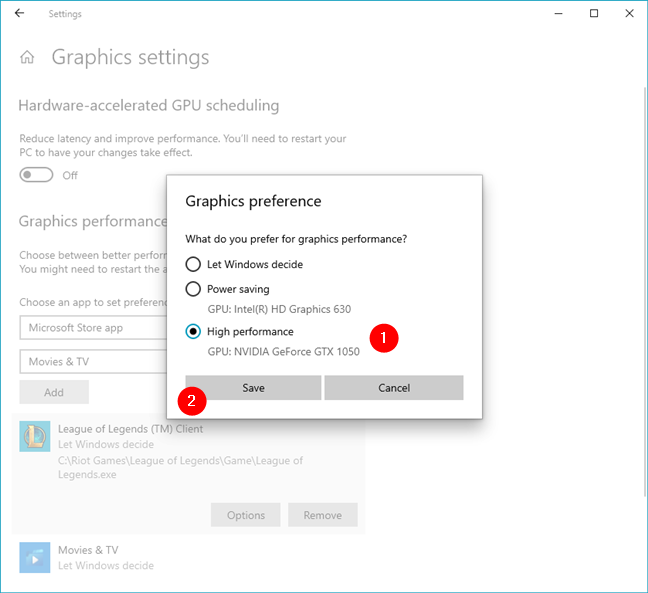
A new dialog called “Graphics preference” opens up. You can see the graphics cards that you can use on your computer, and which one saves power or offers better graphical performance. For instance, on our gaming laptop, we can “Let Windows decide,” or we can choose between:
- “Power saving” - the laptop’s integrated graphics Intel HD Graphics 630 chip found inside the Intel Core i7 7700HQ processor, and
- “High performance” - the much more powerful NVIDIA discrete graphics card found inside the laptop.
Make the selection you prefer and click or tap Save.
How to change what graphics card a game uses
Repeat the process for every app or game that you want to configure and, the next time you launch them, Windows 10 will use the video card you chose, offering you either higher performance or longer battery time, depending on your preferences.
How to remove an app or game graphics performance profile
If you change your mind and no longer want to manage what video card is used by an app or game using the “Graphics performance” feature, you can. In the list of managed apps and games, click or tap on the one that you want to stop managing and then press the Remove button.
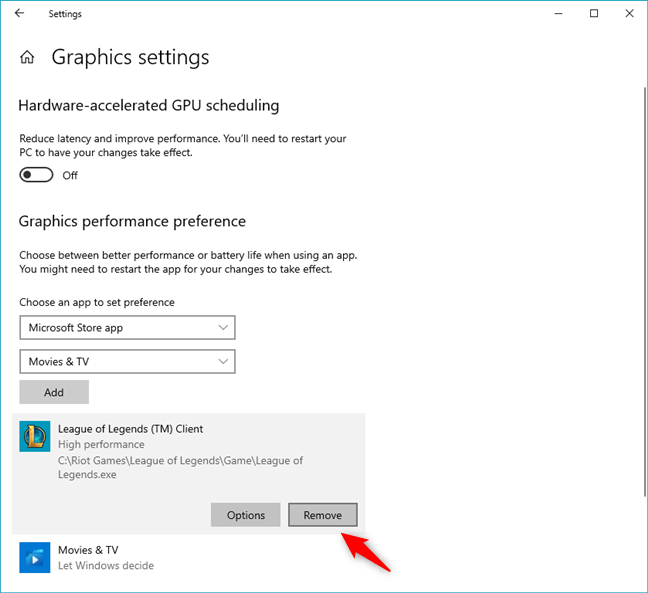
Removing the GPU preference for a game in Windows 10
The graphics performance profile for that app or game is deleted immediately and is no longer used.
Did you force a game to use your dedicated graphics card? Or maybe a Microsoft Store app?
...or do you prefer leaving Windows 10 to automatically choose the best option? Either way, now you know how to get a game (or app) to run on a specific graphics card in Windows 10. We are curious to know whether you like making choices on your own or if it’s too much of a hassle. Also, do you think that this Windows 10 feature is better than making the same settings in Nvidia’s or AMD’s video drivers? Use the comments below to let us know.