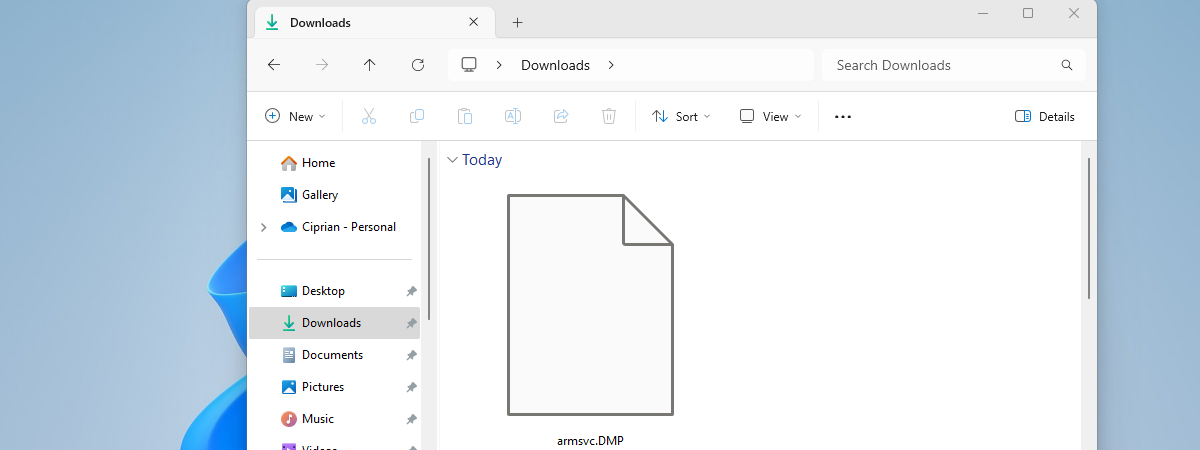
Dump files are a special type of files that store information about your computer, the software on it, and the data loaded in the memory when something bad happens. They are usually automatically generated by Windows or by the apps that crash, but you can also manually generate them. The question that arises afterwards is: "How do I read the contents of a dump file?". In this guide, we're going to show you how that is done:
NOTE: If you've arrived on this web page while looking for ways to generate dump files in Windows, you might want to read: How to create a dump file for an app, background or Windows process. There is more than one way to read the contents of dump files, using various apps from different developers, but the easiest and most user-friendly method we know of is to use an app created by Microsoft, called WinDbg Preview.
Step 1. Download and install WinDbg Preview
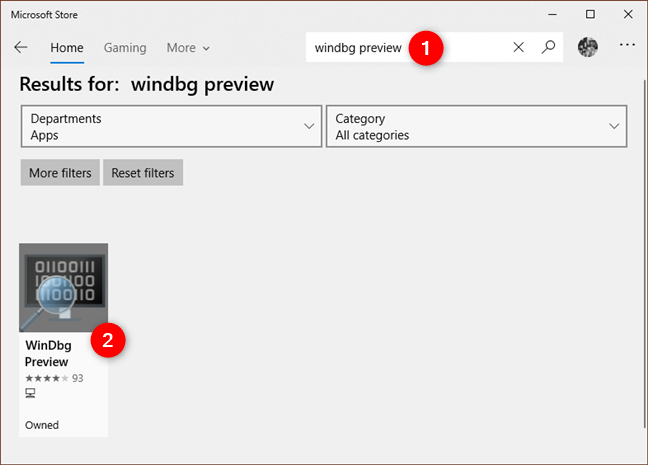
The first step is to download and install WinDbg Preview. On your Windows 10 computer or device, open the Microsoft Store, search for "windbg preview," and click or tap on the WinDbg Preview result from the Apps department. Alternatively, use this link to instantly go to the WinDbg Preview page from the Microsoft Store.
Searching for WinDbg Preview in the Microsoft Store
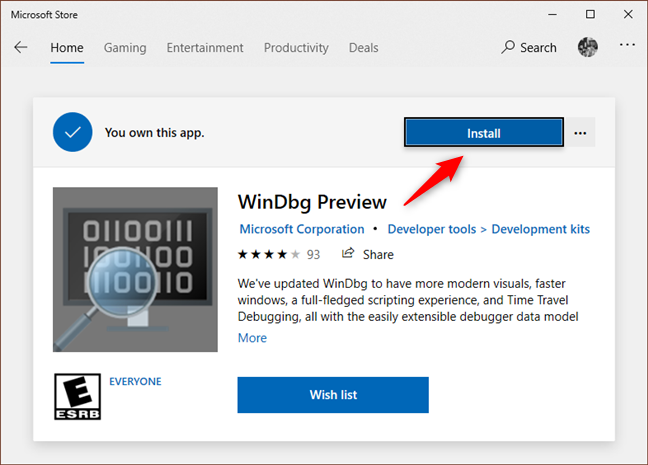
On WinDbg Preview's page from the Store, click or tap on Install.
Installing WinDbg Preview
Now, wait until the app is downloaded and installed on your Windows 10 PC.
Step 2. Open WinDbg Preview and load the dump file
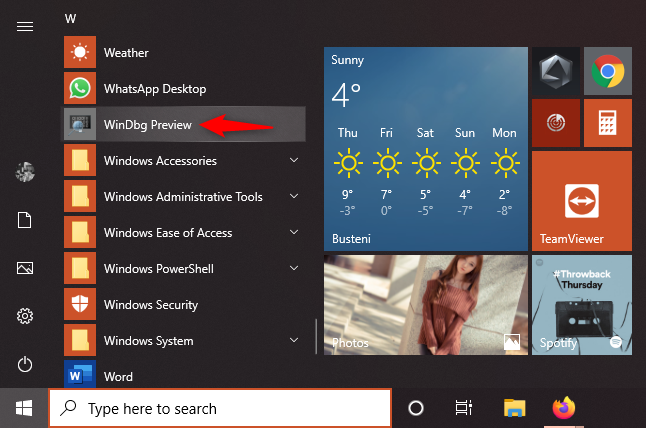
After WinDbg Preview installs, you can find its shortcut in the Start Menu. Click or tap on it to open it.
The WinDbg Preview shortcut form the Start Menu
NOTE: You can use WinDbg Preview to open any dump file but, if you want to open a dump file that was created by Windows 10 during a BSOD (Blue Screen of Death), you must run WinDbg Preview as an administrator.
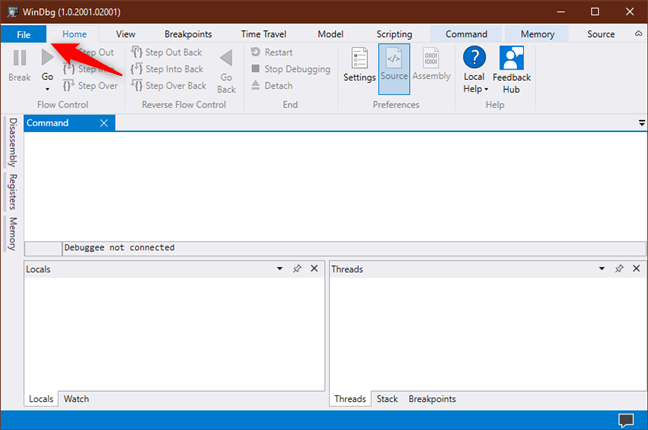
In the screenshot below, you can see what WinDbg Preview looks like. Click or tap on the File button from the top-left corner of the window.
The File button from WinDbg Preview
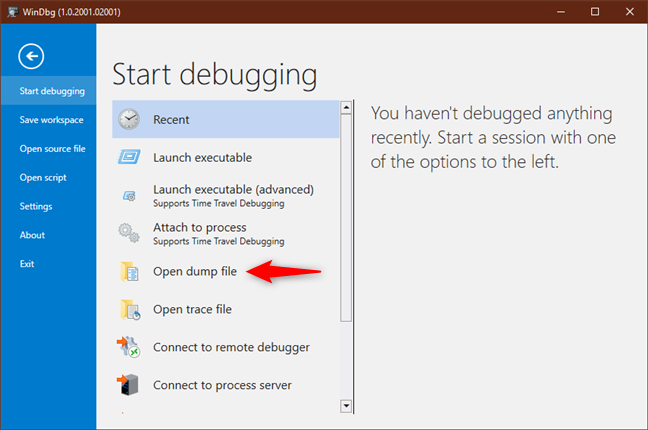
Make sure that the "Start debugging" section is selected and then click or tap on "Open dump file."
Choosing to Open dump file with WinDbg Preview
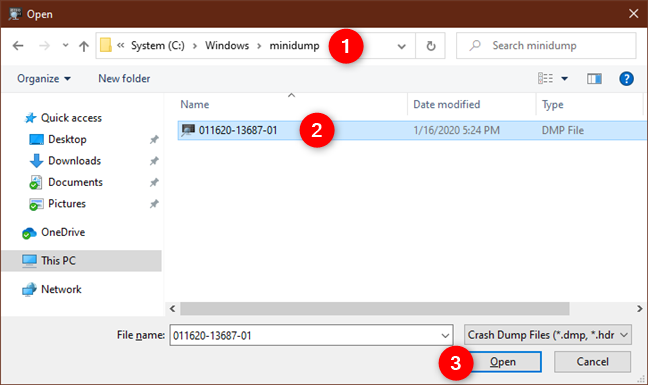
Use the Open window to navigate through your Windows 10 PC and select the dump file that you want to analyze. Then click or tap on Open, as seen in the screenshot below.
TIP: If you want to view the contents of the dump file generated by Windows 10 during its last crash, you can find it in "C:Windowsminidump", where C: is the drive letter of the drive on which Windows 10 is installed.
Browsing the PC and opening a dump file
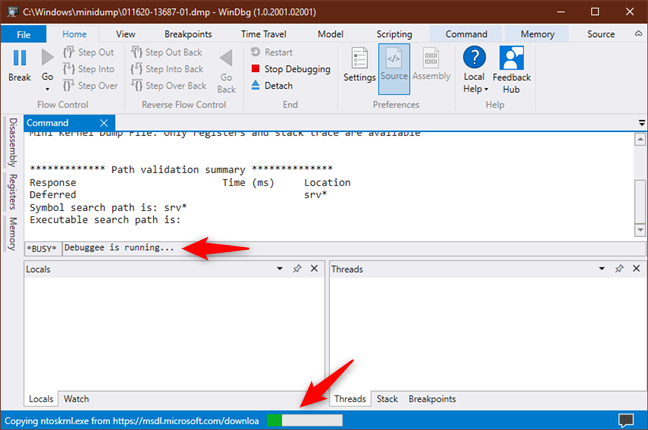
Depending on how large the dump file you chose to open is, and based also on what additional software packages WinDbg Preview needs to download in order to be able to read it, you might have to wait for a while until everything is ready. When it's done, the Busy message shown in the screenshot below should go away.
Waiting for WinDbg Preview to load the dump file
Step 3. Run the !analyze command on the dump file
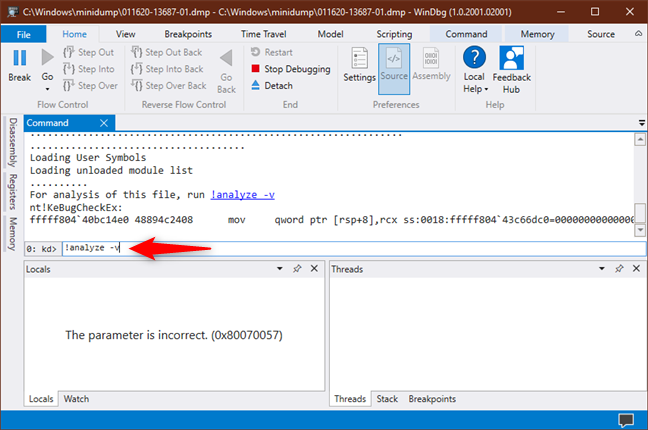
WinDbg Preview has now finished loading the dump file you selected. To analyze its contents, in the text field from the bottom of the Command panel, type !analyze -v and press Enter on your keyboard.
Running the !analyze -v command in WinDbg Preview to interpret the dump file
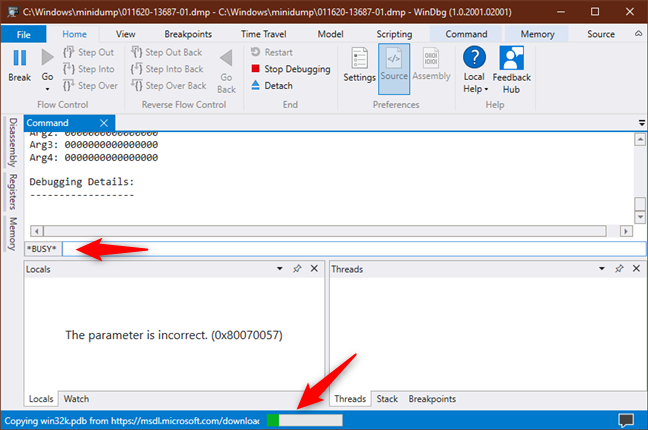
WinDbg Preview starts reading and analyzing the dump file. Just like earlier, this step might take a while, depending on how large the dump file is and how many additional debugging packages the app needs to interpret it.
Waiting for WinDbg Preview to analyze the dump file
Step 4. Interpret the dump file
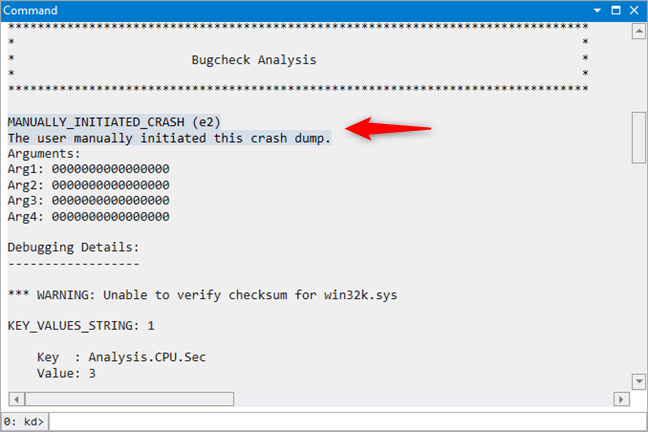
When the analysis of the dump file is finished, you can read the results to find out what caused the crash. In the Command panel, scroll until you find the Bugcheck Analysis. It should display useful information about the issues identified.
Bugcheck Analysis results in WinDbg Preview
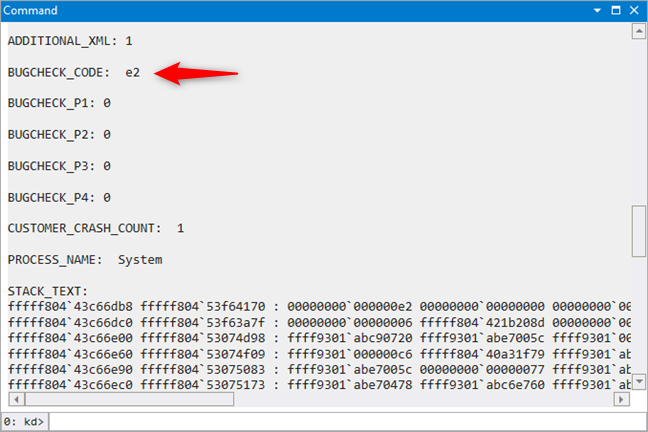
Scroll further down and look for a field called BUGCHECK_CODE. This bug code is quite important because it can help you find out what exactly happened on your Windows 10 PC. Note it down somewhere and use Google to search for it: the results you get should be helpful.
For instance, if you're going to do a Google search for the e2 bug code that you can see in the screenshot below, you're going to find that we manually generated a BSOD on our test computer.
BUGCHECK_CODE shown by WinDbg Preview
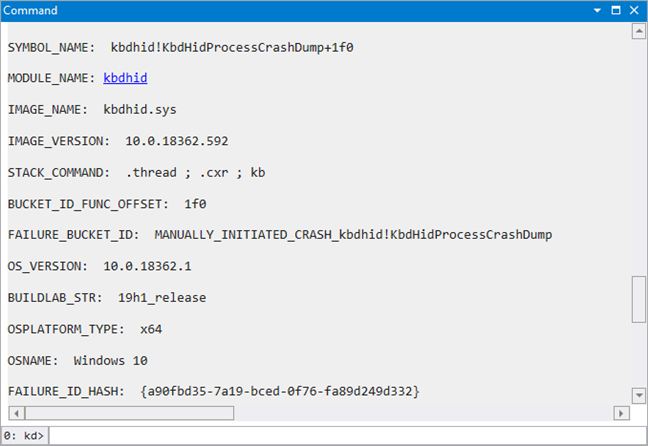
In the same Command panel, you might also find some text lines called SYMBOL_NAME, MODULE_NAME, and IMAGE_NAME. These are also important when interpreting dump files, as they can often point to what drivers broke and crashed your Windows 10 PC.
The information shown by SYMBOL_NAME, MODULE_NAME, and IMAGE_NAME
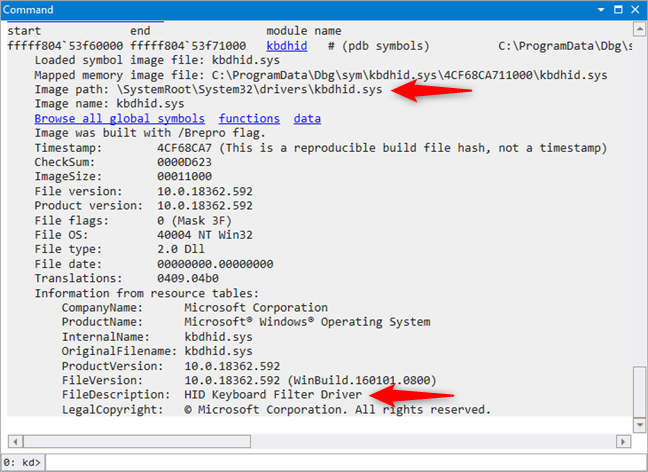
If the MODULE_NAME gives you a link, click or tap on it. That shows you even more details, and you can even learn the exact driver or file that caused you troubles. For example, in the screenshot below, it's enough to look at the Image path and FileDescription lines to see that our dump file was generated by the keyboard driver when we manually triggered a BSOD (Blue Screen of Death) using the Right Control + Scroll Lock + Scroll Lock key combination on our keyboard.
Image path and FileDescription can be useful to identify drivers that cause crashes
WinDbg Preview gives you more details about the contents of your dump file, but most of it is quite technical and therefore not easily digested by regular users. However, the information that we highlighted should give you an idea of what's wrong.
Do you know an easier way to view the contents of a dump file?
We hope that you've found this method of reading the contents of dump files fairly easy. If you know of other ways that are even more user-friendly, or if you have something to add to our guide, don't hesitate to let us know in the comments section.
I was pleasantly surprised that you had written this article genuinely for information and not for traffic to your site. I’ll look up other articles of yours now.
saeed ·
thanks a lot
Matjaz Planinc ·
Yeah Man ! This is the real thing i have learned something that i can utilize and that i have wondered about for the loooongest while. Good Bless You who wrote the instructions.
Best Regards
Mr Energy ·
Efforts like this application, saves the world, thanks a lot











Discussion (5)
I was pleasantly surprised that you had written this article genuinely for information and not for traffic to your site. I’ll look up other articles of yours now.
thanks a lot
Yeah Man ! This is the real thing i have learned something that i can utilize and that i have wondered about for the loooongest while. Good Bless You who wrote the instructions.
Best Regards
Efforts like this application, saves the world, thanks a lot
Glad to help. 😉