


Do you have a child that you need to keep an eye on? Or a pet? Or both? Then you may need a surveillance camera for home use. And if you want features like night vision or the ability to have audio conversations remotely, then TP-Link Tapo C225 might just be what you need. Read this review to see if this Wi-Fi home surveillance camera is the right choice for you:
 The packaging for Tapo C225
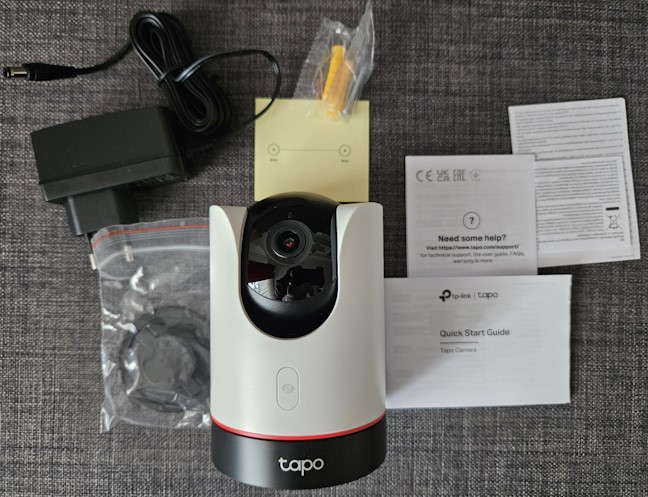
On the sides of the box, you get more detailed information about this product and what it does. Open it slowly, and unpack everything you find inside. At the end of the whole process, you should have the following items: the Tapo C225 camera, its power adapter, some mounting screws and a mounting template, the camera base, the quick start guide, and other leaflets.
The packaging for Tapo C225
On the sides of the box, you get more detailed information about this product and what it does. Open it slowly, and unpack everything you find inside. At the end of the whole process, you should have the following items: the Tapo C225 camera, its power adapter, some mounting screws and a mounting template, the camera base, the quick start guide, and other leaflets.
 Everything you find inside the box
The packaging for the TP-Link Tapo C225 is simple and good-looking. The unboxing experience is quick and pleasant. Inside the box, you find the accessories you need to mount the camera and set it up immediately.
Everything you find inside the box
The packaging for the TP-Link Tapo C225 is simple and good-looking. The unboxing experience is quick and pleasant. Inside the box, you find the accessories you need to mount the camera and set it up immediately.
 TP-Link Tapo C225
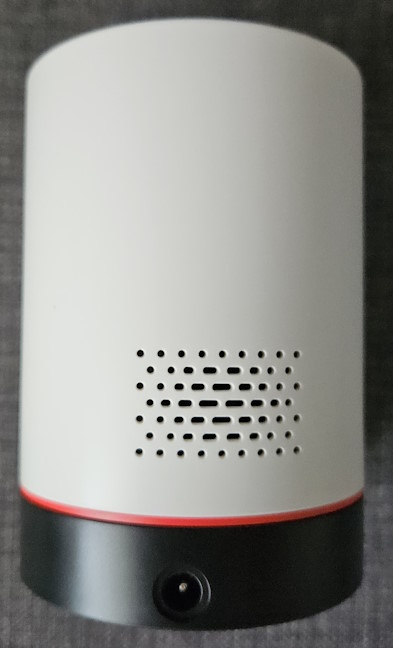
On the back, you find the speaker and the power jack.
TP-Link Tapo C225
On the back, you find the speaker and the power jack.
 The speaker is on the back
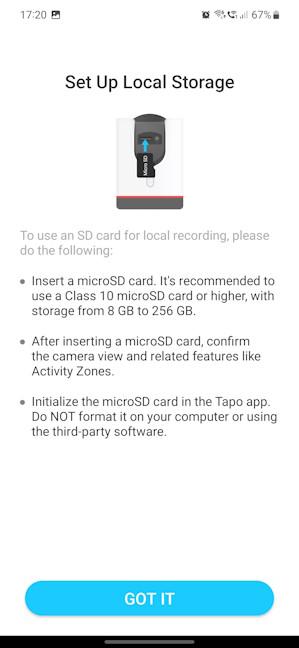
If you tilt up the camera, you reveal the MicroSD slot and the Reset button. You can plug in a microSD card with up to 512 GB capacity inside the Tapo C225. Unfortunately, the device is not integrated with the Tapo H200 hub, which would have allowed you to use one microSD card for multiple cameras.
The speaker is on the back
If you tilt up the camera, you reveal the MicroSD slot and the Reset button. You can plug in a microSD card with up to 512 GB capacity inside the Tapo C225. Unfortunately, the device is not integrated with the Tapo H200 hub, which would have allowed you to use one microSD card for multiple cameras.
 Tilt the camera up to reveal the microSD card
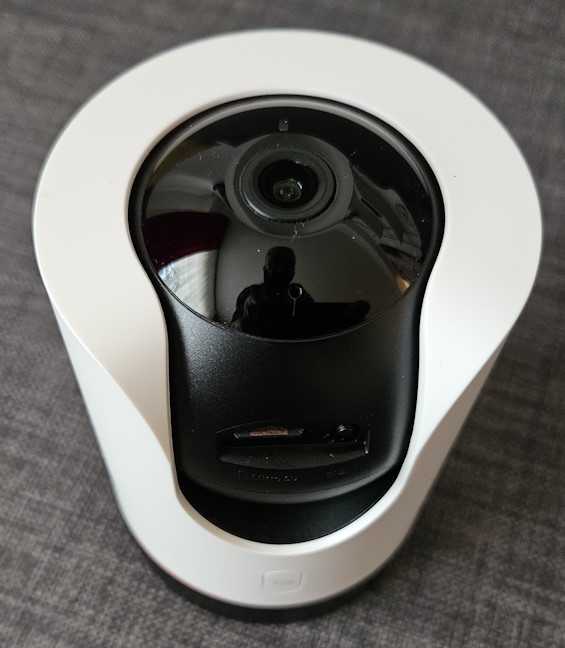
The microphone for two-way audio is found beneath the camera lens, while the system LED is above it. This LED can light up in multiple colors to signal the functioning status of the Tapo C225. It can record video with a maximum resolution of 2560 x 1440 pixels at 15 frames per second. Some users would have preferred 30 fps instead of 15. It has a 1/3" image sensor, a lens with F/NO 1.6±5%, and a focal length of 4mm±5%. The view range is 360° horizontal and 149° vertical. Thanks to its infrared LED, the camera also offers night vision. The LED can be set to 850nm to focus on short distances or 940nm for objects that are further away.
Tilt the camera up to reveal the microSD card
The microphone for two-way audio is found beneath the camera lens, while the system LED is above it. This LED can light up in multiple colors to signal the functioning status of the Tapo C225. It can record video with a maximum resolution of 2560 x 1440 pixels at 15 frames per second. Some users would have preferred 30 fps instead of 15. It has a 1/3" image sensor, a lens with F/NO 1.6±5%, and a focal length of 4mm±5%. The view range is 360° horizontal and 149° vertical. Thanks to its infrared LED, the camera also offers night vision. The LED can be set to 850nm to focus on short distances or 940nm for objects that are further away.
 TP-Link Tapo C225 features night vision
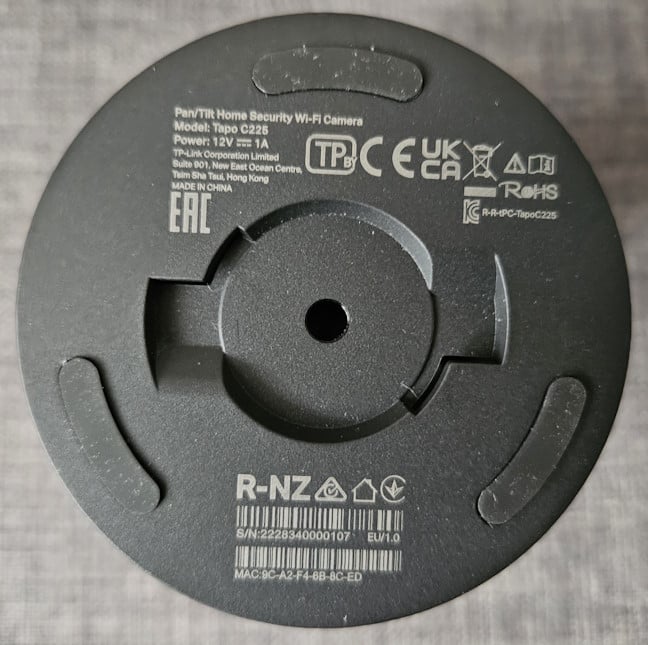
On the bottom of the Tapo C225, you find three rubber feet for holding it into place on flat surfaces and the system for mounting the camera on ceilings. The base of the camera allows it to rotate at 120°/second.
TP-Link Tapo C225 features night vision
On the bottom of the Tapo C225, you find three rubber feet for holding it into place on flat surfaces and the system for mounting the camera on ceilings. The base of the camera allows it to rotate at 120°/second.
 The bottom of the Tapo C225 camera
When it comes to detecting, TP-Link has implemented algorithms that allow the Tapo C225 to identify the following: movement, people, pets, camera tampering attempts, line-crossing, babies crying, vehicles, dog barks, cat meows, or glass breaking. The camera can send notifications to your smartphone for all these triggers, take snapshots, or record clips. For connectivity, it works with wireless networks on the 2.4 GHz band and Wi-Fi 4. It would have been better to include support for Wi-Fi 6 and WPA3 password encryption.
When it comes to operating temperatures, Tapo C225 works between 0℃ and 40℃ ( or 32°F and 104 °F).
For more detailed information about this product and its official specifications, visit Tapo C225.
The bottom of the Tapo C225 camera
When it comes to detecting, TP-Link has implemented algorithms that allow the Tapo C225 to identify the following: movement, people, pets, camera tampering attempts, line-crossing, babies crying, vehicles, dog barks, cat meows, or glass breaking. The camera can send notifications to your smartphone for all these triggers, take snapshots, or record clips. For connectivity, it works with wireless networks on the 2.4 GHz band and Wi-Fi 4. It would have been better to include support for Wi-Fi 6 and WPA3 password encryption.
When it comes to operating temperatures, Tapo C225 works between 0℃ and 40℃ ( or 32°F and 104 °F).
For more detailed information about this product and its official specifications, visit Tapo C225.
 Adding your Tapo C225
The quick setup wizard asks you to choose the Wi-Fi you want the camera connected to, provide a name for the camera, and set the location where you want to install it. Then, you can choose whether to use Tapo Care Cloud Services to store all the footage recorded by Tapo C225 or to set up a microSD card instead. If you prefer the second route, plug it into the camera and follow the instructions for installing it.
Adding your Tapo C225
The quick setup wizard asks you to choose the Wi-Fi you want the camera connected to, provide a name for the camera, and set the location where you want to install it. Then, you can choose whether to use Tapo Care Cloud Services to store all the footage recorded by Tapo C225 or to set up a microSD card instead. If you prefer the second route, plug it into the camera and follow the instructions for installing it.
 You can use a microSD card
Next, choose whether you want to enable the automatic updates for the camera’s firmware and the interval when they’re downloaded and installed. Finally, you get a tour of the camera’s main features and how they work, and you can start using the TP-Link Tapo C225. After validating that it works, turn off the camera, move it to where you want to use it, and install it there. If you plan to hang it on a ceiling, mark its position, drill two holes, affix the camera base, and attach the camera.
You can use a microSD card
Next, choose whether you want to enable the automatic updates for the camera’s firmware and the interval when they’re downloaded and installed. Finally, you get a tour of the camera’s main features and how they work, and you can start using the TP-Link Tapo C225. After validating that it works, turn off the camera, move it to where you want to use it, and install it there. If you plan to hang it on a ceiling, mark its position, drill two holes, affix the camera base, and attach the camera.
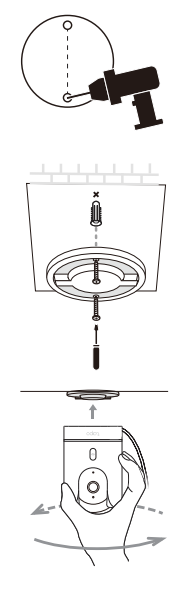
 Installing TP-Link Tapo C225 on the ceiling
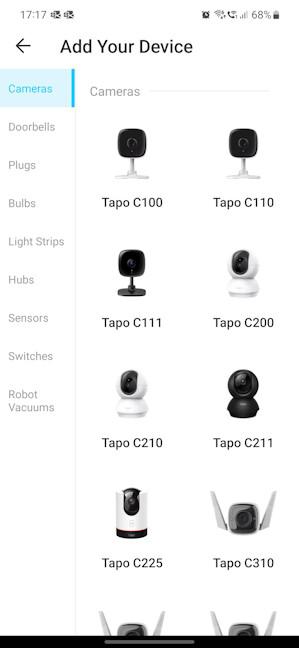
Finally, you can manage the Tapo C225 from the Tapo app on your phone, where you find your other Tapo devices, if you have any. Since I have reviewed and used quite a few in recent weeks, you can see that I have all of them available. It takes a simple tap to access the one I’m interested in.
Installing TP-Link Tapo C225 on the ceiling
Finally, you can manage the Tapo C225 from the Tapo app on your phone, where you find your other Tapo devices, if you have any. Since I have reviewed and used quite a few in recent weeks, you can see that I have all of them available. It takes a simple tap to access the one I’m interested in.
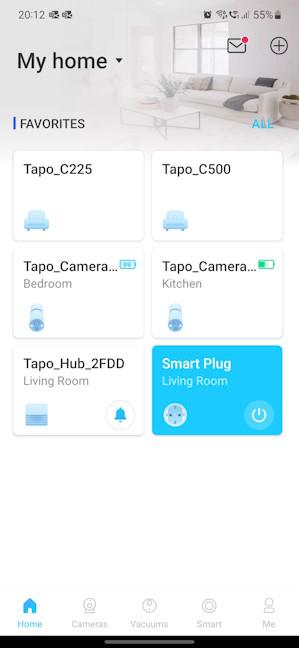 The Tapo app is your smart hub
Installing and setting up the Tapo C225 is easy. The Tapo app does a good job of guiding you through the necessary steps. If you don’t need to install the device on the ceiling and are ok with flat surfaces, you don’t even need to worry about drilling holes.
The Tapo app is your smart hub
Installing and setting up the Tapo C225 is easy. The Tapo app does a good job of guiding you through the necessary steps. If you don’t need to install the device on the ceiling and are ok with flat surfaces, you don’t even need to worry about drilling holes.
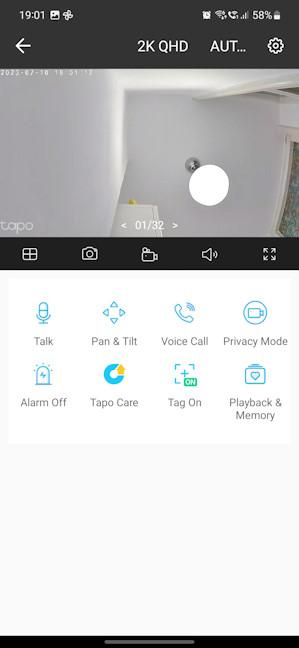 Interacting with TP-Link Tapo C225
You can use the Pan & Tilt controls to change its position or have a voice call with someone in front of the camera. For example, you may use it to monitor your baby and talk to them when needed. Or maybe you want to talk to your pet while you’re not around.🙂
It’s a great idea to look at the camera’s Detection & Alerts section. Here, you can set rules about what you want it to detect and notify you about. You can also set alarms to scare away pets or unwanted guests once they cross a certain line near the Tapo C225.
Interacting with TP-Link Tapo C225
You can use the Pan & Tilt controls to change its position or have a voice call with someone in front of the camera. For example, you may use it to monitor your baby and talk to them when needed. Or maybe you want to talk to your pet while you’re not around.🙂
It’s a great idea to look at the camera’s Detection & Alerts section. Here, you can set rules about what you want it to detect and notify you about. You can also set alarms to scare away pets or unwanted guests once they cross a certain line near the Tapo C225.
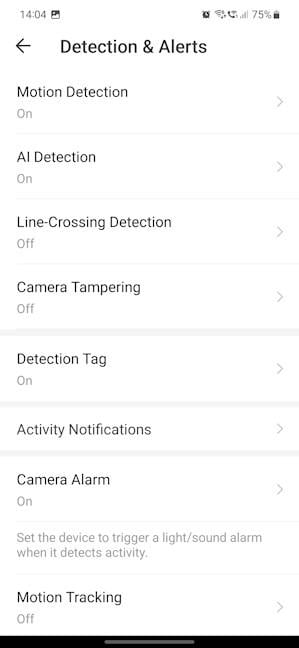 Don't hesitate to configure the detection algorithms
It’s weird that the Tapo C225 can record video in 1440p but not 1080p. You can only switch between two resolutions: 1440p or 720p. While the footage filmed with this camera is of reasonably-good quality, I find it a downside that everything is recorded only at 15 frames per second, no matter the resolution you’re using. For an ideal experience, it would have been better to record at 30 fps and use 1080p.
Don't hesitate to configure the detection algorithms
It’s weird that the Tapo C225 can record video in 1440p but not 1080p. You can only switch between two resolutions: 1440p or 720p. While the footage filmed with this camera is of reasonably-good quality, I find it a downside that everything is recorded only at 15 frames per second, no matter the resolution you’re using. For an ideal experience, it would have been better to record at 30 fps and use 1080p.
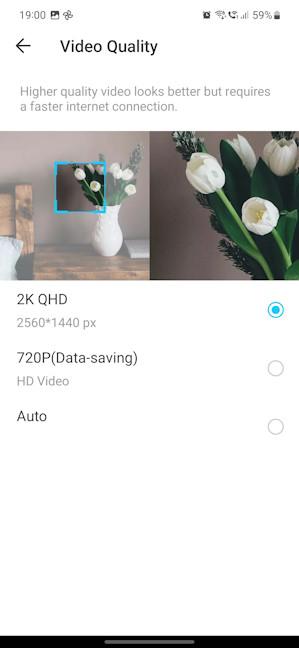 The resolutions you can use for video recording
Tapo C225 is a surveillance camera, and it was created to film everything in its sight based on the rules set by the user. However, if you have a sensitive area you don’t want filmed, you can enable and configure its Privacy Zones. Or if you’re around the camera and don’t want to be recorded, you can enable Privacy Mode, and the lens changes its position to face its housing instead of facing you.
The resolutions you can use for video recording
Tapo C225 is a surveillance camera, and it was created to film everything in its sight based on the rules set by the user. However, if you have a sensitive area you don’t want filmed, you can enable and configure its Privacy Zones. Or if you’re around the camera and don’t want to be recorded, you can enable Privacy Mode, and the lens changes its position to face its housing instead of facing you.
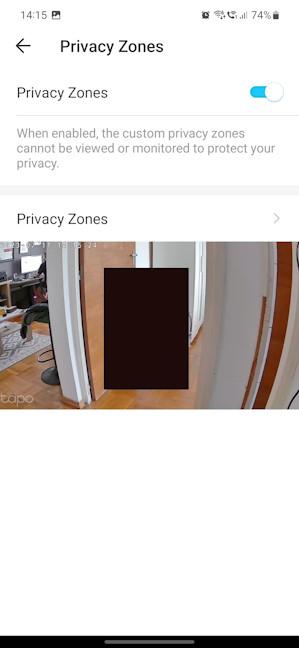 Setting privacy zones is easy
Thanks to the camera’s infrared vision, you can also see what’s going on at night. You have two modes available for a better view of what’s closer to the camera or further away from it. The Close mode is optimal for monitoring babies or pets because it uses invisible infrared light. In contrast, the Far mode uses visible, infrared light to monitor what’s further in the distance. Night mode can film in color too, not just black & white.
Setting privacy zones is easy
Thanks to the camera’s infrared vision, you can also see what’s going on at night. You have two modes available for a better view of what’s closer to the camera or further away from it. The Close mode is optimal for monitoring babies or pets because it uses invisible infrared light. In contrast, the Far mode uses visible, infrared light to monitor what’s further in the distance. Night mode can film in color too, not just black & white.
 Here are all the Night Mode settings
Some people will enjoy the Patrol Mode offered by Tapo C225. You can set two marks in your area and have the camera move between the marked positions. This mode can be set to run on a chosen schedule or permanently. It can be useful, don’t you think?
Here are all the Night Mode settings
Some people will enjoy the Patrol Mode offered by Tapo C225. You can set two marks in your area and have the camera move between the marked positions. This mode can be set to run on a chosen schedule or permanently. It can be useful, don’t you think?
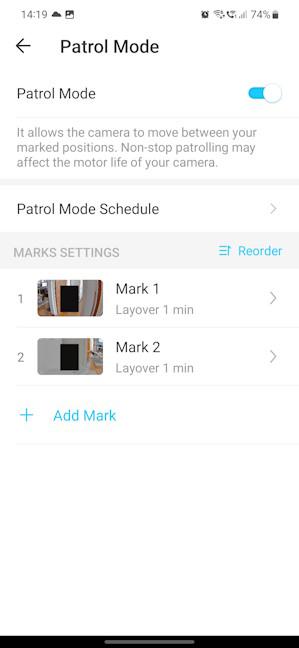 Do you want to set Tapo C225 on patrol?
Another outstanding feature is the capacity to create a local account on your Tapo C225 and use it to log in via third-party portals or integrate with your Network Attached Storage (NAS) or Network Video Recording (NVR) solution. I know people who integrated their Synology DiskStation DS223 with TP-Link Tapo cameras and created their own surveillance system, which stores video automatically on their NAS.
Do you want to set Tapo C225 on patrol?
Another outstanding feature is the capacity to create a local account on your Tapo C225 and use it to log in via third-party portals or integrate with your Network Attached Storage (NAS) or Network Video Recording (NVR) solution. I know people who integrated their Synology DiskStation DS223 with TP-Link Tapo cameras and created their own surveillance system, which stores video automatically on their NAS.
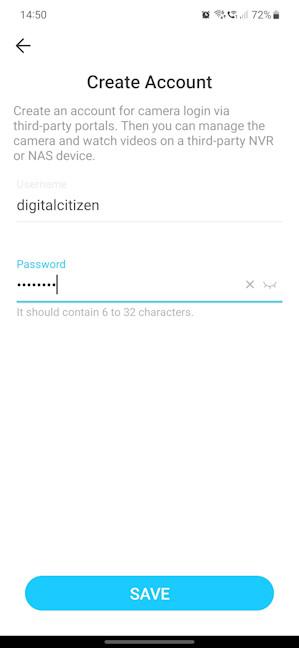 You can create a local camera account
Lastly, you can integrate Tapo C225 with Amazon Alexa, Google Assistant, and Google Home. You can control it using voice commands and integrate it into your smart home ecosystem. Unfortunately for Apple fans, this camera lacks integration with Apple HomeKit.
I’m happy with my experience testing the Tapo C225 home security camera. It works well, and it offers Wi-Fi connectivity, good image quality and night vision, and many smart algorithms for detecting movement, people, babies, pets, etc.
You can create a local camera account
Lastly, you can integrate Tapo C225 with Amazon Alexa, Google Assistant, and Google Home. You can control it using voice commands and integrate it into your smart home ecosystem. Unfortunately for Apple fans, this camera lacks integration with Apple HomeKit.
I’m happy with my experience testing the Tapo C225 home security camera. It works well, and it offers Wi-Fi connectivity, good image quality and night vision, and many smart algorithms for detecting movement, people, babies, pets, etc.
TP-Link Tapo C225: Who is it good for?
This home security camera is a good choice for:- Families with pets and babies they want to constantly keep an eye on
- People who need a camera capable of filming during the night
- Those who don’t want to pay a lot for a home security camera
- Users who wish to integrate their camera with other smart devices
Pros and cons
These are the things I like about the Tapo C225:- Reasonable price
- Easy to install, configure, and use
- Plenty of smart detection algorithms
- Local storage capabilities
- Useful patrol mode
- Two-way audio
- Integrated with Google, Alexa, and IFTTT
- It records video at 15 fps, not 30 fps
- You can’t record video in 1080p, only 1440p and 720p
- Lacking Wi-Fi 6 and WPA3 encryption support
- No Apple HomeKit support
Verdict
TP-Link Tapo C225 is a well-designed home security camera with a reasonable price and many useful features: night vision, smart detection algorithms and a solid notification system, two-way audio, Patrol Mode (yes, you can set it to surveil a specific area continuously), local microSD storage, easy integration with a NAS or NVR system or your smart home ecosystem. Except for a few downsides, it checks all the things people need from a device of this type, and I recommend it to families who need an easy-to-use home security camera.Unboxing the TP-Link Tapo C225
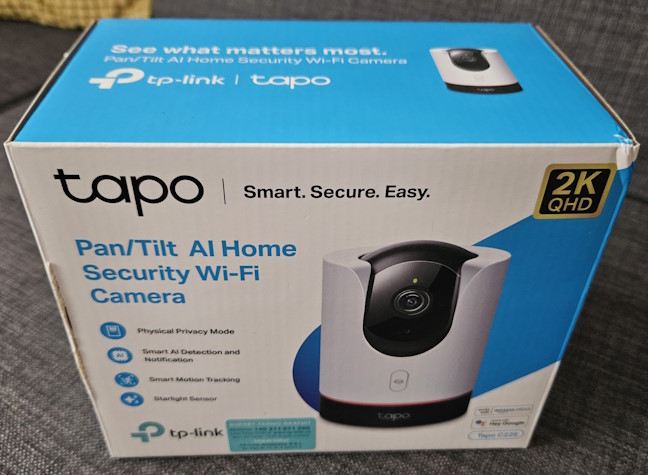
Tapo C225 is packaged in a small cardboard box, using white and blue as the main colors. The front cover features the tapo logo, a picture of the camera, and a list of its most important functions.Design and hardware specifications
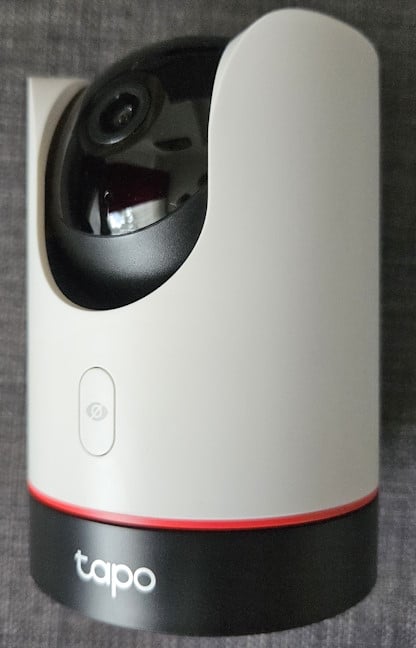
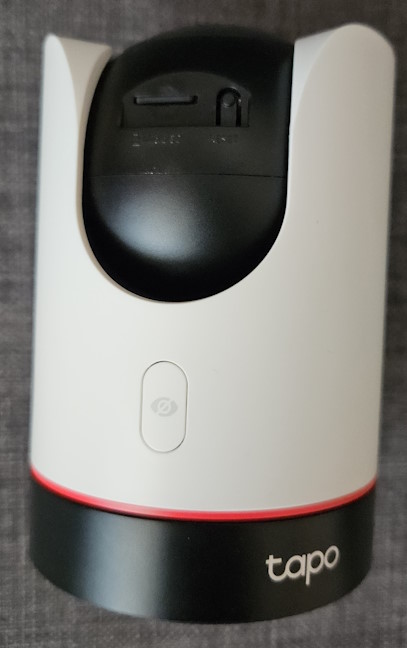
The Tapo C225 camera is hosted inside a white cylindrical block. Its size is 3.15 x 3.15 x 4.41 inches or 80 x 80 x 112 mm in length x width x height. It’s also quite light, at around 320 grams or 11.29 ounces. The camera has a black base with the tapo logo, and a red circle separates the base from the cylindrical block. There’s also a Privacy Mode button on the front. When pressed, the camera lens is hidden, so it doesn’t record anything.Installing the TP-Link Tapo C225
Take the Tapo C225 to a room with good Wi-Fi coverage. Plug in the power adapter, turn on the camera, and install the Tapo app on your smartphone. Sign in with your TP-Link ID, and add the camera.Using the TP-Link Tapo C225
When you want to interact with the Tapo C225 camera and see its surroundings, open the Tapo app. Do the same thing when you want to configure how the camera works. Tap on its name, and then you get access to a live video feed with plenty of controls and settings.

Discussion (2)
I have setup it up last Friday and it froze the next day. Then I did a powercycle, it ran for 2 days straight, but as I left the house for the week and wanted to check if it still works, it froze up again. TP-Link ignores the feedback, so although it’s features are good, I’m returning it.
Sorry to hear about your negative experience, and thanks for sharing it.