Scanning documents, business cards, and other types of printed text, with your smartphone, has become commonplace. It usually involves an app that can do the scanning for you and some post-processing. Microsoft managed to make things even easier than that, by implementing a scanning feature directly in its OneDrive apps for Android and iOS (iPhone and iPad). This feature is built into the OneDrive app and it is easy to access and use. It also automatically saves everything you scan to your OneDrive cloud storage. Here is how to use OneDrive to scan whiteboards, documents, business cards, and photos, with your Android smartphone or with your iPhone:
NOTE: This guide works for Android smartphones and iPhones or iPads. To make things simpler, the images we use in the tutorial have Android screenshots on their left side and iOS screenshots on their right side. If you do not already have OneDrive installed, you can get it from the Play Store, if you use Android, or from the App Store if you have an iPhone or iPad.
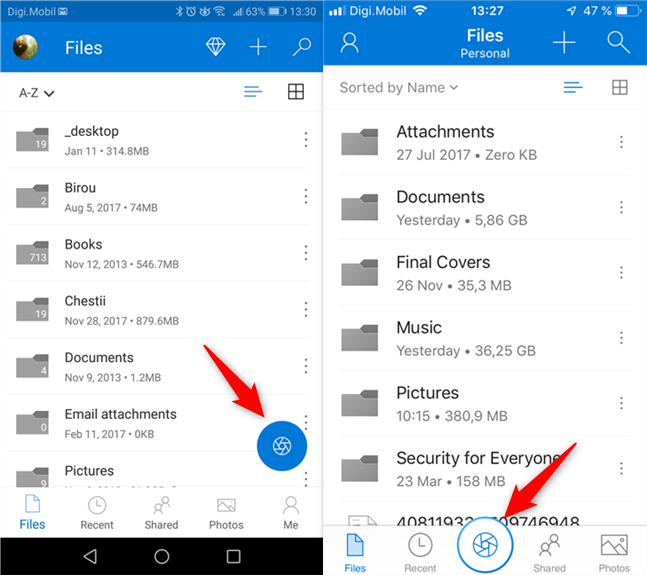
Step 1. Open the OneDrive app and tap the Scan button
Before being able to scan anything, you must open the OneDrive app. Tap on its icon from your smartphone's apps list (Android) or the home screen (iOS).
Opening the OneDrive app in Android and iOS
In the OneDrive app, look for the Scan button and tap on it. Its icon resembles a camera shutter aperture.
Accessing the scanning feature in OneDrive for Android and iOS
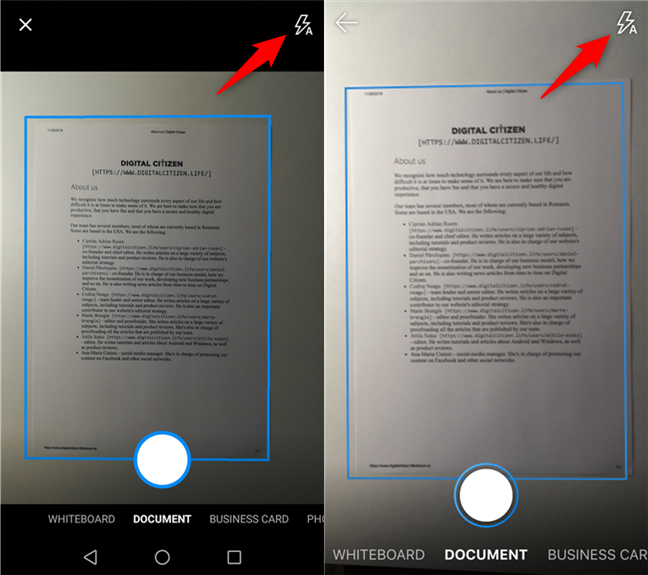
Step 2. Choose whether you want to use your smartphone's flash or not
Now you should choose whether you want to turn the smartphone's flash on or not. If the environment in which you intend to scan is dark, you should turn it on. To do so, repeat tapping on the Flash icon at the top of the screen to choose the mode you prefer: On, Off, Automatic or Torch.
Setting the flash mode for the OneDrive camera
NOTE: The Torch setting for the flash is available only in Android, and not in iOS.
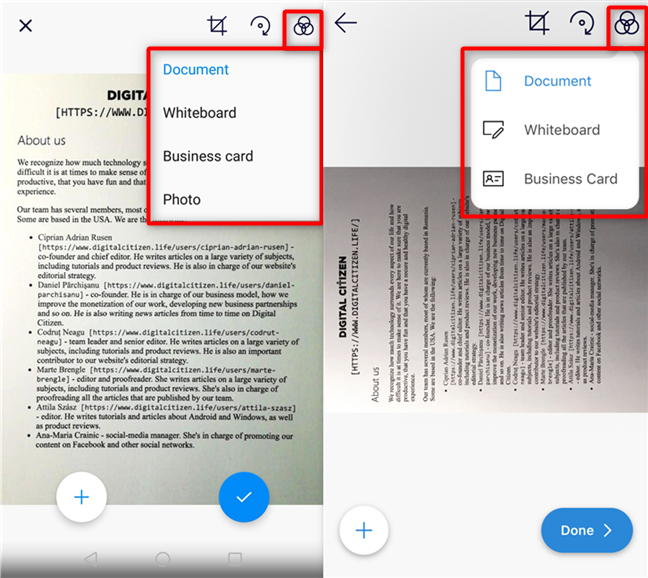
Step 3. Select whether you want to scan a Whiteboard, Document, Business Card or Photo
Choose the most appropriate filter to be used for your scan: Whiteboard, Document, Business Card or Photo. Choosing the one that fits best to your scan makes the end result of better quality, so please do not ignore this step. To select a filter, tap on its name at the bottom of the screen.
Choosing the type of the scan: whiteboard, document, business card or photo
IMPORTANT: The Photo filter is only available in Android. On our iPhone SE running on iOS 12.1, it is not present, so we assume that Photo is not available in iOS.
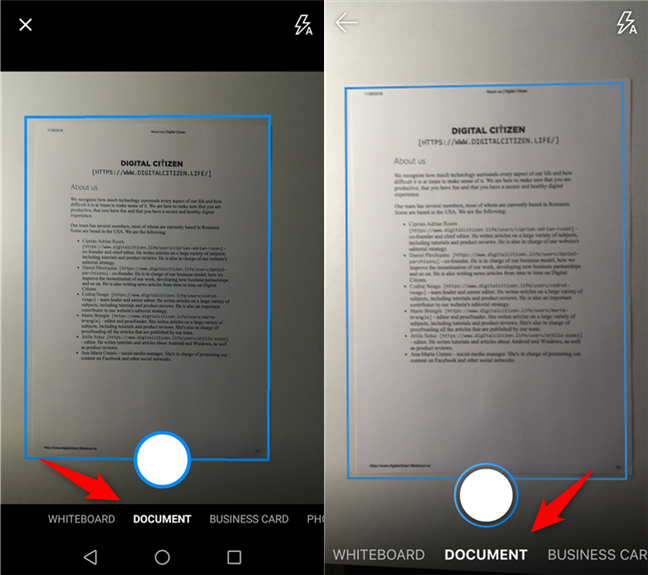
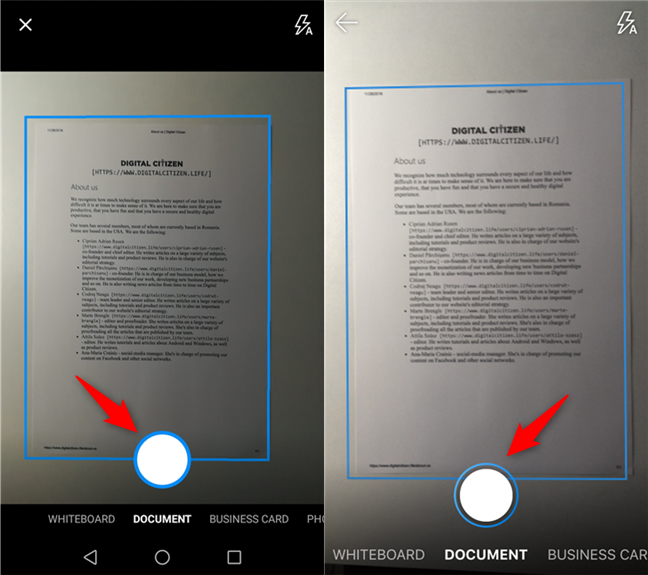
Step 4. Do the scanning with OneDrive's camera
Once you have chosen the right filter and turned the flash on or off, position your smartphone's camera towards the document, whiteboard, business card or photo that you want to scan. When OneDrive detects it, you should see it surrounded by a light rectangle. If you are satisfied with its positioning, tap the Scan button (the white disc).
Scanning an item with OneDrive
NOTE: If you are a subscriber to Office 365, you can also add more pages to your scan and save everything in a single PDF file. To do so, tap Add and scan the additional pages.
Multi-page scanning feature for Office 365 subscribers
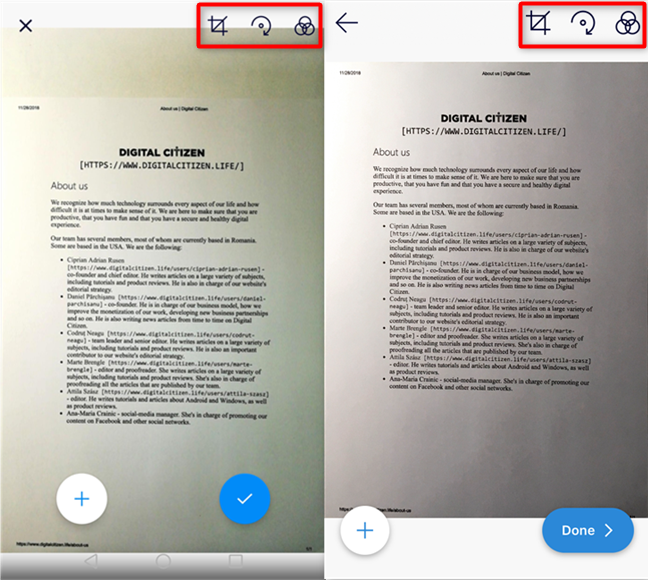
Step 5. Crop, rotate or change the filter for the scan (Whiteboard, Document, Business Card or Photo)
When you are done scanning, OneDrive shows the result on your screen and gives you a few options to adjust the scan.
On the top side of the screen, there are three different buttons which you can use to crop, rotate or change the filter that you used.
OneDrive app buttons for cropping, rotation, and selecting the filter
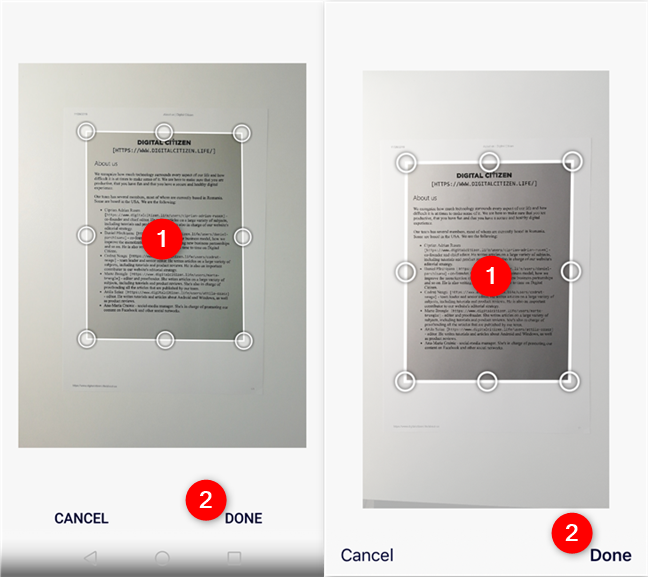
To crop your scan, tap the Crop button and drag the corners of the selection rectangle on your screen until you keep only what you want from that scan. Then, press Done.
Cropping a scan in OneDrive
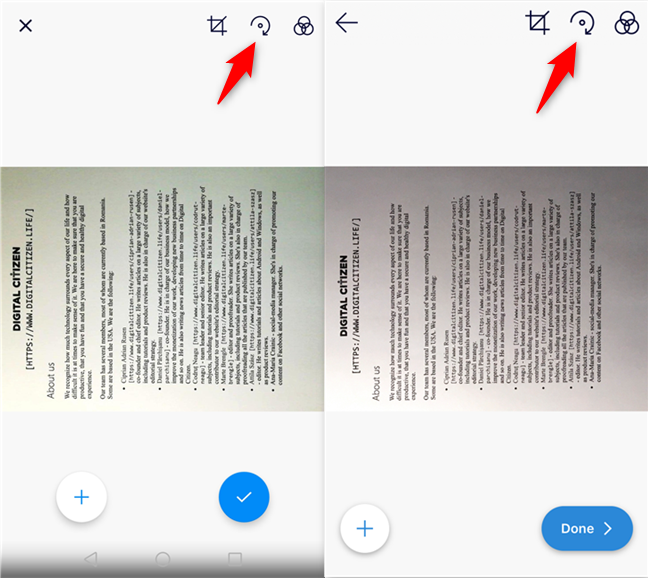
To rotate your scan, tap the Rotate button repeatedly until the scan is oriented as you want.
Rotating a scan in OneDrive
To change the filter used for your scan, tap the Filter button and select the one you prefer: Whiteboard, Document, Business Card or Photo (Photo is available only in Android).
Modifying the filter used for the scan
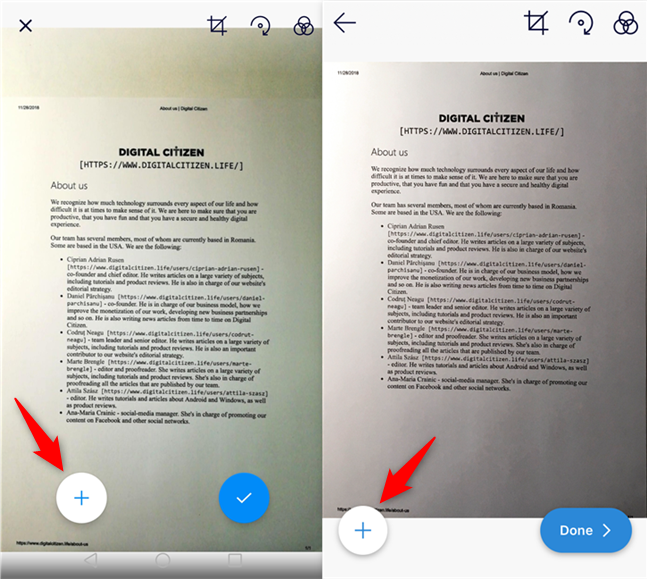
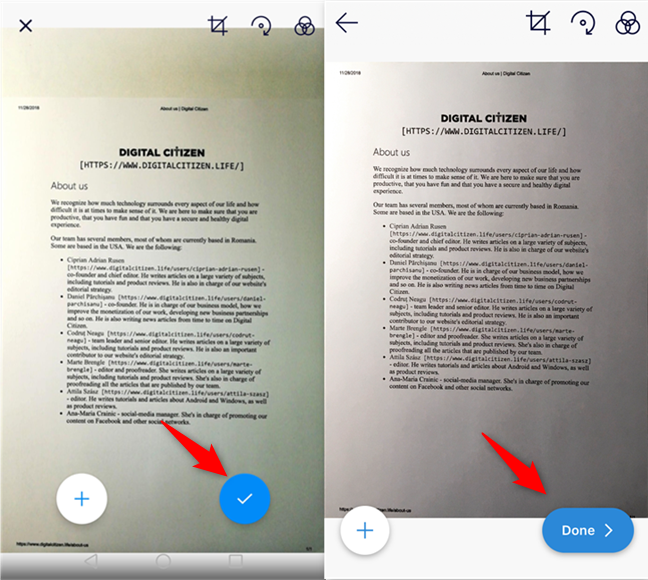
Step 6. Save your scan
Once you are OK with everything and do not want to change any other thing about your scan, tap Done.
Saving the scan to OneDrive
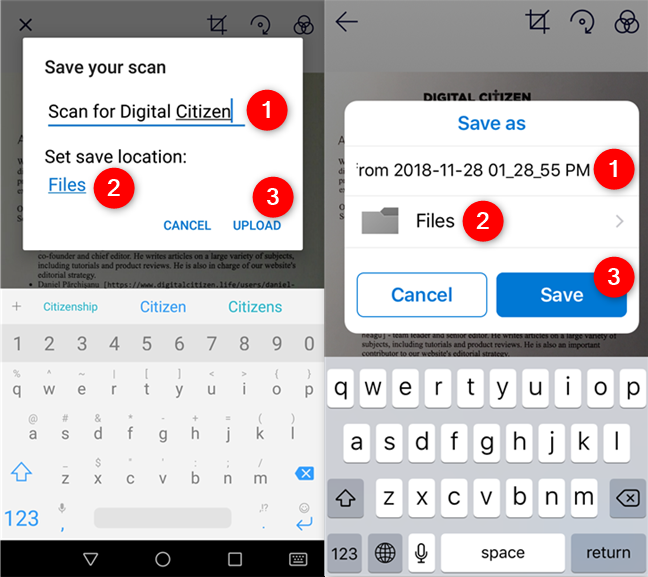
OneDrive then asks you to enter a name for your scan (if you do not like the default one already chosen by the app) and select where the scan is going to be saved in your OneDrive storage space. When done, tap Upload in Android or Save in iOS.
Entering a name, choosing where to save it, and uploading it to OneDrive
OneDrive takes a little while to save and upload your scan, and that is it. You can now find your scan from any device, in your OneDrive cloud storage.
Do you like the scanning feature from the OneDrive app in Android and iOS?
As you have seen, the OneDrive app for Android and iOS offers a neat and simple way of scanning documents, whiteboards, business cards, and photos. Do you like it? Have you ever used it, or intend to use? Share your experience with us, in the comments section below.


Discussion (4)
Photo does work on the latest version of IOS (12.3.1).
The default format is PDF, but I want it to save as Photo images, but I cannot set the default, so I have to change the save format for every picture.
Is there a way to change the default save format?
You mention saving to PDF, so this is an image file. Is there an option to do OCR?
Unfortunately no, you can’t do OCR from the OneDrive app.
Great advice DC, basic, simple and effective.
Thank You 🙂
JD