Many people have been using Google's Picasa photo management software to store and share their photos in the cloud for years. It's free, easy to use, and makes sharing your photos with other people about as simple as it gets. But, as we've seen, Windows Photo Gallery offers a lot more features than the Picasa desktop app does, so if you're looking for good, free, photo and image editing software it makes a lot of sense to use that instead. What if you use Windows Photo Gallery on your computer but you've got a lot of Picasa web albums, especially albums that you have shared with other people, that you're not ready to move to a different format? Can the two be used together? Let's find out.
Adapting Photo Gallery - Installing the Picasa Plugin
I am going to assume that you already have Picasa web albums set up and you want to add more images to them using Photo Gallery. For the purposes of the tutorial I will be using a demo album with the photos of American presidents I used in my article on tagging photos.
Windows Photo Gallery needs a plug-in to allow it to publish directly to Picasa. Microsoft supplies the plug-in here. Although the plug-in itself is a couple years old and the description only mentions Windows Live Photo Gallery 2011, it works fine with Windows Photo Gallery 2012.
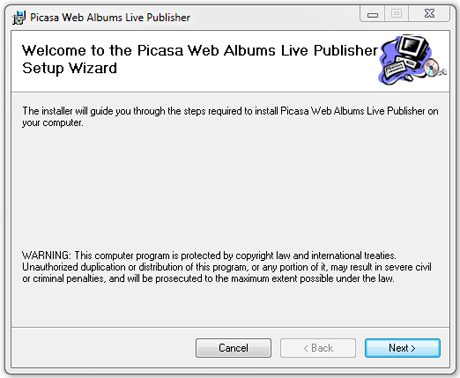
After you've downloaded the plug-in, make sure that Photo Gallery is not running, and then double-click it to run the installer.
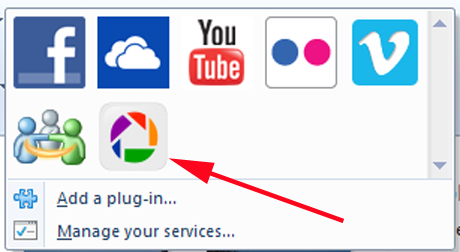
Once the plug-in is installed, you can open Photo Gallery. On the Home tab, under Sharing, when you expand the list of options you'll now see Picasa added to the list.
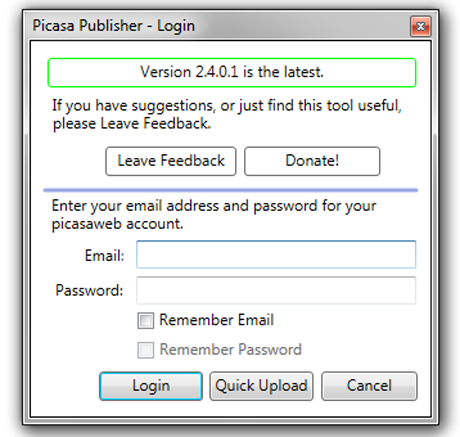
Click on the newly added Picasa option, and you'll be prompted to supply your email address and password. Although the login box does not make it clear which email address you need to supply, it's your Gmail address that it wants. You can choose to have Photo Gallery remember your ID and/or password for future logins, if you like.
NOTE: You will need to have Picasa set up online already or the connection will fail (which is logical).
How to Publish Photos to Picasa Web Albums
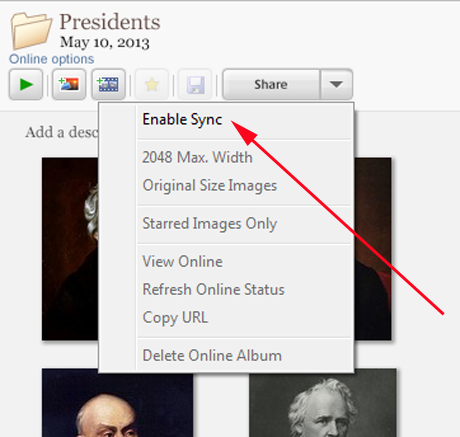
Now you are ready to share your photos. Choose the photos or album in Photo Gallery that you want to send to Picasa, and then click the Share button above your photos. Each album has its own set of buttons.
From the drop-down menu, click Enable Sync.
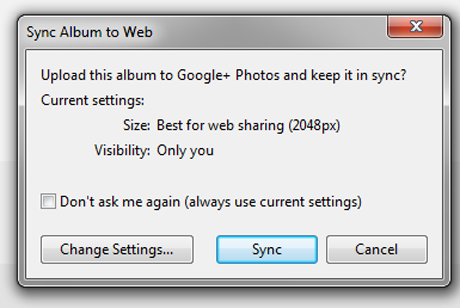
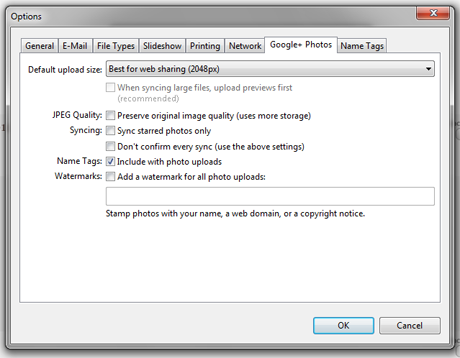
You'll get a window that allows you to choose various options for your web album. You can accept the defaults, or change some settings as you wish.
Here are the ways you can change your settings. For the purpose of the tutorial, I accepted the default settings, which should work fine for most people.
You'll see a small message that the album is syncing.
And then a message that the album is synced and shared only with you. This is what we're going to change in the next part of the tutorial.
How to Share your Photos with Other People
Now that you have uploaded your photos from Photo Gallery to your Picasa web album, it's time to use Picasa's features to share your album.
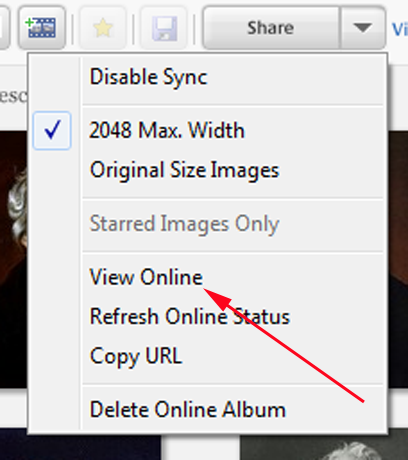
Click the Share drop-down menu again and choose View Online.
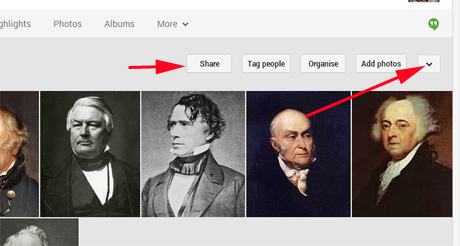
This will take you directly to your Picasa album. Oddly enough, if you want to share your album you don't start by clicking the Share button. Click the small down-arrow on the right side of the screen to set up sharing.
You'll be given a couple of options for your share—Google+ or via a link.
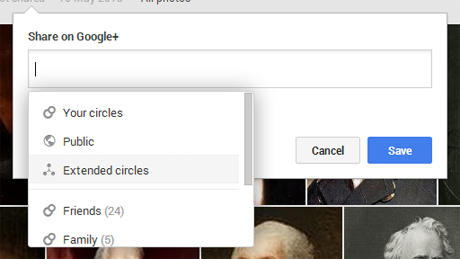
If you want to share the album with your circles via Google+, click in the "Add names, circles or email addresses" box and it will display your Google+ options.
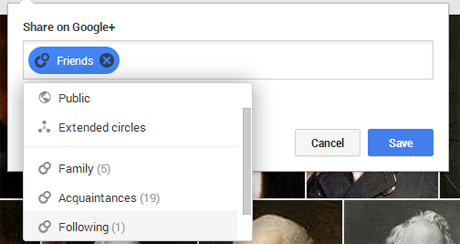
From there, you can click on the name of the circle you want to share with. The downside of doing this is that you can't pick and choose which of the people in the circle to send to. It appears to be all or nothing.,
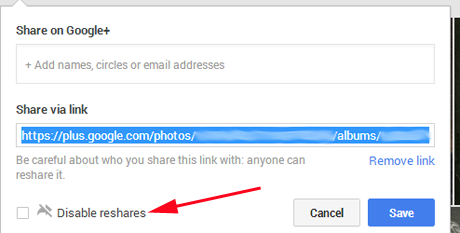
If you don't want to share with an entire circle, Share via Link appears to be a better option. Click on this, and Picasa will display a link already highlighted so that you can copy-paste it into an email or a message or whatever you like. There's a warning message that anyone who gets the link can also share your album—and a helpful box to click if you don't want this to happen.
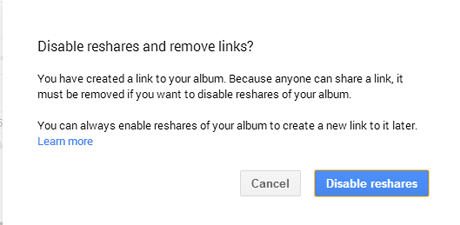
Unfortunately, if you do choose the Disable reshares option it wipes out your link. This seems like a very dumb design to me, but that is the way it works.
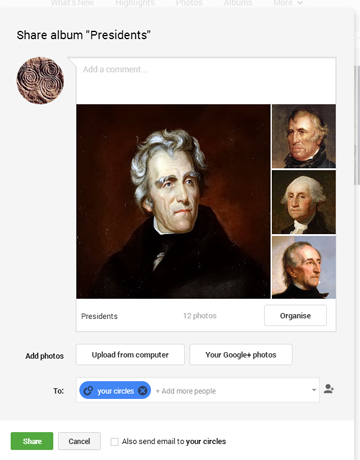
But now since you've set up your sharing options, you have another way to share, and it's that Share button that we bypassed before. Click on this, and you'll get some more options. It comes set up to share the album with your circles, so if you don't want that, click the X button on the your circles object to remove it.
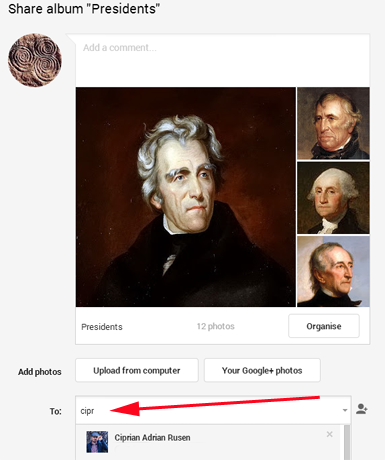
Then you can start typing in people's names. If they are in your Google+ friends list, or your contacts, you'll get a list of possibilities to choose from. Here, I have started typing in a familiar name.
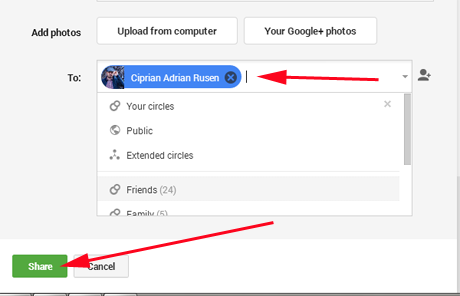
Click on that name, and Picasa inserts it into the list of people to be shared with. Click Share, and it's as simple as that.
Conclusion
Although Picasa sharing isn't a part of Windows Photo Gallery "out of the box," adding it is simple. With these two great free tools working together, you can edit, store, and share your photos easily with just a few clicks. Have you used Photo Gallery to share your Picasa albums? Please tell us about it in the comments.


