




Connecting your Meta Quest headset to the Oculus app is required for setup, account sync, game installs, and casting. This guide walks you through downloading the app, creating your account, pairing your headset, and fixing common Oculus app connection problems.
Step 1: Download the Oculus (Meta Quest) app
The Oculus app (now called the Meta Horizon app) is available for iPhone and Android. You need it to connect, manage, and monitor your headset. Install the app from the iOS App Store or Google Play Store. Your phone should run iOS 13+ or Android 9+ to avoid compatibility issues.

It is important to allow Bluetooth, WiFi, and location permissions when the app asks. These permissions let the app find and connect to your headset during setup.
Step 2: Create or log in to your Meta account
Open the Meta Quest app and tap Sign Up or Log In. If you are a new user, create an account with your email, Facebook, or Instagram credentials. Next, verify your email to activate the account and sync progress across devices.

This login links your phone, your headset, and your VR library under one profile. If you skip this step, pairing will fail later.
Step 3: Connect the Oculus app to your device
Before connecting, charge the headset to prevent shutdown during setup. Also, ensure the headset is not already paired with another phone, and the two devices should be on the same Wi-Fi network to prevent connection failure. Now, power the headset on and keep it near your phone (about 3–6 feet away).
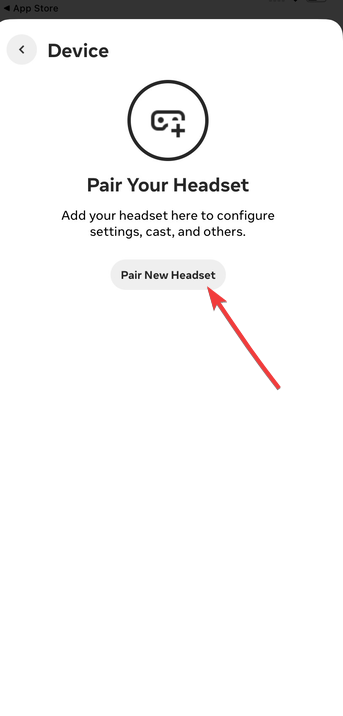
Next, on your phone, open the Meta Quest app and tap Menu → Devices → Pair New Headset. Select your headset model (Quest 2, Quest 3, or Quest Pro) and enable Bluetooth access so the app can detect your headset.
Step 4: Pair and sync your Oculus device
This step finishes the link between the headset and the app. After pairing, you can install games, change settings, and control the headset from your phone.
To get started, put on your Meta Quest headset. You’ll see a short numeric pairing code on-screen. Enter that code in the Meta Quest app when prompted. When pairing succeeds, your headset shows up under Devices in the app. You can view battery level, storage, and guardian boundary status from your phone.
Step 5: Navigate and use the Oculus app
After you're connected, the Oculus app becomes your control center. You can manage games, social features, casting, and device settings from one place. You can browse and buy VR games, install them to your headset remotely, and check for updates. This is the fastest way to load content without putting the headset on.
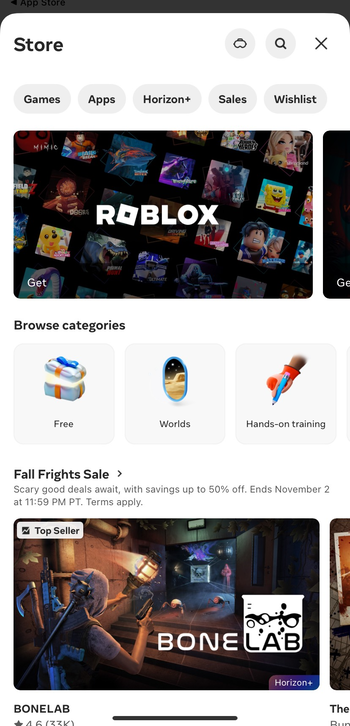
You can also tap Cast to stream your headset view to your phone or to a compatible TV. This helps with demos, parental supervision, or recording clips for social media. What's more, the Devices tab also shows battery levels, controller tracking status, and guardian safety settings, and you can adjust some settings without wearing the headset.
Tip: These steps apply to Meta Quest 2, Meta Quest 3, and Meta Quest Pro. Older Oculus Go and Rift models rely on different software, including desktop tools, and won’t follow this exact mobile app flow.
Troubleshooting Oculus App connection issues
If the Oculus app can’t find your headset or pairing fails, try these fixes first. Most basic connection issues are software or network-related, not hardware failure.
- Restart everything: Turn your headset off and back on, restart the phone running the Meta Quest app, and unplug and replug your Wi-Fi router or modem.
- Reset Bluetooth and wifi: Turn Bluetooth off and back on in your phone settings. Forget the headset if it shows as a saved device; then, retry pairing from inside the Meta Quest app. Also, ensure both the phone and headset are using the same Wi-Fi network and band. Mixing 2.4 GHz on one device and 5 GHz on the other can block discovery and casting.
- Clear cache (Android only): Press and hold the Meta Quest app icon, then tap App Info → Storage → Clear Cache. Finally, reopen the app and try pairing again.
- Factory reset (last resort): If nothing works, you can factory reset the headset. Hold the Power and Volume Down buttons together, then select Factory Reset from the boot menu. This wipes the headset and lets you set it up again from scratch.
Tips for a Stable Connection
- Keep the phone and headset close together during pairing.
- Use a strong 5 GHz Wi-Fi network instead of 2.4 GHz when possible.
- Turn off battery saver or low power mode on your phone so it doesn’t suspend Bluetooth.
- Keep both the Meta Quest app and headset firmware up to date.
- Avoid pairing in crowded wireless environments, like conference halls or dorm common areas.
FAQs
Why can’t the Oculus app detect my headset? Most of the time, Bluetooth is off, the headset is too far from the phone, or the two devices are on different Wi-Fi networks. Turn Bluetooth back on, move closer, and retry pairing inside the app.
Can I use the Meta Quest app without Wi-Fi? You can complete basic Bluetooth pairing without Wi-Fi. But features like casting, downloading games, and updating firmware require an internet connection.
Can I manage more than one headset in the same app? Yes. You can pair more than one supported headset to the same Meta account. Only one headset is active at a time, but you don’t need to create a new account for each device in your household.
Summary
- Download the Oculus / Meta Quest app and allow permissions.
- Create or log in to your Meta account.
- Connect the app to your headset using Bluetooth and shared Wi-Fi.
- Enter the pairing code and install any required updates.
- Use the app to manage games, casting, and device settings.
- Fix connection issues with restarts, cache clears, or (if needed) a factory reset.
Conclusion
The Oculus app is more than a setup tool. It’s how you unlock your headset’s full potential: pairing, installing games, casting to a phone or TV, and keeping firmware current. Follow the steps above to connect smoothly, avoid pairing errors, and keep your Meta Quest headset running without interruptions.

Discussion (0)
Be the first to comment.