

Eye Tracking on iPhone lets you control your device using only your eyes. Apple designed this accessibility feature mainly for users with limited mobility, but anyone can enable it if their iPhone supports it. Below, you’ll find clear, step-by-step instructions for enabling, calibrating, customizing, and fixing Eye Tracking on iPhone.
Table of contents
- Devices and iOS versions that support eye tracking
- How to enable eye tracking on iPhone
- How eye tracking controls work in iOS
- How to customize eye tracking settings
- How to use eye tracking in real-world scenarios
- Common eye tracking problems and how to fix them
- Who eye tracking on iPhone is best for
- Eye tracking limitations you should know
- Tips for getting better eye tracking accuracy
- FAQs
- Summary
Devices and iOS versions that support eye tracking
Eye Tracking works only on newer iPhones with Face ID hardware and requires iOS 18 or newer.
Before continuing:
- Open Settings.
- Tap General.
- Now, tap About.


- Confirm your iPhone runs iOS 18 or later.


If your device does not meet these requirements, Eye Tracking will not appear in Accessibility settings.
How to enable eye tracking on iPhone
This is the main setup process and takes about one minute.
- Open Settings.
- Tap Accessibility.
- Scroll down and tap Eye Tracking.


- Turn on the Eye Tracking toggle.


- When prompted, tap Continue
Your iPhone will immediately start the calibration process.
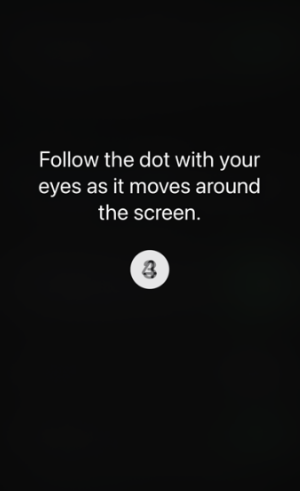
How to complete eye tracking calibration
Calibration ensures your iPhone accurately tracks your gaze.
Steps:
- Hold your iPhone at eye level, about 12–18 inches away. The iPhone screen distance is important for quick caliberation.
- Sit in a well-lit room facing the screen directly.
- Follow the moving dot on the screen using only your eyes.

- Keep your head still until calibration finishes.

- Tap Done when prompted.
If calibration fails, repeat the process under better lighting conditions.
How eye tracking controls work in iOS
Eye Tracking highlights items as you look at them. A circular indicator fills up, and the action triggers once the timer completes.
How dwell control selects items
Dwell control replaces tapping with timed focus.
Steps to understand dwell behavior:
- Look at an icon or button
- Hold your gaze steady
- Wait for the progress ring to complete
- The selected action activates automatically
Shorter dwell times make navigation faster but less forgiving.
How AssistiveTouch works with eye tracking
Eye Tracking relies on AssistiveTouch to perform advanced actions. AssistiveTouch turns on automatically, but you can verify it manually.
- Open Settings.
- Tap Accessibility.


- Next, tap Touch.


- Tap AssistiveTouch.
- Confirm AssistiveTouch is enabled.


The floating AssistiveTouch menu lets you scroll, go home, open Control Center, and more.
How to customize eye tracking settings
Customization improves comfort and accuracy during long sessions.
- Open Settings.
- Tap Accessibility.
- Next, tap Eye Tracking.
How to change dwell timing and sensitivity
Adjust these settings if Eye Tracking feels too slow or too sensitive.
Steps:
- In Eye Tracking settings, tap Dwell Control.

- Increase dwell time for better accuracy.
- Decrease dwell time for faster selection.
- Adjust sensitivity sliders as needed.
Test changes immediately to find the best balance.
How to customize on-screen actions
- Open Settings.
- Tap Accessibility.
- Next, tap Touch.
- Now. tap AssistiveTouch.
- Tap Customize Top Level Menu.
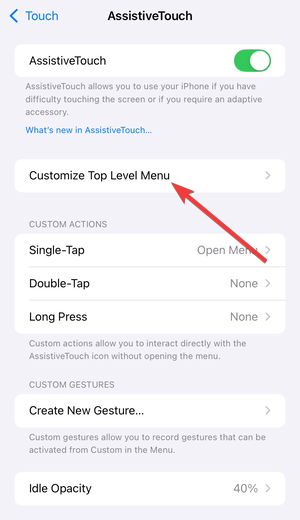

- Replace icons with actions like Home, Scroll, or Notifications.
- Exit settings and test using Eye Tracking.
How to use eye tracking in real-world scenarios
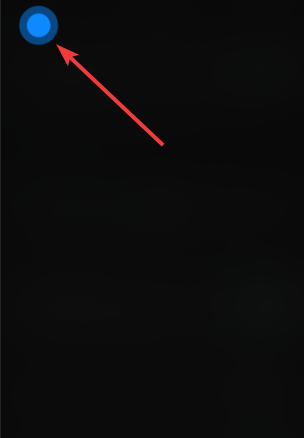
Scrolling and navigating apps with eye tracking
- Open any app or webpage.
- Look at the AssistiveTouch button.
- Select Scroll.
- Choose Up or Down using your gaze.
Typing and text interaction with eye tracking
Typing works but requires patience, as you need to wait for dwell selection to activate each key before moving to another.
- Open any text field.
- Look at individual letters on the keyboard.
- Wait for dwell selection to activate each key.
- Use predictive text to reduce typing time.
Eye Tracking works best for short messages rather than long typing sessions.
Using eye tracking hands-free
Eye Tracking enables near hands-free use, but some actions still rely on menus.
To stay fully hands-free:
- Keep AssistiveTouch enabled
- Customize actions you use most
- Avoid apps with complex gestures
Common eye tracking problems and how to fix them
Eye tracking not accurate or drifting
This usually happens due to lighting or positioning.
- Move to a brighter, evenly lit room.
- Clean the front camera lens.
- Hold the iPhone directly in front of your face.
- Open Settings > Accessibility > Eye Tracking.
- Tap Recalibrate
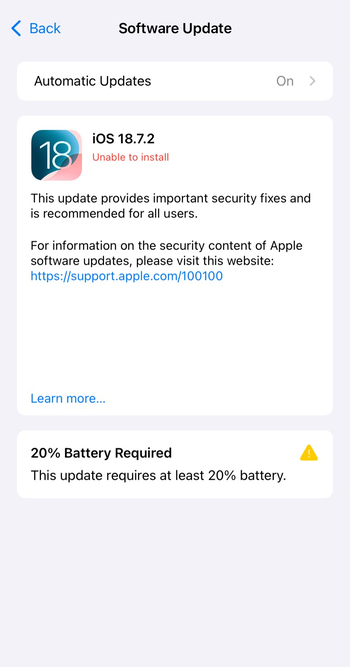
Eye tracking not responding at all
Check these settings if nothing happens.
- Open Settings > General > Software Update and install any available update.

- Restart your iPhone.
- Open Settings > Accessibility > Eye Tracking and confirm it is enabled.
- Open Settings > Accessibility > Touch > AssistiveTouch and confirm it is enabled.
- Return to Eye Tracking and run calibration again.
Who eye tracking on iPhone is best for
Eye Tracking works best for users with limited hand mobility or temporary injuries. It also helps users who need hands-free access in controlled environments.
Eye tracking limitations you should know
Eye Tracking drains battery faster and requires good lighting. Fast-paced tasks and long typing sessions may feel slow or tiring.
Tips for getting better eye tracking accuracy
- Use consistent lighting
- Keep your face centered
- Increase dwell time if misclicks occur
- Recalibrate regularly
- Avoid moving the phone while using Eye Tracking
FAQs
Does eye tracking work on all iPhones?
Eye Tracking works only on Face ID iPhones running iOS 18 or later.
Does eye tracking use Face ID data?
Eye Tracking processes gaze data locally and does not store eye movement history.
Can I turn off eye tracking quickly?
You can disable Eye Tracking instantly from Accessibility settings.
Is eye tracking always hands-free?
Most actions work hands-free, but some apps still require menu navigation.
Summary
- Check that your iPhone supports Eye Tracking and runs iOS 18 or later
- Enable Eye Tracking from Accessibility settings
- Complete calibration in good lighting
- Customize dwell timing and AssistiveTouch actions
- Recalibrate if accuracy drops
Eye Tracking on iPhone offers powerful hands-free control when configured correctly. Once you fine-tune calibration and dwell settings, everyday navigation becomes reliable and accessible, especially for users who need touch-free interaction.


Discussion (0)
Be the first to comment.