
 Published on 05.11.2025
Knowing how to update an Xbox 360 game controller on Windows 10 ensures your device performs smoothly with the latest drivers and firmware. Whether you’re troubleshooting connection issues or simply optimizing performance, updating the Xbox 360 controller is an essential step for PC gamers who rely on precision and stability during gameplay.
This guide covers how to connect your controller, install the proper drivers, use the Xbox Accessories app when needed, and confirm the update process. You’ll also find troubleshooting tips for wireless and wired setups, so you can get your Xbox 360 controller running like new on Windows 10.
Why You Should Update Your Xbox 360 Controller
Updating your Xbox 360 controller improves input accuracy, fixes lag or disconnection issues, and ensures compatibility with modern Windows 10 updates. It also enhances your controller’s firmware, helping it communicate better with your system and supported games.
- Fixes connection and driver errors with older controllers.
- Improves vibration and input response during gameplay.
- Ensures compatibility with the latest Windows 10 updates.
- Prepares your controller for use with Xbox Cloud Gaming or emulators.
How To Update an Xbox 360 Game Controller on Windows 10
Follow these steps to install and update your Xbox 360 controller drivers using Windows and Microsoft’s official tools.
Step 1: Connect Your Xbox 360 Controller to Windows 10
- Plug in your wired Xbox 360 controller to a USB port on your PC.
- If using a wireless controller, connect the Xbox 360 Wireless Gaming Receiver to your PC.
- Press the pairing button on both the receiver and controller until the LED lights flash and sync.
- Wait for Windows 10 to detect and automatically install basic drivers.
Once the controller light stays solid, the device is successfully connected and ready for updates.
Step 2: Download the Xbox 360 Accessories Software
- Go to Microsoft’s official site and search for Xbox 360 Controller or Accessories Software.
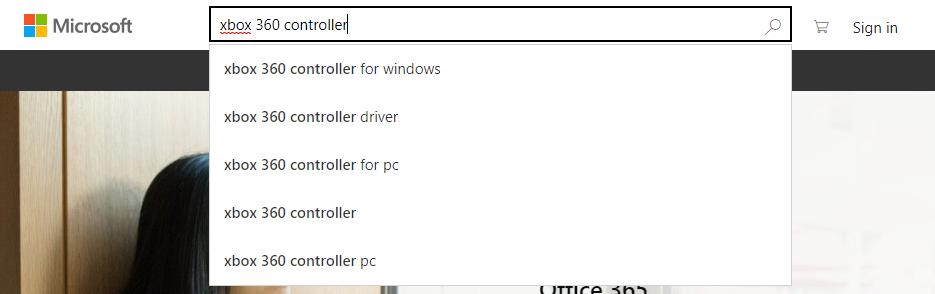
- Click Xbox 360 Controller for Windows.

- Click Downloads. Then download the driver for your Xbox 360 controller. Make sure you select the correct version for your system (Windows 10 32-bit or 64-bit).

- Download and save the installation file.
- Run the setup and follow the on-screen instructions.
This software installs essential drivers and provides the tools required to manage and update your controller effectively.
Step 3: Install and Run the Xbox Accessories App
- Open the Microsoft Store and search for the Xbox Accessories app.
- Install the app on your PC.
- Launch it and connect your Xbox 360 controller via USB or wireless adapter.
- Click the three-dot menu (…) under your controller profile and select Update if available.
The app will check for available firmware updates and apply them automatically, ensuring your Xbox 360 controller stays compatible with the latest Windows 10 features.
Step 4: Update the Xbox 360 Controller Driver Manually (If Needed)
- Press Windows + X and select Device Manager.
- Expand the section labeled Microsoft Xbox 360 Peripherals.
- Right-click your controller and select Update driver.
- Choose Search automatically for drivers or manually select a downloaded one from your PC.
If Windows doesn’t find a new driver automatically, you can visit the Microsoft Learn or Driver Restore pages for the latest Xbox 360 controller driver downloads.
Step 5: Test the Controller After the Update
- Open the Xbox Accessories app or a game that supports controllers.
- Move the analog sticks, press buttons, and test vibration to confirm responsiveness.
- Verify the controller light remains solid when connected.
- If input lag or disconnection occurs, restart your PC and reconnect the controller.
Testing ensures the update is applied correctly and that your Xbox 360 controller performs optimally on Windows 10. If issues persist, reinstall the Accessories software or check Windows Update for additional driver patches.
Troubleshooting Xbox 360 Controller Update Issues
- Controller not recognized: Reconnect the USB cable or try a different port.
- Wireless controller won’t sync: Reinstall the receiver driver and press the pairing button again.
- No update available: Check the Xbox Accessories app version or reinstall it from the Microsoft Store.
- Driver conflict: Uninstall the existing driver under Device Manager and reinstall it.
FAQs
Can I update an Xbox 360 controller on Windows 11?
Yes, the same process applies to Windows 11. You can use the Xbox Accessories app and Microsoft’s official drivers to update your controller on newer versions of Windows.
Do I need the Xbox Accessories app to update?
While the app is primarily for newer controllers, it can help identify and verify your Xbox 360 controller drivers on Windows 10. For older models, manual driver updates may still be required.
What if the controller won’t connect after updating?
Try restarting your PC, reconnecting the controller, or reinstalling the driver. If you’re using a wireless receiver, ensure it’s securely plugged in and recognized by Windows 10.
Can I use Bluetooth to update the Xbox 360 controller?
No. Xbox 360 controllers use proprietary wireless signals, not Bluetooth. You’ll need a wired connection or the official Xbox 360 wireless receiver for Windows.
Summary
- Connect your Xbox 360 controller to your PC using a USB cable or wireless receiver.
- Install the Xbox 360 Accessories software for essential drivers.
- Use the Xbox Accessories app to check for updates.
- Manually update the driver through Device Manager if necessary.
- Test your controller and confirm all buttons respond properly.
By keeping your Xbox 360 controller updated on Windows 10, you’ll enjoy a smoother, lag-free gaming experience with improved performance and reliability. It’s a simple yet crucial step to ensure your hardware stays optimized for all your favorite PC games.

Discussion (0)
Be the first to comment.