




A loud or overheating PC usually points to fan control issues. You can adjust fan speed through your BIOS, Windows utilities, or GPU tuning software. This guide shows every reliable method and explains how to fix common problems when your fans refuse to respond.
1) Change fan speed in BIOS/UEFI (most accurate method)
BIOS control gives the most stable results. Every major board maker, including ASUS, MSI, Gigabyte, and ASRock, offers dedicated fan-tuning menus.
Enter BIOS on any PC
Restart your PC and press F2, Delete, or F12 as soon as it powers on. These keys open UEFI on most desktop boards, so press them repeatedly until the BIOS screen appears.
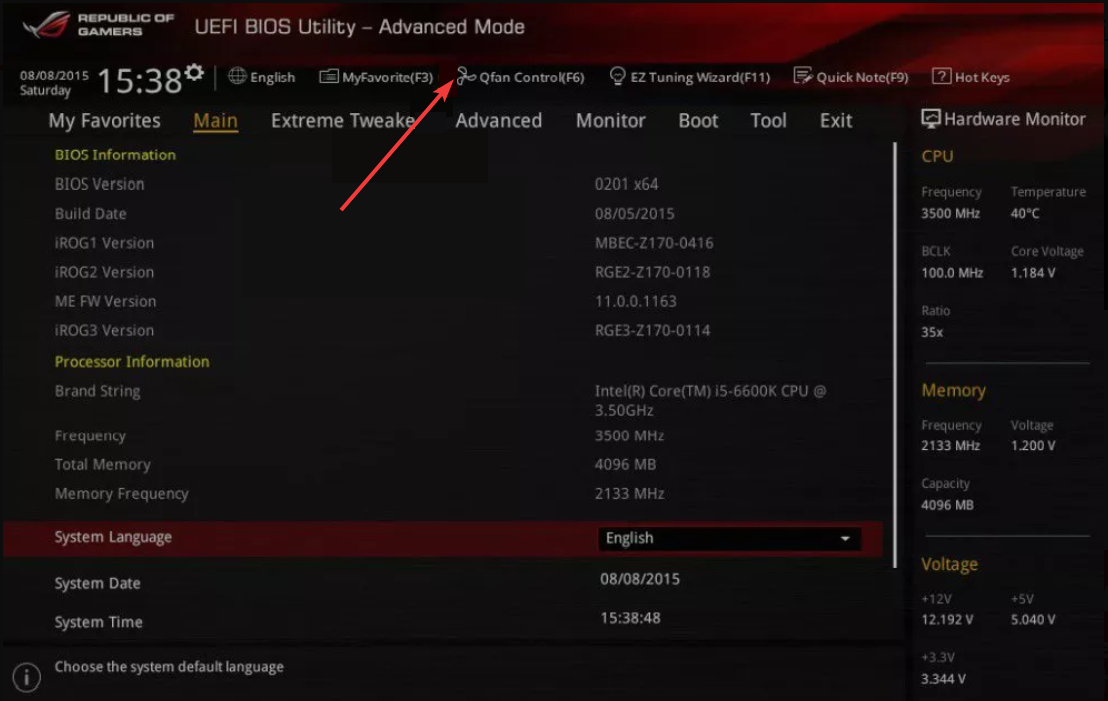
Find fan control or Q-Fan sections
Navigate to menus like Q-Fan Control, Smart Fan, Hardware Monitor, or Cooling. These pages group all connected CPU and system fans and show current RPM and sensor readings.
Set a manual fan curve
Create a custom curve by raising or lowering RPM at each temperature point. A manual curve helps you balance noise and cooling for daily use, gaming, or heavy workloads.
2) Change fan speed using Windows software
Windows utilities let you change fan behavior without rebooting. These tools provide real-time monitoring and per-sensor control, which helps when you want quick adjustments.
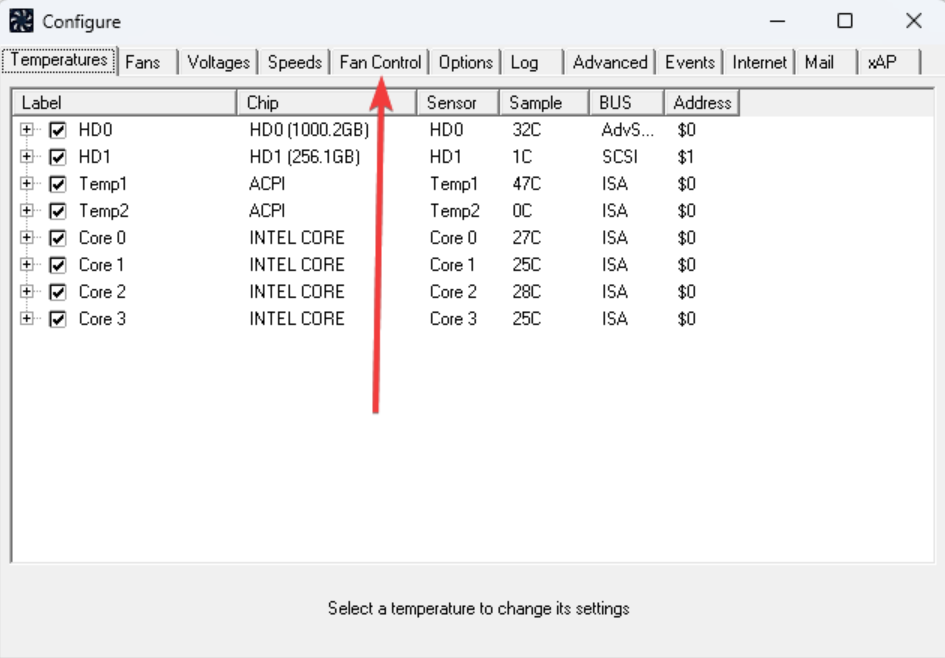
Use Fan Control (open-source) or SpeedFan
Fan Control/SpeedFan detects your motherboard sensors and links each fan to CPU, GPU, or VRM temperatures. You can create curves, test speeds, and save profiles for different use cases.
Use MSI Center, Armoury Crate, or Gigabyte Control Center
PC makers bundle their own fan utilities for supported boards. These apps provide preset cooling modes and direct access to the same sensors that the BIOS uses.

Use Argus Monitor or HWiNFO-linked tools
Advanced utilities let you map multiple sensors to a fan at once. They work well in cases with many intake and exhaust fans where you want more precise control.
3) How to change GPU fan speed
GPU fans operate separately from your chassis fans. You adjust GPU speed through GPU-specific software instead of the BIOS.
NVIDIA and AMD control options
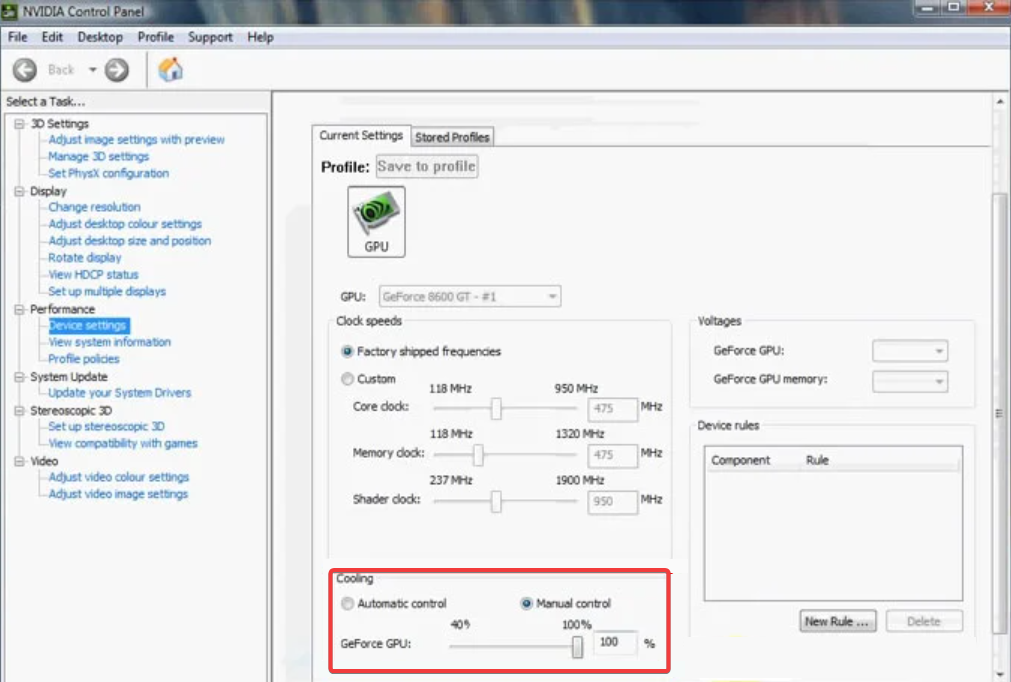
Open your Radeon or GeForce tuning panel from the GPU driver software. Both platforms let you adjust minimum fan speed and temperature targets for your graphics card.
Use Afterburner or Radeon Tuning
Afterburner unlocks custom fan curves for most NVIDIA and AMD cards. Radeon Tuning offers similar control inside the driver panel, where you can save and load fan profiles.
4) How to change fan speed without BIOS or software
Use manual fan controller knobs
Some PC cases or front panels include physical dials for fan control. You turn the knob to increase or decrease RPM instantly, which helps when you want quick manual changes.
Use case fan hubs with preset modes
Fan hubs often provide Silent, Normal, or Performance modes. You switch modes with a slider or button, and the hub automatically adjusts all attached fans.
Troubleshooting when fan speed won’t change
- Fan not detected: Move the fan connector to the correct header and check that it sits firmly. CPU_FAN and SYS_FAN headers behave differently, and the wrong header or a loose plug prevents control.
- RPM not changing: Open your BIOS and switch the header mode from PWM to DC or from DC to PWM, based on the fan type. Wrong mode settings stop the motherboard from adjusting voltage or pulse width.
- Fans too loud even after control: Clean dust filters, fans, and heatsinks to improve airflow. You can also lower curve slopes so the fan increases speed more gradually when the temperature rises.
Best fan speed settings for gaming, productivity, and quiet use
- Noise-focused setup: Keep RPM low until your CPU reaches about 50°C so the PC stays quiet. This curve works well for office work, web browsing, and streaming.
- Balanced setup: Increase RPM steadily between 50°C and 70°C to hold safe temperatures. This setup keeps the system cool during multitasking and light gaming without too much noise.
- Performance setup: Raise RPM aggressively after 60°C to avoid thermal spikes. This curve suits long gaming sessions and heavy rendering when you care more about cooling than noise.
FAQs
Do high fan speeds damage hardware? High fan speeds do not damage components directly. However, clogged dust filters increase heat, which forces fans to work harder and can shorten their lifespan.
What RPM should my fans run at? A typical range sits between 600 and 1800 RPM, depending on workload and fan size. Larger fans often cool well at lower RPM compared to smaller models.
Why do my fans ramp up randomly? Rapid temperature spikes from apps, background tasks, or sensor readings cause abrupt fan changes. You can smooth the fan curve to reduce sudden RPM jumps.
Summary
- Check your fan type and header so you use the correct control mode.
- Adjust fan speed in your BIOS for the most stable and reliable results.
- Use Windows utilities when you want real-time fan curve customization.
- Tune GPU fans separately with driver software or tools like Afterburner.
- Use fan hubs or manual controllers if your system blocks software control.
- Fix non-responsive fans by correcting header mode and improving airflow.
Conclusion
You control heat, noise, and performance when you adjust PC fan speed correctly. BIOS tuning provides the most accurate results, while Windows tools offer quick changes and custom curves. GPU fan control works separately but follows the same principles, and once you set a curve that matches your workload, your system stays cooler, quieter, and more stable over time.



Discussion (0)
Be the first to comment.