07.10.2020
There aren't many people who know about Windows Remote Assistance and how to use it to provide remote technical support to other Windows 10 users. Therefore, in this tutorial, we're going to cover this tool in detail. It's an app that works smoothly for quick assist sessions and does not require installing any third-party software whatsoever. So, without further ado, here's how to provide Windows remote support using the built-in Windows Remote Assistance app:
What you need to be able to provide Windows remote support with Windows Remote Assistance
Windows Remote Assistance requires two parties: one who requests help via this tool and another who accepts the invitation to provide remote support. For it to work, the party receiving assistance must have Windows Remote Assistance enabled in the System Properties of his or her Windows 10 PC. If you don't know how to do that, or if you want to double-check, you can find all the details here: How to enable Remote Desktop in Windows 10 (or Windows 7).
The party in need of help has to request remote support using the Windows Remote Assistance tool. To do that, one has to send a Windows remote assistance file to the helper.
In older versions of Windows 10, you could also use an option called Easy Connect. However, since Windows 10 version 1909 (May 2019), it no longer works for establishing Windows remote assistance sessions. That's because it relied on Microsoft's Peer Name Resolution Protocol (PNRP), which has been removed from newer Windows 10 iterations. If you don't know what Windows 10 version you have, read: How to check the Windows 10 version, OS build, edition, or type.
Finally, you should also know that, even if you have previously connected to it, you cannot connect to another Windows 10 device using Windows Remote Assistance unless its user did not send you an invitation and is waiting for an incoming connection.
How to ask for help using Windows Remote Assistance
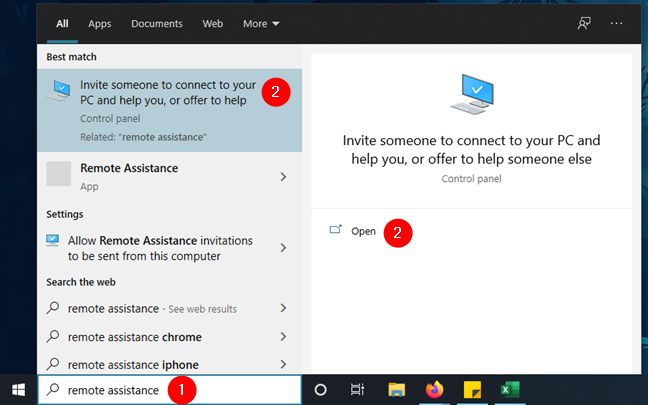
Before anything else, you have to open Windows Remote Assistance. In Windows 10, the fastest way to do it is to type the words "windows remote assistance" in the search box from your taskbar. Then, click or tap on the "Invite someone to connect to your PC and help you, or offer to help someone else" search result.
Another way of launching Windows Remote Assistance is to run the msra.exe file, found in the "C:WindowsSystem32" folder.

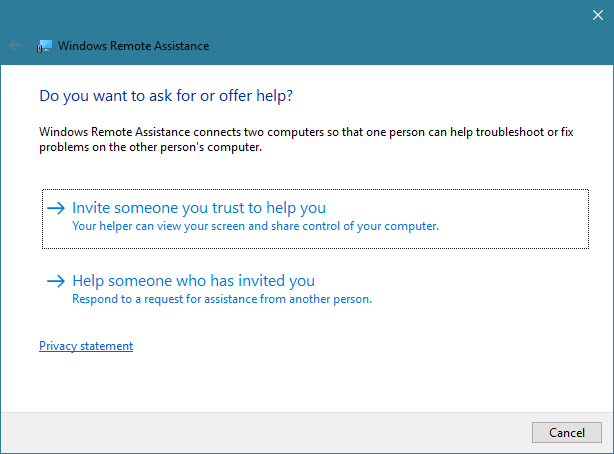
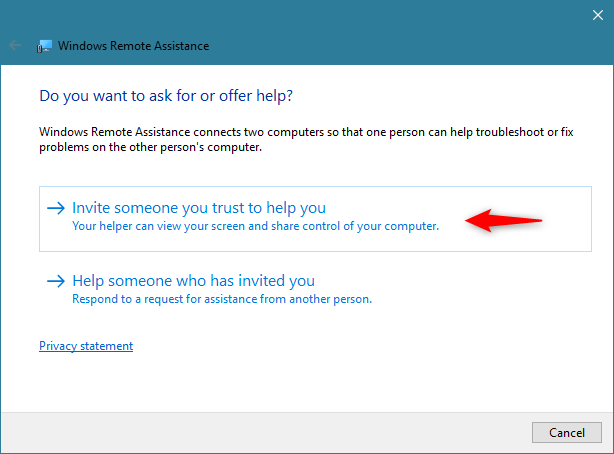
Once you've opened Windows Remote Assistance, click or tap on "Invite someone to help you."
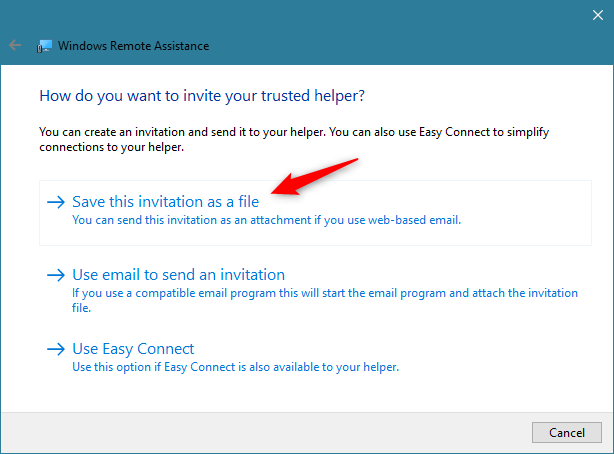
Select "Save this invitation as a file" as the way to connect with the person who will help you. As we've mentioned earlier, although present, the Easy Connect method doesn't work. Also, while testing the Windows Remote Assistance app, we found out that the "Use email to send an invitation" option doesn't work either, although we tried it with both Windows 10 Mail and Microsoft Outlook apps.
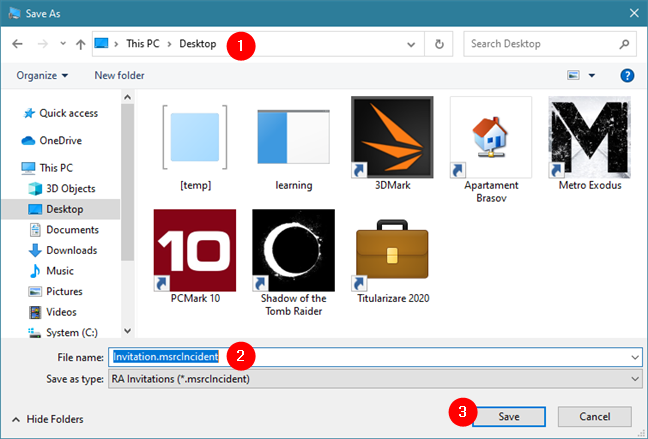
When you choose to send a Windows remote support invitation, make sure the other person receives it and knows about it. The invitation is stored as a file with the ".msrcIncident" extension, which is opened only by Windows Remote Assistance. Save it somewhere on your PC, like on your desktop, for instance.
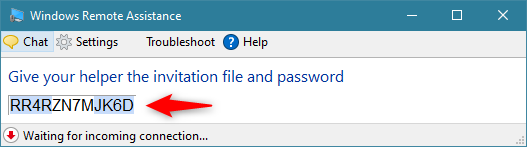
Once the remote support invitation is saved, Windows Remote Assistance shows you a long password and starts waiting for the incoming connection. Use your email, a messenger app, or any other means, to send the invitation file that you've saved earlier, and the password shown by the app, to the person who is about to connect to your Windows 10 PC to help you.
Unless he or she gets both these items, the remote assistance connection can't be established.
How to provide remote support using the Windows Remote Assistance app
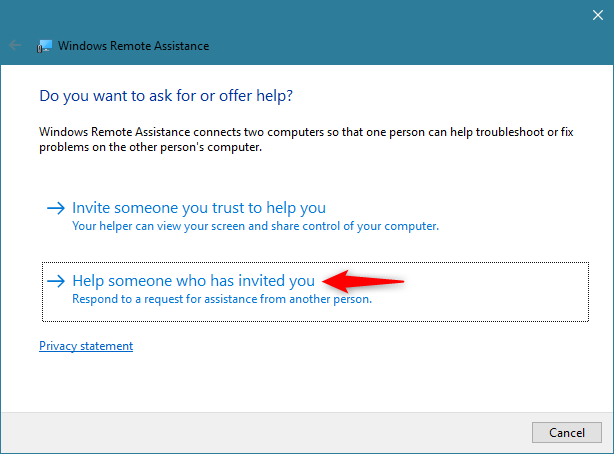
Start Windows Remote Assistance like we've shown you in the previous section of this tutorial. Then, select "Help someone who has invited you."
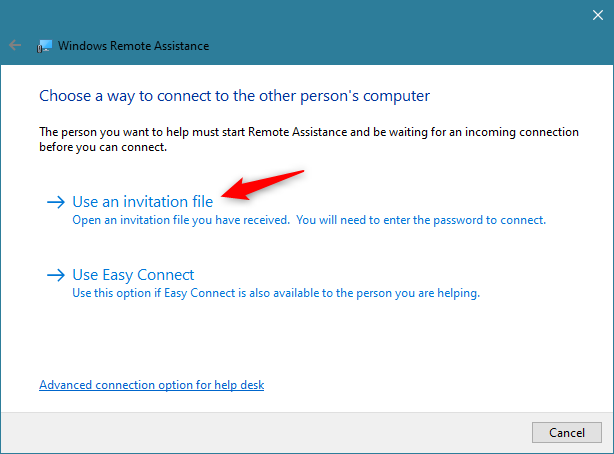
Now you need to choose the connection method. If you received an invitation, download it to your computer, and then click or tap on "Use an invitation file."
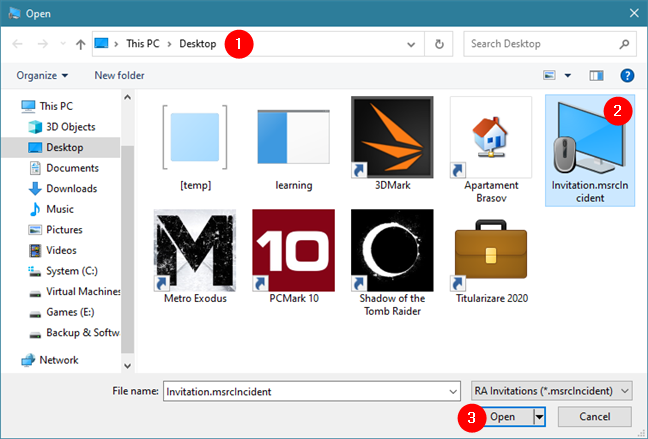
Browse through your PC and select the Windows remote assistance file. Then, click or tap on Open.
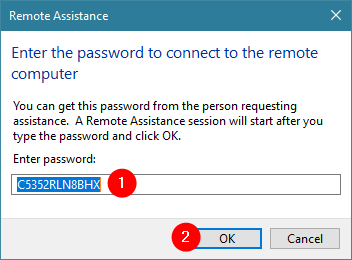
Then, Windows Remote Assistance initiates the remote support connection. Once the other Windows 10 computer or device is found, and the connection is ready, you are asked for the password. Type the connection password that you've received from the other party, and press OK.
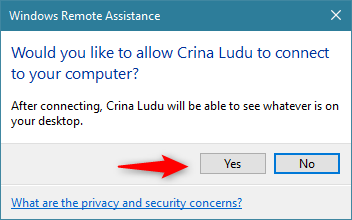
The remote party will be asked to approve the connection. You will have to wait until the user on the remote PC accepts the incoming remote connection.
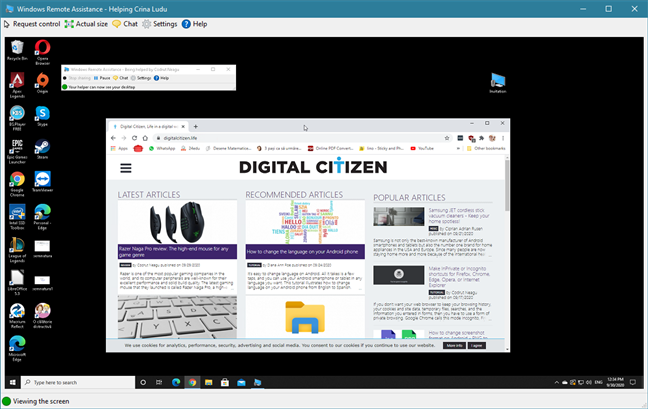
Then, your Windows 10 PC connects to the remote device via Windows Remote Assistance, and you can see its desktop.
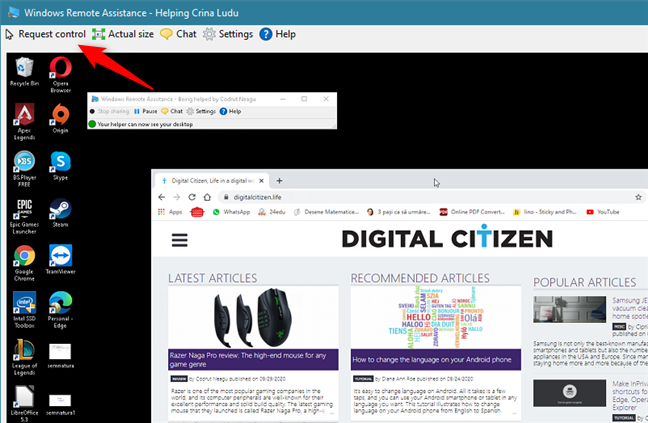
In order to take control and use the mouse and keyboard on the remote computer, you need to first press the Request control button and wait for the other party's approval.
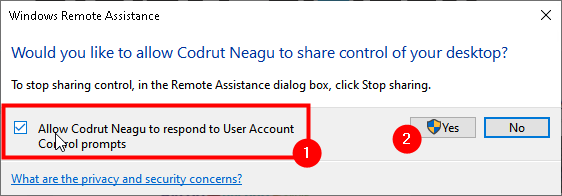
A good recommendation is for the remote party to check the box that says "Allow... to respond to User Account Control prompts", especially if you have to install applications or configure important aspects of the operating system.
How to configure a remote support session established via Windows Remote Assistance
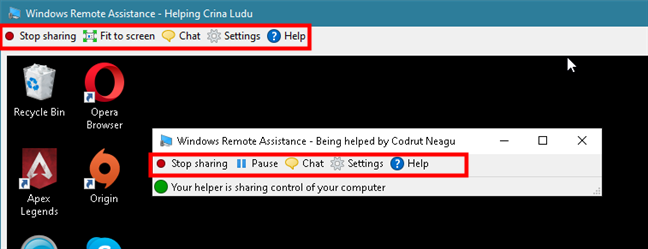
At the top of the Windows Remote Assistance window, there is a toolbar with several buttons. Their number varies depending on the party involved. For example, Request control and Actual size/Fit to Screen are available only to the computer providing help, while both parties can choose to Stop sharing.
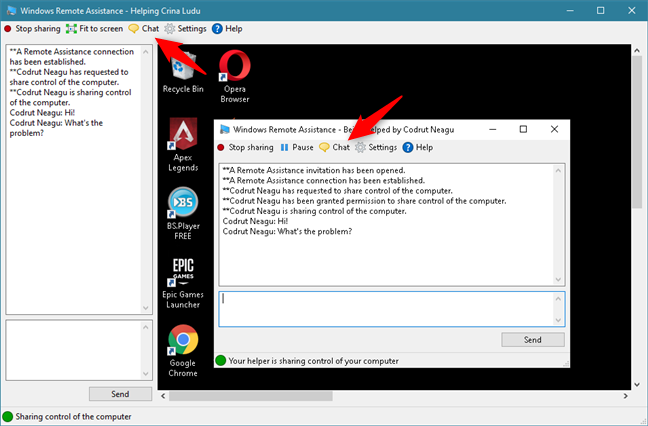
Both the host and the remote Windows 10 users can access the built-in Chat feature and use it to communicate.
On the computer that receives assistance, you can use the Settings to configure the way bandwidth is used. If the connection is poor, try moving the Bandwidth usage slider to Low.
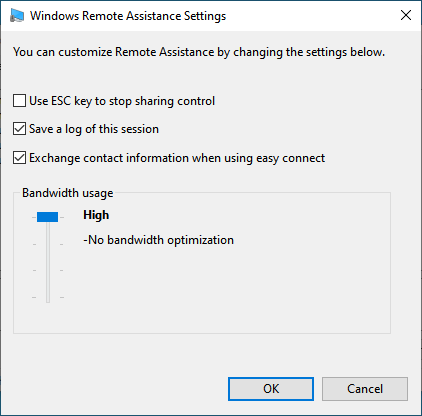
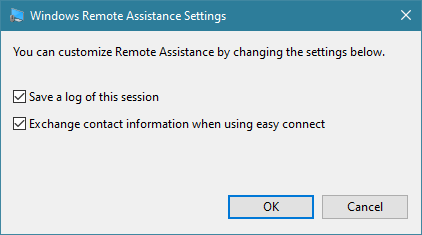
Unfortunately, the computer which provides remote assistance cannot configure the bandwidth usage optimization. It has only two options available: "Save a log of this session" and "Exchange contact information when using easy connect."
The other options you can have in the Windows Remote Assistance menu are a Help and a Troubleshoot button. Help is self-explanatory, and it's available for both parties, regardless of whether a connection is running: it opens your default web browser and looks for help information about Windows Remote Assistance on Microsoft's websites. Troubleshoot is available only on the Windows 10 PC that asks for remote support. Pressing the Troubleshoot button launches a wizard that can help in identifying the problem and fixing it.
Do you use Windows Remote Assistance for helping others?
We used Windows Remote Assistance on a couple of different Windows 10 PCs, and it always worked well. Although it seems that Microsoft doesn't spend any efforts on modernizing it, in our opinion, Windows Remote Assistance is still a decent alternative to some well-known remote desktop support solutions, such as TeamViewer or UltraVNC. Its only downside is that it only works for Windows operating systems. Have you ever used Windows Remote Assistance to help other people?