Although I'd known for a while that one can install Windows on an Intel-powered Mac, I didn't think I had much reason to try it. But then I sat down and actually read the directions for using the Mac utility named Boot Camp, and quickly realized that installing Windows 8 would not only be easy, it would also be an answer to my problems with my underpowered, small-screened netbook. My Mac Mini has plenty of power, and it's attached to a nice widescreen monitor that should show off Windows 8 perfectly. Oh, and I'd finally be able to get apps from the Windows Store! So I decided to give it a try. Here's how I did it. And learned several new things along the way.
What You Need in Order to Install Windows 8 on a Mac
There are several ways one can install Windows 8 on a Mac. It can be done using commercial software called Parallels, for example. But you don't need to buy any third-party software to do it. Boot Camp is built right into OS X, and it will allow you to set up your Mac to dual boot OS X with any other operating system you want.
You will need the 64-bit full version of Windows 8 for this endeavor. The 32-bit version and upgrade versions of Windows 8 won't work. You'll also need at least 30 GB of free space on the hard drive, and an 8GB USB drive to store the Mac/Windows drivers on.
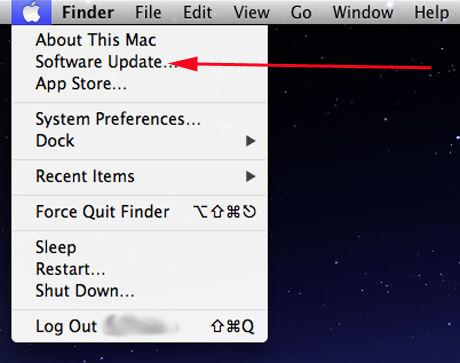
As with any other project of this nature, the very first thing you want to do before you do anything else is make sure that OS X and all your apps are up to date. Click on the Apple menu in the upper left corner and choose Software Update.
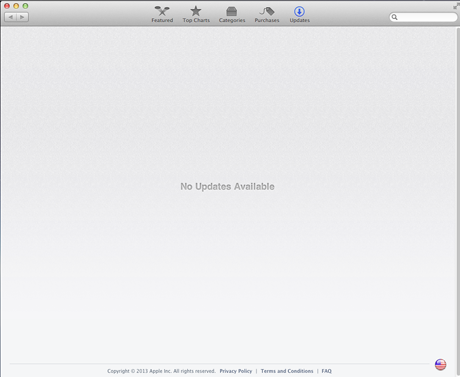
The Mac will search to see if any of your installed software needs to be updated. In my case, nothing needed to be dealt with.
Once everything is up to date, be sure to make a full backup of your Mac. OS X's built-in Time Machine can do this, and here are Apple's official instructions for that: Mac Basics: Time Machine. I use commercial software called SuperDuper! to add more options to my automatic Time Machine backups. As you may have noticed in previous articles, I am a nut about backups. 🙂
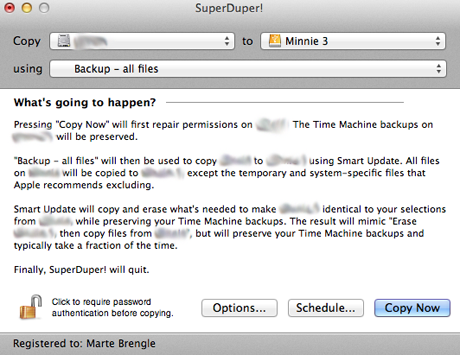
SuperDuper! is very easy to configure, and I usually have it set to back up only the files that have changed since the last backup. While Time Machine runs at regular intervals all day long, SuperDuper! can be set to run on your own schedule.
Once you've backed everything up, you're ready to begin.
How to Use Boot Camp
Either from the Dock or the Finder, open the Applications folder and then choose the Utilities folder. From "Applications -> Utilities", launch Boot Camp Assistant.
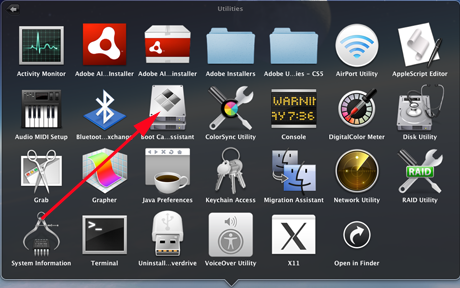
The screenshot above shows it being launched from the Dock.
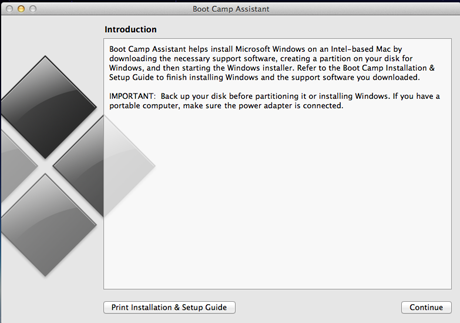
Boot Camp Assistant begins by explaining what it's going to do. Click Continue to start it.
Once you're running the Boot Camp Assistant, you are presented with some choices.
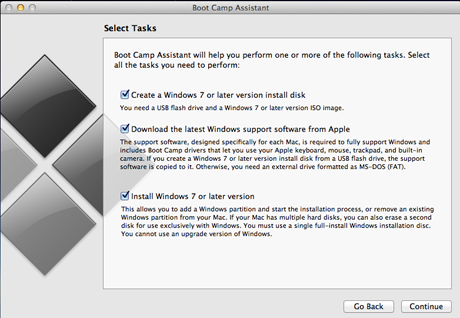
What you do next depends on the form of your Windows 8. If you have an installation disc, you do not need to check the first selection - "Create a Windows 7 or later version install disk". That's to be used if your Windows installation disc came to you in the form of a disk image (ISO). Since I had Windows 8 on a DVD, I un-checked that. The second and third choices are necessary for all Boot Camp Windows installations. As you might guess, Macs don't come with Windows drivers installed, so you will need to download those to make your hardware work properly with Windows 8 (the second choice) and then, of course, you will want to install Windows (the third choice).
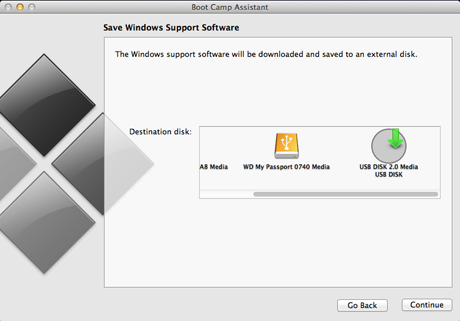
At the next screen you'll choose where to store the necessary Windows drivers that you chose to download on the previous screen. I've chosen my USB stick. Once the driver download starts, you can sit back and relax for a while. 🙂
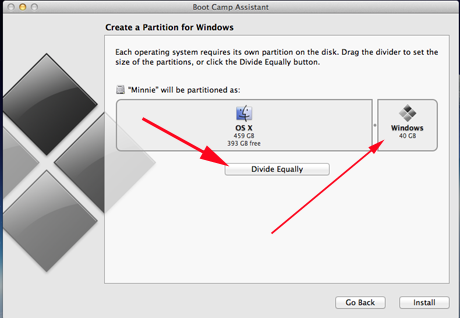
Once you've downloaded and saved the necessary drivers, you'll be asked to partition your hard drive. While 30GB is the minimum recommended, you can assign more space if you prefer. Make sure you leave enough space for your Mac to operate properly and store its files. Just drag and drop the divider to choose your drive size. I set up my Boot Camp partition (which is labeled as Windows) to be 40GB. As you can see, there is even a button to click if you want to assign equal space to OS X and Windows.
Once the partition is created, you'll be asked to reboot your Mac. Make sure that your Windows 8 installation disk is inserted properly in your optical drive (or a USB slot if your software is on a USB stick).
Sometimes, Macs don't "Just work." My USB connections cause problems!
When I began the Windows 8 installation I quickly found that the Mac has an annoying quirk that complicated this otherwise simple procedure for me. When it reboots, if you are using a USB device (either an external DVD drive or a USB stick) to install Windows from, you may get a black screen.
If this happens, the official instructions say to hold down the power key until your Mac shuts off, and then disconnect all USB devices except your installation device, mouse, and keyboard. Then press the power key again, and hold down the Option key (which is the Alt key if you're using a PC keyboard) until you see a screen from which you can choose which device to boot from. Choose your Windows installation device and you're good to go.
Or that's how it works on paper. In practice, if you have a portable DVD drive that gets all its power from the computer by plugging into two USB ports, the Mac will see it as two devices and balk.
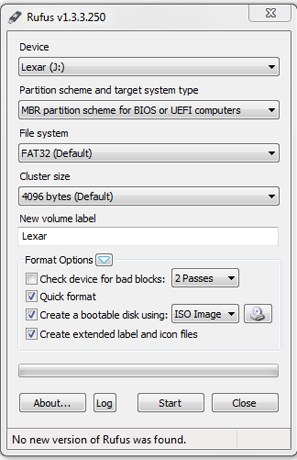
So I took my Windows 8 installation disk and used the OEM version of Nero that came with my DVD drive to create a disc image from it. (Sorry no screenshot of this; I was somewhat frazzled at the time.)
Then I made a bootable USB stick using a small free utility called Rufus. I'd suggest using a 16GB USB stick for this, just to be sure you've got enough space.
Once THAT was all done, I was finally ready to start the installation process. Fortunately, there were no more hiccups! I rebooted the Mac, and with only one extra USB device detected, everything went as it was supposed to.
How to Install Windows 8 on a Mac
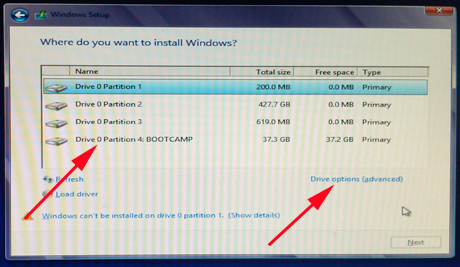
After your Mac reboots, you'll be asked where you want to install Windows. Choose the disk partition called BOOTCAMP. This partition needs to be in NTFS format, so choose "Drive Options (advanced)" and from there choose Format. The Windows 8 installer will take care of formatting it properly for installation. From here you'll have to put up with photos from my phone... yes, I know I need to buy a real camera. 🙂
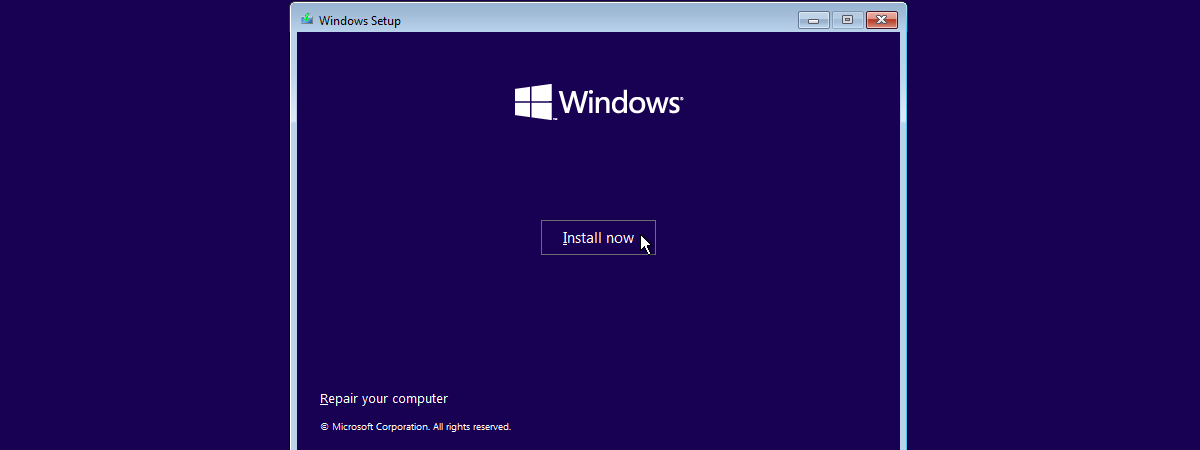
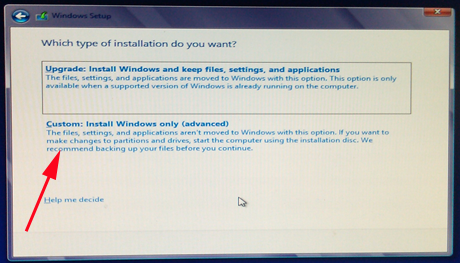
When the installation begins, you will be asked what kind of installation you want. Choose "Custom: Install Windows only (advanced)".
Once you've made your choice, you can just sit back and let Windows 8 do its thing. 🙂
As with an installation on a PC, your computer will reboot several times during the process. Don't worry about this and don't touch anything. Go get a cup of coffee or a snack or find something else to do, because the installation does take a while.
If you'd like a full description of what a new Windows 8 installation looks like, check here: How to Upgrade to Windows 8 from Windows 7, Windows Vista or Earlier.

Finally, you will be rewarded. Ta-daaa!
Mandatory Post Installation Steps
The first thing you should do after Windows 8 installs is to insert the USB drive you created at the beginning (the one that contains all the Apple specific drivers). If the setup doesn't start automatically, use File Explorer to view the files on the USB stick and run Setup. From there, the process is automatic. You will need to restart your computer when it's finished.
Once you've restarted, go to Windows Update, and install all the necessary updates. Here's our tutorial for that: How to Check for & Install Windows Updates.
Once you're finished with the updates, you've got a fully functional Windows 8 on your Mac!
How to Switch Between Windows 8 or Mac OS X
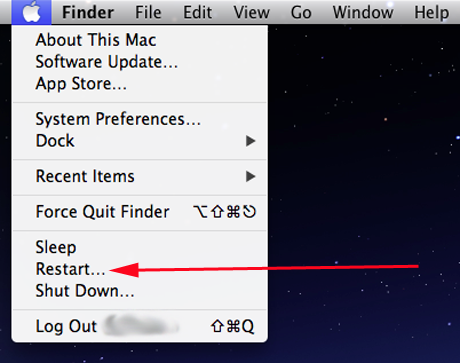
Your Mac can now boot into either OS X or Windows 8. To switch from one to the other, if you're starting from OS X, go to the Apple menu and choose Restart.
From Windows 8, either swipe in from the right or move your mouse to the upper right-hand corner, tap or click the Settings icon, choose Power and then Restart.
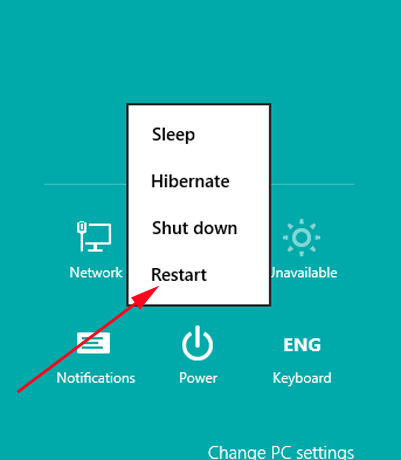
Hold down the Option or Alt key till you get the screen from which you can choose your operating system.
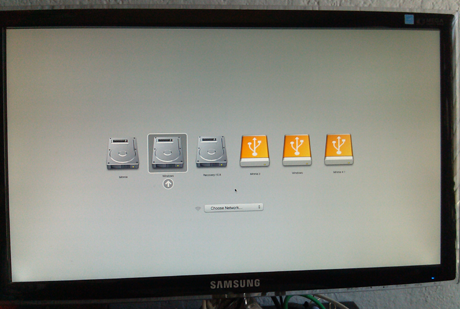
Click the drive labeled Windows, and you're good to go.
Conclusions
Although installing Windows 8 on my Mac Mini running OS X Mountain Lion wasn't quite as quick and easy as the official instructions made it appear it would be, it was still not difficult to do. And I suspect most people will not run into the stumbling blocks that I did, because statistics say that the vast majority of Mac owners have portable computers, where the USB port issue won't be a problem.
One really great thing about this dual-boot setup is that the files from each operating system are fully available to the other one, either from the Finder in OS X or File Explorer in Windows 8. No more schlepping files across the network or via sneakernet!
I now have a Windows 8 computer that is fast, has a reasonable sized screen and that can open up anything in the Windows Store I might desire. I'm definitely going to spend time browsing all the apps, now that I can get them, and checking our great tutorials to find out how to personalize Windows 8. They are listed just beneath this article.