05.05.2025
Animated GIFs are everywhere - on websites, social media feeds, and messaging apps we use daily. They’re a fun, creative way to express ideas and reactions and share short visual stories. Did you ever want to create an animated GIF using your own photos? Or maybe you’re curious how to make a GIF from a video to highlight a moment from your favorite clip. This guide shows how to create a GIF from images and how to make a video into a GIF using Ezgif’s free online tools. Whether you’re working with pictures or clips, it’s an easy way to create a GIF from video or photos in just minutes. And it’s all done without downloading and installing additional software.
How to create a GIF from images
If you’re wondering how to make a GIF from images, Ezgif has the perfect tool. The Animated GIF Maker makes the process quick and simple. Don’t worry; I’m still gonna offer you step-by-step instructions. Let’s get started:
Step 1. Access Ezgif’s Animated GIF Maker
Of all the online tools I’ve tested, Ezgif’s Animated GIF Maker provides the smoothest experience. To begin, use the link I provided to access it. Its interface is simple and offers additional information, like the file formats it accepts and their size.
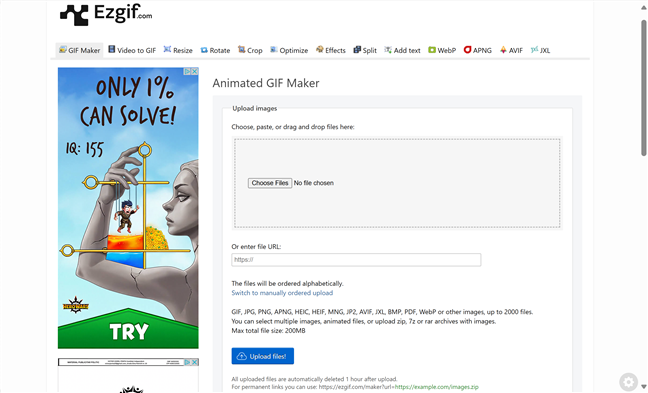
Use Ezgif’s Animated GIF Maker to create a GIF from images
Step 2. Upload the image files
Click or tap Choose Files under Upload images to add photos from your PC. Alternatively, drag and drop or paste your files in this section. You can use pictures or archives (like ZIP files) with images, as long as their size isn’t over 200 MB. When you are done, click or tap the blue Upload files! button.

Upload the image files you want to use
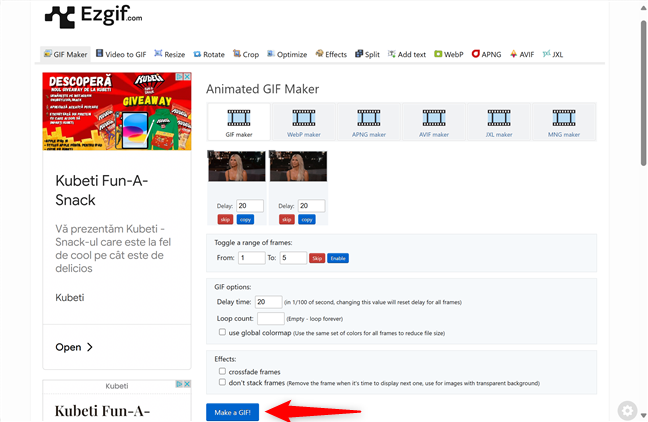
Step 3. Create an animated GIF from your pictures
The next page shows the photos you uploaded and other options for your GIF file. You can set a delay, choose to loop your GIF, and add other effects. When you are done setting everything up, click or tap the blue Make a GIF! button.
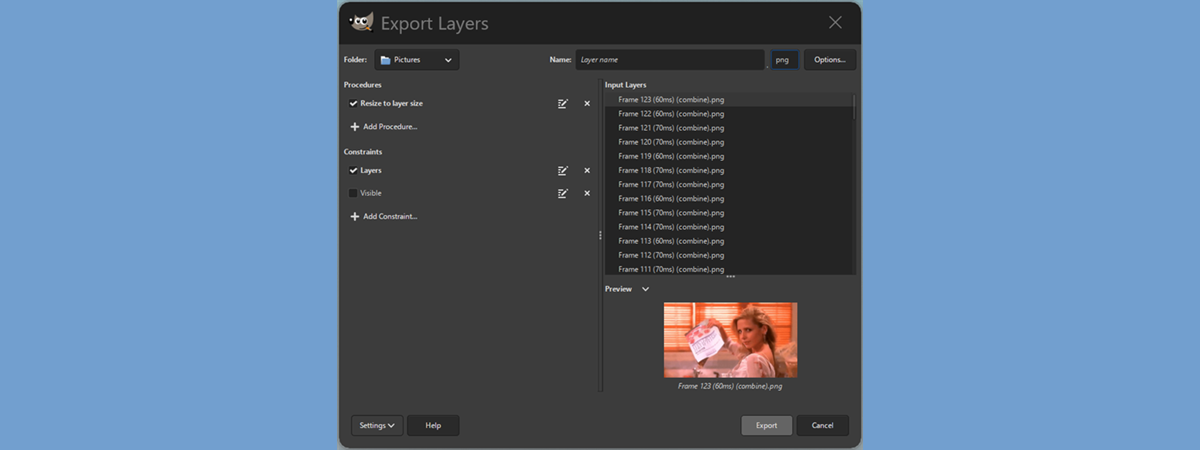
Step 4. Edit and save your GIF
Scroll down to find your GIF under the Make a GIF! button. You get a lot of other options here, from converting your GIF to another format to cropping, resizing, reversing, and more. If you want to make a GIF with text, you can also do that from this section. Check out all the other options, and when you are done, click or tap the floppy disk save button highlighted below.
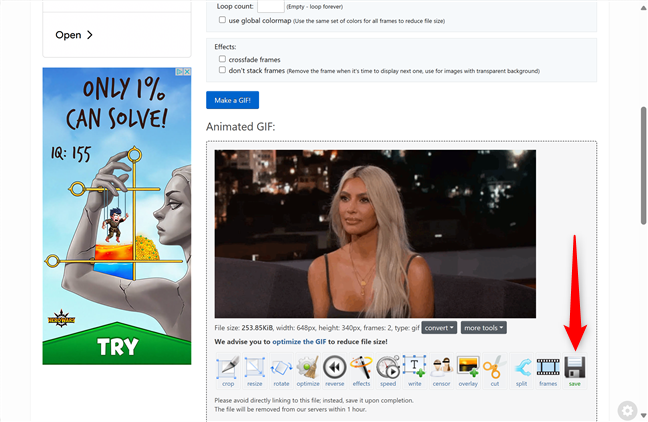
Your GIF is saved on your PC immediately.
How to create a GIF from a video
Turning a video into a GIF is a great way to highlight a memorable moment. With Ezgif’s MP4 video to GIF converter, you can easily make a video into a GIF to create a smooth, looping animation in no time.
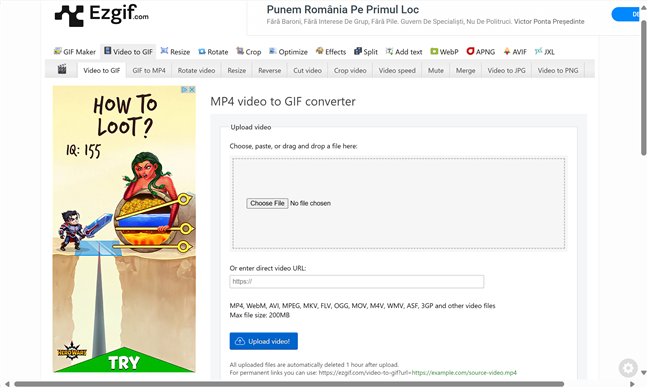
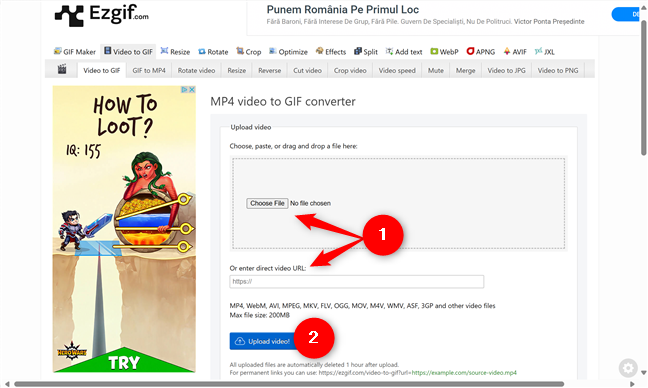
Step 1. Access Ezgif’s MP4 video to GIF converter
Despite its name, Ezgif’s tool can also work with different file formats: WebM, AVI, MPEG, MKV, FLV, OGG, MOV, M4V, WMV, ASF, 3GP, and other video files. To access it, click or tap this link: MP4 video to GIF converter.
Step 2. Upload the video file
Under Upload image, you can drag and drop or click/tap Choose File to upload a video from your PC. Alternatively, if you have the link to the video file, enter its URL in the appropriate field. Whatever you choose, click or tap the blue Upload video! button.
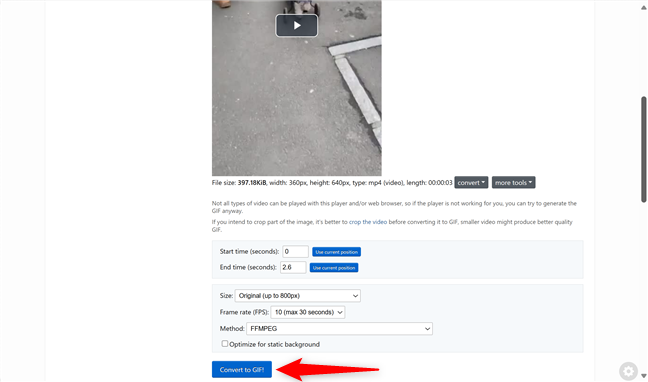
Step 3. How to make a GIF from a video
After uploading the file, you can see your video together with several editing options at the top.

Scroll down to find more options for your GIF under it. When you finish tinkering with the available tools, click or tap the Covert to GIF! button.
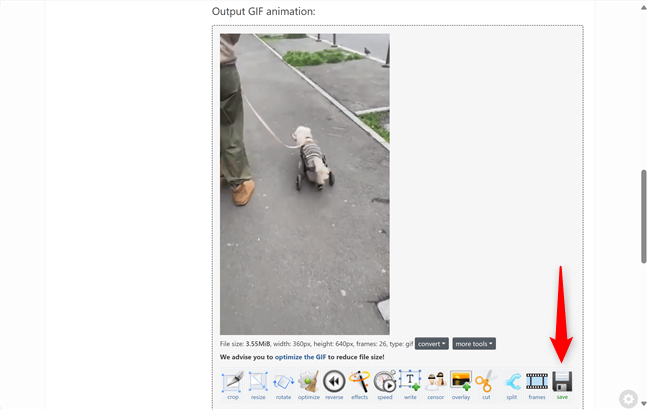
Step 4. Edit and save your GIF
Scroll down again to find the Output GIF animation. You can use the tools at the bottom to resize, crop, rotate, add text, etc. When you are done, click or tap Save to download your new GIF.
Simple, right?
Did you create a GIF today?
Turning images and videos into GIFs is a fun and simple way to bring your content to life. Whether you’re turning photos into a smooth animation or transforming a video clip into a shareable loop, Ezgif provides all the tools you need to create GIFs in just a few steps. Now that you know how to make a GIF from images and how to make a video into a GIF, it’s time to get creative. What GIF did you make today, and how will you share it with the world?