

Workgroups are the simplest way to link together a small number of computers and devices in order to make networking and sharing easier, making them ideal for your home network. If you want your laptop(s), desktop computer(s), printer(s) and other devices to share resources, they need to be part of the same workgroup. This tutorial shows how to change the workgroup on a Mac in just four steps:
NOTE: This guide covers macOS Mojave or newer. The features shared in our guide may not work on older versions of Mac OS.
Step 1. Open System Preferences
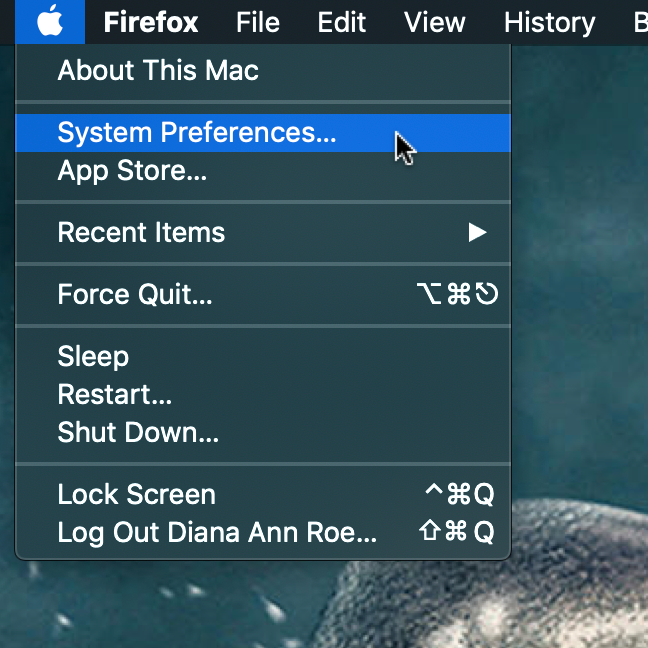
While there are more ways to access System Preferences, one of the simplest is to open it from the Apple menu on the top left corner of your screen. Click or tap the Apple logo, and then System Preferences.
Step 2. Go to Network
In the System Preferences window, click or tap Network.
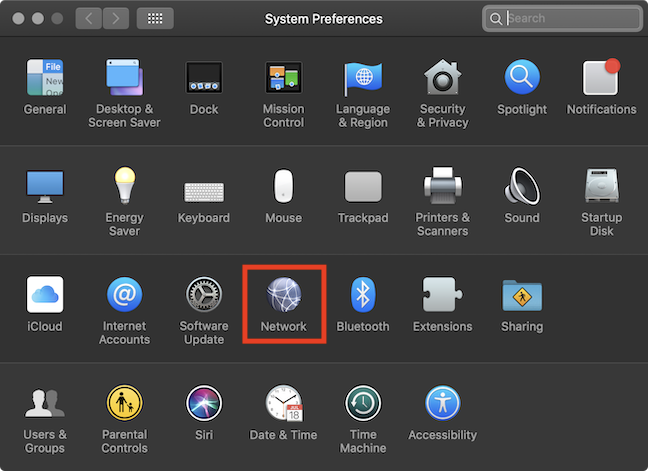
This action opens the Network pane.
Step 3. Open the advanced options for your network connection
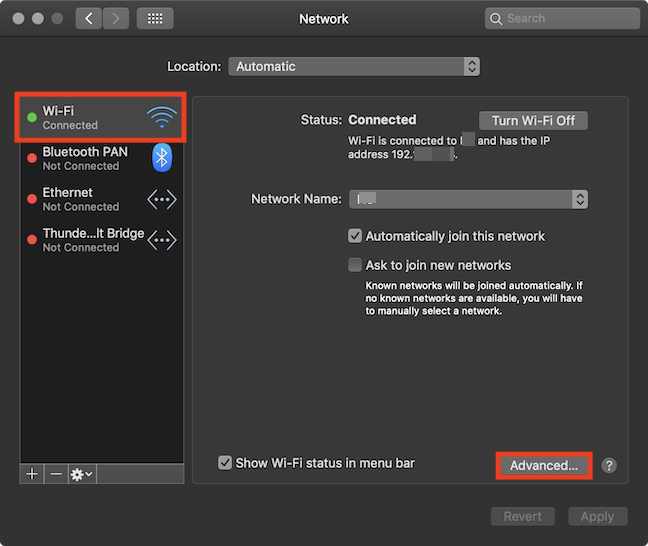
On the left-hand side, the Network pane displays a list with your network connections. A green dot indicates which connection is currently active. You may be connected to the network through Wi-Fi or Ethernet, using a network cable. Select the active network connection for which you want to change workgroup. Then click or tap the Advanced button on the bottom right side, to see the properties of the selected network.
Step 4. Change workgroup from the WINS tab
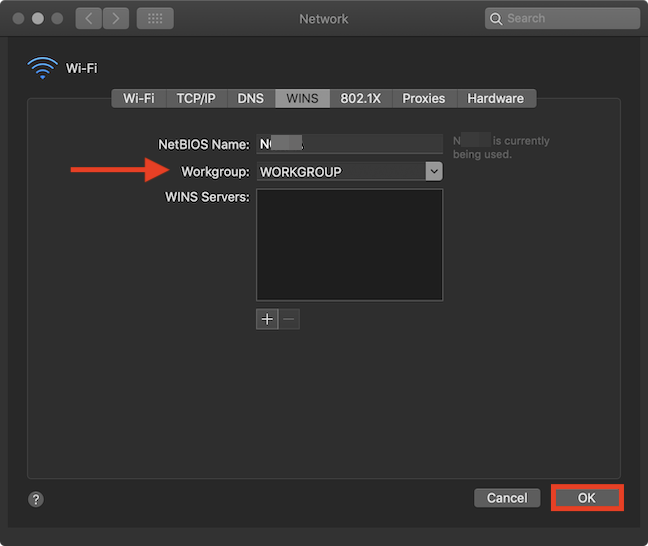
Go to the WINS (Windows Internet Name Service) tab. The settings you make in this tab affect your network connection with Windows-based devices and computers. In the Workgroup field, type the name of the workgroup that you want to use. It must be the same workgroup name used by other computers in that network, to facilitate easy sharing of folders and devices. When done, click OK, and you are returned to the Network pane.
In the Network pane, click or tap Apply, and your workgroup settings are saved and used by your Mac.
TIP: The default workgroup name on both macOS and Windows is WORKGROUP, making things easier for users. However, in your network, you may use a different name.
How many PCs and devices do you have in your workgroup?
We hope that this tutorial has helped you set up your workgroup and that you can enjoy all the advantages that come with it. Before closing, let us know how many devices does your workgroup include? Also, do you use both Macs and Windows PCs? Are there any PCs with Linux in your workgroup?

Discussion (12)
Thanks for the article! Is there a way to remove a workgroup? Somehow a workgroup formed in my computer and I cannot get rid of it. Any information is greatly appreciated!
OMG Thank You!
Thank you for your instruction. I managed to have my Macbook share folder to my Windows PC. The problem is, I only select one folder in Shared Folders area, but it shared everything, that folder, the entired Macintosh HD and the attached drive. How can I limited it to share only the one I chose?
I know this is an old post, but I wanted to share something that works to solve this problem of getting the workgroup name to stick in the Network preferences. I have an iMac 2019 running Mojave and a Dell pc with Windows 10. Both have the latest updates installed. On the mac, go into the sys preferences > network > advanced> wins. Enter the new workgroup name. Down under the WINS Servers, click the + sign and enter the IP address of the Windows 10 machine. Click OK to close the Advanced window. In the bottom right of the Network window, click the Apply button. That should get it to accept the new workgroup name and also make the Mac show up in Windows Explorer under Network. On my Windows machine, I now see both computers.
Fantastic! It’s *so* weird, but it works for macOS Catalina 10.15.3 as well!
Thank you so much, I spent 2-1/2 hours today rebooting everything and this solved the problem immediately.
… and it’s still working under Big Sur (I’m currently running 11.3 Beta (20E5186d)).
It’s so stupid that you have to resort to these kinds of ‘tricks’ to allow macOS to save your workgroup. One would think that they’d fixed that behaviour by now!
Then again, I suppose that this only makes sense if you have at least one machine in your network which is not running macOS/iOS/iPadOS — it would be pointless to configure it otherwise.
On the other hand, I wonder if I could hack
/etc/nsmb.confto make those settings permanent…This does not work. If you go back and check the Workgroup name reverts back to Workgroup. Sharing works without changing the Worgroup name.
Setting up a network from Window 7 comuter to MacBook Air 11 did not work using your guidance.
I am trying to add a shared folder on my Mac server to be accessible to my Windows PCs. I see that it is only possible, according to your blog post, if the PCs are in the same workgroup domain. Will changing the workgroup domain on my Mac server disrupt any other settings on my Mac network? Also- I plan on doing this because I want to get rid of my Windows server completely, how will getting rid of the Windows Server affect the connectivity to the shared folder on the Mac?
There is no such thing as a workgroup domain. You have either a workgroup or a network domain (like those used in Enterprise networks).
If you remove a Windows Server why should it impact your Mac server? I really don’t see any reason why your Mac server setup will stop functioning after you remove the Windows Server.
Hi,
I want my Mac to get access to shared folders in domain. So when setting with the name of my workgroup on Mac, what is that with respect to domain? Using domain’s name to fill in my Mac’s workgroup name?