

Do you need an easy way to add the Take Ownership entry to the right-click menu in Windows 7 or Windows 8? If you do, we have two options for you, both of them quick and reliable. They work with both Windows Explorer and File Explorer.
NOTE: If you access this option from the contextual menu, the owner of the selected file or folder will automatically change to your username.
Add a Take Ownership Entry to the Right Click Menu - Method 1
There are several ways to add the Take Ownership option to the right-click menu in Windows or File Explorer. The quickest is to use an application named Ownership. You can find it here: Downloads Datumza. There you will see several apps listed. Look for the one named Ownership and download it to your computer.
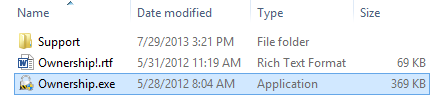
Extract the archive you just downloaded and run the Ownership.exe file. A UAC (User Account Control) prompt is displayed. Confirm that you want the application to run.
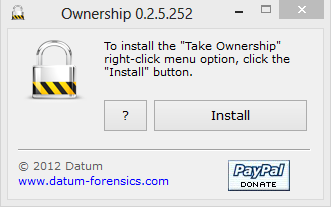
Then, click Install. That's it!
Add a Take Ownership Entry to the Right Click Menu - Method 2
Another way is to edit the Windows Registry and add some custom entries at HKEY_CLASSES_ROOT*shelltakeownership.
Since this is a complex thing to do manually, we have created a registry file that you can download and run.
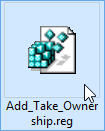
It is found in the archive attached at the end of this article. Download the archive and extract its contents. You will see a file named Add_Take_Ownership.reg. Run it!
You will receive several prompts. First, a security warning is shown. Press Run.

Then, a User Account Control (UAC) prompt is shown. Click Yes.

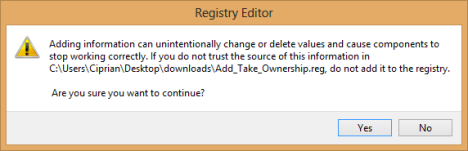
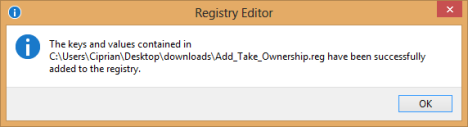
Then, the Registry Editor asks you whether you want to run this file. Click Yes.
Finally, you are informed that the keys and values contained in this file were added to the Windows Registry. Click OK.
Talk about encountering too many prompts. 🙂
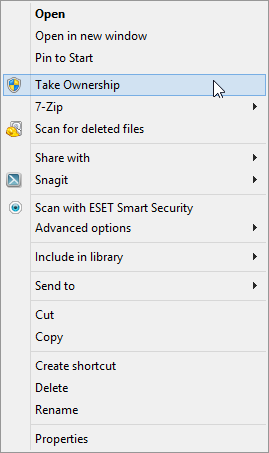
At the end of this exercise, right click on any folder, and you will see the Take Ownership entry.
Remove the Take Ownership Entry - Method 1
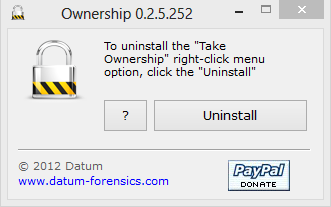
If you have used the Ownership application to add the Take Ownership to the right-click menu, you can remove this entry using the same program.
Run the Ownership.exe file, click Yes in the UAC prompt and then click Uninstall.
Without any further confirmation, the entry is removed.
Remove the Take Ownership Entry - Method 2
You can also use the archive attached at the end of this article. Download it and extract its contents. You will see a file named Remove_Take_Ownership.reg.
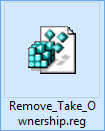
Run it and you will go through the exact same prompts that were displayed when adding this entry. Confirm that you want to run this file and let it do its thing. Now the Take Ownership entry is removed from the right-click menu in Windows/File Explorer.
Conclusion
The two solutions mentioned in this article will help you take ownership of files and folders with minimum effort. I hope you found them useful. For more useful tips and tricks, read the articles recommended below.
Download Link: ownership.zip

Discussion (8)
Great,Thanks!
…and even after running the program you listed, “take ownership” is still there when I right click
since installing “take ownership” I have had numerous problems running programs. I have the cmd. box flash very fast and then nothing or the cmd. box stays up but is inoperable. going to “safe mode”, however I am able to run most programs.
I would like to remove everything that came with “take ownership” from my registry and my win7 machine. will that program you listed do that?
Thanks a lot
Does this not work with newer versions of windows 7? I was just trying to use it (both GUI installation and .reg file) the option shows up for it on right click but when I use it it flashes a cmd window with “ERROR: Access is denied.”
Max–I think Jasray turned you on to the program; I see the link under the “old” way of Taking Ownership. That’s sort of a cheat!
I don’t think that’s cheating. We want to offer best ways to accomplish your goal, even when referring to custom solutions provided by us or offering another application. It is true that jasray provided the link to the program and we considered that the application is worth mentioning in a separate tutorial. I think it’s a sign that every comment it’s taken into consideration.
Thanks! This goes well with the “Run as administrator” option also in my context menu. Something I use constantly.