Windows 10 has accustomed us to bloatware being bundled all the time, even when we make a clean installation. No longer is bloatware a lousy approach of various hardware manufacturers, but it is also Microsoft's thing now. While researching for ways to get rid of Windows 10 bloatware quickly, we found a helpful tool that does that, called Windows 10 Debloater. It runs PowerShell scripts but also offers a graphical interface that is easy to use for less technical users. Here's the fastest way to remove Windows 10 bloatware:
Step 1. Download and extract Windows 10 Debloater
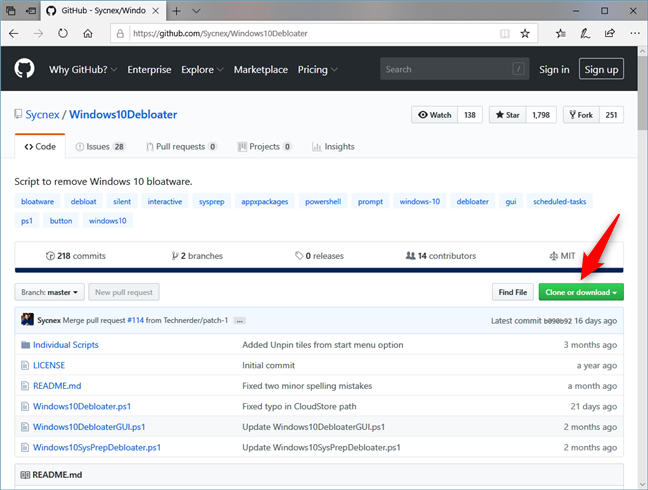
You need to download the tool that you're going to use to uninstall all the bloatware on your Windows 10 PC. The tool is called Windows 10 Debloater, and it is a collection of Powershell scripts, which you can download from GitHub. Go to this webpage and click or tap on the green Clone or download button.
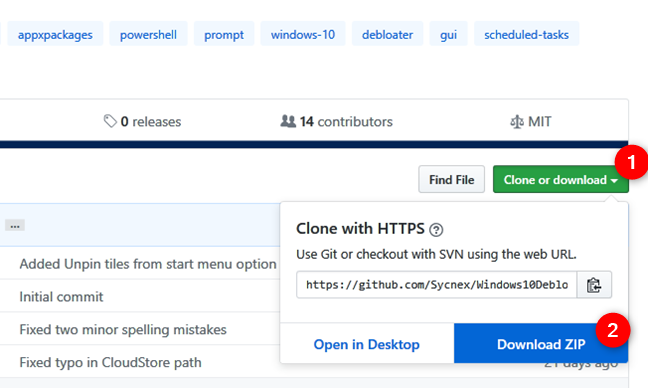
Then, click or tap Download ZIP.
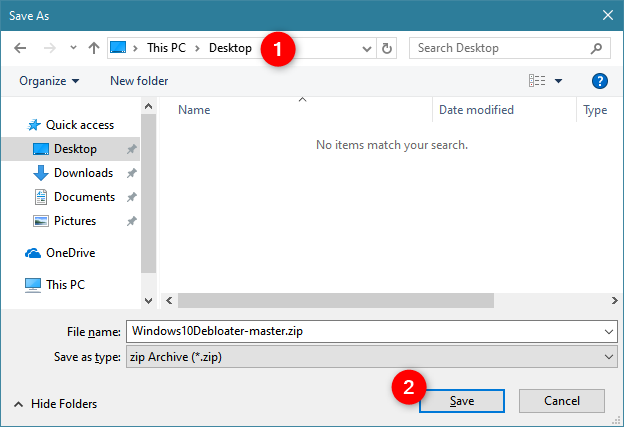
You should now get a ZIP file called Windows10Debloater-master.zip. Save it somewhere on your Windows 10 computer or device.
After it finishes downloading, extract the contents of the ZIP file.
Step 2. Run Windows10DebloaterGUI.ps1 using PowerShell
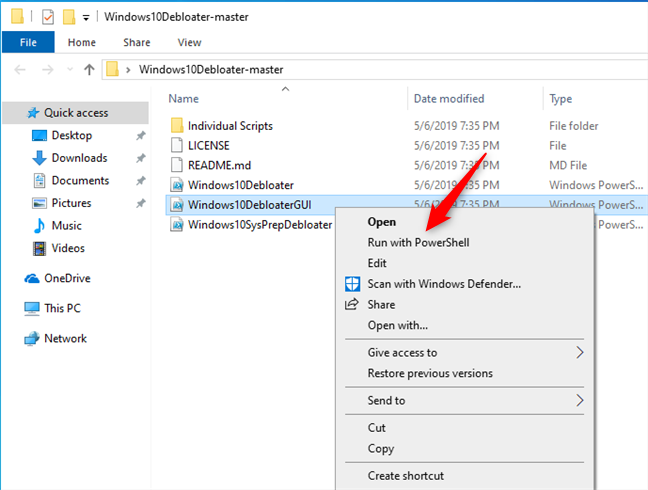
Open the Windows10Debloater-master folder and right-click or tap and hold on the file named Windows10DebloaterGUI.ps1. In the contextual menu, go to "Run with Powershell."
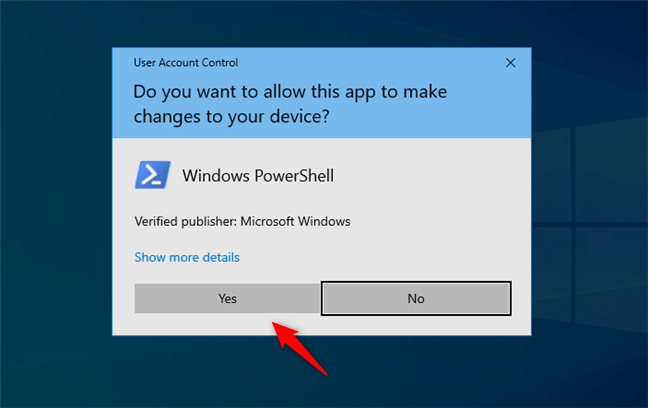
You should see a User Account Control prompt. Choose to allow the tool to run, by pressing the Yes button.
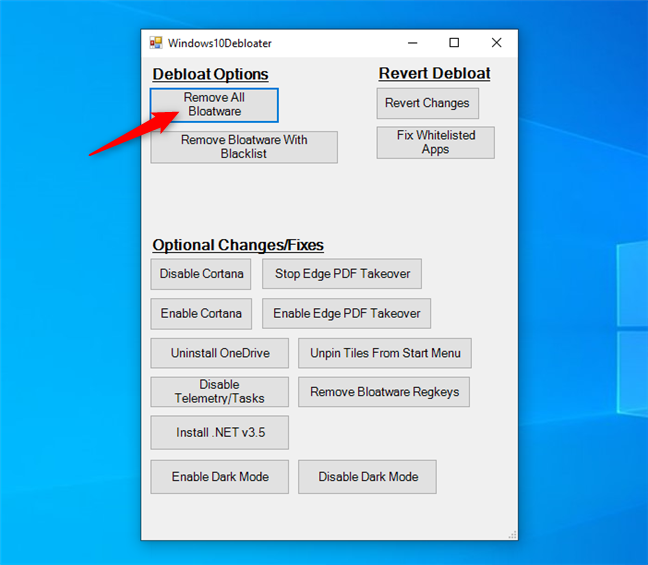
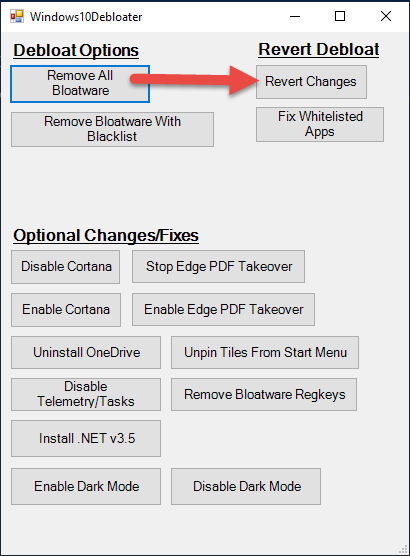
The previous action opens PowerShell and a window called Windows10Debloater. It contains a few different buttons that let you remove bloatware or revert changes or make some other optional changes such as disabling Cortana, uninstall OneDrive and so on.
Step 3. Remove all bloatware from your Windows 10 PC
The first button in Windows10Debloater and the one that interests us for this tutorial is Remove All Bloatware. Click or tap on it.
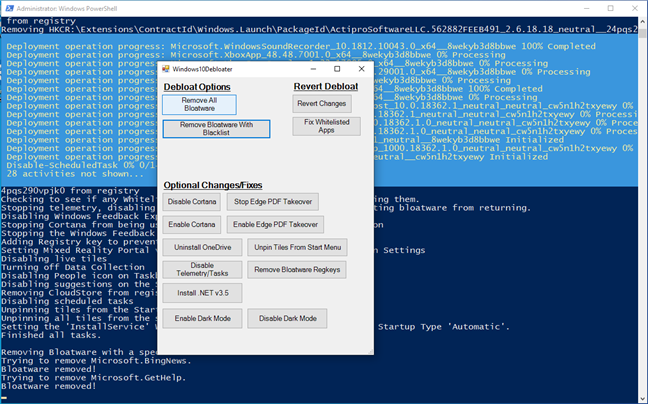
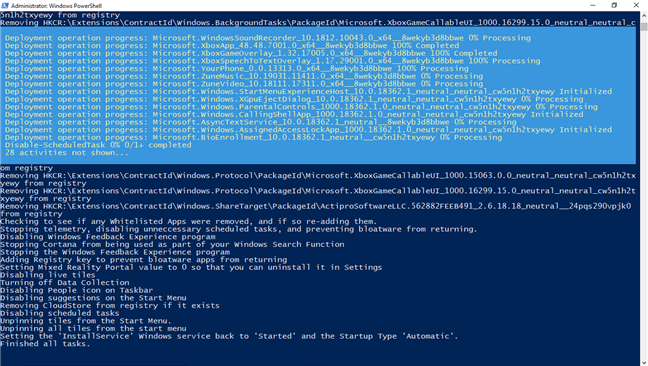
Windows 10 immediately starts to uninstall the bloatware apps found on your PC or device. If you look at the PowerShell window from the background, you can watch the progress of the scripts that are being run.
That's it! Now you can enjoy a bloatware-free Windows 10 experience!
Which apps are removed by Windows 10 Debloater?
According to its GitHub page, Windows 10 Debloater removes the following apps:
3DBuilder, Appconnector, Bing Finance, Bing News, Bing Sports, Bing Weather, Fresh Paint, Get started, Microsoft Office Hub, Microsoft Solitaire Collection, Microsoft Sticky Notes, OneNote, OneConnect, People, Skype for Desktop, Alarms, Camera, Maps, Phone, SoundRecorder, XboxApp, Zune Music, Zune Video, Windows communications apps, Minecraft, PowerBI, Network Speed Test, Phone, Messaging, Office Sway, OneConnect, Windows Feedback Hub, Bing Food And Drink, Bing Travel, Bing Health And Fitness, Windows Reading List, Twitter, Pandora, Flipboard, Shazam, CandyCrush, CandyCrushSoda, King apps, iHeartRadio, Netflix, DrawboardPDF, PicsArt-PhotoStudio, FarmVille 2 Country Escape, TuneInRadio, Asphalt8, NYT Crossword, CyberLink MediaSuite Essentials, Facebook, Royal Revolt 2, Caesars Slots Free Casino, March of Empires, Phototastic Collage, Autodesk SketchBook, Duolingo, EclipseManager, ActiproSoftware, BioEnrollment, Windows Feedback, Xbox Game CallableUI, Xbox Identity Provider, and ContactSupport.
As you can see, the list of apps removed is slightly different than the Windows 10 bloatware that we documented here.
How to revert the process and get all that bloatware back
Not everybody agrees with removing all the apps that this tool considers to be bloatware. They might include apps which you want on your system. Fortunately, Windows 10 Debloater also lets you revert all the changes that you made. To do that, rerun it and click or tap the Revert Changes button.
How to choose which bloatware to remove with Windows 10 Debloater
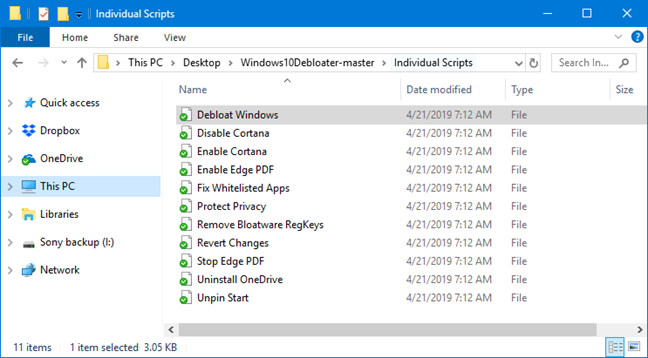
You cannot choose from the user interface which apps to remove and which to keep, and that would have been useful to have. However, you can edit the Debloat Windows file found in the Individual Scripts folder of the app, and remove from the list the apps that you want to keep.
Maybe some users want to keep apps such as Weather, Sticky Notes or Camera, but want to get rid of all the other bloatware.
Did you manage to uninstall all the bloatware from Windows 10?
Hopefully, you managed to do it quickly and easily with Windows 10 Debloater. Did you encounter any issues during the process? Did this tool remove all the bloatware apps? When we tested it, we found out that it did get rid of all the bloatware in Windows 10 with October 2018 Update, but it did not remove some of the tiles that led to bloatware apps, tiles found on the Start Menu from Windows 10 with May 2019 Update. What is your experience with Windows 10 Debloater? Comment below and let's discuss.


 09.05.2019