


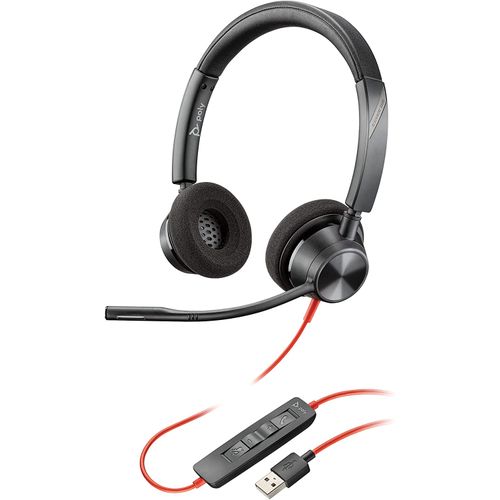
Using a Plantronics headset on computer can transform calls, meetings, games, and streaming. Whether you use a wired Plantronics USB headset, a 3.5 mm model, or a wireless Plantronics Bluetooth headset, a few setup essentials keep everything sounding clear on Windows or Mac.
This guide walks through the Plantronics headset setup from the first connection to audio fine-tuning and simple troubleshooting. You learn how to connect a Plantronics headset on PC or Mac, choose it as your main speaker and microphone, and fix common problems like low volume or a mic that will not pick up your voice.
Follow the steps in order, use bullet lists as quick checklists, and you can get almost any modern Plantronics headset working smoothly on your computer at the time of writing.
What To Know Before You Set Up A Plantronics Headset

Before you plug in or pair your Plantronics headset, confirm that your computer can support it. A quick check of ports, Bluetooth support, and system updates saves time later.
Check Connection Type And Compatibility
Plantronics headsets connect in a few different ways, and the exact steps depend on the type you own.
- 3.5 mm Headsets - Use a single combo audio jack or separate mic and headphone jacks on laptops and desktops.
- USB Headsets - Use a USB A or USB C plug and appear as a separate audio device on your computer.
- USB Wireless Dongles - Some wireless Plantronics headsets include a USB adapter that handles Bluetooth pairing for you.
- Built-in Bluetooth - Many newer Plantronics or Poly Bluetooth headsets can pair directly with a computer that has Bluetooth.
Check which ports your computer has available and match them to your headset type before you start the Plantronics headset setup.
Update Your Operating System And Drivers
Updated software helps avoid glitches with a Plantronics headset on computer, especially on newer versions of Windows and macOS.
- Install the latest Windows or macOS updates before you set up your Plantronics headset.
- Restart the computer after major updates so audio changes fully apply.
- If you use a desktop PC, update motherboard and audio drivers from the manufacturer site when possible.
Once your system is current, you are ready to connect the headset to your computer.
How To Connect A Wired Plantronics Headset To Computer
Wired Plantronics headsets are usually the fastest option to get working on a computer. You either plug into a 3.5 mm audio jack or into a USB port.
Connect A 3.5 Mm Plantronics Headset
If your Plantronics headset ends in a standard 3.5 mm plug, use the built-in audio jacks on your laptop or desktop.
- Find the combined headset jack or separate headphone and microphone jacks on your computer.
- Plug the 3.5 mm connector from your Plantronics headset firmly into the correct jack.
- If your computer has separate jacks and your Plantronics headset has a single plug, use a compatible audio splitter if needed.
- Put on the headset and play some audio to confirm that sound is coming through the speakers.
- Speak into the microphone and watch for input activity in your sound settings or communication app.
If you hear audio through speakers instead of the Plantronics headset on PC, you likely need to change the default output device, which you do in a later section.
Connect A USB Plantronics Headset
A Plantronics USB headset usually installs automatically and appears as its own sound device in Windows or macOS.
- Plug the USB connector from the Plantronics headset into a direct USB port on your computer, not a low-power hub if you can avoid it.
- Wait a few seconds while the operating system detects and configures the headset.
- Look for a small notification that a new audio device is ready to use.
- If your computer has both USB A and USB C ports, use an adapter that matches your headset and supports audio if needed.
- Move the USB plug to a different port if the headset disconnects or cuts out during use.
Once a USB Plantronics headset connects, you can make it the main speaker and microphone for your computer or for specific apps like Zoom or Microsoft Teams.
How To Connect A Wireless Plantronics Bluetooth Headset

A Plantronics Bluetooth headset gives you more freedom to move around. You can pair it directly with your computer if Bluetooth is built in, or use the Plantronics USB Bluetooth dongle that ships with many models.
Pair A Plantronics Bluetooth Headset With Built In PC Bluetooth
The exact buttons vary by model, but most Plantronics or Poly Bluetooth headsets use a long press on the power or call button to enter pairing mode.
- Charge your Plantronics Bluetooth headset until the battery is at a safe level.
- Turn the headset on and hold the power or call button until you hear a pairing prompt or see red and blue flashing lights.
- On Windows, open Settings, choose Bluetooth And Devices, then select Add Device.
- On macOS, open System Settings, select Bluetooth, and make sure Bluetooth is turned on.
- Click the Plantronics or Poly headset name when it appears in the list and complete the pairing process.
After pairing your Plantronics headset to your computer, it should show up as both an output device and an input device in sound settings.
Use A Plantronics USB Bluetooth Dongle
Many higher-end Plantronics wireless headsets ship with a small USB dongle, often labeled BT series or with a Poly logo. The dongle handles pairing and usually gives a more stable connection than built-in Bluetooth.
- Plug the Plantronics USB Bluetooth dongle into a free USB port on your computer.
- Turn your wireless Plantronics headset on and wait a few seconds to see if it auto-pairs with the dongle.
- If the headset does not connect, put both the dongle and headset into pairing mode using the instructions for your specific model.
- Check your sound settings to confirm that the dongle now appears as the main audio device for the Plantronics headset.
- Keep the dongle plugged directly into the computer instead of a hub for the best stability.
Using the dongle keeps your Plantronics headset on PC separate from other Bluetooth devices and helps avoid random drops in calls.
How To Configure Plantronics Headset Audio Settings
Connecting the Plantronics headset is only half of the setup essentials. You also need to tell Windows or macOS to use it as the default speaker and microphone, or select it inside your favorite apps.
Set Plantronics Headset As Default In Windows
On Windows 10 and Windows 11, you can manage the audio device for your Plantronics headset on the computer directly in Settings.
- Click the Start button and open Settings.
- Select System, then choose Sound.
- Under Output, pick your Plantronics headset or dongle from the list of devices.
- Under Input, choose the Plantronics headset microphone as the default mic.
- Use the Test buttons to play a sample tone and watch the microphone level meter move when you talk.
If you run into apps that still use laptop speakers, open their audio settings and select the Plantronics headset on PC as the preferred device inside each app.
Set Plantronics Headset As Default On Mac
On a Mac, you also need to choose the Plantronics headset as both the output and input device.
- Open System Settings from the Apple menu.
- Click Sound in the left sidebar.
- Choose your Plantronics headset or dongle under Output to play audio through it.
- Select the Plantronics headset under Input so the built-in microphone is used for calls.
- Adjust output volume and input level so you hear clearly and your voice does not distort.
Once you have set both directions correctly, most Mac apps switch to the Plantronics headset automatically.
Use Poly Lens App To Fine Tune And Update
Plantronics is now part of Poly, and Poly Lens has replaced the older Plantronics Hub software for many models. The Poly Lens desktop app helps keep your Plantronics headset firmware up to date and lets you tweak additional settings.
- Download and install the Poly Lens desktop app for Windows or macOS.
- Open Poly Lens and wait for it to detect your connected Plantronics headset.
- Check for firmware updates and install them when prompted.
- Explore options to adjust sidetone, mute alerts, and other advanced audio settings.
- Use Poly Lens to confirm that your Plantronics headset on computer is healthy and correctly configured.
You can use the headset without Poly Lens, but the app helps unlock more control and can fix odd problems after updates.
How To Test Your Plantronics Headset On Computer
After configuration, run a few quick tests so you know your Plantronics headset setup works before an important call or game session.
Test Audio Playback
- Play a song or video from a site you trust.
- Confirm that sound comes from the Plantronics headset speakers, not from the built-in laptop speakers.
- Adjust the headset volume controls and system volume until the level feels comfortable.
- Listen for crackling or dropouts that might suggest a loose plug or wireless interference.
Test Microphone Quality
- Use the sound settings panel or a simple voice recorder app to capture a short clip.
- Speak at a normal volume and move the microphone boom slightly closer and farther from your mouth.
- Play back the recording and listen for clarity, background noise, and overall volume.
- Fine-tune mic placement and input level until your voice sounds clear and natural.
Test In Your Main Call Or Meeting App
- Open your primary call app, such as Microsoft Teams, Zoom, or Google Meet.
- Go into the audio or device settings inside the app.
- Select the Plantronics headset for both speaker and microphone if it is not already selected.
- Use the built-in test tools in the app to play a sample sound and record a short test message.
- Join a test meeting or call a friend to confirm that you sound good on their side.
This last step helps catch any app-specific issues before you rely on the Plantronics headset on the computer for work calls.
How To Fix Common Plantronics Headset Problems On Computer
Even with careful setup essentials, you might run into issues like no audio, a muted mic, or choppy Bluetooth. These quick fixes solve many Plantronics headset on PC problems without extra tools.
Plantronics Headset Connected But No Sound
- Make sure the headset volume wheel is turned up and not muted.
- Check system volume in Windows or macOS and confirm it is not muted.
- Reopen sound settings and confirm that the Plantronics headset is still the default output device.
- Unplug the USB connector or dongle, wait a few seconds, and plug it back in.
- Restart the computer if audio randomly stops after a long session.
Plantronics Headset Microphone Not Working
- Verify that the boom mic is not flipped up into a mute position if your model supports that feature.
- Open sound settings and confirm that the Plantronics headset microphone is selected as the default input device.
- On Windows, review app microphone permissions and allow communication apps to access the mic.
- In meeting apps, open audio settings and manually choose the Plantronics headset mic inside the app.
- Use Poly Lens to check for firmware updates if the mic works on one device but not another.
Bluetooth Plantronics Headset Keeps Disconnecting
- Keep the headset and computer within a reasonable distance with minimal walls or interference.
- Turn off Bluetooth on phones or tablets that might steal the connection from your computer.
- If you use built-in Bluetooth and have issues, try the included Plantronics USB dongle instead.
- Charge the headset fully; low battery can cause random disconnects.
- Remove and re-pair the Plantronics Bluetooth headset to clear old connection data.
If these steps do not help and your Plantronics headset on computer still does not work correctly, test it on another device to see whether the issue follows the headset or the original computer.
Summary
- Confirm ports, Bluetooth support, and updates before starting any Plantronics headset setup on computer.
- Use 3.5 mm or USB connections for the simplest and most reliable Plantronics headset on PC experience.
- Pair wireless Plantronics Bluetooth headsets either with built-in Bluetooth or with the included USB dongle.
- Set the Plantronics headset as default speaker and microphone in Windows or macOS and inside key apps.
- Use Poly Lens to update firmware and adjust advanced audio features when your model supports it.
- Run quick playback, microphone, and app tests so you catch issues before important calls or meetings.
Conclusion
Getting a Plantronics headset on computer is mostly about understanding how it connects, then telling your operating system and apps to use it. Once you plug in or pair, a few minutes in sound settings makes the difference between muffled audio and a clean, professional sound.
For most people, a wired Plantronics USB headset or a wireless model with a dedicated dongle offers the best mix of reliability and convenience on Windows and Mac. Bluetooth direct pairing works too, as long as your computer has solid wireless support.
Use these setup essentials as a checklist whenever you connect a new Plantronics headset on PC or Mac. With the right connection, correct default devices, and basic troubleshooting, you can enjoy clear calls, focused meetings, and immersive audio on your computer with confidence.
Discussion (0)
Be the first to comment.