


Setting up mobile service on your iPhone 11 starts with inserting a SIM card correctly. A properly seated SIM activates your calls, texts, and cellular data. If you just upgraded phones, switched carriers, or restored your device, inserting the SIM card ensures your iPhone connects to the network without errors.
The iPhone 11 uses a physical Nano SIM, and the SIM tray sits on the right side of the phone. With the right orientation and a few quick steps, you can install the SIM card safely and avoid issues like No Service or SIM not recognized.
Steps For Inserting SIM Card In iPhone 11
Follow these steps to insert your SIM card securely and activate your carrier service.
Locate the SIM Tray
The SIM tray sits on the right edge of the iPhone 11. You will see a small pinhole above the tray outline.
- Hold the phone upright and look along the right side.
- Find the thin rectangular outline and the small circular pinhole.
- Keep your device powered off before opening the tray.

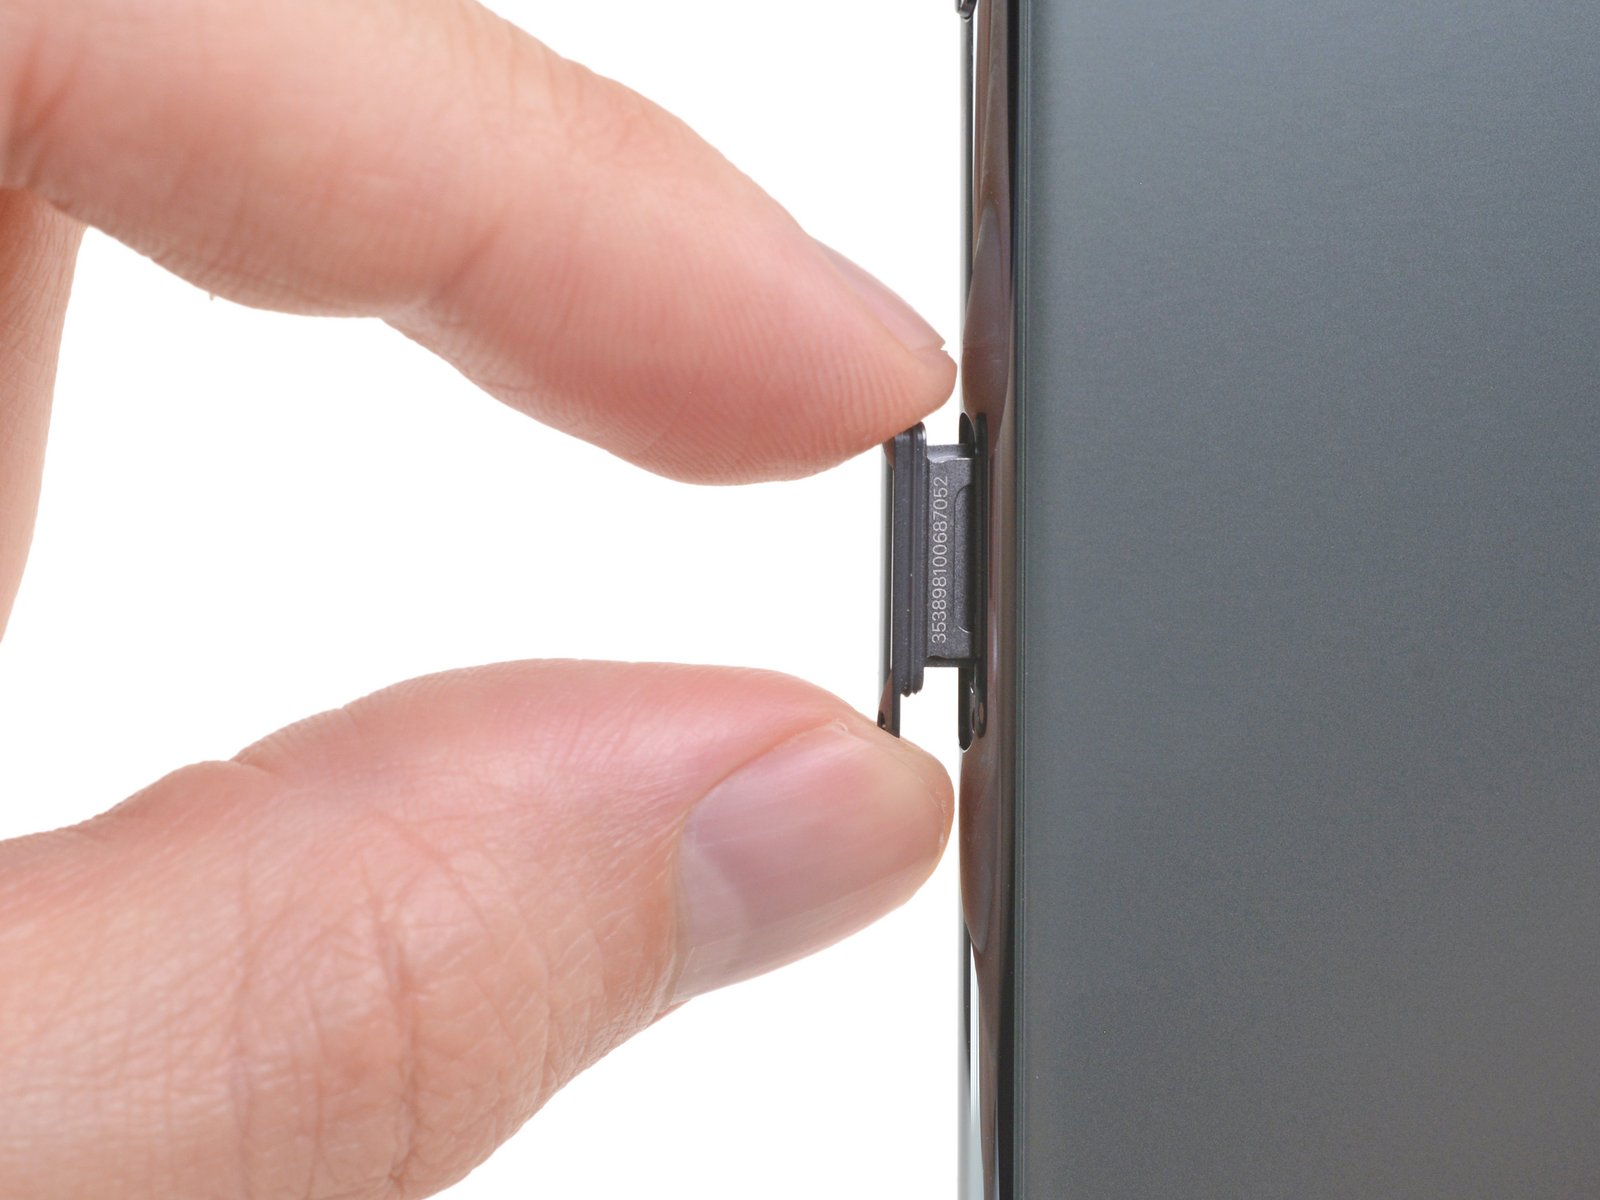
Eject the SIM Tray
You need a SIM eject tool or a straightened paperclip to open the tray safely.
- Insert the SIM eject tool into the pinhole.
- Push straight inward until the tray pops out slightly.
- Pull the tray out gently to avoid bending it.
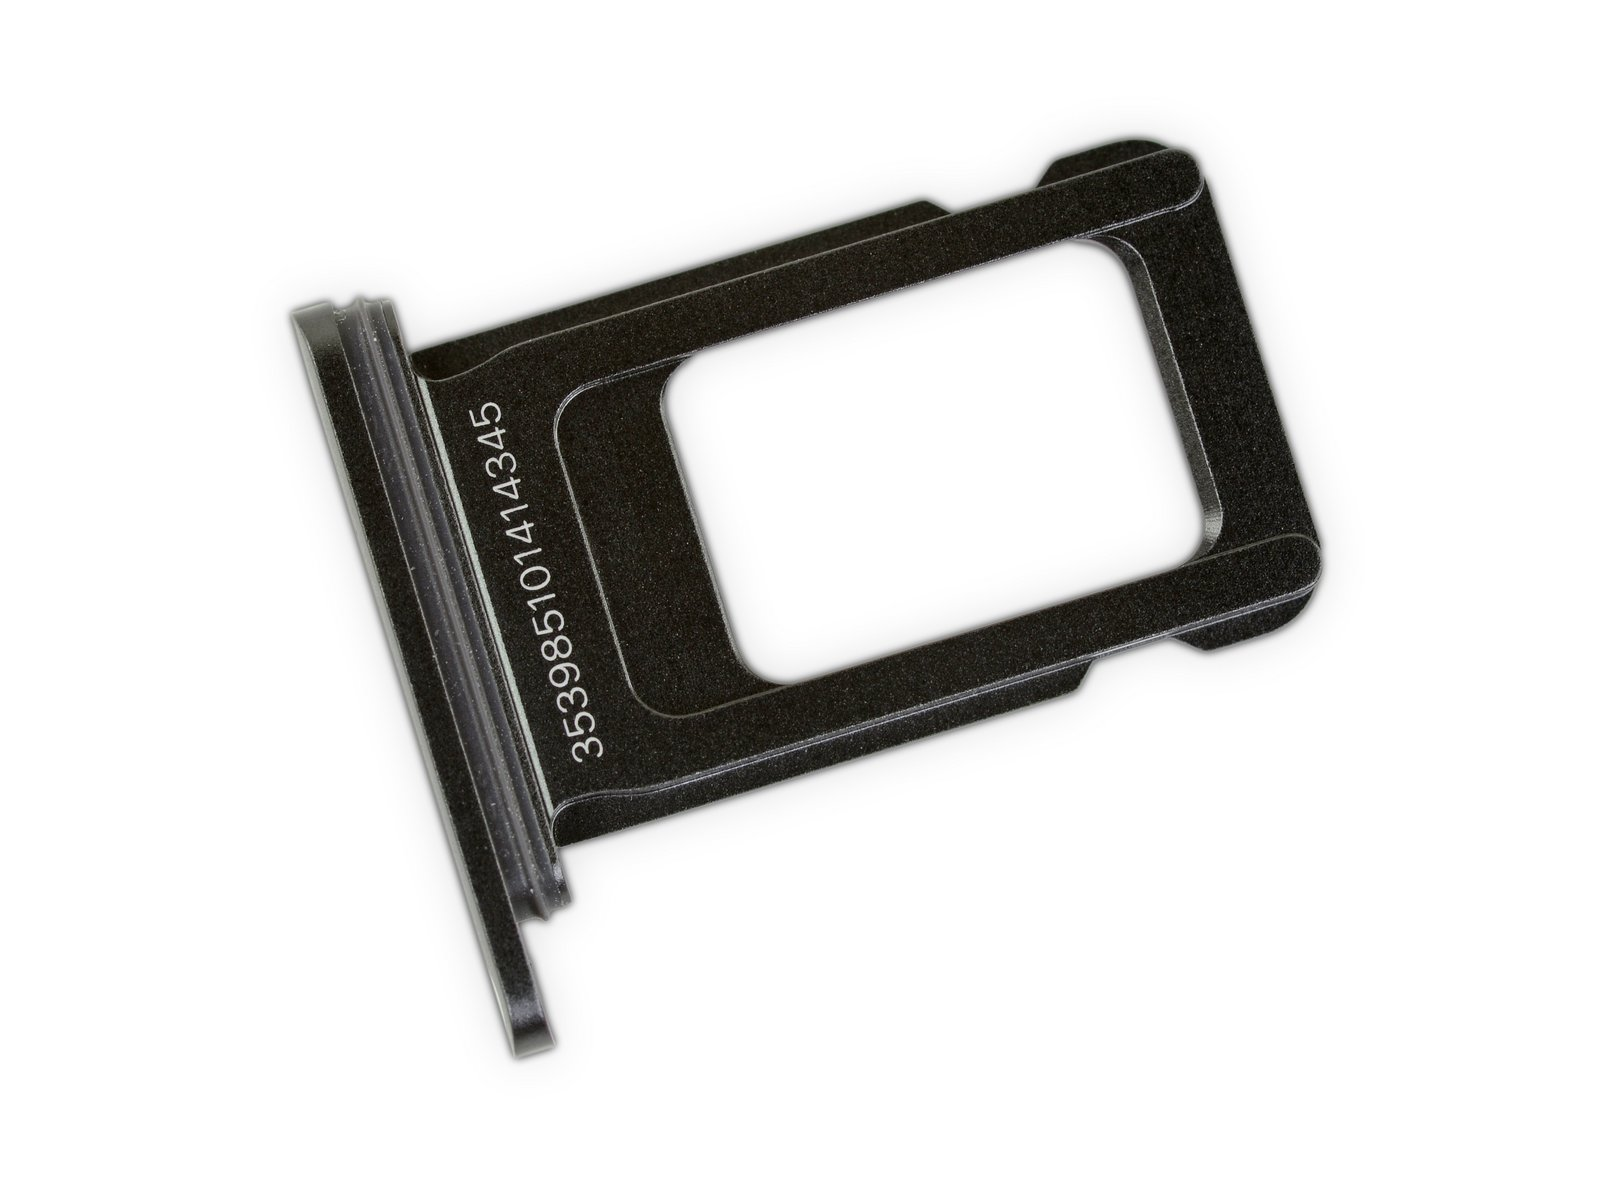
Insert the SIM Card
The iPhone 11 uses a Nano SIM, and it fits into the tray in one orientation only. Align the notched corner properly so the card sits flat.
- Place the SIM card in the tray with the gold contacts facing down.
- Match the notched corner of the card to the angled corner in the tray.
- Keep the card flat so it does not shift when reinserting.
Reinsert the SIM Tray
Carefully slide the tray back into the device. A proper fit prevents SIM reading problems and helps the iPhone activate your service instantly.
- Slide the tray in gently until it sits flush with the frame.
- Turn your iPhone 11 back on and wait for carrier activation.
- Check the signal bars to confirm successful detection.

Troubleshooting Common Problems
If your iPhone 11 does not detect the SIM card, these quick checks usually fix the issue.
- SIM Not Recognized: Remove the tray and make sure the SIM sits flat without shifting.
- No Service: Restart the phone or toggle Airplane Mode on and off.
- Invalid SIM Message: Clean dust from the SIM contacts or test another SIM card.
- SIM Tray Not Closing: Check for misalignment or a bent tray.
- Carrier Activation Delay: Ensure the SIM is active and supported by your plan.
Tips
- Power off the phone before opening the SIM tray.
- Use the official SIM eject tool to avoid scratching the device.
- Store spare SIMs in protective sleeves to avoid contact damage.
- Handle the tray gently; replacement trays must match the iPhone 11 model.
- Check the notched corner orientation to avoid inserting the SIM incorrectly.
FAQ
Can I use an eSIM instead of a physical SIM?
Yes. The iPhone 11 supports eSIM activation from supported carriers, but you can also use a physical Nano SIM.
Why does my iPhone 11 still say No Service?
Your carrier may need to activate the line. You can also restart the phone or reseat the SIM.
Does the SIM tray work for any iPhone model?
No. SIM trays are model-specific. Use a tray made for the iPhone 11 only.
Can I insert the SIM while the phone is powered on?
You can, but powering off prevents read errors and is the safer method.
Summary
- Locate the SIM tray on the right side of the iPhone 11.
- Eject the tray using a SIM tool or paperclip.
- Align and insert the Nano SIM into the tray.
- Slide the tray back in gently until flush.
- Restart the device and check for carrier activation.
Conclusion
Correctly inserting a SIM card in your iPhone 11 ensures that calls, texts, and cellular data start working without errors. Following proper alignment, handling the tray gently, and confirming activation help avoid common issues like No Service or SIM not recognized. With the SIM seated securely, your iPhone 11 connects to your carrier and stays ready for everyday use.


Discussion (0)
Be the first to comment.