30.08.2019
File History makes automated backups of your data, and it works with storage devices like external hard drives, network storage, and so on. If you want to use File History to back up your user data from Windows 10, read this tutorial. We show you how to turn on File History, how to change the way it works, how to stop it when you no longer need it, and how to change File History storage devices. Read on to learn more:
How to turn File History on, in Windows 10
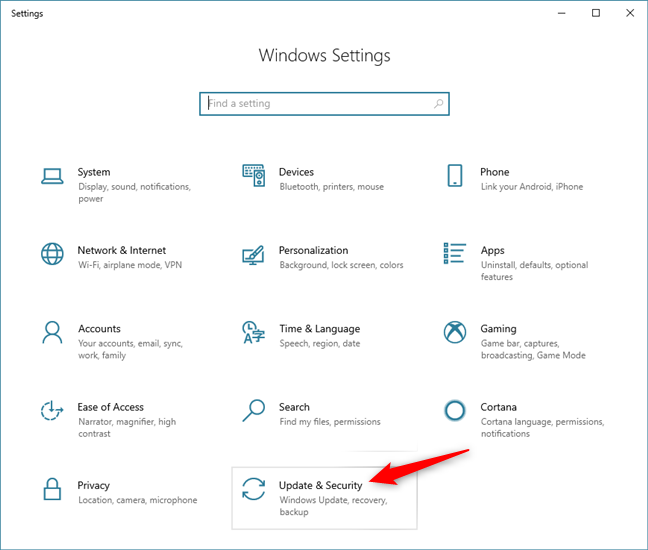
Before turning File History on, make sure that you connect an external hard drive to your Windows 10 computer or device. You may also map a network drive so that you can use it to backup your data with File History. After you connect the storage device that you want to use, open the Settings app (a quick way is to press the Windows + I keys at the same time). In the Settings app, go to Update & Security.
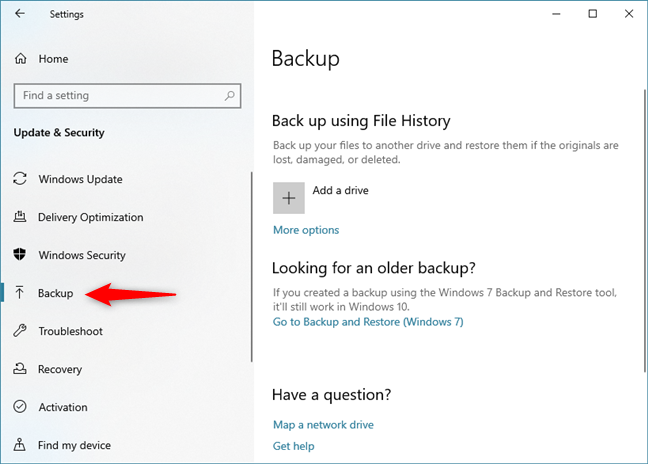
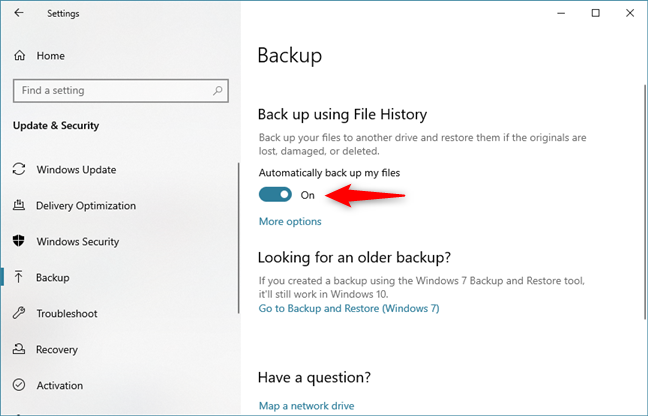
Choose Backup on the left column: this is where Windows 10 displays File History options and controls. By default, File History should be disabled.
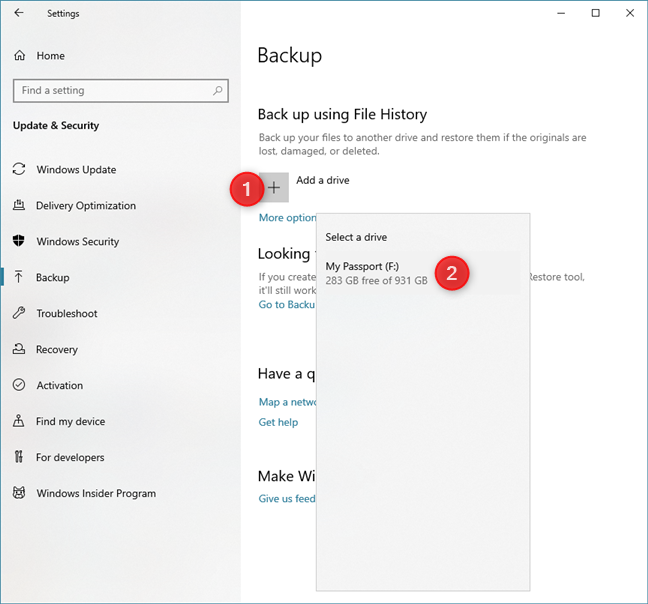
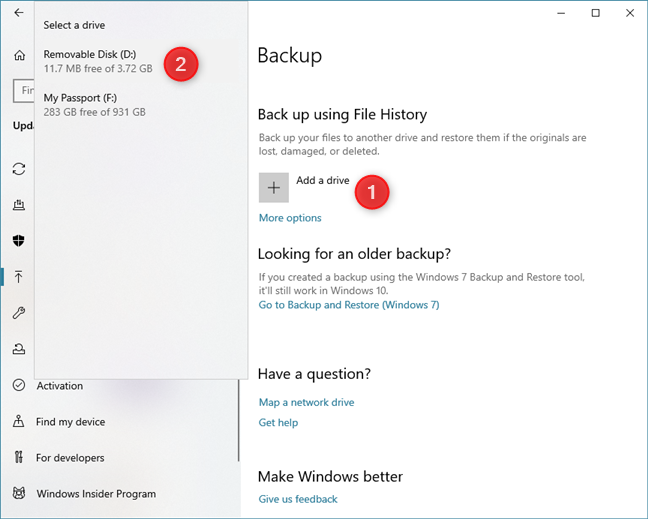
To turn File History on, click or tap on "+ Add a drive" in the "Back up using File History" area from the right side of the window, and then select the drive that you want to use for storing backups of your data.
After a few seconds, File History is turned on, and you see a switch appear, named "Automatically back up my files." The switch is set On, signaling that File History is activated and doing its job in the background.
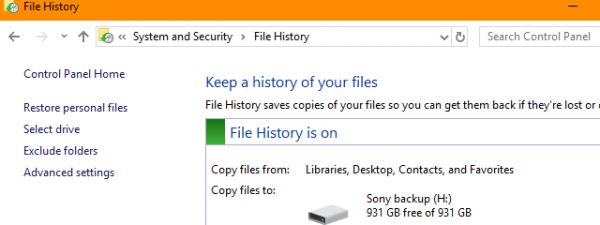
NOTE: Although configuring File History from the Settings app is a better experience, you should know that you can also work with it from the old Control Panel.
What data does File History back up and how long does it take to perform a backup?
If you do not change its default configuration, File History automatically backs up all your user libraries (both default libraries and custom libraries that you created), the Desktop, your Contacts, Microsoft Edge favorites and, finally, OneDrive. File History is a background process with low priority and, the first time it runs, it takes hours to back up your data. If you need to back up more than 100 GB of data, the first complete run might take up to 24 hours. The backup speed depends on the following factors:
- How you use your Windows 10 computer or device. If you run resource intensive apps and tasks, File History has a lower priority (it runs in the background) and takes longer to back up your data.
- The speed of the storage drive that you are using for File History. If you use a USB 2.0 port instead of USB 3 port, the transfer speed is much lower. It also matters whether the storage drive is an SSD or hard-disk drive. The slower the drive, the longer the backup process. Network storage tends to be even slower than local storage.
After the first complete run, File History is a lot faster because it backs up only new and changed files. A typical run, after the first backup, takes no more than a few minutes to finish.
Where to configure File History
There are many things that you can change about the way File History works. To access the available configuration options, click or tap the "More options" link, beneath the "Automatically back up my files" switch.

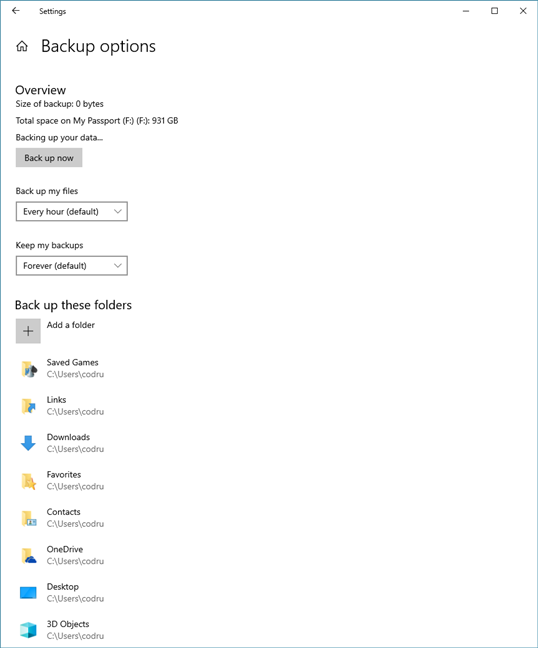
First, you see an overview that shows the size of the existing backup (until the first run is finished, the size is likely to be zero), the total space available on the storage device used by File History, and the status of your backup. Beneath the overview, there are options to change how often Windows' File History scans for file and folder changes, how long it keeps your files and the list of folders that it backs up. Let's take these options one by one, see what they do and how to change them.
How to change the default schedule of File History to save files
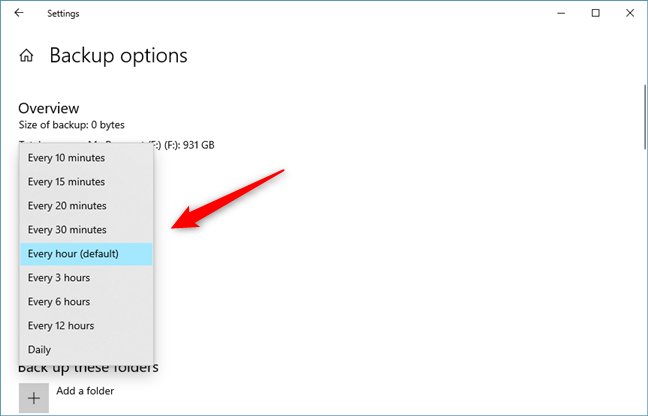
To change how often File History runs, click or tap on the "Back up my files" drop-down list. You can choose to run File History every ten minutes, every fifteen minutes, and so on, up to once a day. The default schedule of File History to save files is once every hour. However, you can choose any of the available schedule times that you prefer.
How to change File History's default time to keep backups
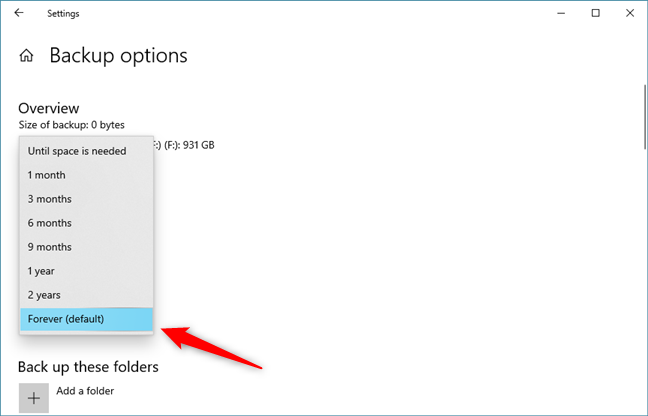
By default, File History keeps your files forever. This is a sure way to quickly run out of space on the storage device used by File History. You might prefer File History to keep your deleted files only for a limited time. To do so, click or tap on the "Keep my backups" drop-down list. You can then choose to keep deleted files or older versions of your files for at least a month, and increase the duration up to two years or… forever.
How to choose which folders are backed up by File History
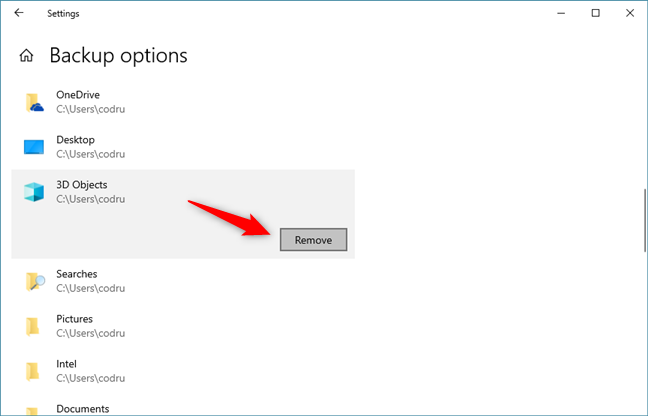
Also, you might not want File History to back up all your user libraries and folders. To remove some of them, scroll down to the list of folders and click or tap the first folder that you want to be skipped from the backup process. Then, click or tap the Remove button near that folder's name. Repeat the process for all the folders that you do not want to be backed up by File History.
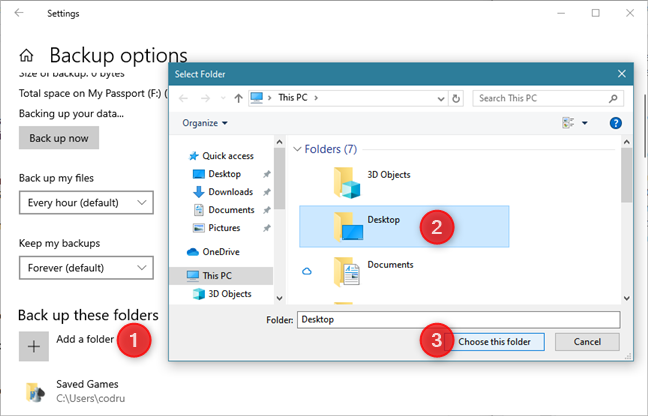
You can also add new folders to the list of backed up data. To do so, click or tap on "+ Add a folder," browse to the folder that you want to include, select it, and then press "Choose this folder."
The selected folder is now included in the list of folders that are backed up by File History. Repeat the process to add all the folders you wish.
How to manually run File History backups
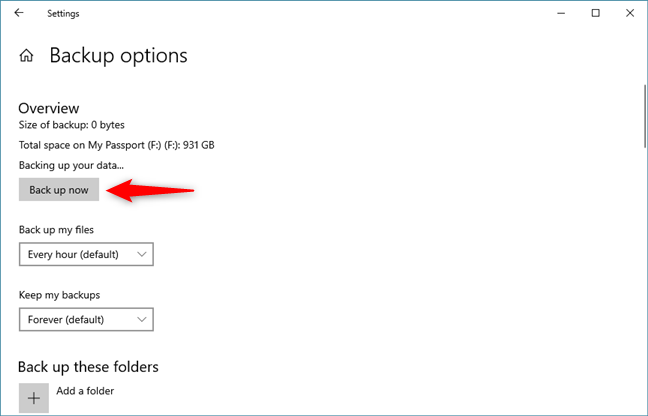
If you want to manually start a File History backup, outside of its regular schedule, you can do so. Go back to the Backup Options window: in the Settings app, open Update & Security, select Backup, and then click or tap on "More options." In the Overview section, press the "Back up now" button, and File History starts a manual run, right now.
How to stop File History in Windows 10
If you want to stop File History from running, do the following: open the Settings app, go to Update & Security, choose Backup, and turn Off the "Automatically back up my files" switch.
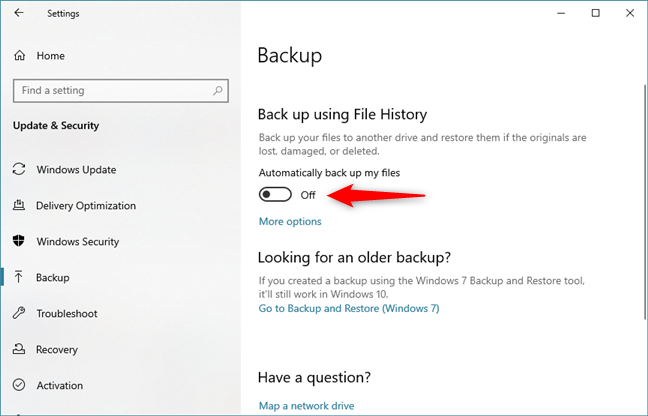
As long as you do not set this switch back On, File History is disabled and does not back up your data.
How to change the storage drive used by File History for backups
At some point, you may need to stop using a storage drive for File History, so that you can change it with another. To do so, go to the Backup Options window: open the Settings app, go to Update & Security, choose Backup, and click or tap on "More options." Scroll down the list of options until you see the "Backup to a different drive" section. Here, press the "Stop using drive" button.

File History now temporarily stops backing your data up. Click or tap on the Back arrow, and plug in the new storage drive that you want to use for File History. Then, click or tap on "+ Add a drive" and select the new drive that you want to use for storing the backup data.
The trouble is that now File History reverts to its default settings. You need to configure it again and run the backup, once more following our instructions from the previous sections of this tutorial.
Do you like the File History from Windows 10?
In Windows 10 File History offers more personalization options than it did in previous Windows operating systems. We use it to back up our data, alongside cloud storage services, for redundancy. This way, we never lose the files and documents that are important to us. Now that you have finished reading this tutorial, try File History and let us know how well it works for you. Are you satisfied with File History? Do you find it easy to use? Does it deliver the results you wanted? Comment below and let's discuss.