




The Oculus Rift S delivers crisp, PC-powered VR with reliable inside-out tracking. This gives you an immersive experience and allows you to enjoy your games to the fullest. In this guide, we will break down how to set up, configure, and optimize the Oculus Rift S PC-powered VR gaming headset for smooth gaming on Windows.
Step 1: Check your PC compatibility
Run the official setup tool to confirm your hardware meets Rift S requirements. You need a compatible GPU, a DisplayPort, and a USB 3.0 port. Clear a safe play area - around 6.5 x 6.5 ft works well for room-scale tracking.

Also, update your GPU drivers and Windows, especially on Windows 11. Fixing drivers first prevents setup failures later.
Step 2: Download and install the Oculus app for PC
Go to the official website to download the Oculus app for Windows installer. Double-click the downloaded installer and follow the onscreen instructions to complete the process.
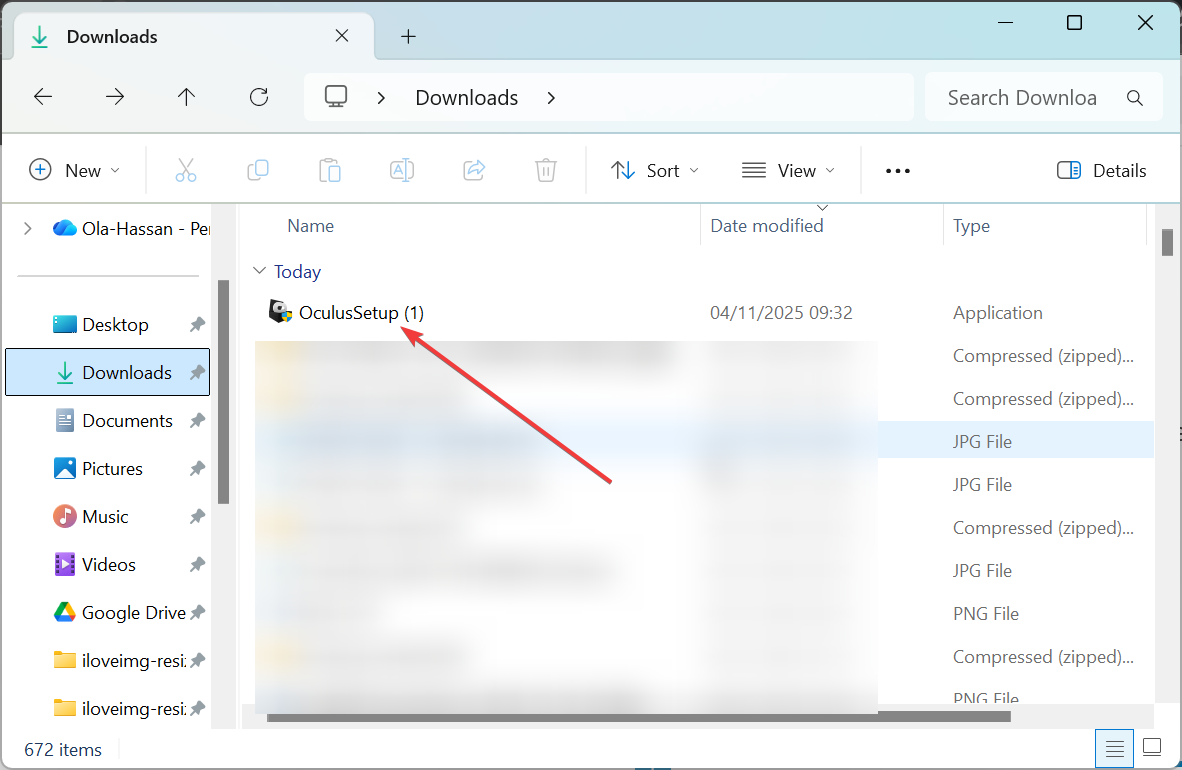
When all is set, sign in with your Meta account and follow the on-screen prompts. The app handles device updates automatically.
Step 3: Connect the Oculus Rift S to your PC
Connect the DisplayPort cable directly to your discrete GPU, not the motherboard. Plug the USB 3.0 cable into a blue USB port for stable power and data. A white LED on the headset confirms detection.
If Windows doesn’t recognize the headset, reseat the cables or switch USB ports. Avoid USB hubs and video adapters, which commonly cause handshake issues.
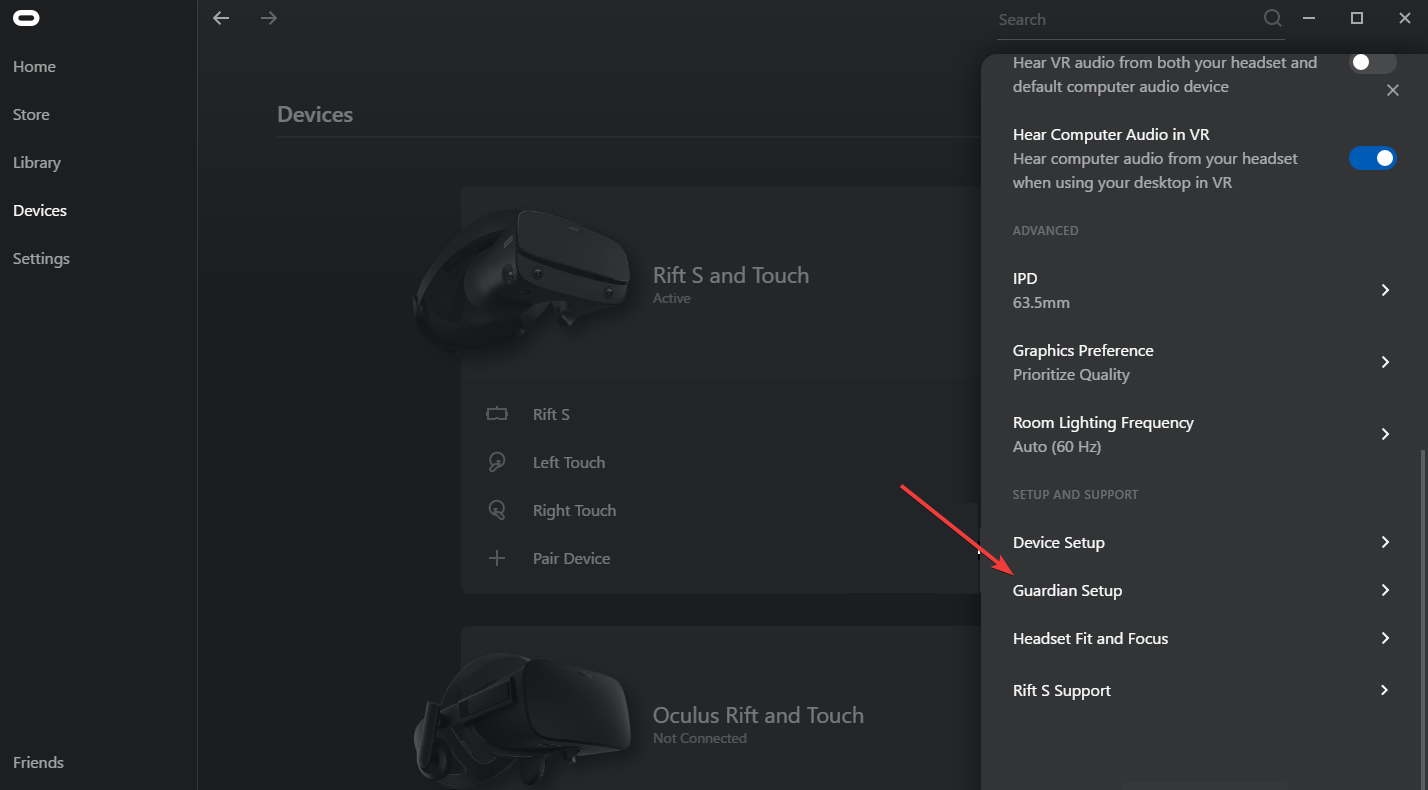
Step 4: Set up the Oculus sensors and Guardian boundary
Use the setup wizard to trace a Guardian boundary with your controller. Keep lighting even and avoid reflective surfaces that confuse inside-out tracking. Confirm there are no obstacles within your drawn space.
Step 5: Pair and calibrate the Touch controllers
Insert AA batteries and power on the Touch controllers. They should pair automatically in the Oculus app. Test inputs and thumbsticks to confirm tracking and responsiveness.

If pairing fails, reinsert the batteries and restart the Oculus app. Keep the controllers close to the headset during the first pairing attempt.
Step 6: Test VR performance and optimize graphics
Launch a lightweight demo to verify smooth performance. If you see stutter, enable ASW or lower in-game settings. Confirm your GPU drivers are current and disable background apps that consume CPU or GPU.
Best VR games to try after setup
- Beat Saber – Great for mastering motion timing and warming up.
- SUPERHOT VR – Teaches precise movement and hand control.
- The Lab – Easy interactions to verify tracking and comfort.
- Half-Life: Alyx – Deep PC-VR experience for powerful rigs.
Troubleshoot common Rift S Setup problems
- Headset not detected: Reseat DisplayPort and USB, try another USB 3.0 port, then restart the Oculus app.
- Tracking lost: Improve room lighting, remove reflective objects, and clean headset cameras.
- Black screen or flicker: Update GPU drivers, plug the DisplayPort into the primary GPU port, and reboot the PC.
- Controller issues: Replace batteries, re-pair in the app, and check for firmware updates.
- Setup loop: Uninstall and reinstall the Oculus software to reset device profiles.
Tips for a better VR gaming experience
- Manage cables with clips or a simple ceiling pulley to prevent tangles.
- Use diffuse, even lighting to help inside-out tracking stay locked.
- Clean lenses with a microfiber cloth to keep the image sharp.
- Enable performance-focused settings if your PC is mid-tier.
FAQs about Oculus Rift S setup
Can I use the Rift S with a laptop? Yes, if the laptop offers a native DisplayPort or USB-C with DisplayPort Alt Mode. Adapters are unreliable and often cause detection failures.
Do I need external sensors? No. Rift S uses inside-out tracking via onboard cameras, so you don’t need external sensors.
Can I use Rift S with SteamVR? Yes. After initial setup, install SteamVR and launch titles normally. The Oculus software bridges compatibility in the background.
Summary of setup steps
- Confirm PC compatibility and update drivers.
- Install and sign in to the Oculus app.
- Connect the DisplayPort to the GPU and the USB 3.0 to the PC.
- Create a Guardian boundary with proper lighting.
- Pair and test the Touch controllers.
- Adjust fit and IPD for clear visuals.
Conclusion
If you know how to set up your Oculus Rift S PC-powered VR gaming headset, you get reliable tracking and steady performance. We have shown how to do that effectively in this guide and more. Just keep drivers current, secure your cables, and fine-tune settings for your hardware. You’ll get a consistent, comfortable PC-VR experience every session.


Discussion (0)
Be the first to comment.