




Adding a watermark in Word isn’t complicated, but doing it properly makes a big difference. A poorly placed watermark can make a document look unprofessional or hard to read.
Whether you’re marking a document as confidential, draft, or branded, Word gives you enough control to get it right without overcomplicating things.
What is a Watermark in Word?
A watermark is a faint text or image that appears behind the main content of your document.
In Microsoft Word, it’s typically used for:
- “Confidential” or “Draft” labels
- Company branding
- Ownership or document status
The key is subtlety. A watermark should be visible but not distracting.
Method 1: Use Built-in Watermarks (Quickest Way)
Word includes preset watermark options.
Go to Design > Watermark
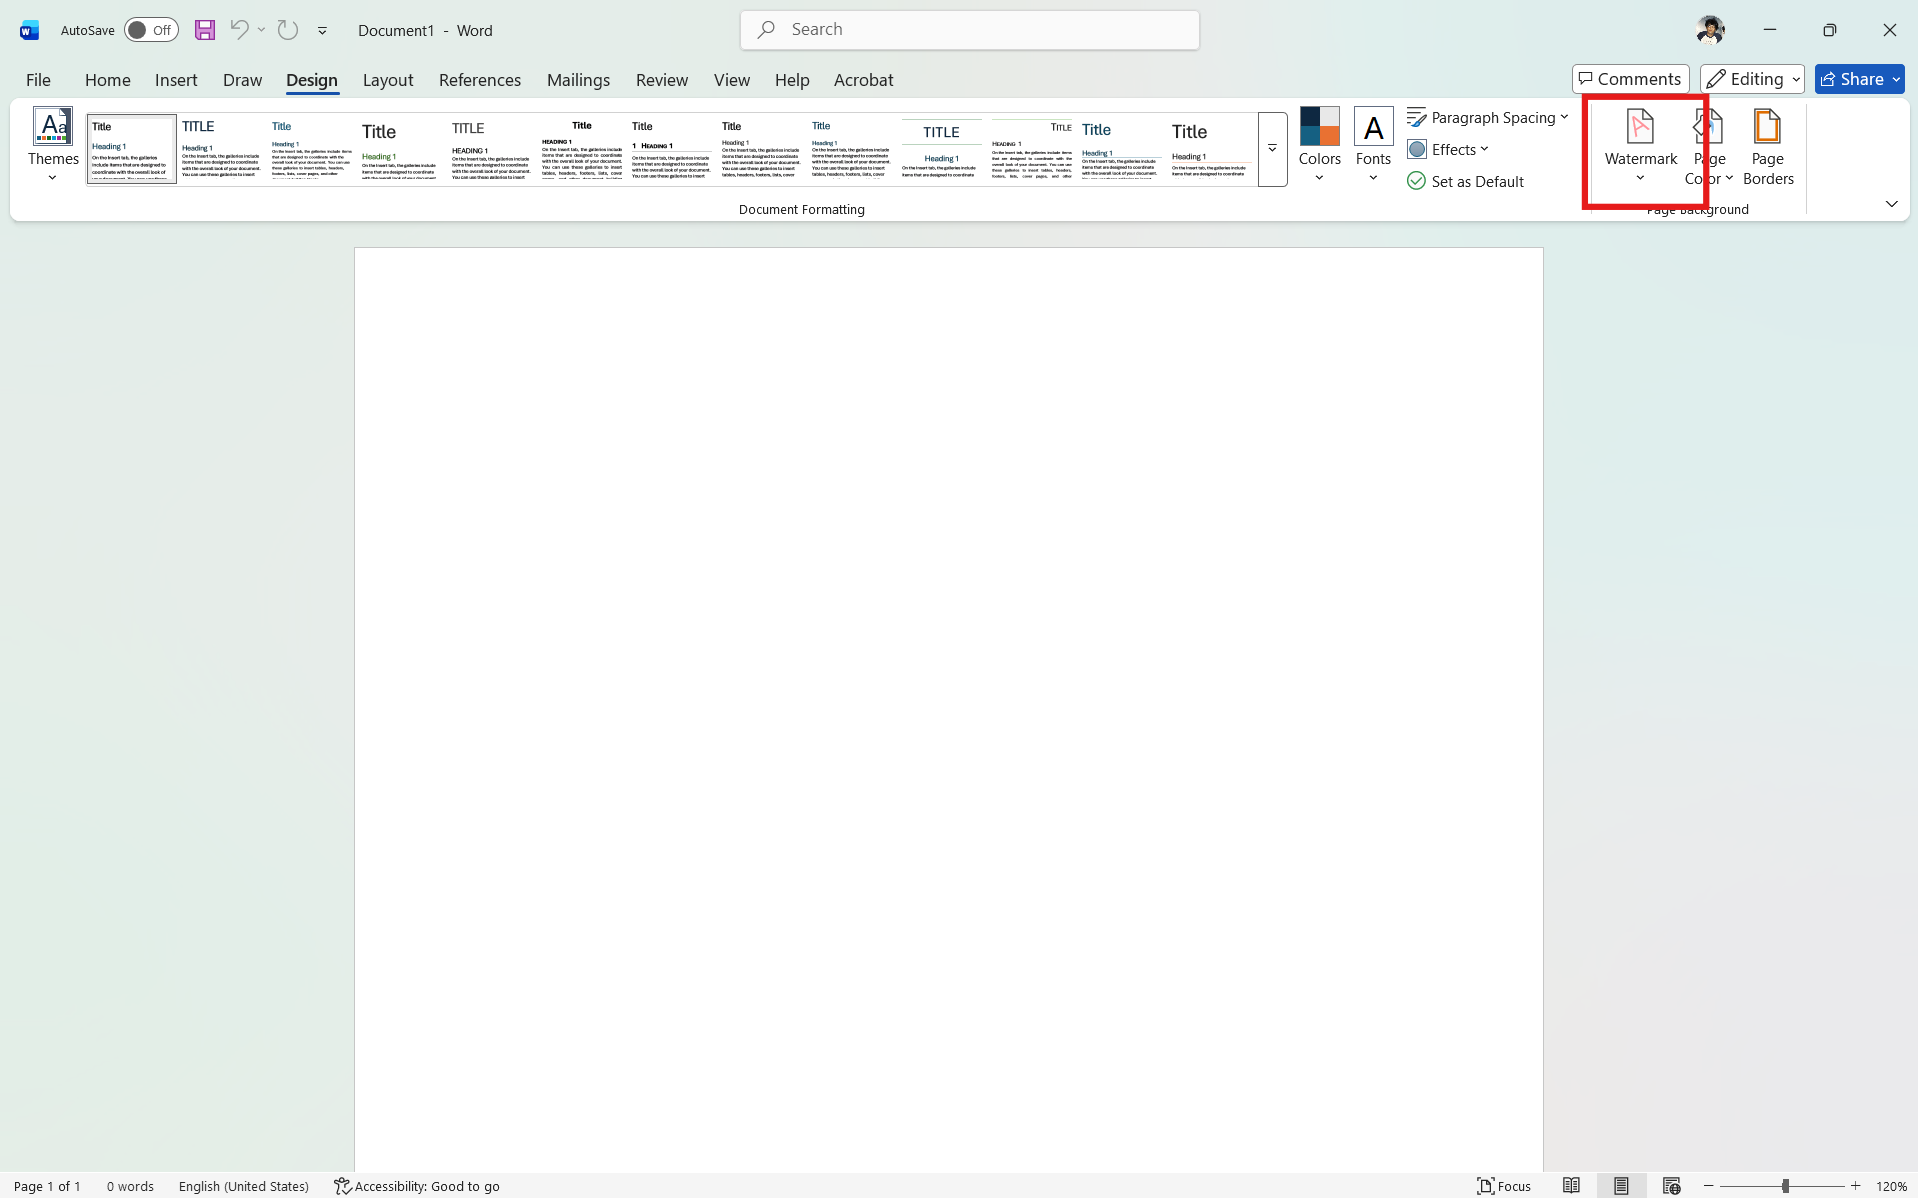
You’ll see options like:
- Confidential
- Draft
- Sample
Click one, and it’s applied instantly.
This is the fastest method, but it’s limited in customization.
Method 2: Create a Custom Text Watermark
If you want more control, create your own.
Go to Design > Watermark > Custom Watermark
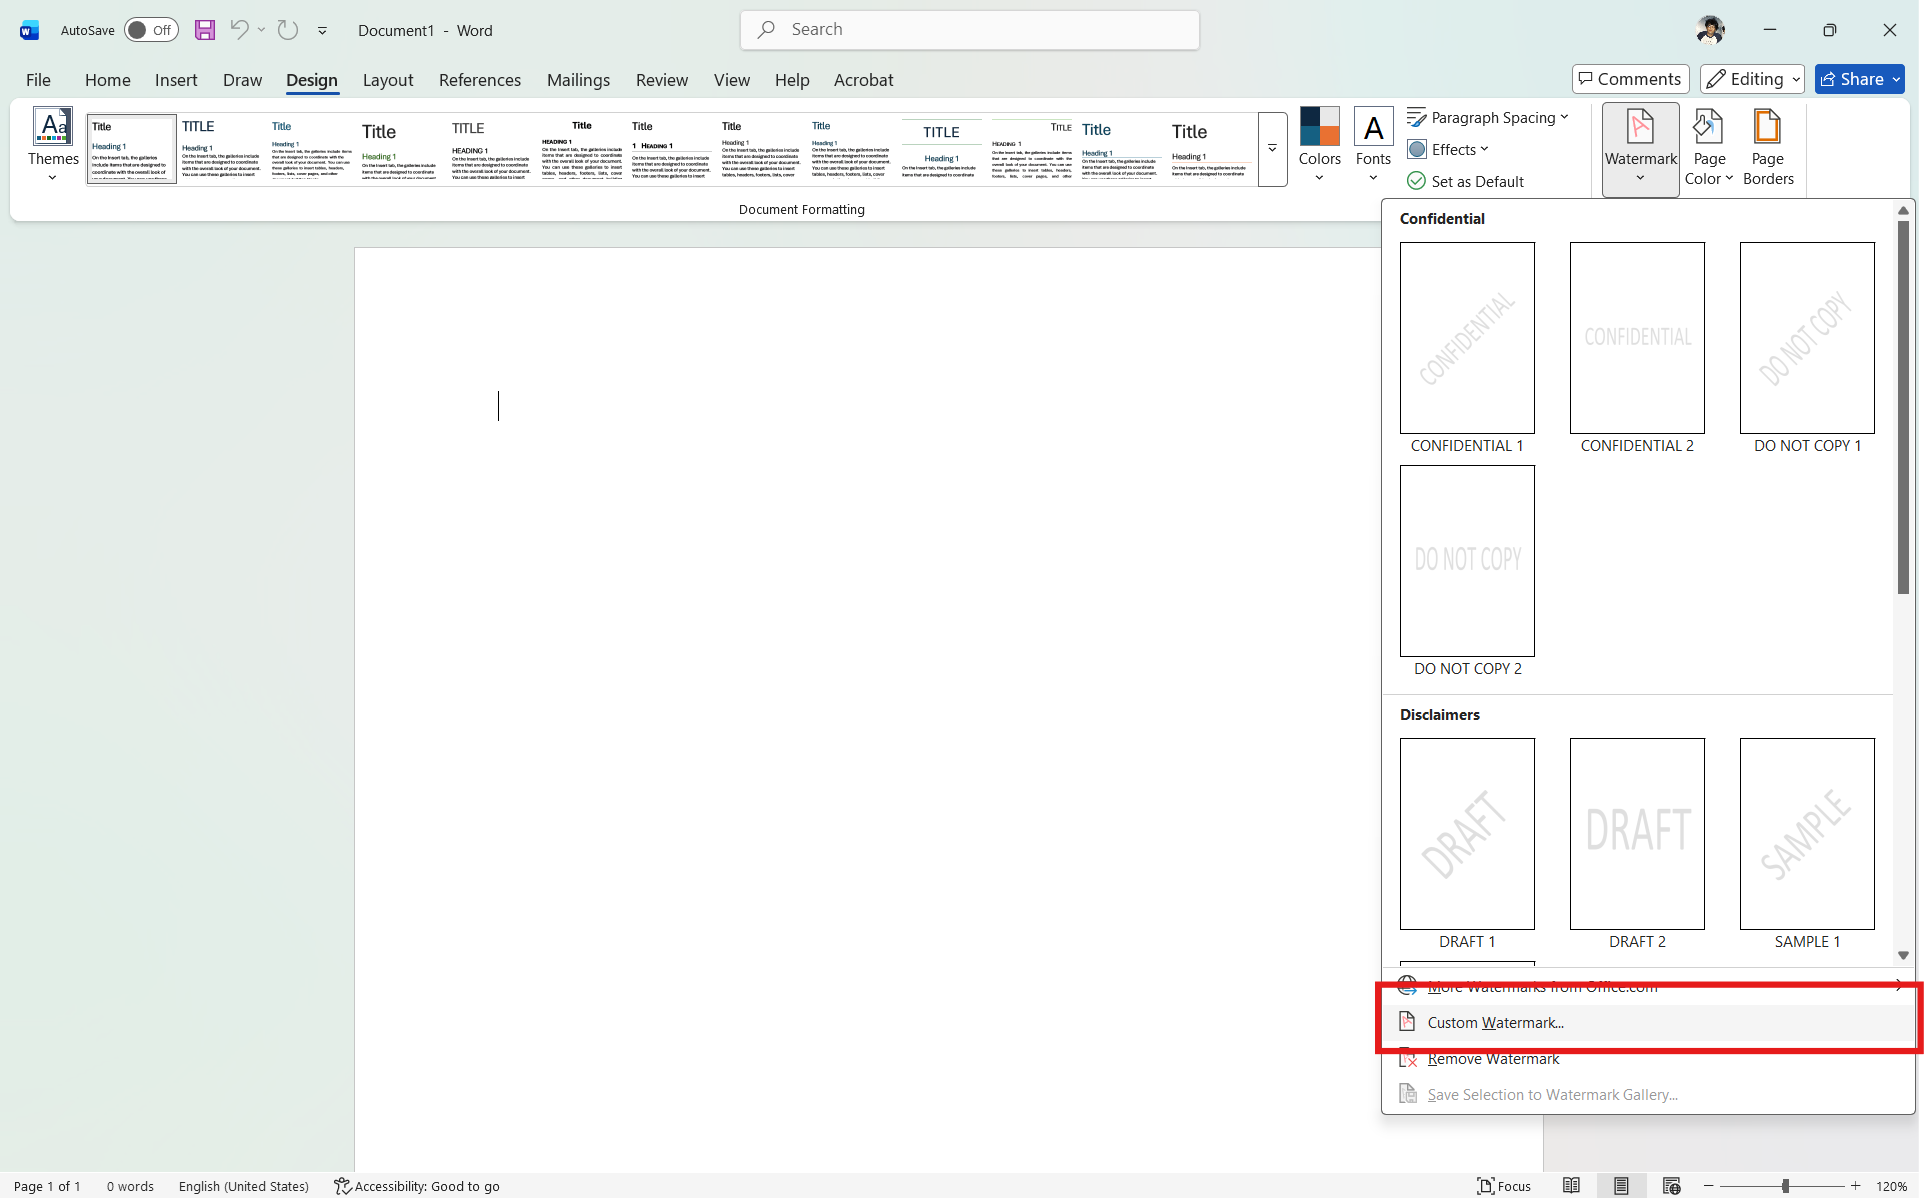
Choose Text watermark, then adjust:
- Text (e.g., “CONFIDENTIAL”)
- Font and size
- Color
- Layout (diagonal or horizontal)
You can also adjust transparency so it doesn’t overpower your content.
This is the best option for most use cases.
Method 3: Add an Image Watermark
For branding or logos, use an image.
In the same Custom Watermark menu, select Picture watermark.
Upload your image and adjust the scale.
Word will automatically fade it slightly, but you can tweak the settings for better visibility.
This works well for company logos or official documents.
How Watermarks Actually Work in Word
Watermarks are applied through the header layer of the document.
That’s why they appear behind content on every page.
Understanding this helps if you need to adjust or remove them later.
You’re not editing the main document. You’re modifying the header.
Real-World Usage: What Works Best
For most documents, simple text watermarks are the most effective.
They’re clear, lightweight, and don’t interfere with readability.
Image watermarks are useful for branding, but they need to be subtle. Overly visible logos can make documents harder to read.
If the watermark draws too much attention, it defeats its purpose.
Common Mistakes to Avoid
One common mistake is using a watermark that’s too dark or too large.
This makes the document harder to read and looks unprofessional.
Another issue is poor placement. Diagonal layouts usually work better for visibility without blocking text.
Also, avoid using multiple watermarks in the same document. It creates clutter.
How to Remove or Edit a Watermark
To remove a watermark:
Go to Design > Watermark > Remove Watermark
To edit it, reopen Custom Watermark and adjust settings.
Since it’s part of the header, you can also double-click the header area to access and modify it directly.
Limitations You Should Know
Watermarks apply to the entire document by default.
If you need different watermarks on different pages, you’ll need to use section breaks and manage headers separately.
Also, some export formats may affect how watermarks appear, especially when converting to PDF.
Final Thoughts
Adding a watermark in Word is simple, but doing it well requires a bit of attention to detail.
Keep it subtle, readable, and relevant to the document’s purpose.
Word gives you enough flexibility to get it right. You just need to avoid overdoing it.
FAQs
How do I add a watermark in Word quickly?
Use Design > Watermark and select a preset option.
Can I create a custom watermark?
Yes, using the Custom Watermark option.
Can I use an image as a watermark?
Yes, you can insert a picture watermark from the same menu.
Why does the watermark appear on every page?
Because it’s applied through the document header.
Can I remove a watermark easily?
Yes, using the Remove Watermark option in the Design tab.


Discussion (0)
Be the first to comment.