

In Windows, it’s easy to pin your apps and programs to the taskbar. However, it’s not as simple to pin folders and add shortcuts on the taskbar for the folders you use the most. While there is a way to pin folders to the taskbar, I suspect many users will have lots of trouble figuring it out. If you don’t want to search for an answer on your own, here are the steps you need to pin any folder to the taskbar in Windows 11 or Windows 10:
NOTE: The steps in this tutorial cover both Windows 11 and Windows 10. To showcase all the steps required to pin a folder to the taskbar, and because most of our readers are asking how to pin OneDrive to the taskbar in Windows, I’ll use OneDrive as an example.
 Create a new shortcut
The Create Shortcut wizard opens. Click or tap the Browse button and navigate to the folder you want to pin to the taskbar. After you select it, press OK. As you can see in the next screenshot, I chose to pin OneDrive to my taskbar.
Create a new shortcut
The Create Shortcut wizard opens. Click or tap the Browse button and navigate to the folder you want to pin to the taskbar. After you select it, press OK. As you can see in the next screenshot, I chose to pin OneDrive to my taskbar.
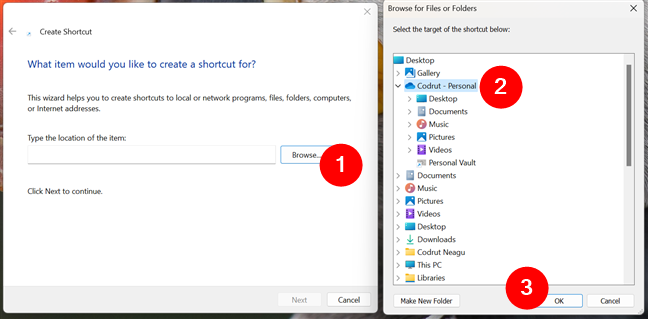
 Choose the folder that you want pinned to the taskbar
TIP: If you need more help working with the Create Shortcut wizard, read How to create shortcuts for files, folders, apps, and web pages in Windows.
The wizard places the whole path to the selected folder in the location field. Don’t click or tap Next! Before that, you must type the word explorer, followed by a space, just before the folder’s path. Don’t type “C:\explorer” or something else, and don’t forget the space; otherwise, the procedure won’t work. Look at the next screenshot and follow the same approach. Only then, press the Next button.
Choose the folder that you want pinned to the taskbar
TIP: If you need more help working with the Create Shortcut wizard, read How to create shortcuts for files, folders, apps, and web pages in Windows.
The wizard places the whole path to the selected folder in the location field. Don’t click or tap Next! Before that, you must type the word explorer, followed by a space, just before the folder’s path. Don’t type “C:\explorer” or something else, and don’t forget the space; otherwise, the procedure won’t work. Look at the next screenshot and follow the same approach. Only then, press the Next button.
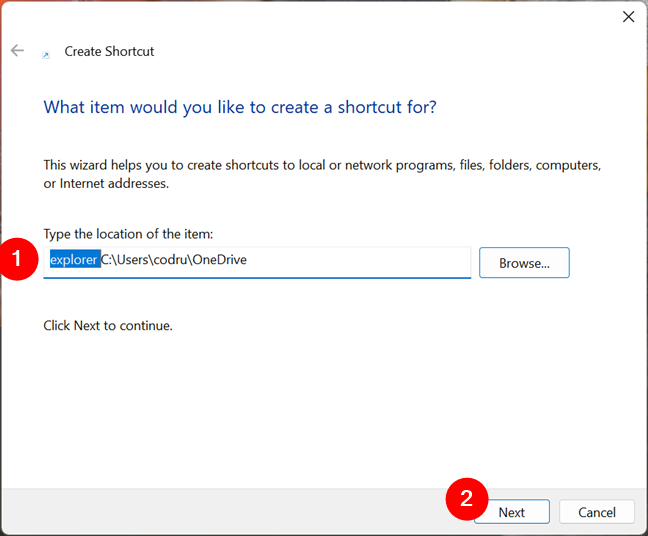
 Type explorer and add a space in front of the folder
You’re asked to enter the name of this shortcut. I recommend changing its default name to a personalized one, indicating what folder is opened when you use the shortcut. After you type the name, press Finish.
Type explorer and add a space in front of the folder
You’re asked to enter the name of this shortcut. I recommend changing its default name to a personalized one, indicating what folder is opened when you use the shortcut. After you type the name, press Finish.
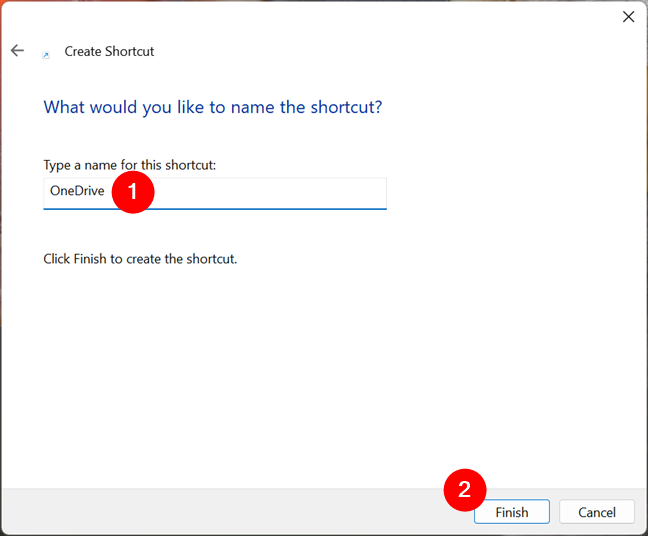 Choose a name for the folder's shortcut
The shortcut is now created on your desktop, but its icon is the same as that of File Explorer.
Choose a name for the folder's shortcut
The shortcut is now created on your desktop, but its icon is the same as that of File Explorer.
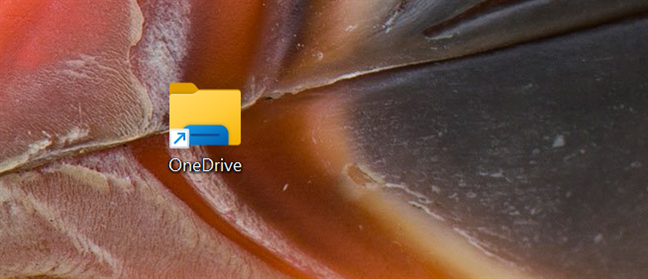
 The folder shortcut is created
To verify that the shortcut works and takes you to the folder you intend to pin to the taskbar, double-click or double-tap it.
The folder shortcut is created
To verify that the shortcut works and takes you to the folder you intend to pin to the taskbar, double-click or double-tap it.
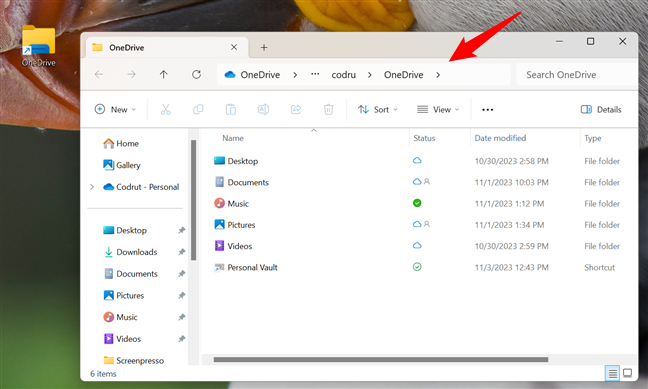
 Checking the shortcut to the folder
Next, let’s…
Checking the shortcut to the folder
Next, let’s…
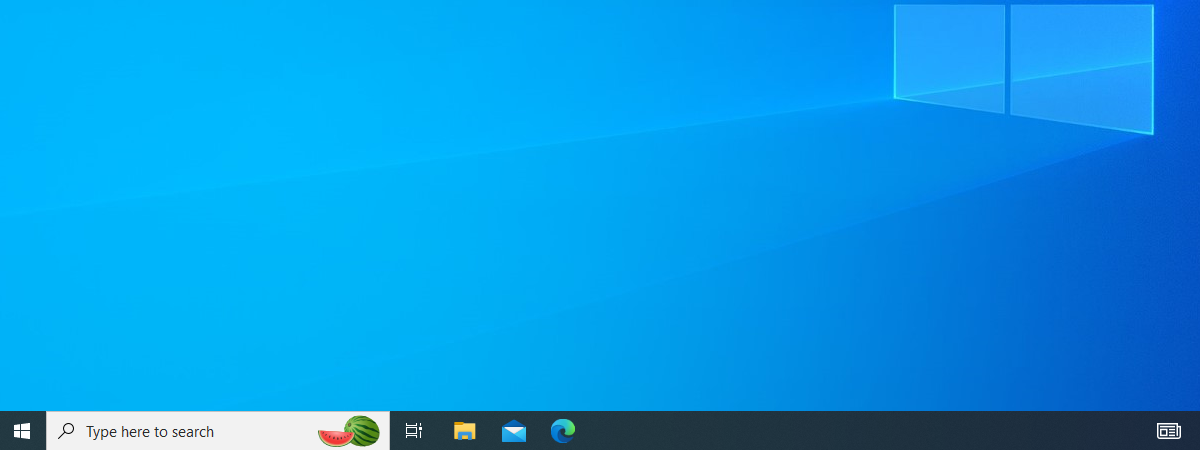
 What pinned folders look like by default
To avoid confusion, you should personalize the icon of the folder shortcut to something unique that makes it easy to identify. See below how I replaced the icon of my OneDrive folder on the taskbar.
What pinned folders look like by default
To avoid confusion, you should personalize the icon of the folder shortcut to something unique that makes it easy to identify. See below how I replaced the icon of my OneDrive folder on the taskbar.
 What a pinned folder with a custom icon looks like
To change the shortcut’s icon, you can follow the steps in this guide: How to change a shortcut icon in Windows 11 and Windows 10. However, you might not have the time to spend reading a whole other tutorial, so I’ll give you the short version here: right-click on the folder’s shortcut (or press and hold if you have a touchscreen) and choose Properties.
What a pinned folder with a custom icon looks like
To change the shortcut’s icon, you can follow the steps in this guide: How to change a shortcut icon in Windows 11 and Windows 10. However, you might not have the time to spend reading a whole other tutorial, so I’ll give you the short version here: right-click on the folder’s shortcut (or press and hold if you have a touchscreen) and choose Properties.
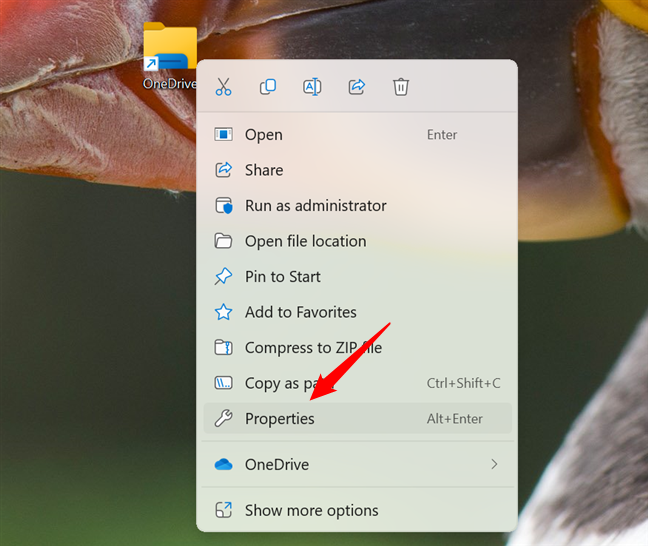
 Open the Properties of the shortcut
In the shortcut’s properties, go to the Shortcut tab and press the Change Icon… button. Select the file containing the icon you want to use, choose the icon, and click/tap OK in the Change Icon window and then in the shortcut’s properties.
Open the Properties of the shortcut
In the shortcut’s properties, go to the Shortcut tab and press the Change Icon… button. Select the file containing the icon you want to use, choose the icon, and click/tap OK in the Change Icon window and then in the shortcut’s properties.
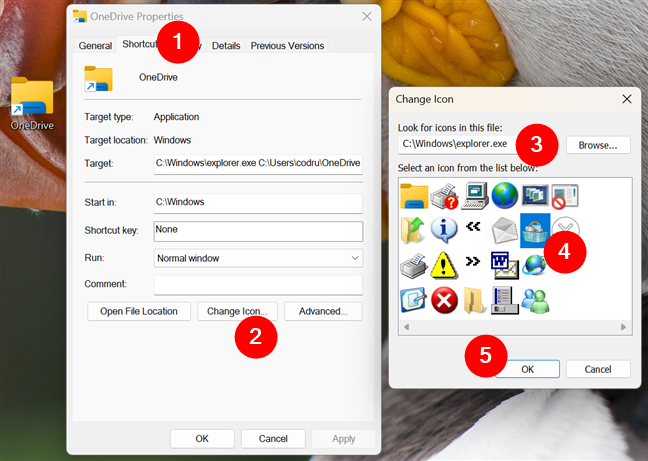
 Changing the icon of the folder's shortcut
The icon is now changed for your shortcut to the folder you want to pin to the taskbar.
Changing the icon of the folder's shortcut
The icon is now changed for your shortcut to the folder you want to pin to the taskbar.
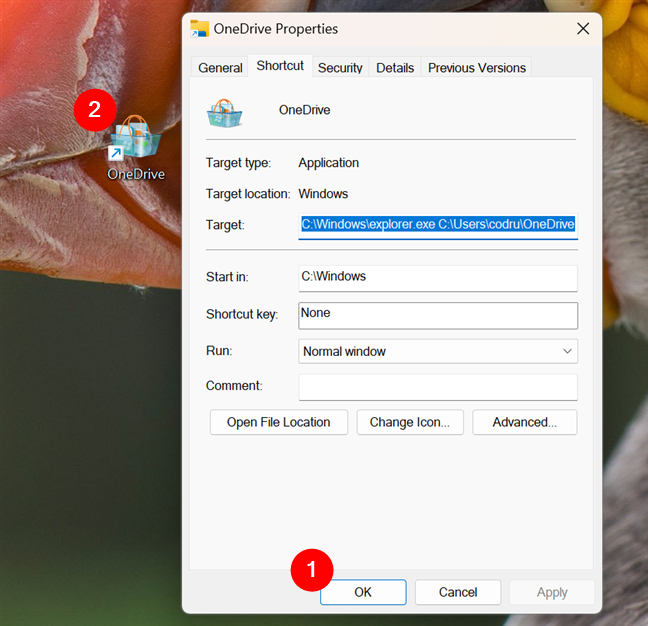
 Saving the new icon for the shortcut
TIP: If you’ve created a shortcut for OneDrive, like I did, you may want to use one of the default OneDrive icons for it. In that case, you can find it in this location: C:\Program Files\Microsoft OneDrive\OneDrive.exe. Furthermore, if you want to get some other free icons, you’ll find some ideas in these two articles we published previously: Windows icons locations. Where are the default icons found? and 8 websites with free desktop icons for Windows.
Saving the new icon for the shortcut
TIP: If you’ve created a shortcut for OneDrive, like I did, you may want to use one of the default OneDrive icons for it. In that case, you can find it in this location: C:\Program Files\Microsoft OneDrive\OneDrive.exe. Furthermore, if you want to get some other free icons, you’ll find some ideas in these two articles we published previously: Windows icons locations. Where are the default icons found? and 8 websites with free desktop icons for Windows.
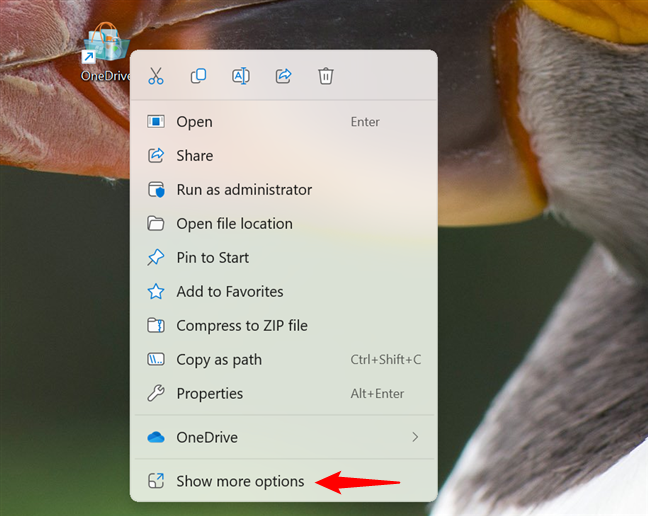
 Right-click the shortcut and choose Show more options
Next, click or tap the “Pin to taskbar” option to pin the folder to the taskbar of your Windows 11 computer.
Right-click the shortcut and choose Show more options
Next, click or tap the “Pin to taskbar” option to pin the folder to the taskbar of your Windows 11 computer.
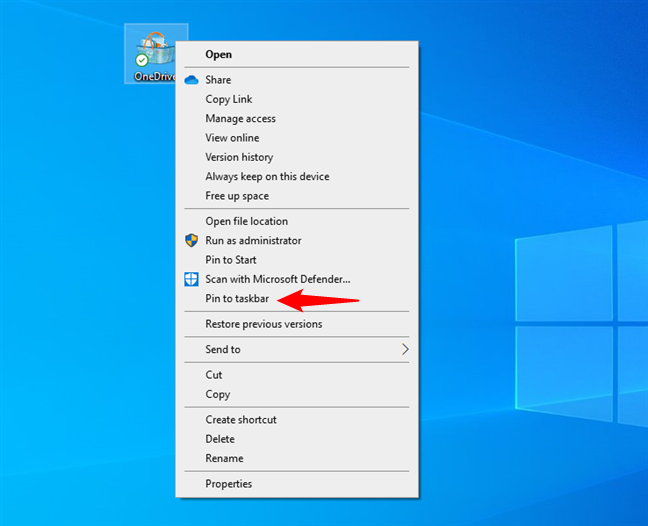
 Select Pin to taskbar in the menu
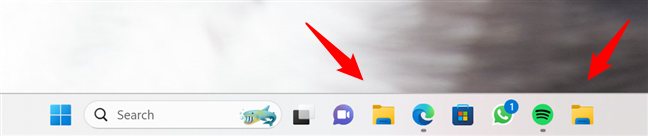
The shortcut is now pinned to the taskbar, and so is the folder it points to.
Select Pin to taskbar in the menu
The shortcut is now pinned to the taskbar, and so is the folder it points to.
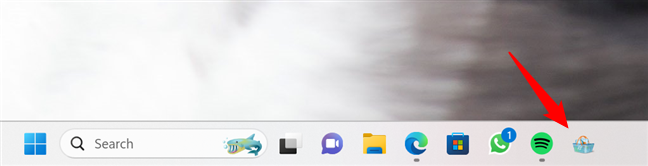
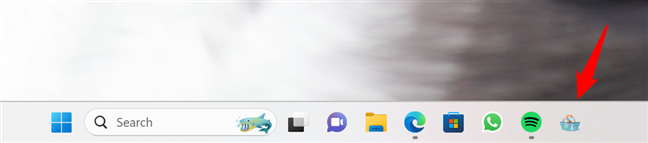
 The folder is pinned to the taskbar of Windows 11
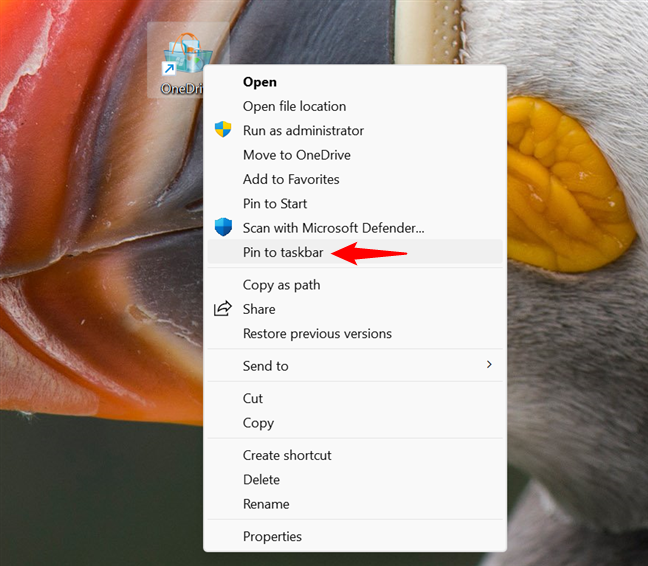
 Right-click the folder's shortcut and choose Pin to taskbar
Just like I pinned my OneDrive to my taskbar, your folder should now be pinned to your taskbar.
Right-click the folder's shortcut and choose Pin to taskbar
Just like I pinned my OneDrive to my taskbar, your folder should now be pinned to your taskbar.

 The folder is pinned to the taskbar of Windows 10
TIP: Did you know that there are at least nine methods to pin a shortcut to Windows 10’s taskbar?
The folder is pinned to the taskbar of Windows 10
TIP: Did you know that there are at least nine methods to pin a shortcut to Windows 10’s taskbar?
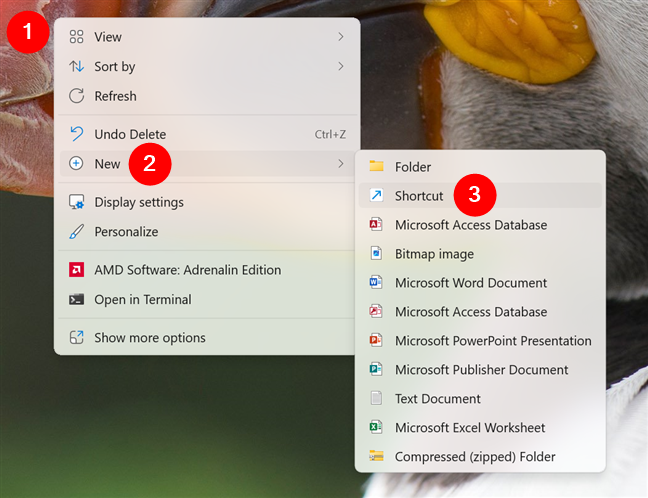
Step 1. Create a desktop shortcut for the folder
First, decide on the folder you want to pin to the taskbar. You need to create a desktop shortcut that points to it. Therefore, go to the desktop and right-click or press and hold (if you have a touchscreen) somewhere in an empty space. In the context menu that shows up, choose New and then Shortcut.Step 2. Change the icon of the shortcut
The next logical step is to pin this shortcut from the desktop to the taskbar. If you do this right away, you end up having a File Explorer shortcut on the taskbar and an identical-looking shortcut next to it. You’ll likely have trouble telling which one is File Explorer and which one’s the folder you pinned.Step 3. Pin the folder’s shortcut to the taskbar
Now, it’s time to pin the shortcut you created to the Windows taskbar. The steps are similar but differ slightly in Windows 11 compared to Windows 10. Therefore, depending on the operating system you’re using, follow the instructions in one of the next two subchapters:Step 3.1. How to pin a folder to the taskbar in Windows 11
Right-click on the shortcut (or press and hold if you have a touchscreen), and choose Show more options.Step 3.2. How to pin a folder to the taskbar in Windows 10
Right-click on the shortcut (or press and hold if you have a touchscreen), and then click or tap the “Pin to taskbar” option to pin the folder to the taskbar of your Windows 10 PC.

Discussion (99)
How to pin a folder to the taskbar on Windows 11 does not work for me.
My desktop computer is running Windows 11 Version 23H2 (OS Build 22631.2715). When I right click on a folder and click show more options, it does not show the “pin to taskbar ” option in that window. I attempted to use snipping tool to capture the picture and paste it in this comment for your information but this comment square does not allow me to do so. Kindly advise. Thank you.
Can you please carefully read our tutorial? Our instructions are about how to get around the limitation you described. Doing things as you tried, doesn’t work.
Does not work (Win 7) I add the word explorer and hit next. The shortcut is changed to
C:\explorer”C:\Users\Owner —–
In other words the program automatically adds a C:\ before the word explorer. No way to remove it.
Any suggestions
What if you write explorer.exe?
H!, Thank you this saved my day:
YS: B
Thank you so much. This worked to add programs / executable / .bat files that don’t normally work to add to the taskbar.
Many thanks. This worked perfectly. May I please ask, why does adding “explorer” does the magic?
Aurelio
This does not work. If you say make a shortcut for the Download folder, drag it to the taskbar and pin it, when you close then reopen by clicking the folder icon on the taskbar it opens the Quck Access folder.
Works like a charm for me. I love this trick. I purchased Revo a couple of years ago and couldn’t pin it to the taskbar. I chatted with a Revo tech as to why they coded it so it wouldn’t pin. He said to send it to the desktop and change the name there. We created a couple of names for the icon on the desktop. I removed “uninstall” and it didn’t work. Then he said to remove the “Pro” and leave Revo. I did and it worked. The name change has never worked for me again but, this does and I have become a wiz at this. I just need to learn how to get the icons I find elsewhere to work. I haven’t learned how to do this yet. Do you have a tutorial on this also? Thanks for this tutorial. You did an awesome job of explaining each step so clearly.
Very simple but useful , very good
Thank-you! This was exactly what I was looking for and so helpful!!
Your method is the best I have found till now. I keep coming back to it when I forget how it’s done. Thanks so much.
when i try to make a shortcut to be pinned to taskbar; 1- The word “explorer” is changed to windowsexplorer.
2- the shortcut does Not work in either on desktop or in the task bar.
it used to work before but no matter what i do,(resetting windows to factory settings- downloading registry batch files, or anything else suggested here) the result is the same.
Thank you for your help beforehand
What Windows version are you using? How do you make the shortcut?
Thanks for this. It works perfect in Windows 10. I had been using the toolbars quicklaunch (for program shortcuts) and a Games folder (for game shortcuts) I created. Problem is Windows 10 has this bad habit of when opening either Quicklaunch or the Games Toolbar, it took like a minute to open every time I started Windows up the next day. It was a royal pain in my neck and made those toolbars rather worthless (having to wait for all the shortcuts to load before I could do anything). I had searched and searched for a fix for this and never found one. I was resigned to the fact that Microsoft just had this behavior with toolbars and it’s just the way it was. Thanks Bill. This method fixed that. I got rid of those two toolbars and created two folders, one for program shortcuts and one for game shortcuts and then copied all the shortcuts over to them. I then did this method and then pinned this both to taskbar separate of File Explorer . Now I have instant access to all the same shortcuts as before but now don’t have to wait for them to load before use anymore. Took me ages to finally get the solution to this situation that was driving me nuts. Now I’m good.
There is a rather serious problem with your approach.
If, for example, there is a sub-folder in “Digital System”, right-clicking on it (to obtain the context menu), sends the Windows Explorer under Win 7 in an infinite loop. (the famous donut).
It worked great — just as you described. Thanks so much — I’ve been fighting this for several years & finally looked your article up.
I’ve been testing many things and oly this method worked for me. Thanks a lot
As others have mentioned I also do not have the “Pin to Taskbar” available as an option when right clicking the shortcut on the desktop. I have “Pin to Start’ but no “Pin to Taskbar” or “”quick Launch’ either.
Thank you for your assistance, and your process works, but only when the option to ‘Pin to Task Bar’ is listed. Until today, I thought this would always be an included option for desktop shortcuts, but it’s not. For some reason, it’s been replaced by “Pin to Quick Access” (at least for some shortcuts), and I don’t even know where that would be, but it is not on the Task Bar! We need a way to attach a shortcut to the Task Bar, for those occasions when you double click on the Shortcut and that option is not provided.
This is a must have tip – really helps for fast drill down to any folder location without the hassle of a Toolbar. MS should just allow this option for any folder.
Thanks a lot bro, it really helped me! I wasnt able to figure out how can I pin a folder to my taskbar. Thanks for help!
Happy to help. Don’t hesitate to subscribe to our newsletter.
THANK YOU! I can’t believe they would develop a version of windows, windows 10, force you to use it, and then make it ridiculously difficult to do something simple like find saved files!
thx is worked
This was EXCELLENT help. Thanks!
Just drag and drop the folder to task bar !! It’s very simple 🙂
The easy way to do this is to create a shortcut on the desktop for the folder you want to pin and drag it to the explorer folder in the taskbar. When you drag you will get the message “Pin to taskbar” as you drop it. Then delete the shortcut. The folder will be pinned.
Awesome, thanks!
Great. Thanks.
Awesome thx mate
Worked like a charm. Very simple and easily described. Thank you for your assistance with this!
Bless you, you have brought an end to a very large pain in my arse
THAAAAAAAAAAAAAAAAAAAAAAAAAAANK YOUUUUUUUUU! Saved me so much time trying to figure out how to get something like this to work!
RESOLVED! Found the answer to my OWN question! You can set your JUMP list to 60… but all may not be displayed. Here’s the answer and instructions and IT WORKED!!! https://malektips.com/windows-7-jump-list-size-increase-decrease.html#.VUbBa_lVgoI
HELP~ Ok, I really, really use the lower taskbar JUMP features a LOT, but I cannot find ANYWHERE what the LIMIT of items are for each icon. I am using 12 on the internet chrome icon; and I have 15 folders in the Explorer icon, but I want to add one more folder, but it won’t let me. WHERE are these “limits” explained????? Your viewers should also take note: there’s been 2 occasions for unknown reason where my JUMP items have disappeared… so I’ve learned to not only LIST them on a Notepad, but I also keep a copy of the shortcuts in a folder-for quick rejuvenation. Thanks -using HP PC Windows 7 Home Premium version
Great tutorial! Seems like a serious flaw that we’re not able just to drag a folder to the task bar.
It’s more like bad design. They never thought about implementing this feature.
Worked like a charm!!! I really needed this. You are a good technical writer.
It doesn’t really do me any good to pin folders to the taskbar if I have to leave them on the desktop anyway.
i can’t get past the “click or tap Browse” part of your instructions. Where do i find the Browse command?
Thanks!!!
Thank You!!!
Thanks, worked, solved my problem
I’m glad it worked. Thanks for letting us know.
Thank you! Very clear and easy to understand instructions with helpful details and great images. Love your work!
Doesn’t work for me: It gets pinned and everything, but when I click on the icon in the task bar it takes me to C: and not C:Userschris
See my earlier reply to myself. (You encountered the same problem I did, and I would have expected this tutorial to have been corrected.)
What if you write
explorer.exe "C:Userschris"instead ofexplorer "C:Userschris".Also, always use the ” for the path to the folder you want to pin.
This works fine if you only pin one icon but I found that if I try to pin two, opening the latter-added icon will cause it to add a currently-opened listing under BOTH of the icons.
This sort of defeats the purpose of “one click access for most common folders” because you now need to click twice. Since there are multiple folders opened under the same icon, it requires a first click to display the “sub-options” and then click again to specify which one you want.
Very annoying as the list eventually builds up, adding all subsequently-opened folders to the list under your shortcut icons (even if they’re completely unrelated) & makes folder switching very time consuming when you add up a dozen instances or “hmmm, let me see which one it was….nope, nope, nope, nope… nope… oh, this one!” per hour over the course of a work day, every day for the entire year.
This should be basic functionality, I can’t believe folder navigation still has such bugs this late into windows.
As an aside, this captcha system you guys have is complete trash. “Captcha reuse attack detected” ok.jpg
Thank you. I needed to know how to pin a file to the taskbar in Windows 7. It will make life much easier for me now. Everything is very clearly explained.
I’m glad you found this helpful!
Does not work for me. In Windows 8.1, after creating the shortcut on the desktop, there is no option in my context menu for the shortcut to pin it to the taskbar. Pin to Start, yes. If I have no other folder on the taskbar and I open the folder, then I can pin it using the icon which now appears on the taskbar. However, when I close the folder, the pinned icon simply becomes the generic This PC ‘folder’. Any way around this? I want to pin a _particular_ folder, and I don’t want it to merge.
I found the (non-obvious) solution. Here:
https://www.surfaceforums.net/forum/microsoft-surface-faq-guides/3105-how-add-folders-windows-8-desktop-taskbar.html
The file path “%windir%system32imageres.dll” appears not to exist for windows 8.1 when trying to find additional icons.
So far I haven’t been able to find where the icon file location is in Win8.1. Sorry!
Great help! Thank you very much.
I would give away my dog, my husband, and possibly my house if you could get your trick to work for me, but when I follow your directions exactly (the ones with the visual pics at the beginning), I do not have an option to Pin to the Task Bar. 🙁 Your steps are easy to follow…I wonder why it won’t work for me? I really, really wanted this to work. Donna in Texas
awesome! managed to pin music folder to my taskbar 18 months after purchasing my laptop, haha. thanks for the clear instructions.
This was helpful.
Thanks
Can anyone tell me how to pin folders to the taskbar folder in Windows 2010? I used to have no trouble with Windows 2007. Now I can’t figure it out! Please reply to this post as I entered the wrong email in the earlier post – thank you!
Does anyone know if you can pin folders to the folder shortcut in Windows 2010? I’ve having trouble doing that. Let me know how if you do please!
…Or you can just drag the folder immediately to the taskbar and it will be pinned under the usual forlder icon on the bottom left which you access by right-clicking it.
Seriously? On a Mac you just drag it to the task bar.
Me too! 🙂
I love you.
Sincerely,
My clicking finger.
Thanks! I have been trying to do this for ages!!! Worked perfectly!
If you place the added folder to the left of the explorer folder on the taskbar it will be just fine not opening in explorer.
Goodluck
MUCH easier method and with more flexibility, pin ‘Windows Explorer’ to the task bar. Yes, when opened, this will open your Libraries, but keep reading. Find the folder you want easy access to, and drag it onto the new Windows Explorer icon on the task bar. When you right click it on the task bar, a list of all the folders you have pinned to it will appear, as well as frequently used ones.
You’ll need two clicks rather than just one, but it’s much easier to set up and you can attach many folders to it instead of just one.
Open a window explorer; go to where the folder you want to pin is; right click and drag the folder to Windows 7 Taskbar; release the right mouse button when you see “Pin to windows explorer” tool tip message. That’s it.
I have done it that way too!
It was pain in the *** because i have tried creating a shortcut of “Favorites” (in the sidebar/i find this folder so useful!) using a shortcut + shell command and i have not found the shell command for this Favorites… Grrr
if anyone has it?
Turns out there’s a much easier way:
Grab the folder you want to pin. Drag it onto the windows explorer icon on the taskbar. The cursor icon displays a “pin to windows explorer”.
Done.
(I only found this with inspiration from your pictures above).
Why this behaves differently from everything else, nobody knows..
Thanks man, I researched this for about an hour or so and everybody had me trying to edit registry keys and a bunch of other non-sense. Hands down this was the best tutorial that I have seen on this subject. Thanks for taking the time to put it together!!
I followed your steps, but my problem i face is that the folder I want on the taskbar is from a partitioned drive. Explorer is from C:/ but the folder I’m making a shortcut of is on D:/…Will I not be able to make a direct shortcut to the folder because the source didn’t come from c:/??
Here is a screen shot of the problem…
Step 1
https://img80.imageshack.us/f/94781734.jpg/
Step 2
https://img807.imageshack.us/f/98347234.jpg/
Error
https://img718.imageshack.us/f/43679457.jpg/
What if you add a space between explorer and the path of the folder?
Something like explorer “D:Rasmus….” I think that’s the cause of the problem.
Thanks that worked!
A New Toolbar is faster:
I find it faster to create and use by having a new taskbar with a shortcut on my taskbar.
Create a folder with shortcuts to favourite programs, files, other folders etc.
On the taskbar, right-click> Toolbars>New Toolbar>browse to the folder and wolla! (its done!)
Next to the name of the new toolbar (on the taskbar), appears /”>>” which upon clicking on it, shows all the content of the folder in a compact list without opening the folder.
Its much faster to setup and use than the procedure here (although I would still prefer to improve this by showing larger icons and by having more to click on than only the >> which is rarther small, so I am still looking…)
Magic – like this
While this works, do note that this will create extra Explorer.exe procedures since executes it everytime it is used.
Sorry, if this question has already been asked. After you pin a folder how do you make it show contents like in the old XP Classic style Start Menu – i.e. click on the folder and it branches out to shortcuts inside? Does my question make sense?
Thank you. 🙂
WORKEDDDDDDDDDDDDDDDDDDDDDDDDDDDDDDDDDD
THANK YOU
THIS WAS A HUGE PAIN FOR ME
ok i have a lil homemade fix for this, i usually like to keep my drives and most used folders in quick launch,…so i just made my own quick launch since windows 7 doesnt have a decent one…
i created a folder on desktop put shortcuts for all my folders that i need to be seen on taskbar as quicklaunch…
then i made a shortcut on desktop n targeted the folder i created, now i have the shortcut on the desktop containing all the shortcuts i need on my quicklaunch..
now i just rightclick on taskbar>toolbars>new toolbar….now select that shortcut folder on desktop n u have it in ur taskbar ..
to simplify it as windows vista/xp quick launch, simply right click on the new toolbar and uncheck show title and show text…move it anywhere,,..u own windows 7!
Hi i have managed to work this out the problem was i was not leaving a space after thw word explorer and the letter C.
it now work brilliant thank you
Actually, the correct version is: explorer “C:program data….”
You don’t need any C:explorer at the beginning. It is an incorrect path.
Yes i see that now but if you dont put a space between the word exprorer and “C:program data…… then widows puts it there automaticly and then i will not work but if you leave a space between the explorer and C: programdata it works perfect. you just need the space.
Regards for the help.
Hi hope this works
https://img138.imageshack.us/i/capture1d.png/
https://img138.imageshack.us/i/capture2l.png/
I have followed you instructions to get my microsoft office folder on to the task bar on windows 7. but when i put the word explorer at the start windows inserts another C: and the the path is wrong. if i leave out the word explorer it works but i can not pin it to the task bar
Can you show a screenshot of that please?
i carnt see anyway of uploading a screen shot
use https://imageshack.us/ and then post the link in a comment.
You can just drag the folder (to which you are creating a shortcut) onto the start button and drop it. A shortcut will automatically be created and pinned to the start menu.
attempting to pin an Office shortcut described above to the Taskbar, after creating the shortcut, the only options for pinning are to the Start Menu. there’s no “Pin to Taskbar” item – even when shift-rightclicking. what’s up with that? thanks for the tips
Nice..Work for my Windows 7..Thanks.
Any chance anyone knows how to make that newly pinned folder behave like a menu?
Try 7stacks or Standalone Stack.
I wasn’t able to get a new icon to stick to the folder. Maybe that’s the bug you were talking about. I’m not sure what you meant in your bug description. Or you meant this:
I pinned 2 different WE folders onto the taskbar per your instructions. When I click them one after the other, both WE screens will open, pointing to the 2 different folders which I added to the taskbar. But if I click on one taskbar icon, then wait, then click the remaining icon, the 2nd icon will open up the same path as the first icon I just opened.
That’s exactly what I mean. Sorry if the explanation wasn’t very clear.
About the icon, that’s another bug. Apparently, you can’t change the icon of a folder pinned to the taskbar. However, you can change the icon before you pin the folder to the taskbar.
That worked. Thanks.