

The SmartScreen filter, Windows SmartScreen, or the Windows Defender SmartScreen are the same protection feature, with different names, depending on the Windows version you’re using. While it helps protect your computer from malicious files, apps, and websites, some users consider it annoying and want to disable it. If you want to turn off the SmartScreen filter, here’s how it’s done:
IMPORTANT NOTE: Disabling this feature is not recommended! If you want to know more about what SmartScreen is, how it works, and why it’s not a good idea to turn it off, read this article first: What is the SmartScreen filter, and how does it work?. Also, keep in mind that to disable Microsoft Defender SmartScreen, you need to use an administrator account on your Windows 11 or Windows 10 computer. And last but not least, because the settings described in this guide are the same in both operating systems, I used screenshots taken mainly in Windows 11.
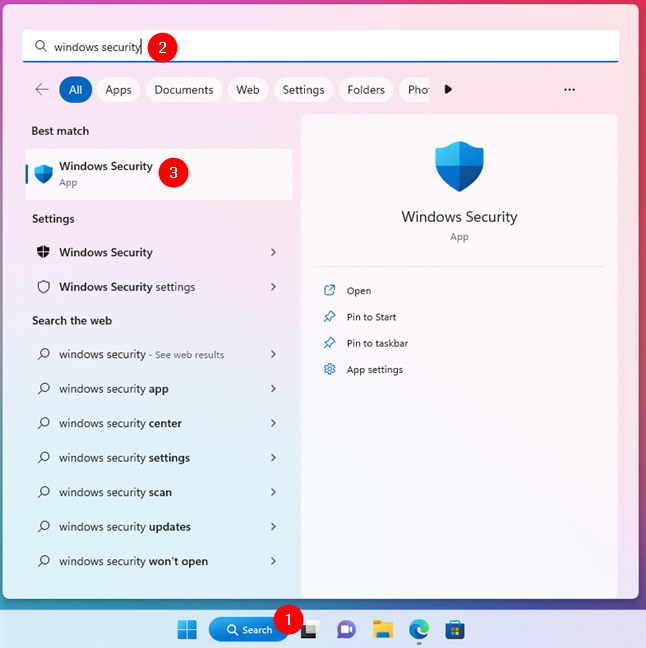
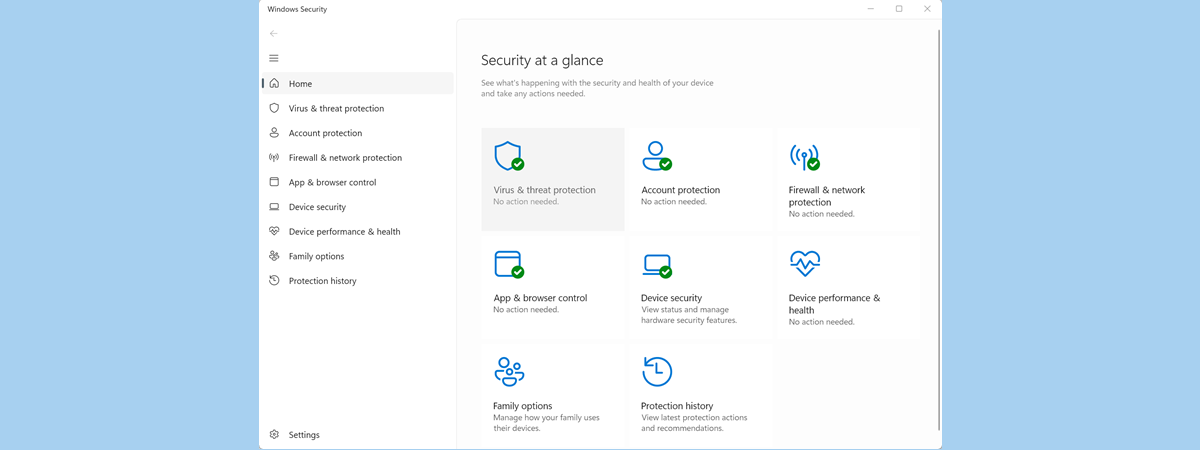
 Search and open Windows Security in Windows 11
In Windows 10, type windows security in the search field on the taskbar and then click or tap the appropriate search result.
Search and open Windows Security in Windows 11
In Windows 10, type windows security in the search field on the taskbar and then click or tap the appropriate search result.
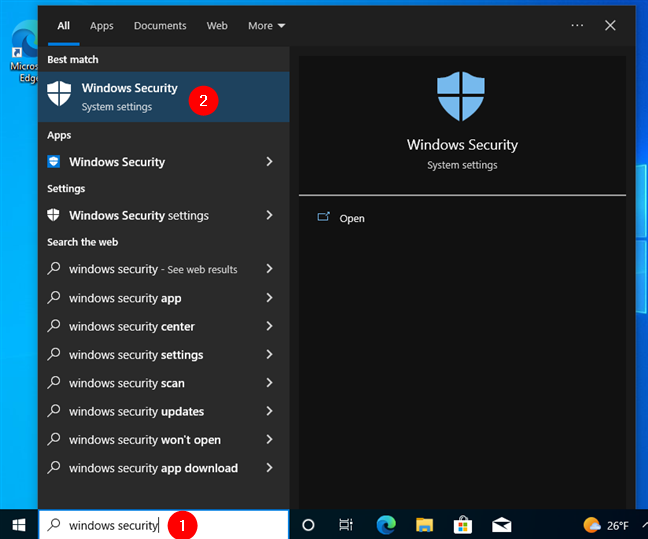
 Search and open Windows Security in Windows 10
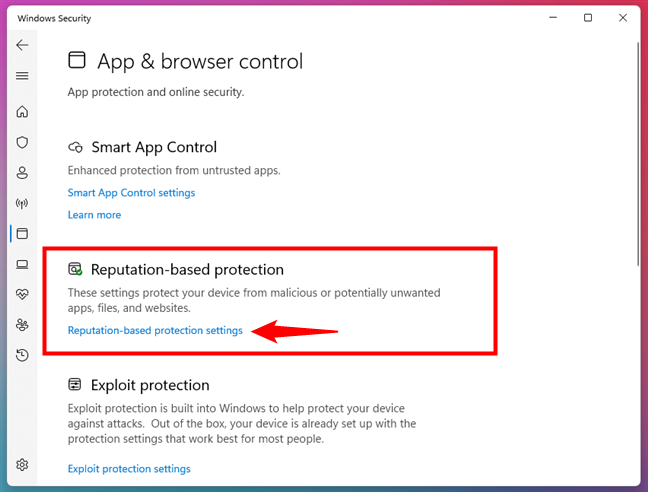
In the Windows Security window, click or tap “App & browser control” in the left sidebar.
Search and open Windows Security in Windows 10
In the Windows Security window, click or tap “App & browser control” in the left sidebar.

 Select App & browser control in Windows Security
On the right side of the window, look for the section titled Reputation-based protection. It explains that “These settings protect your device from malicious or potentially unwanted apps, files, and websites.”
Click or tap the Reputation-based protection settings link under this description.
Select App & browser control in Windows Security
On the right side of the window, look for the section titled Reputation-based protection. It explains that “These settings protect your device from malicious or potentially unwanted apps, files, and websites.”
Click or tap the Reputation-based protection settings link under this description.
 Go to Reputation-based protection settings
Then, you get access to all the settings that control how Windows Defender SmartScreen works.
Go to Reputation-based protection settings
Then, you get access to all the settings that control how Windows Defender SmartScreen works.
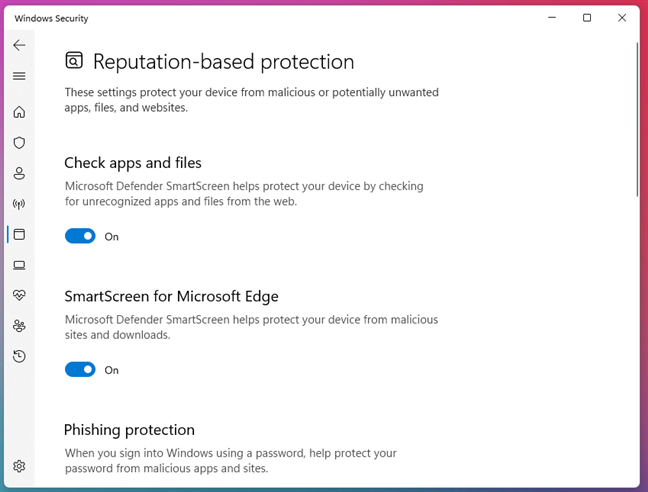 The SmartScreen controls are found in the Reputation-based protection settings
The first setting is “Check apps and files.” Windows Security explains that “Microsoft Defender SmartScreen helps protect your device by checking for unrecognized apps and files from the web.” Turn the switch Off and confirm your choice when Windows shows the UAC prompt.
The SmartScreen controls are found in the Reputation-based protection settings
The first setting is “Check apps and files.” Windows Security explains that “Microsoft Defender SmartScreen helps protect your device by checking for unrecognized apps and files from the web.” Turn the switch Off and confirm your choice when Windows shows the UAC prompt.

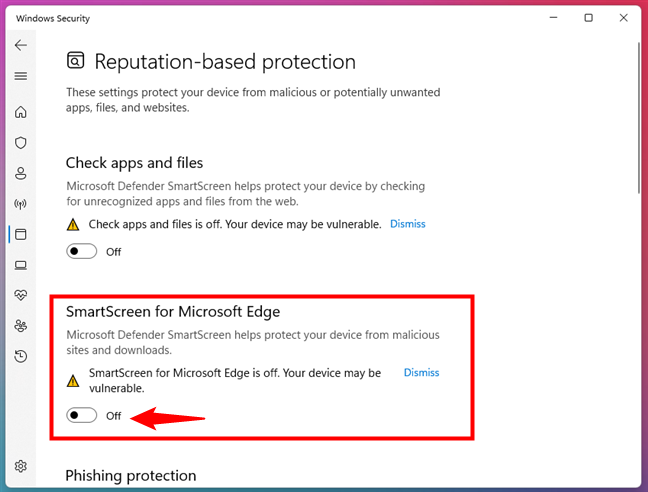
 Turn off SmartScreen's Check apps and files feature
The second option you get is called “SmartScreen for Microsoft Edge,” and it’s about “Microsoft Defender SmartScreen [helping to] protect your device from malicious sites and downloads.” If you don’t want that, switch it Off too.
Turn off SmartScreen's Check apps and files feature
The second option you get is called “SmartScreen for Microsoft Edge,” and it’s about “Microsoft Defender SmartScreen [helping to] protect your device from malicious sites and downloads.” If you don’t want that, switch it Off too.
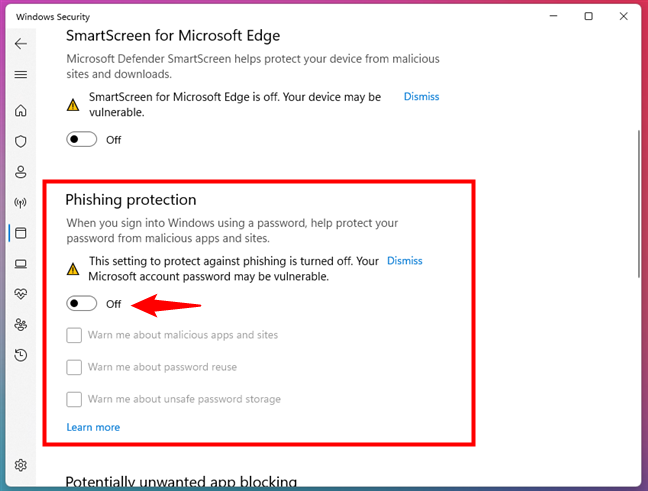
 Turn off SmartScreen for Microsoft Edge
Third, you have “Phishing protection: When you sign into Windows using a password, help protect your password from malicious apps and sites.”
This setting has a master switch that you can turn Off to disable it completely, and three options to customize your experience:
Turn off SmartScreen for Microsoft Edge
Third, you have “Phishing protection: When you sign into Windows using a password, help protect your password from malicious apps and sites.”
This setting has a master switch that you can turn Off to disable it completely, and three options to customize your experience:
 Turn off SmartScreen's Phishing protection
Next, there’s the “Potentially unwanted app blocking” setting. This is a feature of Microsoft Defender SmartScreen that “Protect[s] your device from low-reputation apps that might cause unexpected behaviors.” To disable it, turn its switch Off.
Turn off SmartScreen's Phishing protection
Next, there’s the “Potentially unwanted app blocking” setting. This is a feature of Microsoft Defender SmartScreen that “Protect[s] your device from low-reputation apps that might cause unexpected behaviors.” To disable it, turn its switch Off.
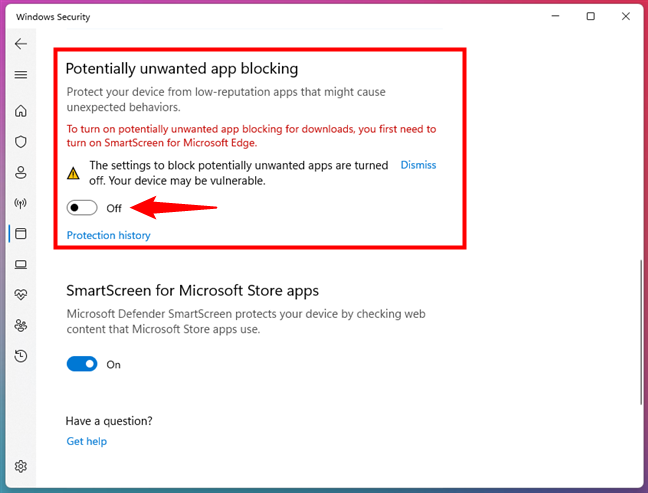
 Disable SmartScreen's Potentially unwanted app blocking
And last but not least, the final setting for Microsoft Defender SmartScreen is called “SmartScreen for Microsoft Store apps.” This one “[...] protects your device by checking web content that Microsoft Store apps use.” Again, turn its switch Off to disable it.
Disable SmartScreen's Potentially unwanted app blocking
And last but not least, the final setting for Microsoft Defender SmartScreen is called “SmartScreen for Microsoft Store apps.” This one “[...] protects your device by checking web content that Microsoft Store apps use.” Again, turn its switch Off to disable it.

 Turn off SmartScreen for Microsoft Store apps
Microsoft Defender SmartScreen is now completely turned off on your Windows 11 or Windows 10 computer. If you ever want to enable it again, follow the same steps and turn on the settings you disabled.
Turn off SmartScreen for Microsoft Store apps
Microsoft Defender SmartScreen is now completely turned off on your Windows 11 or Windows 10 computer. If you ever want to enable it again, follow the same steps and turn on the settings you disabled.
How to disable Windows Defender SmartScreen in Windows 11 or Windows 10
In Windows 11 and Windows 10, the SmartScreen filter is used in many places to provide users with the best protection possible: in Microsoft Edge, File Explorer, and the apps you install from the Microsoft Store. To disable it completely, you need to disable it for each of these areas. Here is how: First, you need to open Windows Security. In Windows 11, a quick way to launch it is by using search: click or tap the Search button on the taskbar, type windows security, and click/tap the Windows Security result.- “Warn me about malicious apps and sites” - if you enter your Microsoft account password into a site or app that Microsoft Defender SmartScreen finds malicious, you will get an alert.
- “Warn me about password reuse” - if you reuse your Microsoft account password on sites or in apps, then Microsoft Defender SmartScreen will alert you about the dangers of doing that.
- “Warn me about unsafe password storage” - if you attempt to save your Microsoft account password in a text editor like Notepad or in Microsoft 365 Office apps such as Word or OneNote, then Microsoft Defender SmartScreen will warn you about this being a security risk.
Discussion (8)
Smart Screen for Explorer will not turn off; button just pops back on.
Watching ProcessExplorer in my system tray during bootup, SmartScreen takes a LOT of CPU cycles for many minutes, and does a lot I/O as well. My bootup painfully, painfully slow, and I think SmartScreen has a lot do with that. (Running Win10 1909, which latest build MS will give me.)
It seems Windows 10 Enterprise does not know the difference between the intranet and the internet. We have numerous Network Shares on numerous Servers. Windows SmartScreen cant seem to tell if I have downloaded a file from a network share or the internet and it blocks the files and .exe and .cmd files that came from a server on the network. Automatic Full Trust of Network Resources should be implemented.
Bit late I know, but this should be resolved by your IT Dept
data collector
Working on a government closed restricted network. Smartscreen blocks us from doing literally anything we need to do. It doesn’t recognize our internal programs. It is highly annoying
Since the last update it keeps turning on and using most of my CPU power. I was already using avast so it probably wasn’t helping THAT much
i have tried putting on my windows SmartScreen but it doesnt give any option to put it on, what should i do?