24.05.2019
All Windows versions offer easy ways to create user accounts using click-based wizards. You can create users using the Settings app from Windows 10 just as easily as you can create user accounts from the Control Panel, in Windows 7. However, you do not see IT Pros using such tools too often, do you? No, IT admins use snap-ins, consoles, scripts or commands for such tasks. If you want to learn how to create local users and groups of users in Windows, using a snap-in called Local Users and Groups, then you have arrived at the right place. Here is how to create new user accounts, in Windows, like a pro:
What types of user accounts and groups can you create using this method?
The method that we are showing you in this tutorial for creating user accounts in Windows works only with local user accounts, also known as offline accounts. You cannot use this method to create Microsoft accounts for Windows 10 or Windows 8.1.
If you want to learn more about what Windows user accounts are and how they work, read: What is a user account or a username in Windows?. Moreover, if you are wondering what user groups are and what their purpose is, this guide sheds some light: What is a user group in Windows and what does it do?.
What tools do you need to create local user accounts and groups?
Creating local user accounts and groups relies on using the Local Users and Groups tools from Computer Management. Unfortunately, the Local Users and Groups tools are not available in all Windows editions. If you are using a Home edition of Windows 10, Windows 8.1, or Windows 7, you do not have them. You need an edition like Pro, Enterprise or Education. If you need help identifying your Windows version and edition, read: What version of Windows do I have installed? (5 methods).
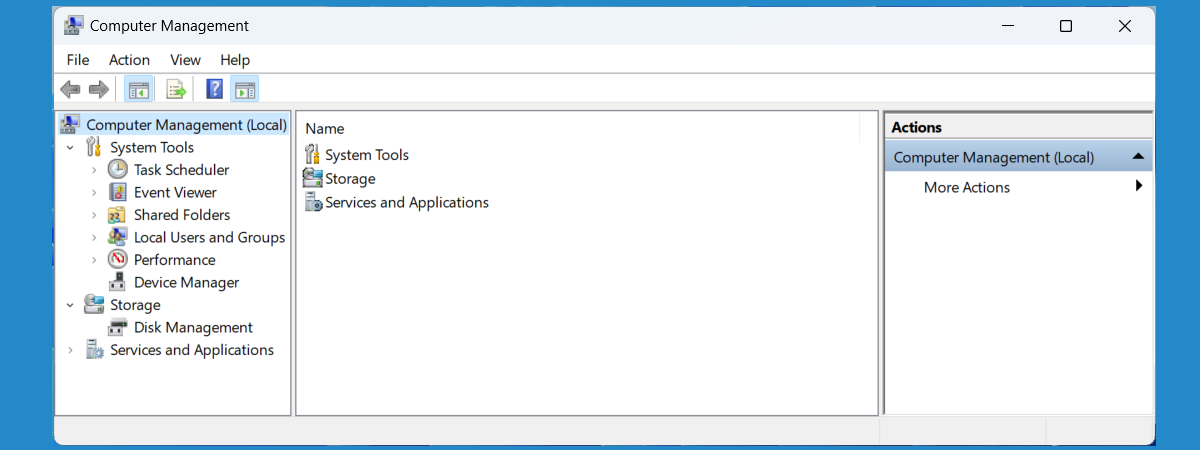
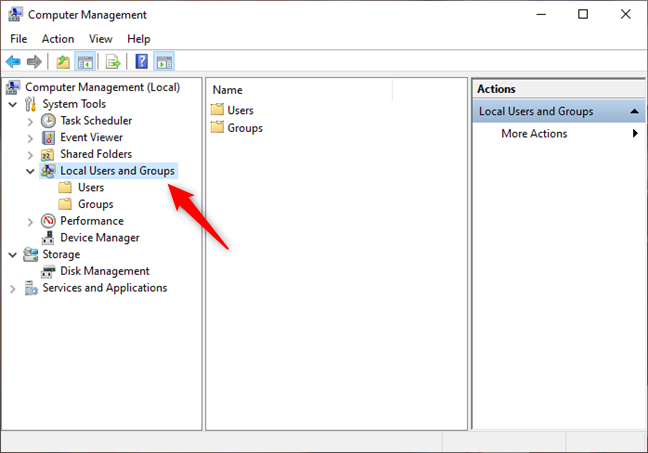
Before you go ahead and start creating or managing user accounts or groups, first open Computer Management. Then, expand the Local Users and Groups from the left side of the window.
How to create a local user account like an IT Pro
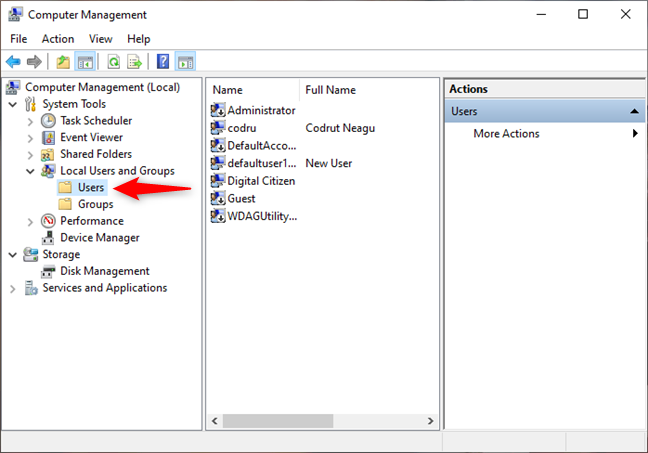
To create a local user, first select Users in Local Users and Groups, on the left side of the Computer Management window.
Right-click somewhere on the blank space found in the middle section of the window, and click or tap on New User.
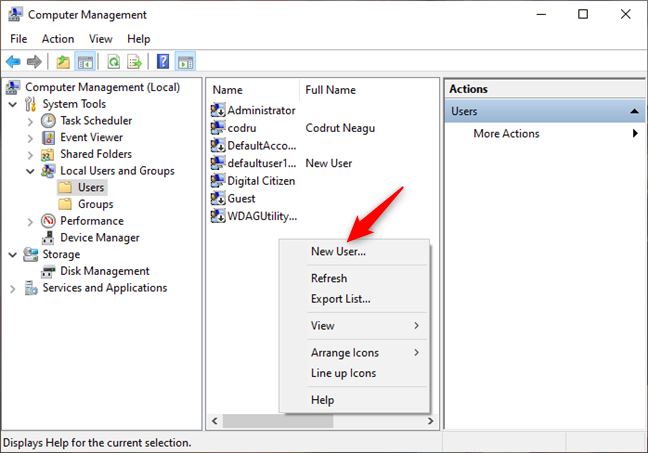
This opens the New User window, where you can enter all the details about the new user account.
First, type the user name (1) and, optionally, its full name (2) and description (3).
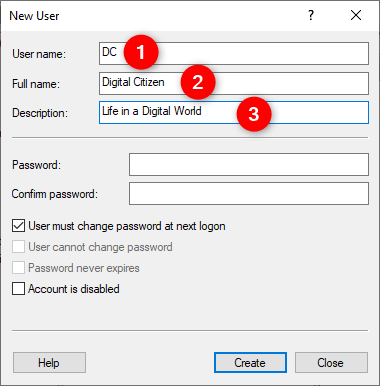
Then, you type the password to be used for that user and confirm it. You can choose not to use a password and check the box which says "User must change the password at next logon." This way, when the person using this user account logs on for the first time, he or she must create their password.
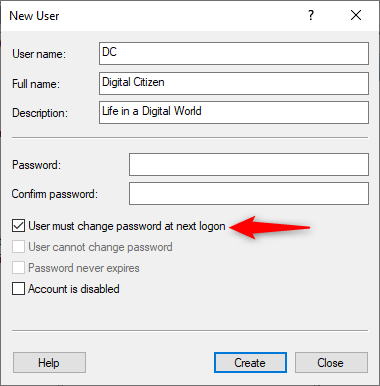
There are also other options that can be used:
- "User cannot change password" - this is self-explanatory. Only the administrator can change the password for that user account.
- "Password never expires" - this setting is useful in business network environments which have policies for user account passwords to expire after a specific time. Checking this box makes the password set to never expire.
- "Account is disabled" - checking this box means that you are creating a user account that is disabled and cannot be used.
Once you are done making all the settings, click Create and Windows immediately creates the user account. When you are done creating user accounts, click Close in the New User window.
NOTE: None of the user accounts created using this method has any administrative permissions. They are all members of the Users group, which can use only existing applications and resources, and cannot install new apps or change system settings.
How to manage a local user account
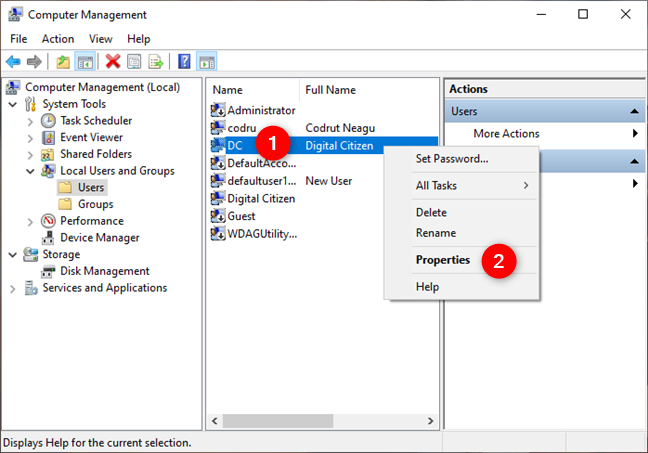
You can also edit the properties of existing users. To do so, right click on the user account you want to configure and click or tap Properties.
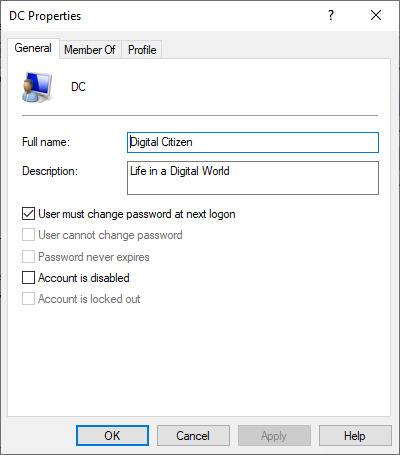
This opens the Properties window for that user account. In the General tab, you have the options we have shown in the previous section of this guide. You can change them as you want.
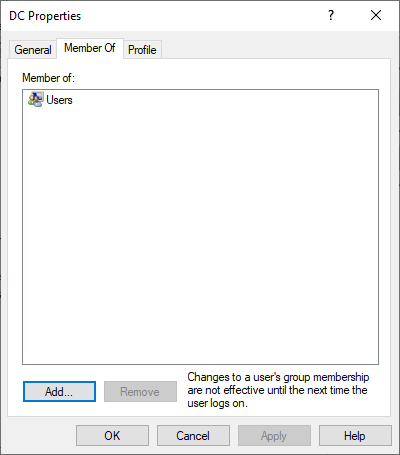
The Member Of tab lists the user groups that user account is a member of. By default, any local user that you created should be a member of the Users group.
The user account can be made a member of other groups, by clicking on Add and selecting the user groups. You can also remove its membership of a group by selecting the user group from which you want it removed and clicking on Remove.
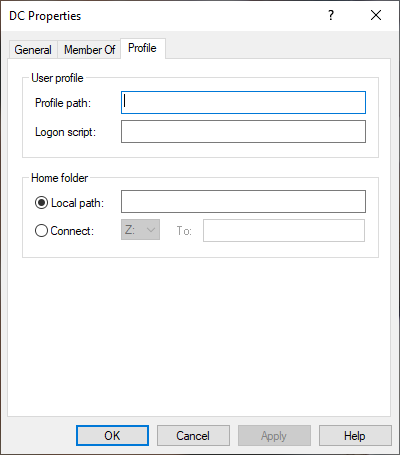
The Profile tab should be used only in business network environments to set specific paths for where the user profile data is stored, login scripts that should be executed at the Windows login or setting the home folder to another value than the Windows default.
Once you have made the changes you desire, don't forget to click OK, so that they get applied.
How to create a user group like an IT Pro
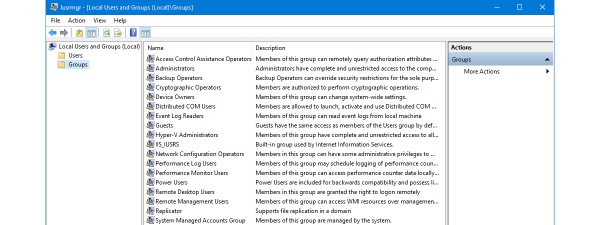
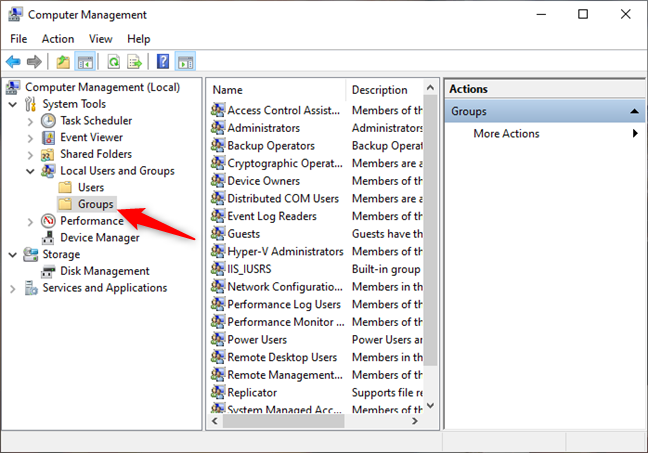
To create a new user group, select Groups in the Local Users and Groups from the left side of the Computer Management window.
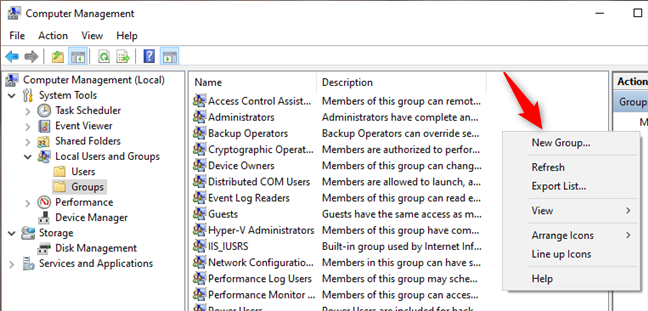
Right-click somewhere on the space found in the middle section of the window. There, click on New Group.
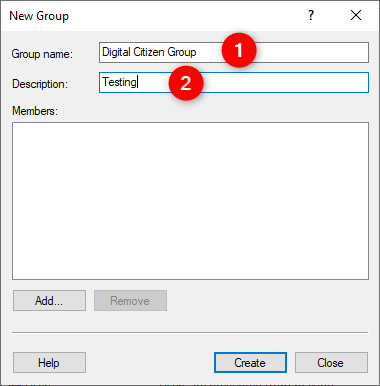
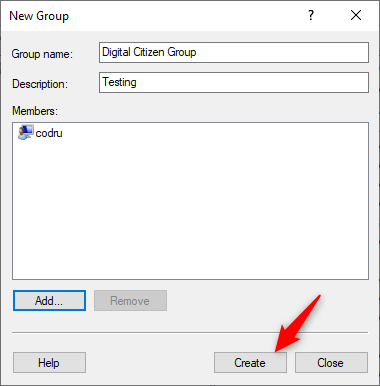
The New Group window opens. There, type the name and description(optional) of the group.
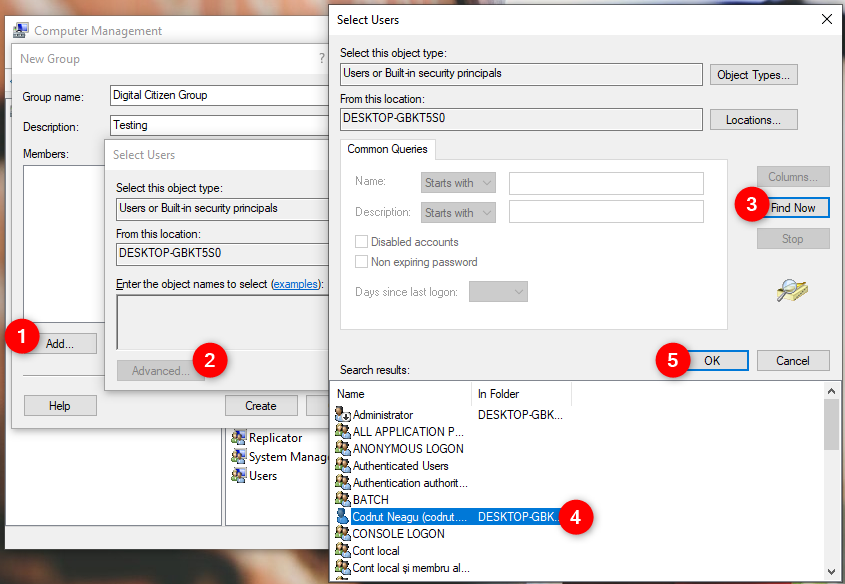
Then, it is time to add members. Click or tap Add. This opens the Select Users window. There, click on Advanced. Another window opens, with more options for finding user accounts. Click Find Now and then scroll down through the list of results and select the user account(s) that you want as part of the user group. Then, click OK.
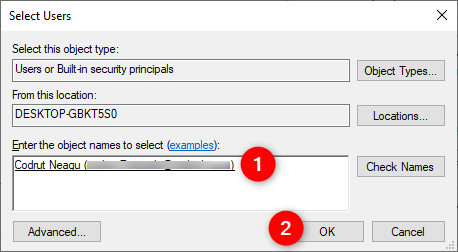
The user account you selected is now shown. Click OK again.
You are back to the New Group window where you can see the member(s) you just added. When you're done with the user group configuration, click Create and then Close.
You can now give special permissions to that user group, and all its members inherit them. If you are looking for a good tutorial on how to change permissions, read this one: Take ownership and change permissions of files and folders.
Do you like creating users and groups this way?
We hope you found our guide on creating and managing users and groups in Windows like an IT admin useful. If you have any troubles with it or if you have questions, don't hesitate to write to us in the comments section below.