24.03.2022
When you protest for a cause, alongside thousands of people, it is very likely that the mobile network will stop working because of the sheer number of connections to a small number of cell towers. Also, in the event of an emergency like an earthquake or armed conflict, the communication infrastructure might be partially damaged, leaving you without any means of communication or information. For such situations, there's a mobile app that can help. It is named Briar, it is free and it works on most Android smartphones. Here's how to use it, when protesting or during an emergency, to communicate with others on your Android smartphone:
How does Briar work?
Briar is a messaging app useful in case of network outages or heavy internet surveillance. Its main advantage is that messages are synced directly between the users' devices. If the internet is not working (or if the user decides not to use it), Briar can sync via Bluetooth or Wi-Fi. If it finds no direct link to the user you’re contacting, it relays the messages through multiple devices until they reach the recipient. If the internet is working, Briar doesn’t expose the information by using regular communication and instead transmits messages via the Tor network, protecting users from surveillance. Also, you can use Briar to communicate even when the mobile network is down and you get no signal.
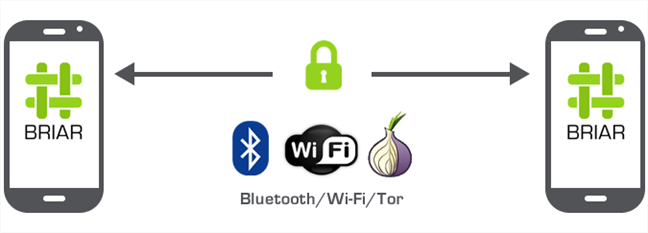
Briar uses multiple connections to sync content
Briar also allows you to create blog posts that are instantly shared with all your contacts. This feature, along with the ability to create, share, and participate in forums, makes Briar a great tool for organizing in the event of emergencies and for keeping users informed. Here are some scenarios where Briar could be extremely useful:
- Large-scale protests, where mobile networks may be inaccessible due to overloading of cell phone towers
- Post-calamity communication (earthquakes, floods), in case the mobile network infrastructure is destroyed
- Warzones, if the internet is out and you need to communicate with friends located in various shelters throughout the region
- Areas with heavy surveillance, where authorities or malicious third parties are monitoring internet traffic in order to suppress information and communication between citizens
If you’re unfortunate enough to be in one of the scenarios described above, here’s how to use Briar to keep in touch with loved ones, colleagues or fellow freedom fighters:
Step 1: Install Briar
Briar is available in the Play Store, but in order to increase the privacy of the download, we recommend installing the app directly from the Briar website. As opposed to downloading the app from the Play Store, no one can trace the download back to your personally identifiable Google account. If you choose to download and install the app from the Briar website, you need to allow the installation of apps from unknown sources. If you need help enabling this feature, we have a tutorial that explains it in detail: How to install an APK on Android without Google Play Store.
After downloading the application, either tap on the Open link inside the File downloaded notification or navigate to the download folder using your smartphone’s File manager and tap on the APK file. This will start the installation.
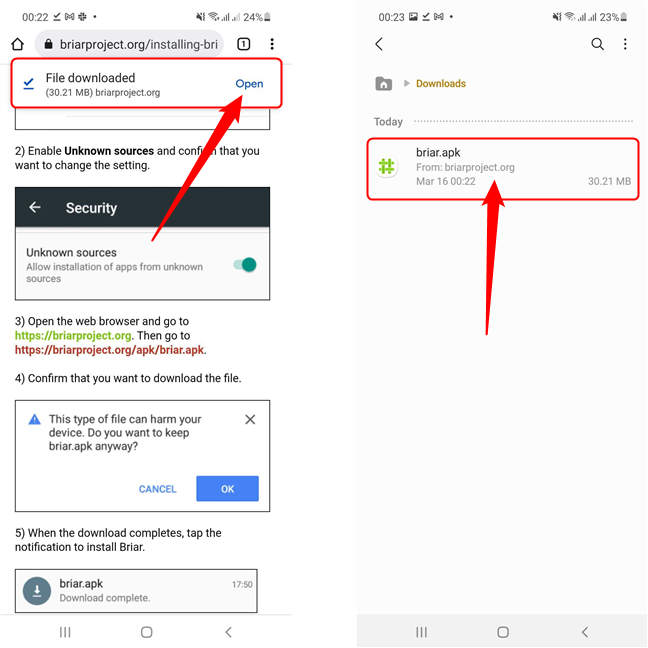
Install Briar from an APK file
NOTE: When you enable the installation of apps from unknown sources, the system informs you that it is not a good decision from a security perspective, which is generally true. However, after installing Briar, you can (and should) go back to Settings and disable the feature.
Step 2: Complete the initial setup
After installing the app, open it. The first thing you need to do is create a username and set a password. The brilliant thing about Briar is that the username is not sent to a server, it’s strictly local. This keeps you safe from identification by malicious third parties.
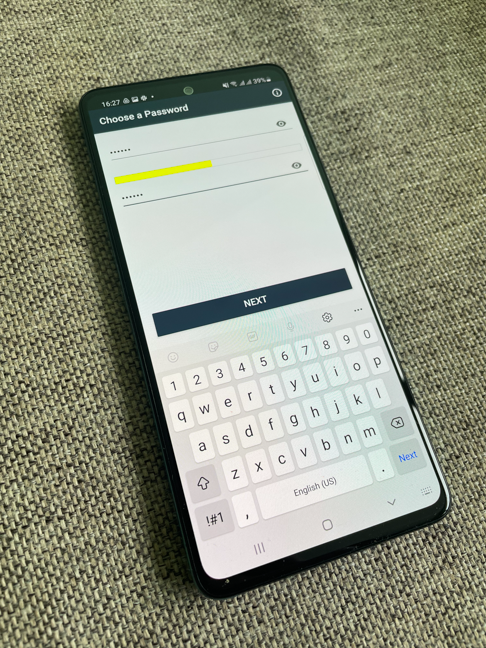
Choose a username, then set a password
NOTE: The app is so secure that it doesn’t even allow screenshots while using it. This prevents third parties from reading and sharing the content written in the app.
The next step is to bypass battery optimization for Briar. This allows the app to function in the background indefinitely. You should do this to ensure it functions properly. So tap on Allow connections, then on Allow. Finally, tap the Create account button at the bottom of the screen.
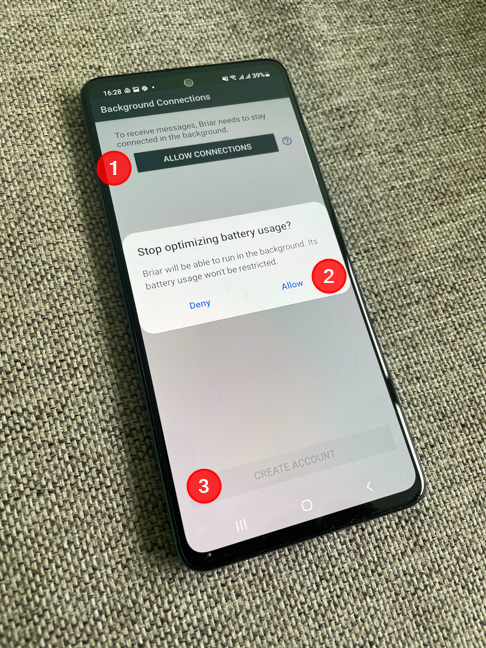
Disabling battery optimization for Briar
NOTE: The app uses a significant amount of battery, so make sure you have a charger or a power bank available nearby.
Creating the account only takes a few seconds. Now, you need to configure how the app communicates with other devices. Tap on the menu button in the upper left corner of the screen, then on any of the icons at the bottom of the menu.
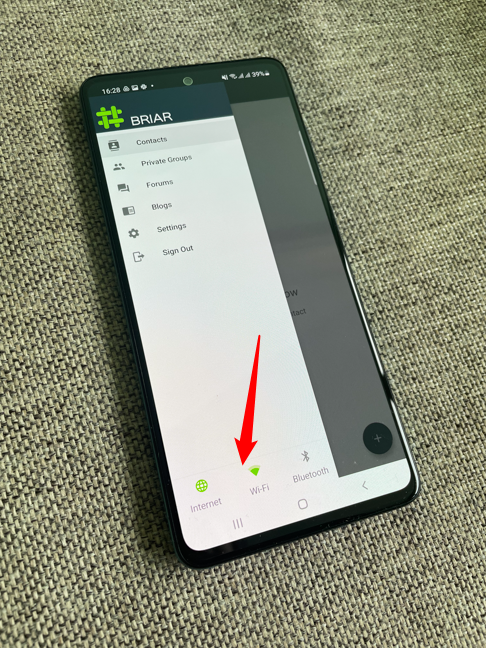
Tap on the icons at the bottom of the main menu
The next screen allows you to toggle communication methods: using a secure connection through the internet, via Wi-Fi, and/or Bluetooth. If you want the best communication performance, you should enable all the options here, but be aware that doing so will affect battery life (especially Tor and Bluetooth).
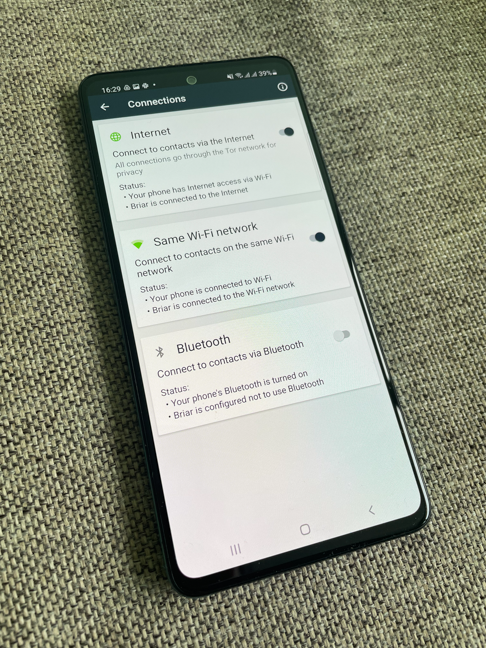
Configuring connection methods
TIP: After doing the initial setup, we strongly encourage you to browse through the app’s Settings section (accessible via the same Menu button in the upper left corner of the app window). You can configure the app’s security and even integration with a panic button, which can trigger a sign-out or even a full deletion of the app.
Step 3: Add contacts
Adding contacts on Briar is simple and secure. The first contact can only be added via direct proximity. To add a contact, first press the Plus (+) button in the lower right corner of the Contacts screen.
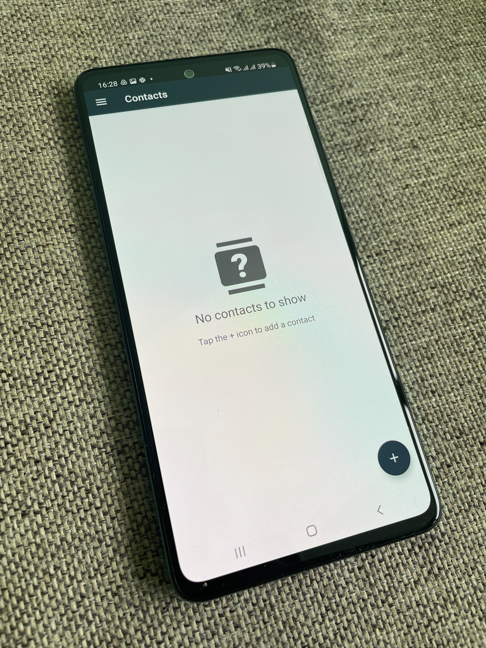
The Contacts section allows you to add users by pressing the plus button
The next screen describes how the process works: you need a direct “handshake” between the devices in order to successfully add a contact. Go ahead and tap on Continue.
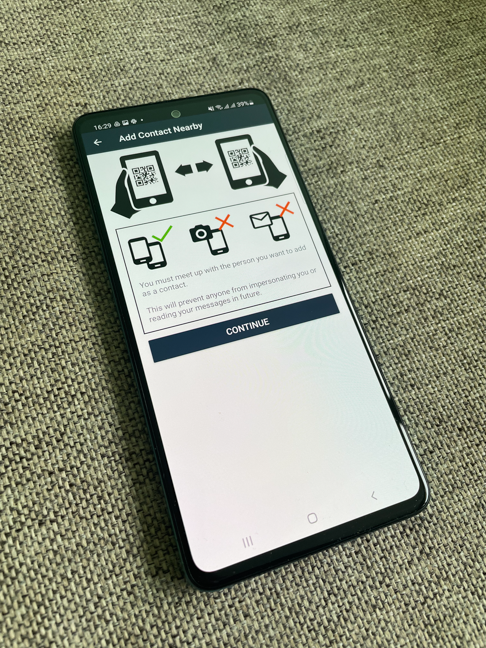
Connecting with users nearby
The screen will now be split between a QR code and a camera viewfinder. You need to scan the QR code on your contact’s device and allow the contact to scan your own. After both devices scan the QR codes, you will connect with your contact. Be aware that it can sometimes take a while to complete the action.
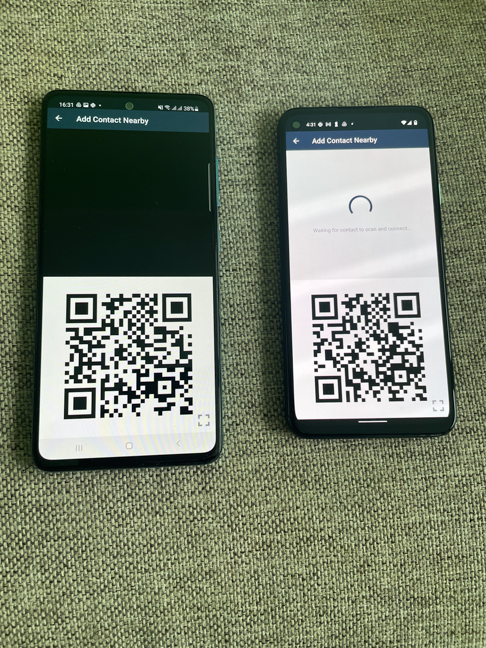
The smartphone on the right has scanned the QR code and is waiting for the device on the left to scan it as well
You can now add other contacts using the same method but, more importantly, you can share contacts. Creating a network of interconnected devices is slow at first, but as more and more devices are added, the process speeds up a lot. To share a contact with another person on Briar, you must have them both in your Contacts list. Then, tap on one of the contacts and then on the Menu button in the chat window (the icon with three dots in the upper right corner). Choose Make introduction, then select the contact you want to introduce.
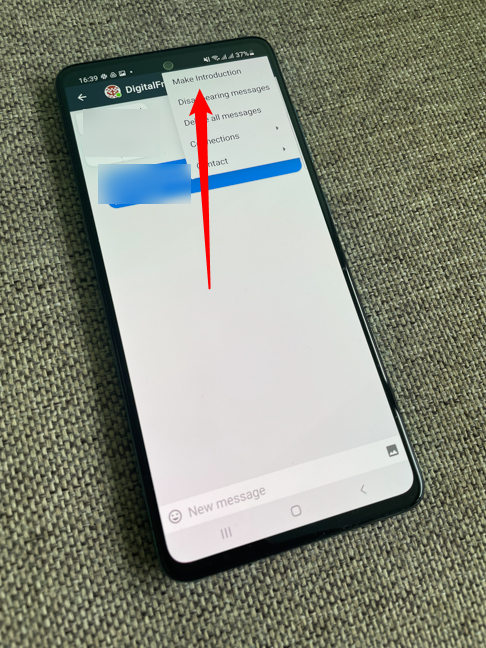
Connect two users by introducing them to each other
You can add a message that is displayed to the recipient in the chat window. Tap on Make introduction to proceed.
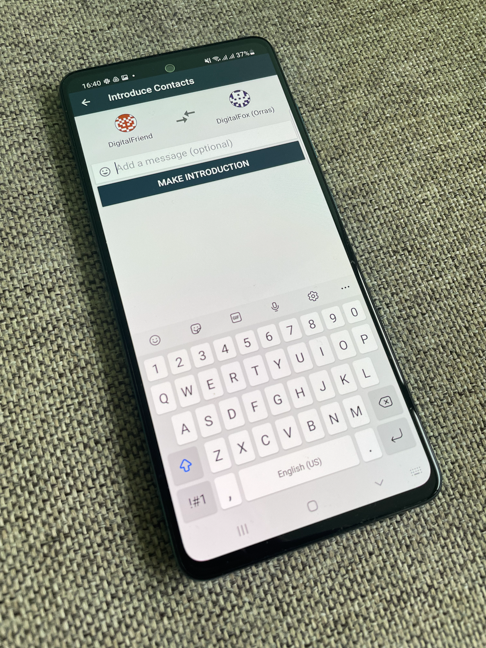
Making an introduction
After both parties accept the introduction, they become connected independently from you and can exchange messages and information.
Step 4: Communicate and share information
All contacts should be visible on the main screen of the app. Tapping on any of them opens a chat window, and you can communicate with that person securely. You can add photos, enable disappearing messages and even sync messages using a removable drive such as a USB stick or an SD card.
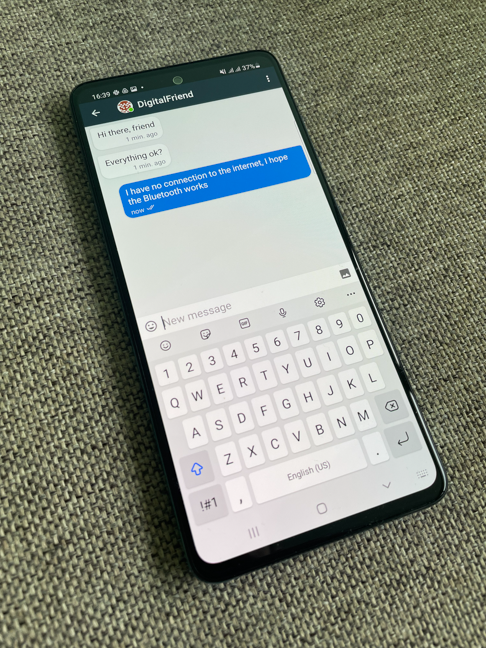
Messaging in Briar
In order to help you share or get information, Briar has two sections called Blogs and Forums. You can access them from the main menu. You can then write a blog post that is instantly shared with all contacts, read other users’ blog posts, create or join forums (by invitation from a user).
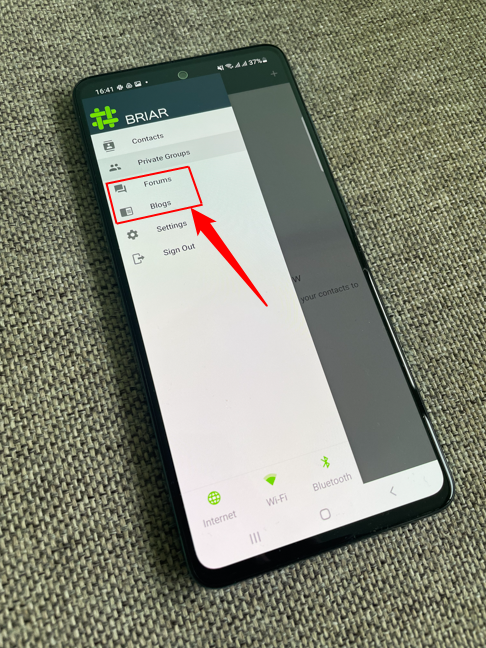
Forums and blogs are essential in sharing information with many users at the same time
The app has other functions as well, but we will only mention one last great feature: if an Android user doesn’t have the app and the internet is out (or restricted), you can give the app to that user directly from your own smartphone. The feature is available in the Settings menu and it creates a direct Wi-Fi link with the other user’s smartphone in order for that user to install the app.
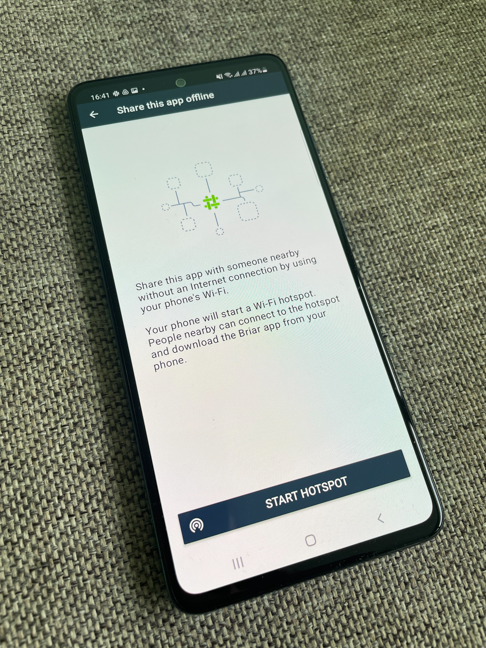
You can share the app directly to other users, bypassing internet altogether
Try Briar and let us know how it works
During our use of Briar, we found it very effective. We can see scenarios where this app can be the only way to talk to our friends and family. The app can be useful in coordinating during protests or to disseminate critical information that can’t be shared on regular, unsecured channels. We found that battery drain can be a problem during long protests, but having a power bank or a power source nearby mitigates this issue. Try Briar for yourself and let us know what you think about it by writing a comment below.