The first thing you see when you start Windows 10 is the Lock Screen background. After your PC boots, it shows you the Lock Screen; when it goes to sleep, it wakes up and displays the Lock Screen; leave your computer unused for a while, and when you come back, it is going to be waiting for you on the Lock Screen. Since you see this screen a lot, having only a boring stock wallpaper on it is no fun. That is why, in this article, we show you six ways to customize its looks, including how to change the wallpaper of your Lock Screen and how to choose what apps get to display updates on it:
1. Use your favorite picture as the Lock Screen wallpaper in Windows 10
The most obvious method to customize the Lock Screen is to change its default wallpaper to your favorite picture. In Windows 10, open the Settings app. A fast way to do it is to click or tap on the Settings button from the bottom left area of the Start Menu. Then, in the Settings app, go to Personalization.
The Personalization section from the Settings app
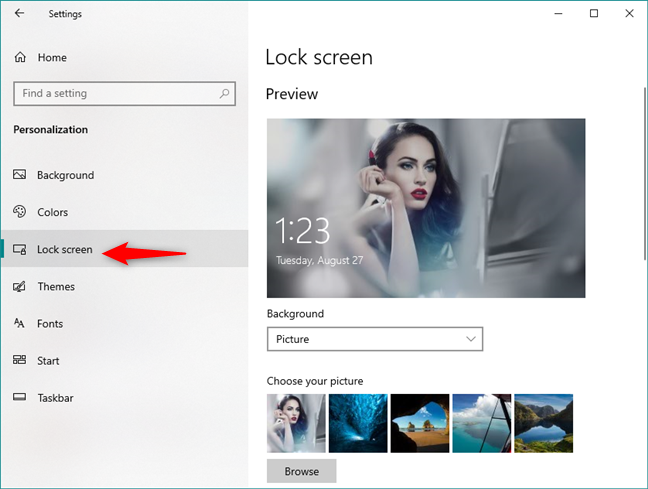
On the left side column, click or tap on the Lock screen.
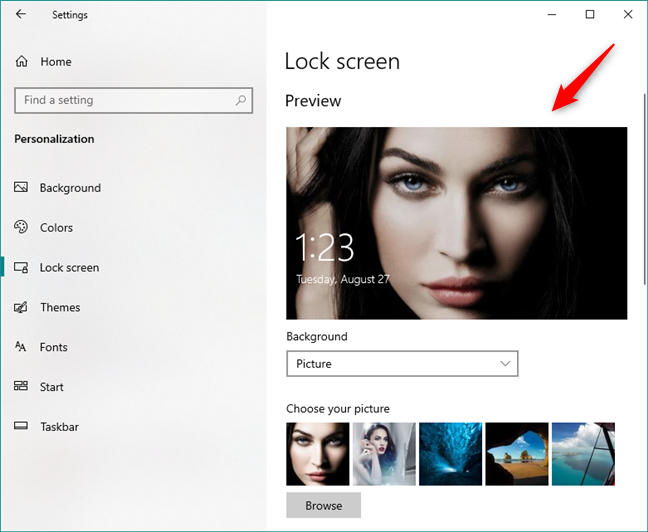
The Lock screen page from the Settings app
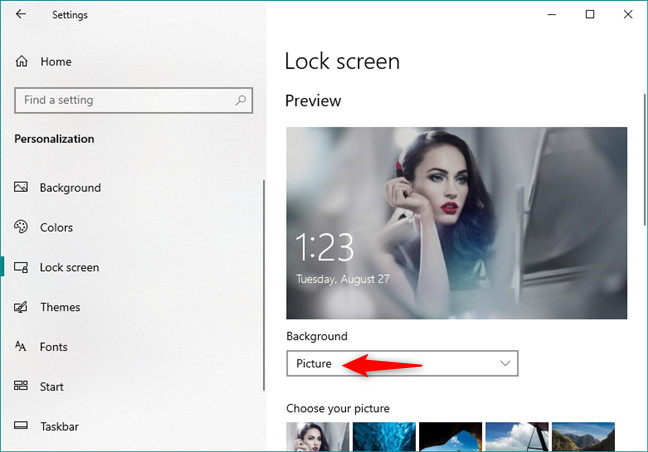
Your current Lock Screenwallpaper is shown at the top of the window. By default, the Background should be set to be a Picture. If it is not, but you want to use your favorite picture as the Lock Screen background, make sure to select Picture.
The Picture option from the Background list
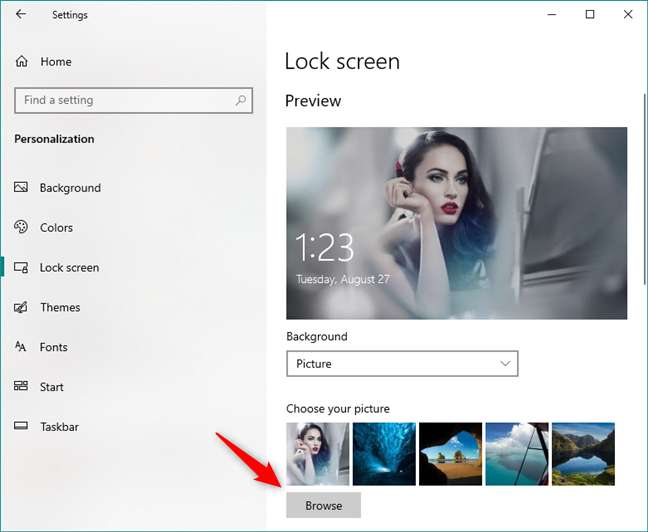
A few stock wallpaper options and your last-used wallpaper are shown on small tiles below. Click or tap on one of the small tiles to select it, or press Browse to pick an image from your photo collection.
Choose your picture or browse for others, in Windows 10
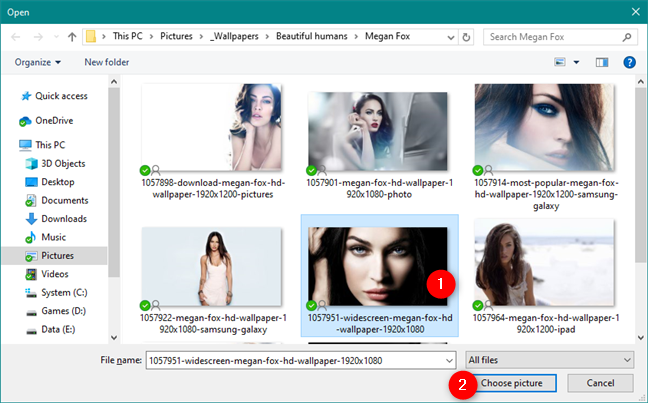
Browse through your image collection to find your favorite picture, and select it by pressing the Choose picture button.
Choosing a new picture for the Windows 10 Lock Screen
In the Preview section, you should now see the new picture that you have selected.
The Preview of the Windows 10 Lock Screen
From now on, the Lock Screen should use the image you selected as background.
2. Display all your favorite pictures as a slideshow on the Lock Screen in Windows 10
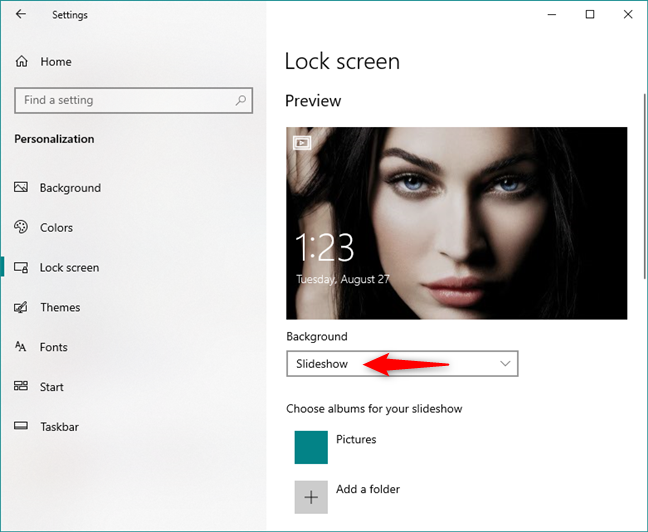
Windows 10 also has a Slideshow option. To enable it, open the Settings app and go to "Personalization -> Lock screen," just like we showed in the first section of this article. Then, click or tap the Background drop-down menu and choose Slideshow.
The Slideshow option from the Background list
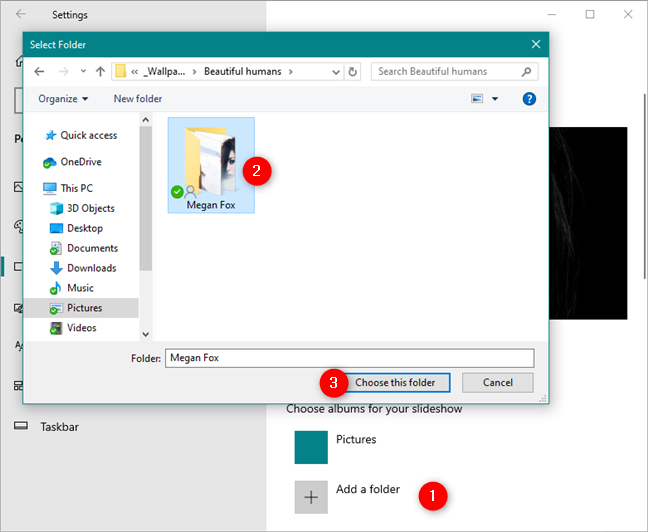
Click or tap the "+ Add a folder" to choose the folders containing the pictures that you want to add to the slideshow.
Choosing a folder of pictures to use as a slideshow
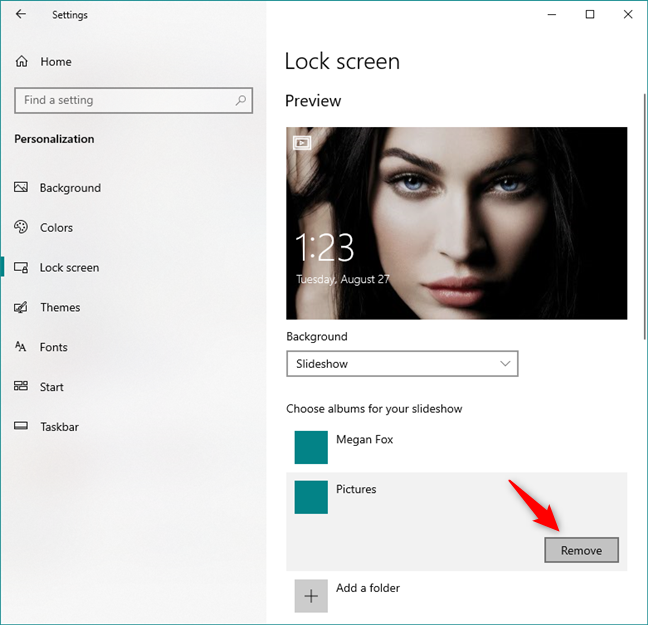
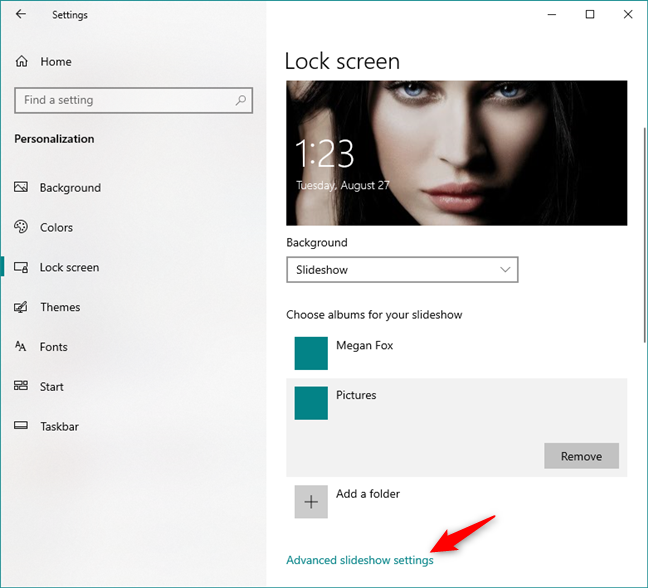
You can use one or more folders as albums for the slideshow, and you can see all of them displayed in the list called "Choose album for your slideshow." If you want to remove one of the folders, click or tap on it and then press the Remove button.
Adding or removing folders from the Lock Screen slideshow
NOTE: Although Windows 10 does not yet allow you to use animated Lock Screen wallpapers, you can use the Slideshow option to point to a folder of images that resemble one another, such as the frames from a GIF file. When they transition from one image to another, it appears that the Lock Screen wallpaper is animated. Unfortunately, even this workaround is a hit and miss, because you can't control the transition effects between the pictures.
Next, for even more customization options, right under the "Choose albums for your slideshow" list, you can click or tap on the "Advanced slideshow settings" link.
The Advanced slideshow settings link in Windows 10
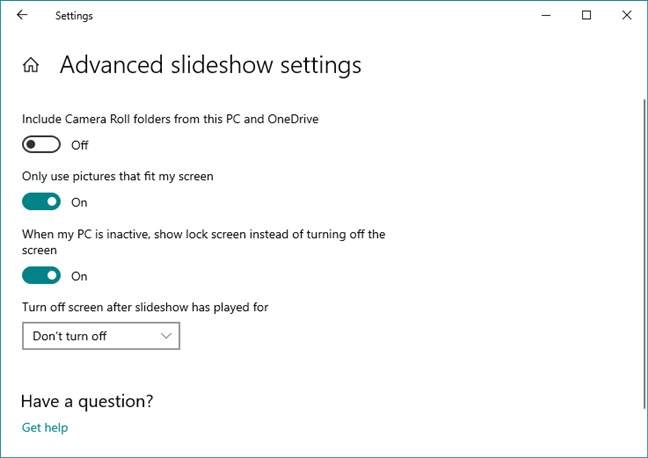
In the Advanced Slideshow Settings:
If you turn On the switch of the first option, the slideshow uses the pictures that are contained in the Camera Roll folders from your PC and OneDrive.
If you enable the second option, the slideshow uses only the photos that fit on your screen.
The third option lets you choose whether you want your Windows 10 device to "Play a slideshow when using battery power." This option is available only on battery-powered devices such as laptops or tablets.
The fourth option lets you choose whether your PC shows the Lock Screen or turns off the screen when it is inactive.
At the end, there is a drop-down list that you can use to select the time after which the screen turns off.
Advanced slideshow settings
Set these options properly and enjoy your new Lock Screen design.
3. Make the Lock Screen from Windows 10 display a different image each day, from Windows Spotlight
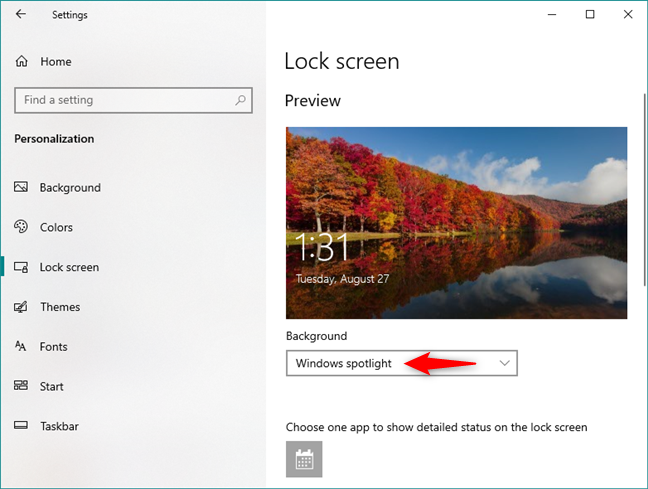
In Windows 10, you can also set the Lock screen to display images from Windows Spotlight. To do that, open the Settings app and go to the "Personalization -> Lock screen" section, just like we showed you in the first section of this article. Then, in the Background drop-down list, select the option called Windows spotlight.
The Windows spotlight option from the Background list
If you choose Windows spotlight for your LockScreen, Windows 10 changes your wallpaper periodically, every day.
4. Get tips from Cortana on your Lock Screen, in Windows 10
If you use a new version of Windows 10, after Anniversary Update, you can get some interesting bits of information from Cortana and Windows 10 right on your Lock Screen. Usually, these are just interesting facts and tips, but sometimes you might also see small ads for Microsoft apps such as Microsoft Edge.
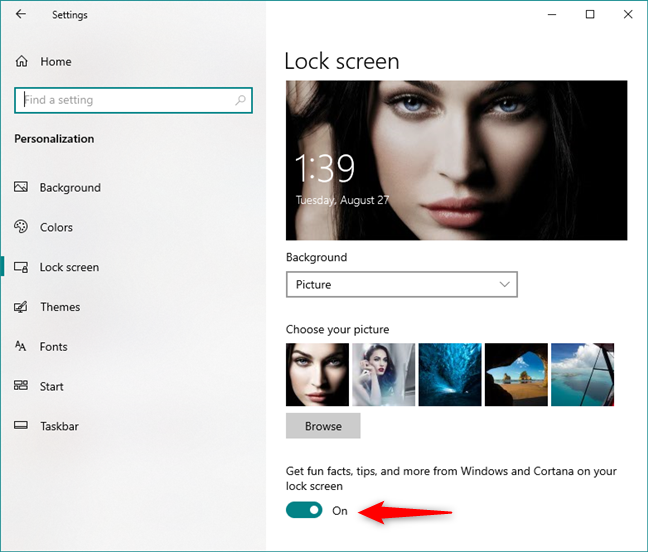
In the "Personalization -> Lock screen" section from the Settings app, scroll down until you find a switch called "Get fun facts, tips, and more from Windows and Cortana on your lock screen."
Get fun facts, tips, and more from Windows and Cortana on your Lock Screen
However, note that this works only if you set the Lock Screen to use a Picture or a Slideshow as your background.
5. Choose which notifications you see on your Lock Screen in Windows 10
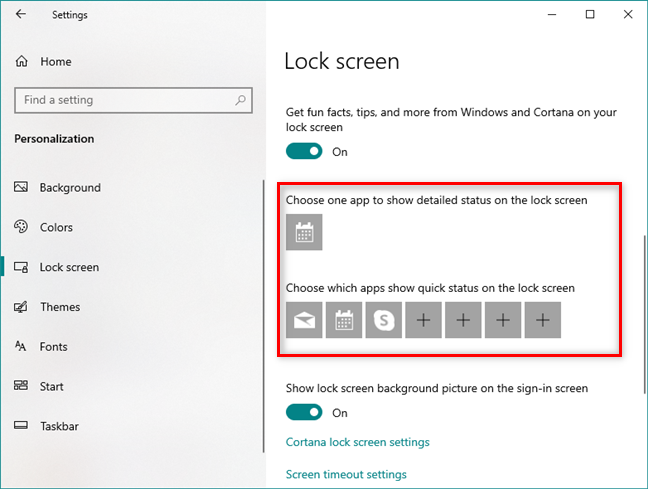
If you want to add apps to show updates on the Windows 10 Lock Screen, open the Settings app and go to "Personalization -> Lock screen." Then, scroll down below the Background section until you find the two lists saying that you can choose some apps to show their status on the Lock Screen. The first list is "Choose one app to show detailed status on the lock screen" and the second is "Choose which apps show quick status on the lock screen."
The apps that show notifications on the Lock Screen
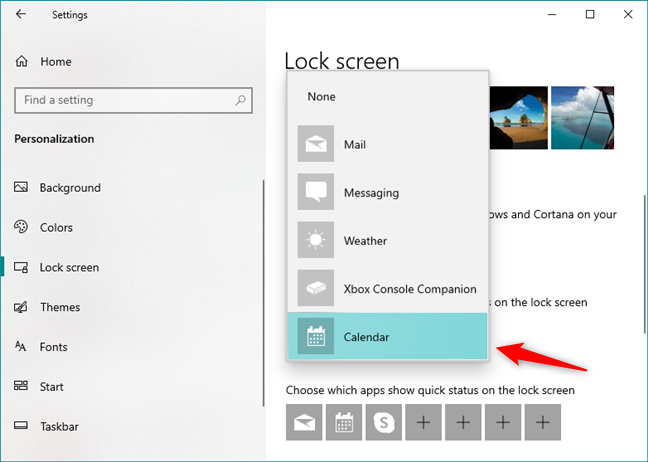
Click or tap the tile in the first row, and select the app for which you want to display a detailed status on your Lock Screen.
Selecting the app that shows detailed notifications on the Lock Screen
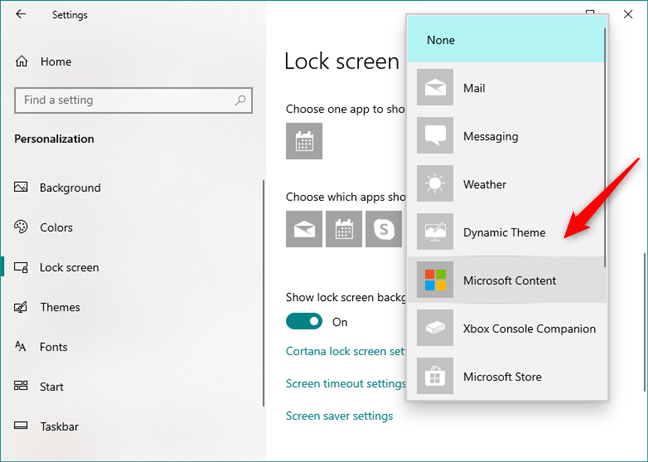
Click or tap a tile on the second line to reveal a list of apps that are capable of leaving notifications on your Lock Screen. Next, select the desired application.
Selecting the apps that show notifications on the Lock Screen
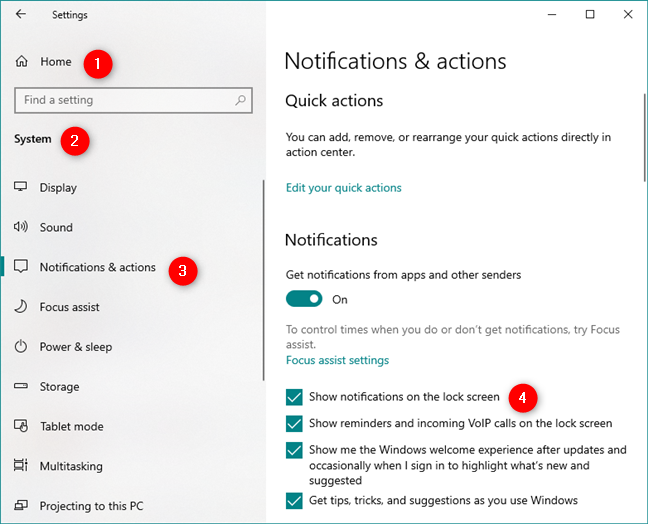
Now, you have to make sure that notifications have the right to appear on your Lock Screen. Go back to the main Settings window, select System, and then choose Notifications & actions. In the Notifications section, you should find the same switch that enables/disables the right of notifications to be displayed on the Lock Screen. Turn it On, so that notifications are allowed on your Lock Screen.
The Notifications & actions page from the Settings app
6. Use Cortana directly from your Lock Screen in Windows 10
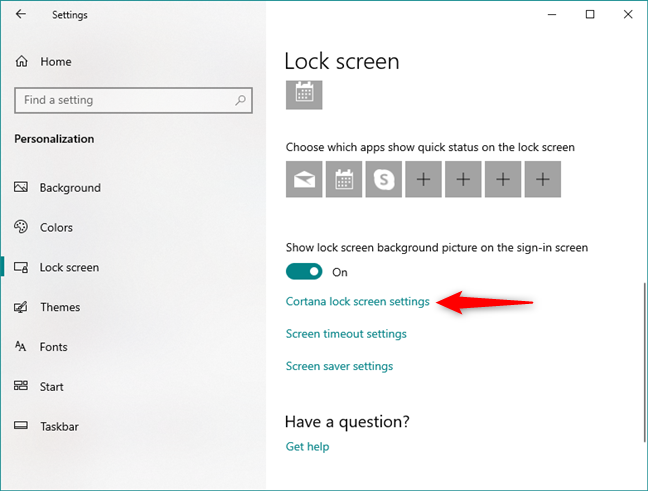
Finally, you can also configure Windows 10 so that Cortana is available even if your PC is locked. To do so, on the Lock Screen page from the Settings -> Personalization section, click or tap on the link that says "Cortana Lock Screen settings."
The link to Cortana Lock Screen settings
This takes you to Cortana's settings.
What does your Windows 10 Lock Screen look like?
Now you know how to customize the Lock Screen of your Windows 10 PC or device. All that remains for you to do is to choose the configuration that works best for you. Set your favorite wallpaper, select the preferred applications that are capable of showing notifications on the Lock Screen, and choose whether you want Cortana to work on the Lock Screen. From now on, you can use this feature of your Windows operating system at full capacity. If you have any problems or questions, do not hesitate to ask in a comment below.
My lock screen settings only have two choices: Microsoft Store and Microsoft Content. Start>Settings has no System or Notifications entry.
I’m on Win10 Home, 64bit, version 2004, build 19041.264.
kostas ·
change the picture window 10
David ·
Hi: A question please-
Somehow I have a small circular picture that appears on my lock screen, with the locksvcreen photo fuzzed-out in the background. How do I get rid of the circular picture; I don’t know how the heck I put it on there!


Discussion (3)
My lock screen settings only have two choices: Microsoft Store and Microsoft Content. Start>Settings has no System or Notifications entry.
I’m on Win10 Home, 64bit, version 2004, build 19041.264.
change the picture window 10
Hi: A question please-
Somehow I have a small circular picture that appears on my lock screen, with the locksvcreen photo fuzzed-out in the background. How do I get rid of the circular picture; I don’t know how the heck I put it on there!