Like most operating systems, macOS supports multiple display languages you can choose from. While you are prompted to choose a default system language on the initial system start, you can change this at any time and have the system display menus, app windows, and other system features in the language of your choice. In this guide, we show you how to change to a new display language on your Mac, in order to fully enjoy the operating system in your preferred language:
NOTE: For this tutorial, we changed the display language from English to Spanish. The steps are the same for changing to any language you want, including Chinese, German, Arabic or Hindu.
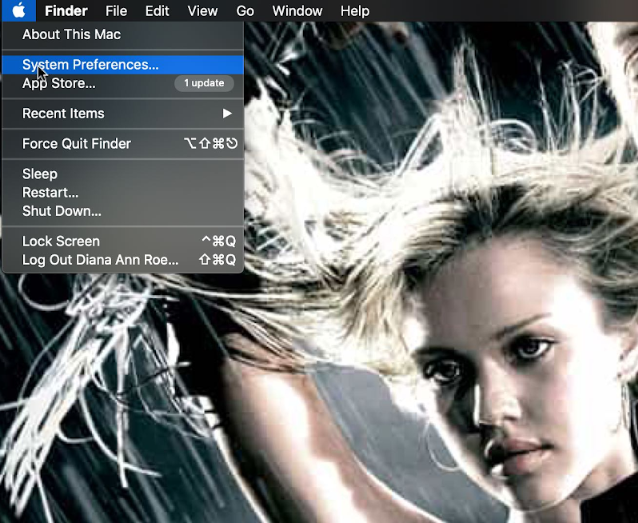
Step 1. Open System Preferences
There is more than one way to open System Preferences, but the simplest (and the most popular from what I've noticed) is to access it from the Apple menu on the top left corner of your screen. Click the Apple logo, and then System Preferences.
System Preferences in the Apple menu
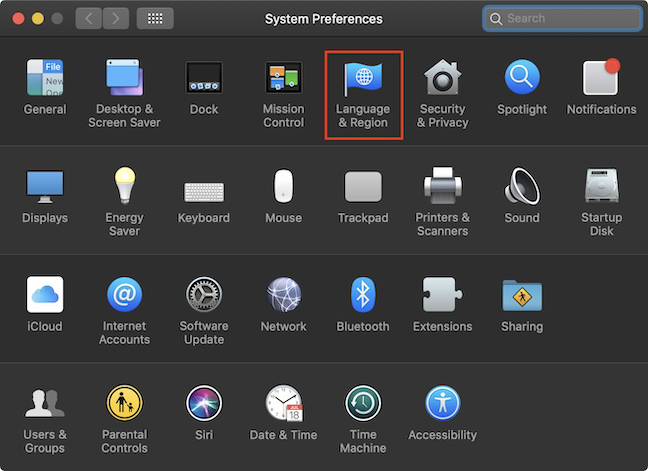
Step 2. Go to Language & Region
In the System Preferences window, click the Language & Region option.
The Language & Region option in the System Preferences window
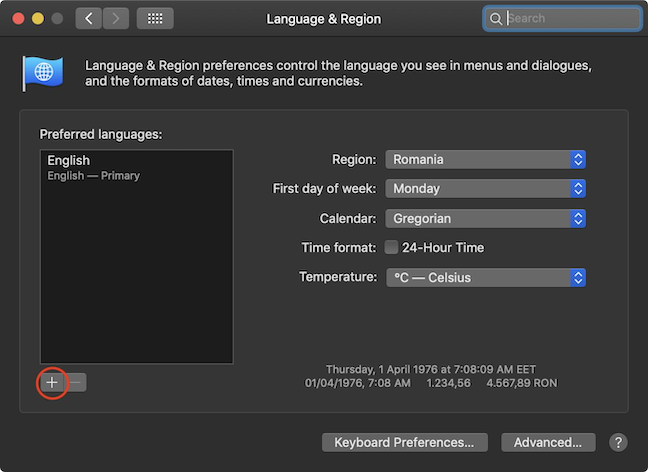
Step 3. Add the new language that you want to use
In the Language & Region window, click the + (Add) button under the Preferred languages list to start adding a new language.
Adding a new language to your Preferred languages, in Mac OS
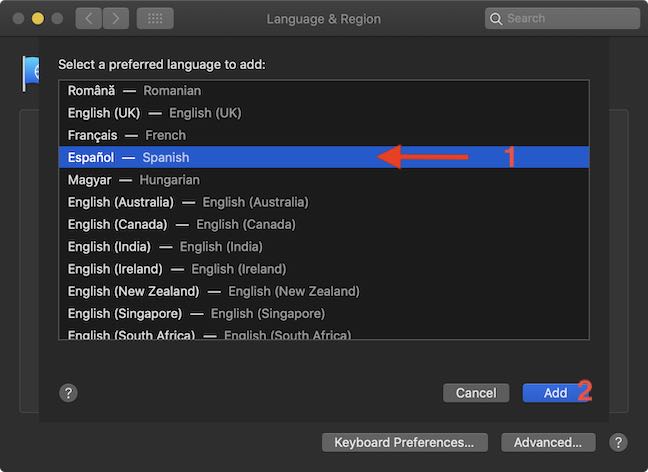
Step 4. Find and add your preferred language
Clicking on the + (Add) button prompts a pop-up window to open, displaying all the available languages you can choose from. Pick your desired language from the list, then click the Add button in the lower right corner. This adds the language that you selected to the Preferred languages list. In our case, we selected Español - Spanish.
Finding your preferred language
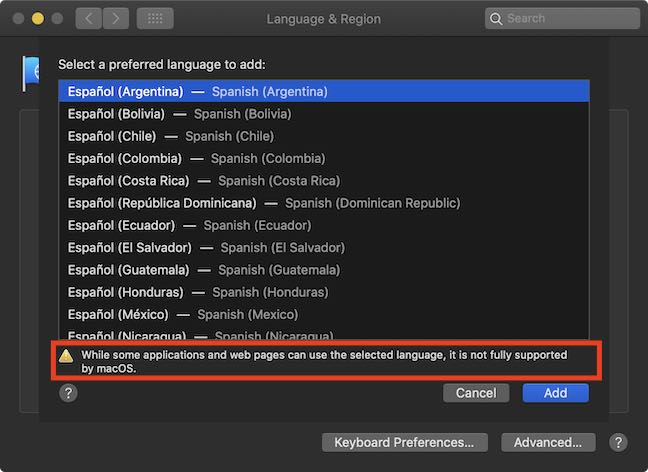
Depending on your language, you might need to choose between multiple variations that are specific to different regions and countries. In our case, another viable option as you scroll down is Español (Latinoamérica) - Spanish (Latin America).
However, as you scroll further down, you notice that the list is divided by a horizontal separator line. Only languages above the line are system languages fully supported by macOS (shown in all menus, messages, apps, web pages, etc). Languages below the line are not fully supported by macOS, and a warning is displayed when they are selected. In our case, we found several options for Spanish below the line:
Spanish language variations that are not fully supported
TIP: You can select and add multiple languages at the same time, by holding down the Command (⌘) key, and clicking on the name of the languages that you want to add.
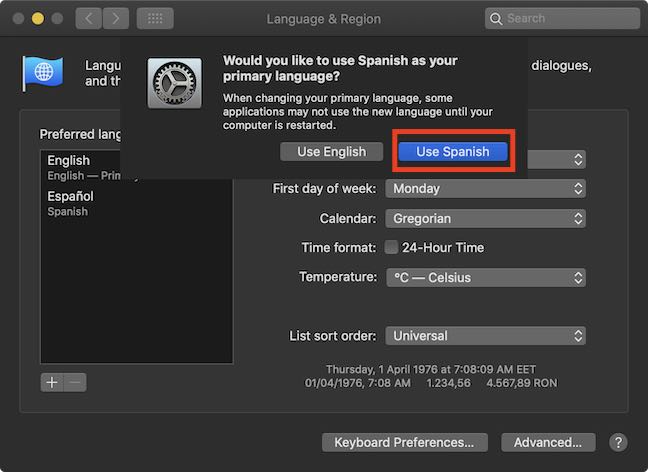
Step 5. Confirm your choice for the primary language
After adding your language of choice, a pop-up prompts you to select a primary language for your Mac, by choosing between your previous primary language and the new one you added. The button corresponding to your recently added language is colored in blue. In our case, we clicked the Use Spanish button to start using Spanish as the primary display language.
Confirm your new primary language in macOS
The current primary language is always displayed at the top of the Preferred languages list.
In our case, once we decided to Use Spanish, we could find it as the primary language at the top of the list. Even if you choose to continue using the already enabled primary language instead of the one just added, the new language is added to the preferred languages list. Also, once two or more languages are added in the Preferred languages list, you can change their order and choose one of them as primary by dragging it up and down the list, according to your preferences. If the primary language is not supported (by macOS and/or apps), the second language from the list is used and so on.
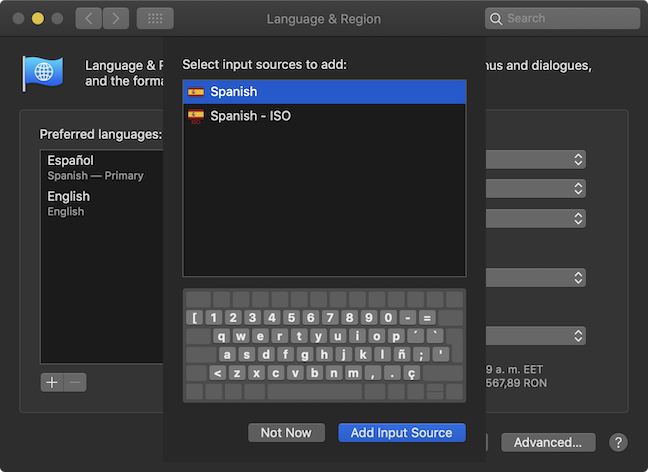
Step 6. Select the keyboard input sources for the selected language (if you want)
On MacOS Mojave and newer, a pop-up window prompts you to "Select input sources to add" immediately after a new language is added to the list as primary. This allows you to use special characters specific to that language when typing on your Mac. Since this step does not influence your progress in changing the primary system language, you can choose the appropriate language layout or click the Not Now button to decide later.
Choose the keyboard language layout for your newly added primary language
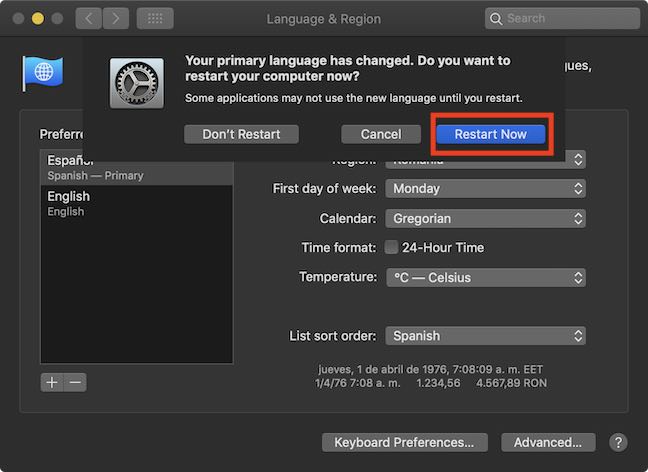
Once your desired language is set as primary, close the Language & Region window by clicking the x button in the upper left corner and you are offered the option to restart. Choose Restart Now, and the changes should take effect immediately after restarting your Mac.
Restart your Mac for the changes to take effect
Did you find the language you were looking for?
If you stayed with us and read the entire tutorial, thank you! We like to think that it was helpful and you are now enjoying your Mac in the language that makes you happiest. 🙂 Before closing this tab in your web browser, tell us if your language is fully supported on Mac OS. We are also curious about the most exotic language some of you might choose as the default. If your language is not what most people use, we would be thrilled to learn about it. 🙂


Discussion (0)
Be the first to comment.