
 21.11.2018
Do you need to create a Word document with checklists that you want people to complete on paper? You want to create a document that is used digitally, and ask people to check boxes in a checklist, in Microsoft Word? Creating checklists in Microsoft Word is quite simple for printed documents and a bit more complicated for forms that can be checked on the computer. See how to do both, so that you are ready for your next to do list or online form with checkboxes:
NOTE: This tutorial applies to the desktop versions of Microsoft Word, found in Microsoft Office, and Office 365. It does not apply to the mobile versions of Word, like those found for free, on Windows 10 tablets, or on devices with Android and iOS.
How to create a checklist in Microsoft Word, for printing
A checklist for printing means you print the resulting document and mark the items on paper. The easiest way to build such a list is to create a special kind of bullet list. Select the lines you want to transform into a checklist (you can start from an empty line as well and write your checklist elements afterward). In Word, go to the Home tab on the ribbon and look for the Paragraph section.
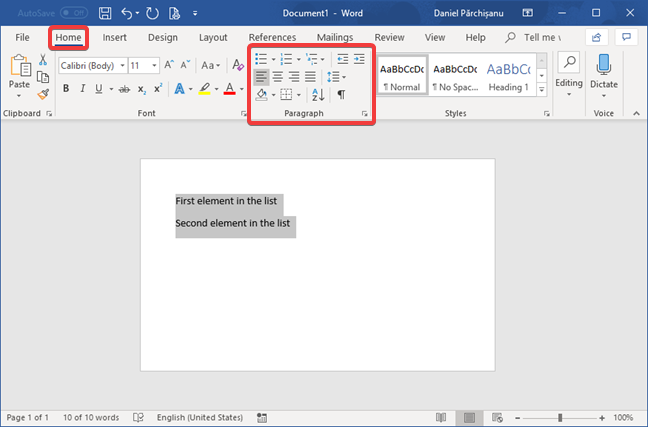
Click or tap on the arrow in the bullet list button. In the menu that opens, choose "Define New Bullet…."

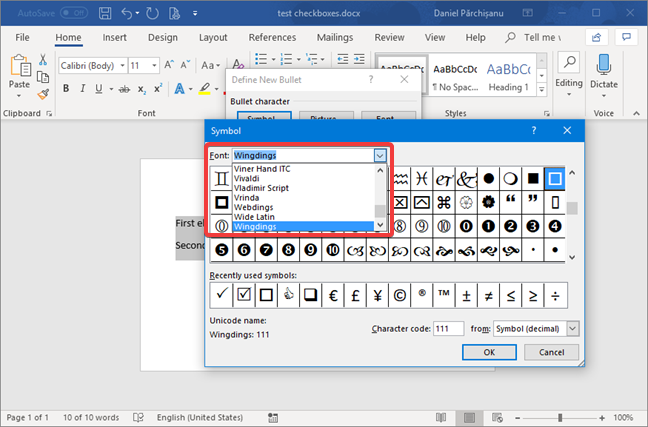
In the pop-up window called Define New Bullet, click or tap Symbol.

In the Symbol window, make sure the Font selected is Wingdings.
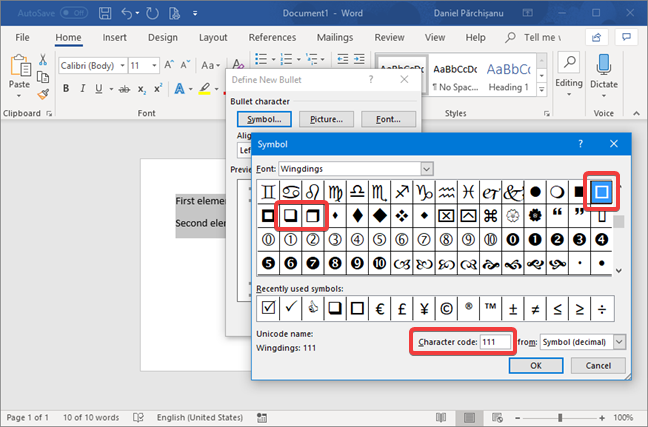
Select the rectangular box from the character list or fill in the character code 111. You also have the option of selecting 3D boxes (character codes 113 and 114).
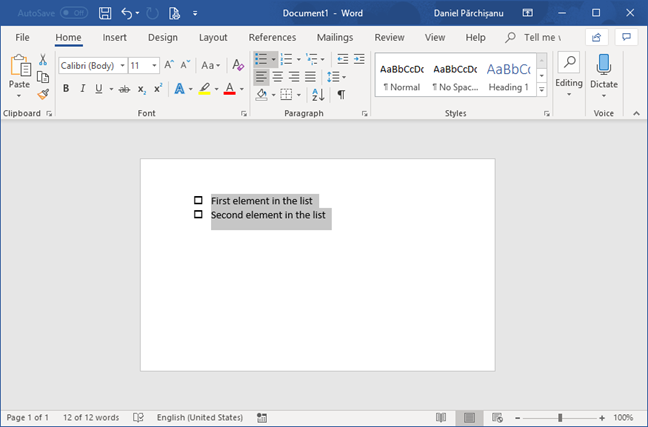
Once you are done selecting your checklist character, press OK in the Symbol window and again in Define New Bullet. The list is displayed now with checkboxes that you can print and mark on paper.
If you want to expand your list, position your cursor at the end of a line in your list and press ENTER. The new line automatically starts with the checkbox character.
How to create a checklist for a form to be filled in Word, and not on paper
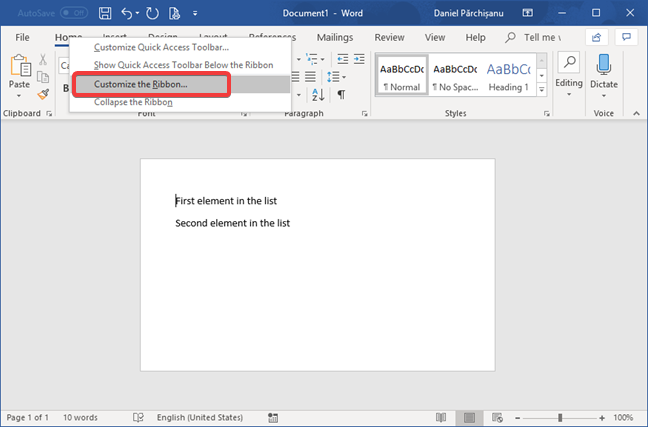
If you want to create a checklist that can be marked as checked, in Microsoft Word, you need to use a different feature called Check Box Content Control. This feature is accessed through a tab in the ribbon called Developer that is not shown by default in Microsoft Word. Our first step is, therefore, to bring up this tab in the ribbon. Right-click or tap and hold anywhere on the ribbon. In the context menu that appears, choose "Customize the Ribbon…."
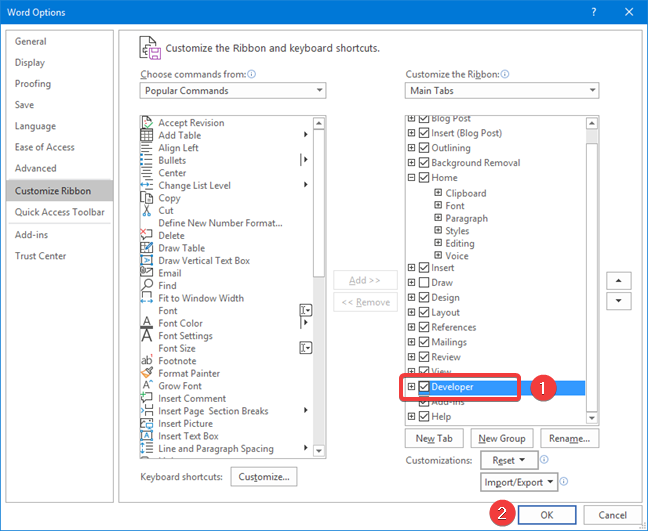
The window with Word Options opens up and Customize Ribbon is selected on the left. In the second column check the box for Developer and press OK.
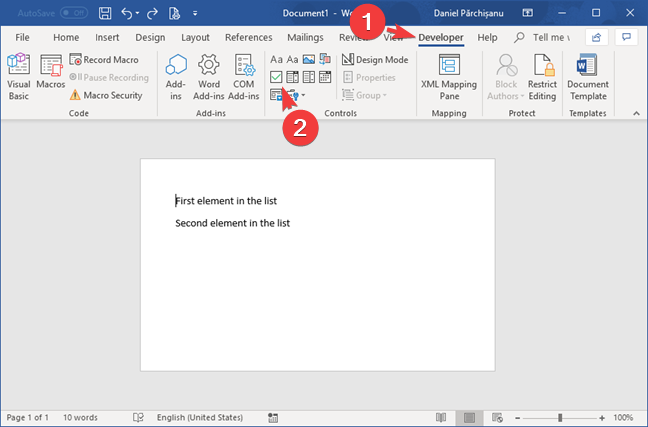
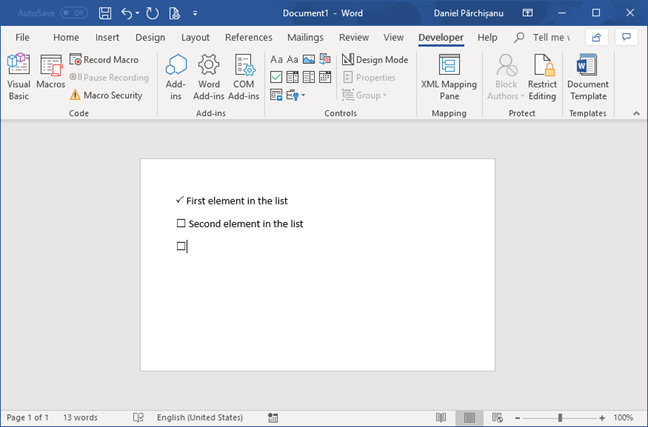
Now we can finally add checkboxes in Microsoft Word documents. To do that, click or tap the newly shown Developer tab. Click or tap the marked checkbox button in the Controls section to insert a new checkbox element.
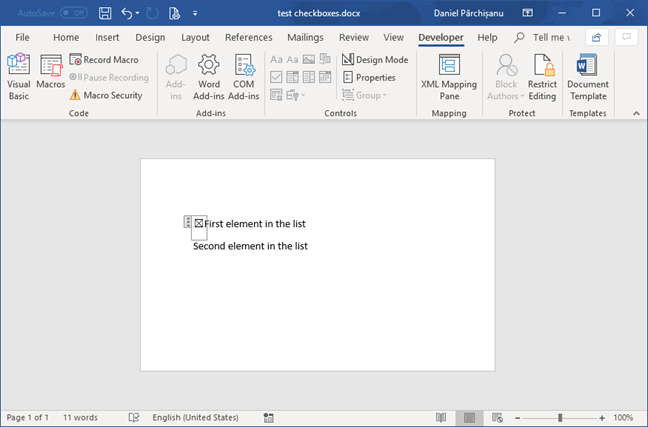
After the Check Box Content Control is inserted, the cursor remains inside the control element.
You can test the marking and unmarking of the control by pressing Spacebar or by double-clicking on it. To exit the control and continue editing the checklist, press the right arrow key a couple of times.
If you want to add the Check Box Content Control to other lines, place the cursor at the beginning of each line and click or tap the Check Box Content Control button or copy and paste an existing control.
NOTE: The Check Box Content Control is behaving like a special character that you insert in the text. It is not formatting existing text, but it is rather a separate piece of content. If you select the text before you click or tap on the Check Box Content Control button, it deletes the selected text and it replaces it with a Check Box Content Control. The other implication is that you need to copy and paste the control at the beginning of each line that is part of your checklist (the controls do not appear automatically when you add new elements in the list).
How to modify the symbols used to mark the checklist in a form, in Microsoft Word
You may decide to modify the characters used in your checklist built with the Check Box Content Control. Let's say that we want replace the default crossing of the checkbox with an X with a checkmark symbol. You can use whatever character you want. Here is how to do this:
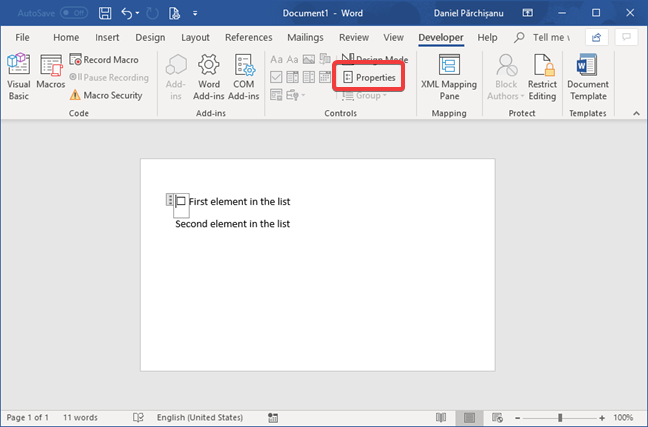
First, click inside the Check Box Content Control that you want to modify, and then click Properties in the Controls section of the Developer tab.
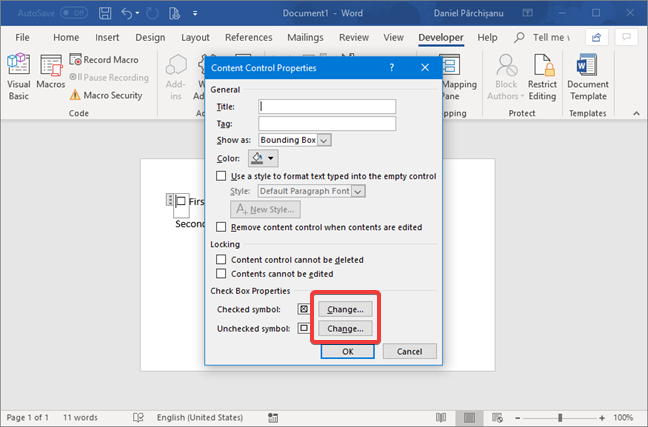
In the Content Control Properties window, press the "Change…" button near Checked symbol or Unchecked symbol, depending on which one you want to change. In our example, we change the Checked symbol.
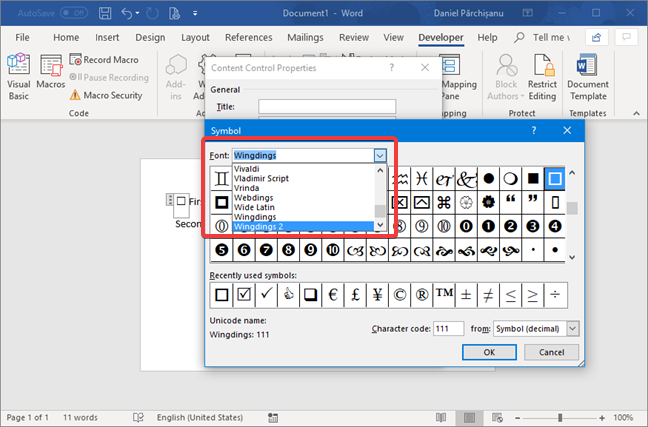
The character we want is part of the Wingdings 2 font, therefore we select "Windings 2" in the drop-down list for the Font.
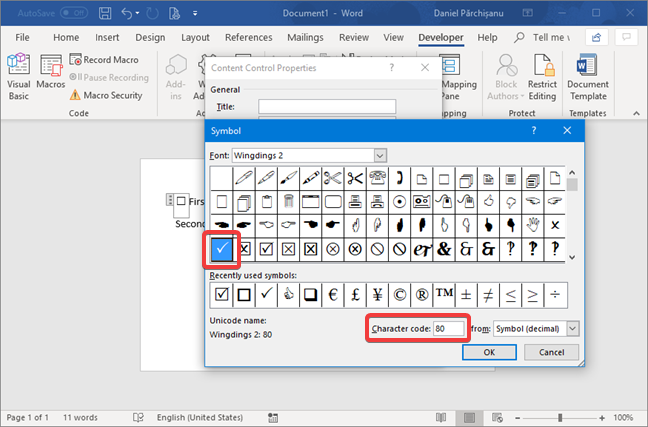
Select the desired character in the list. Our character has the code 80. Press OK when done in the Symbol window and then again in Content Control Properties.
When you press the Spacebar or double-click the control, the character shown when marked is the one selected in the previous step.
Please keep in mind that you need to copy and paste the modified control to keep the same behavior for new elements in the checklist. When you press the Check Box Content Control in the ribbon, Word inserts the standard default Check Box Content Control.
How to lock the checklist for text changes in a form from Microsoft Word
Once your list built using Check Box Content Control is ready for use in Microsoft Word, you might worry that during the checking of the list, you or others may inadvertently change the text associated with each element. Microsoft Word offers a feature that takes care of this problem for you. The checkboxes can be marked or unmarked, but the text from the list is protected.
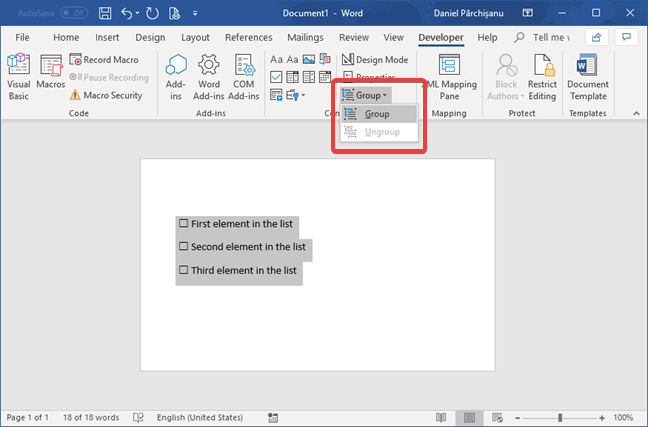
First, select the checklist that you want to secure from changes. Go to the Developer tab in Microsoft Word. In the Controls section, click Group, and select Group from the drop-down list.
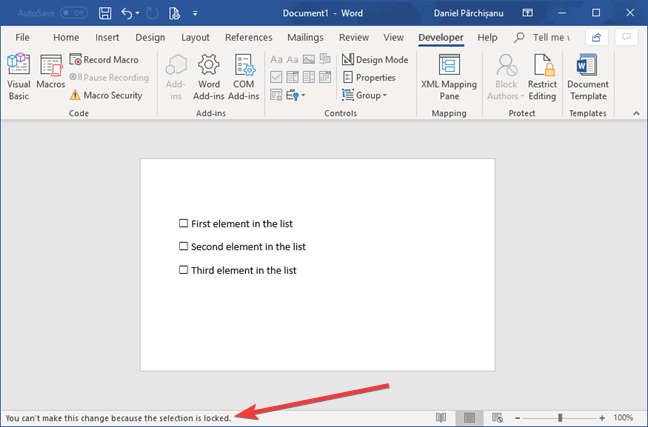
The checklist is secured. If anyone attempts to modify the checklist, they get the warning: "You can't make this change because the selection is locked." The warning is shown on the status bar of Microsoft Word and the attempted changes are ignored.
NOTE: The caution here is that Word does not let you put a Check Box Content Control as the first or the last element in the selection. You need to insert and select an additional space or a new line to ensure the checkboxes are completely inside the selection.
Do you print your checklists or do you use them in Microsoft Word documents that you complete on your computer?
What is your preference for checklists in Microsoft Word? Do you print them or do you mark them inside Microsoft Word documents? We live in the digital age, and yet the humble paper continues to be used defying the sophisticated devices that surround us. Let us know your preference in managing checklists by leaving a comment below.
