


Windows computers and devices can interconnect and share files and folders between them using network shares. However, if you also use Ubuntu Linux on some of your computers, network sharing between them and Windows is not straightforward. To connect your Ubuntu Linux computers to Windows computers and share files and folders, you need to make a series of settings. The first one is to enable file sharing using the Samba protocol. You also have to change the workgroup used by your Ubuntu Linux PCs so that all your computers belong to the same workgroup. In this tutorial, we will demonstrate how to enable file sharing and then how to configure and change the workgroup on a Ubuntu PC:
NOTE: We created this article using Ubuntu 20.04 LTS.
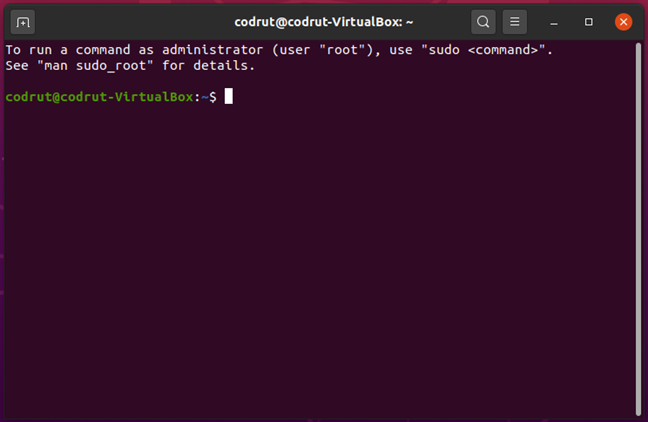
 Terminal in Ubuntu Linux
In the Terminal window, run this command: sudo apt update. This command downloads package information from all the sources configured on your Ubuntu PC. In other words, it downloads data from the internet about updated versions of software packages or their dependencies. After you run this command, you might be asked to enter your user password.
Terminal in Ubuntu Linux
In the Terminal window, run this command: sudo apt update. This command downloads package information from all the sources configured on your Ubuntu PC. In other words, it downloads data from the internet about updated versions of software packages or their dependencies. After you run this command, you might be asked to enter your user password.
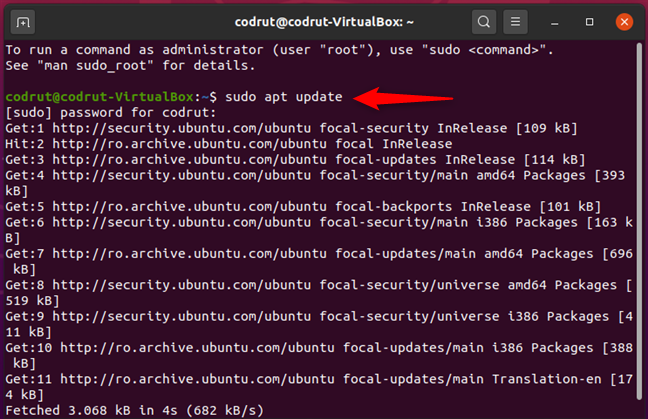
 Running sudo apt update in Ubuntu Linux
Next, run the command sudo apt install samba. This command tells Ubuntu Linux to download and install all the software packages required for Samba - the sharing service - to run on your computer. Wait for the command to do its thing and, if you’re asked to confirm that you want to install a certain package, accept by entering Y (Yes) and pressing Enter on your keyboard.
Running sudo apt update in Ubuntu Linux
Next, run the command sudo apt install samba. This command tells Ubuntu Linux to download and install all the software packages required for Samba - the sharing service - to run on your computer. Wait for the command to do its thing and, if you’re asked to confirm that you want to install a certain package, accept by entering Y (Yes) and pressing Enter on your keyboard.
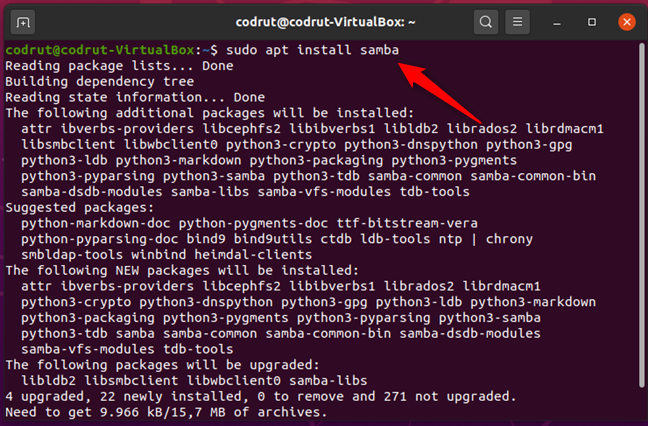
 Running sudo apt install samba in Ubuntu Linux
Once the installation is done, Samba should be running on your Ubuntu Linux machine. However, just to make sure that everything is OK, you might want to restart your PC before moving on to the next part of this tutorial.
Running sudo apt install samba in Ubuntu Linux
Once the installation is done, Samba should be running on your Ubuntu Linux machine. However, just to make sure that everything is OK, you might want to restart your PC before moving on to the next part of this tutorial.
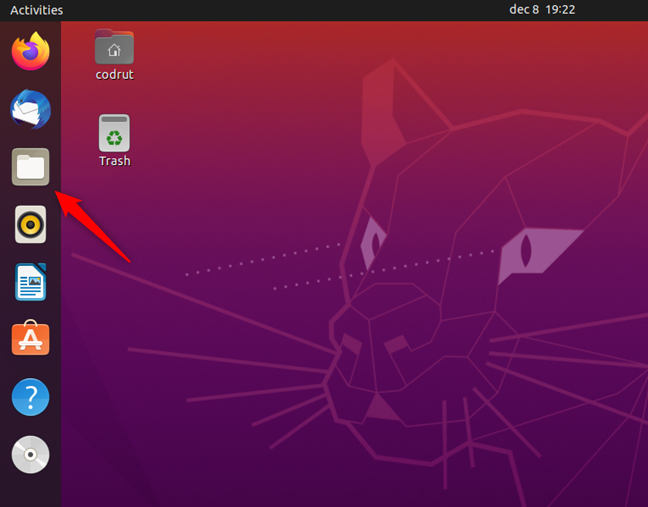
 Opening Files in Ubuntu Linux
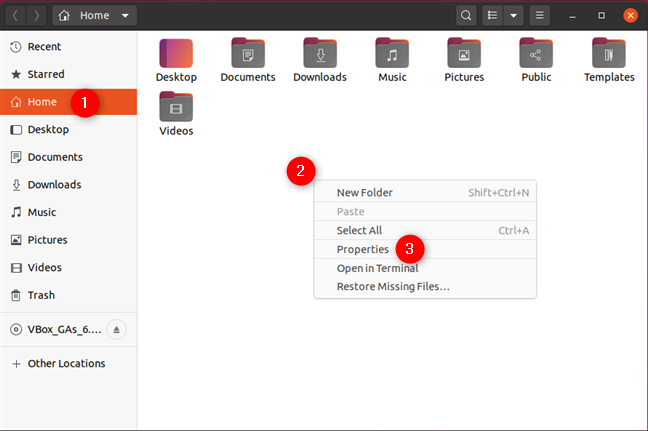
Next, go to the folder that you want to share on the network and right-click on it to open a contextual menu. On the menu, select Properties.
Opening Files in Ubuntu Linux
Next, go to the folder that you want to share on the network and right-click on it to open a contextual menu. On the menu, select Properties.
 Opening Properties of a folder in Ubuntu Linux
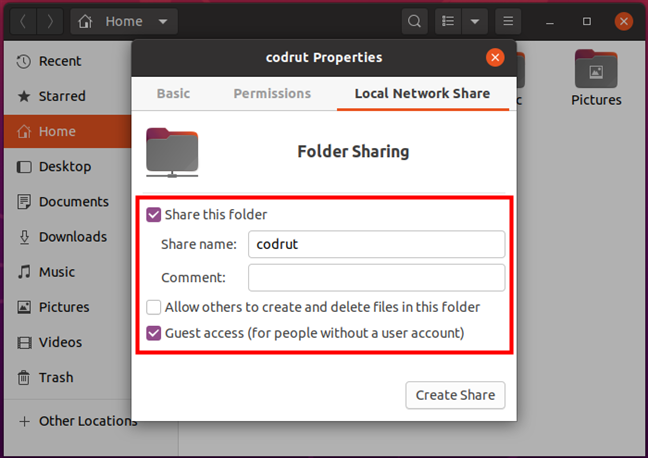
In the Properties window, select the Local Network Share and check the setting called “Share this folder.”
Opening Properties of a folder in Ubuntu Linux
In the Properties window, select the Local Network Share and check the setting called “Share this folder.”

 Share this folder in Local Network Share
Change the Share name and add a Comment if you want. Then, also select or deselect the “Allow others to create and delete files in this folder” and “Guest access (for people without a user account” settings according to how you want to give other network users access to your shared folder.
Share this folder in Local Network Share
Change the Share name and add a Comment if you want. Then, also select or deselect the “Allow others to create and delete files in this folder” and “Guest access (for people without a user account” settings according to how you want to give other network users access to your shared folder.
 Configuring how the folder is shared in Ubuntu Linux
When done, click the Create Share button to start sharing that folder with your network, including all the Windows computers and devices connected to it.
Configuring how the folder is shared in Ubuntu Linux
When done, click the Create Share button to start sharing that folder with your network, including all the Windows computers and devices connected to it.
 Running sudo gedit /etc/samba/smb.conf in Ubuntu Linux
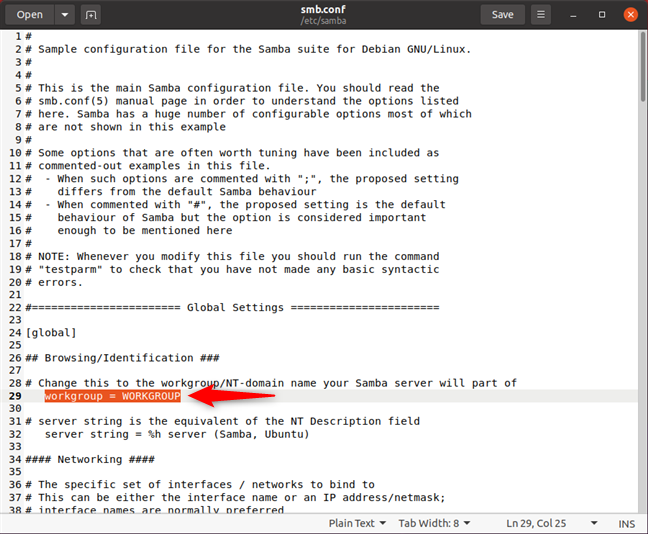
Next, the Samba configuration file opens in a gedit window. Scroll down, if necessary, until you find the workgroup line in the Global Settings section.
Running sudo gedit /etc/samba/smb.conf in Ubuntu Linux
Next, the Samba configuration file opens in a gedit window. Scroll down, if necessary, until you find the workgroup line in the Global Settings section.
 Ubuntu workgroup setting
Change the Ubuntu workgroup value to match the name of the workgroup you want to add your Ubuntu computer to. Then, click Save and restart Ubuntu to make sure that the new settings are applied.
Ubuntu workgroup setting
Change the Ubuntu workgroup value to match the name of the workgroup you want to add your Ubuntu computer to. Then, click Save and restart Ubuntu to make sure that the new settings are applied.
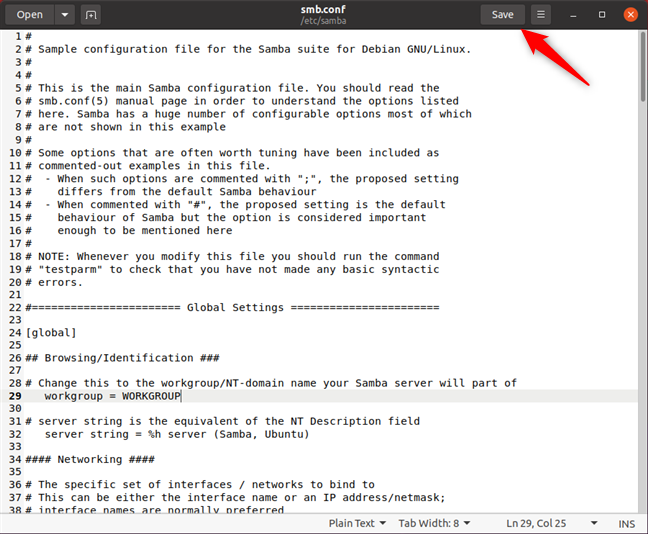 Save to apply the Ubuntu workgroup change
NOTE: If you have a network that includes Windows computers, you need to make sure the workgroup is set up the same as on your Ubuntu computers. Do that if you want your Ubuntu PCs to join your Windows workgroup. To learn how to do this, check out this tutorial: The Windows 10 workgroup and how to change it.
Save to apply the Ubuntu workgroup change
NOTE: If you have a network that includes Windows computers, you need to make sure the workgroup is set up the same as on your Ubuntu computers. Do that if you want your Ubuntu PCs to join your Windows workgroup. To learn how to do this, check out this tutorial: The Windows 10 workgroup and how to change it.
How to enable file sharing (install Samba) in Ubuntu Linux
The sharing service or Samba is not installed by default in Ubuntu Linux. The installation process of Samba varies in complexity, depending on the method you prefer to use. Here’s the easiest and most straightforward way to install Samba: First of all, open the Terminal by simultaneously pressing CTRL + ALT + T on your keyboard.How to share folders on a Ubuntu Linux computer
Once Samba is running, you can easily share folders. To do that, first open Files.How to set the Ubuntu workgroup
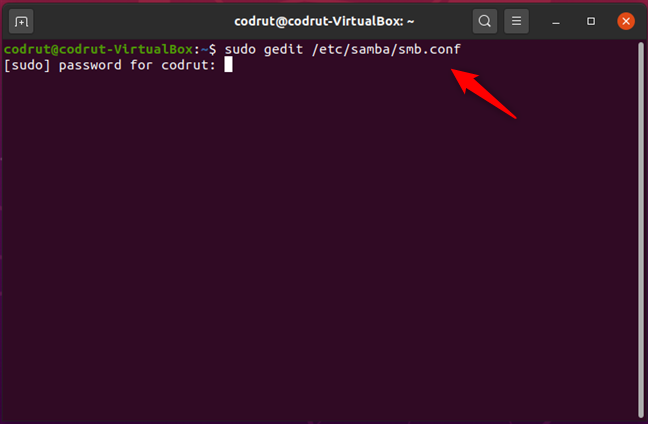
In most cases, you don’t have to change the workgroup name because, by default, Ubuntu, Windows, and Mac OS all have the same workgroup name, which is actually WORKGROUP. However, if you have to change it, follow the next steps. Open a Terminal window (CTRL + ALT + T), and run the following command: sudo gedit /etc/samba/smb.conf. Then, press Enter. If you haven’t previously used the Terminal this session, Ubuntu should ask you to type in your user account password.
Discussion (36)
After following this I can seemingly only share folders but none of the files within the folders. Or to that point, none of the sub folders within the shared folders. When I use X-Plore, it says “INVALID_PARAMETER” when I try to click on the shared folder.
Normally shared folder with files in it appear to be shared.
When I create a new folder to be shared, it will access the files within but no shared folders within that newly shared folder. For example, I create a folder called Share1 and include it the smb.conf file, it sees it and files within. When I try to add shortcuts within that folder, they are not seen.
I don’t want to have to transfer gigabytes of files to that folder in order to view them.
How do I make other folders or even an attached USB drive viewable and all its subfolders and files?
Do you know why it’s asking me for a password when the user tries to access the shared folder? I’ve tried both my and the users’ passwords but neither is accepted. Is there a way to find out what this password is?
I am not able to share folders or drives outside home folder.. is there any tutorial to do the same ?
I was able to send from Win7 to Ubuntu 14.04, after the process to create a folder to share in Ubuntu, install samba and be sure those are in the same work group.
I searched from Win by the IP of Ubuntu machine and Win got access to Ubuntu, then I was able to copy from Win to Ubuntu.
Note: From “Share in Network” option by right click on the folder to share from Ubuntu I enable those options:
“Allow to other users to create and delete files in this folder”
“Guest access (for people without a user account)”
Using Ubunut 14.04.
Trying to get from Ubuntu into Win7
Installed samba.
Modified the smb.conf
Ubuntu can see the Win7, but will not open shares.
Keep asking username, pass.
I tried all Win 7 usernames and passwords, I created the same user name as in Ubuntu, just in case, no luck.
Any ideas?
I try all users of the
Awesome! I’ve been wondering how to change the workgroup.
I do not understand how the connection is handled. When I open a Network folder (with password protected access, I suppose) there is a field to specify the work-group name. Should this specification over-rule the default name?
It doesn’t in my case. Many thanks
I have installed ubuntu and have everything working including backups however when I try and share the drives I get the message Package ‘samba’ is virtual after that package ‘libpa-smbpass’ is virtual. What do I do I am almost finish and want to use the drives
thx this was helpful..I was wondering if linux supports file system or sharing on windows 7 and this webpage was helpful thx to all..
Excellent guide! It works just as described on 11.04. I had to update my Ubuntu from 9.04 to 11.04 because I kept getting errors when trying to enter my passwd to install sharing in Ubuntu 9.04.
Many thanks =D
This is very helpful and easy to follow. It worked for me.
SO now both my win7 and ubuntu pc are both in the same workgroup. I still coudn’t see my ubuntu pc in network, so i went to my win7 run command and typed manually searched for ubuntu pc ip \192.168.*.* and now I can see my shared folders but It won’t let me access them. “Windows cannot access \192.168.*.*shared” any ideas?
“sudo gedit /etc/samba/smb.conf” came back with Cannot open display. I’m running xbmcbuntu and I’m a linux noob, be gentle.
https://www.liberiangeek.net/2012/05/windows-7-vs-ubuntu-12-04-how-to-change-system-workgroup/
This worked for me on latest ubuntu 12.10.
i have asus eee pc 900ha notebook running ubuntu 12.10 and trying to access folders in my workgroup from my 2tb hard drive on my desktop which runs windows 7 home premium.
now that samba app on ubuntu has my workgroup hopefully it will run smoothly.
This half worked. My ubuntu 12.04 can see the windows computers but none of my windows computers can see the unbuntu 12.04. i followed ever step to the exact.
thank you it worked….my home PC(windows XP) and laptop (Ubuntu Linux) are now connected
Very clear and concise instructions. A good job well-done.
I’m glad you found it useful.
Really very usefull. Thanks for sharing..
https://www.liberiangeek.net/2011/04/share-files-folders-ubuntu-11-04-natty-narwhal/
I followed all directions on this tutorial and nothing worked, still could not see each other. So i tried again today not giving up and found the link above, you have to install Samba directly from software center. the directions given here for installing samba are apparently incorrect or outdated. However i would try the steps on this tutorial and the one above i have the link to. Both machines see each other and i can share folders. I just have to work out some things on windows 7 now to allow my Ubuntu machine to access files on it. I think its my firewall or i need to allow everyone to access the folders etc.
if you are getting errors after clicking “Install Service”, try a “sudo apt-get update” before it.
I followed all the steps but still i have the windows workgroup with the other pcs and a separate one called “WORKGROUP” with the ubuntu pc.
i can view the pcs from the windows group and can access the ubuntu pc from the windows, they are just in separete workgroups.
Any advice? thank you in advance.
Did I understand correctly that the Windows computers have the workgroup “workgroup”, in lower case while the Ubuntu computer has the workgroup “WORKGROUP”, written in upper-case?
If my understanding is correct then you don’t need to worry. All is fine. It is not case sensitive.
This didn’t work for me. My W7 machine cannot “see” the ubuntu 11.04 box at all
Double check that the Windows 7 computer has the same Workgroup setup as your Ubuntu one.
This guide worked perfectly on my Ubuntu 11.04. Thanks a lot!
Thanks for the update and your help. It still does not work for me. My Windows 7 computer and the Ubuntu 10.04 LTS box are both displaying the correct workgroup name, but the Windows 7 machine is connecting via “Homegroup” and can not see Ubuntu. It sees the other Win7 machine, of course.
Ironically I was separated from my Ubuntu for a few days, through no desire of my own. I suspect I can figure this out this weekend. I thought I should mention it.
This is a fine site and your attention to updates and accuracy here is to be commended.
You cannot see the Ubuntu computer in the Homegroup. You need to open Windows Explorer and go to Network. There you will see the Ubuntu computer.
The Homegroup is made to work only with Windows 7 computers. To learn more about it and truly understand how it works, please read this tutorial The HomeGroup Feature & How it Works.
While it’s true that’s the way it’s *supposed” to work, it often does not.
Set-up identically, I have one Ubuntu box that never appears on the Windows 7 machines, and another box that intermittently “appears” and “disappears.”
Again – The two Ubuntu boxes are (to the best of my ability) configured identically.
It’s unclear (to me) if this is a real “bug” in Ubuntu, or just another unnecessarily obscure configuration “quirk” (usability bug), but it is real.
Worth mentioning – All eight machines on this network are WiFi.
Many thanks, and my apologies for my late-night snarkiness! Working on a Masters and taking it out on you when I ended up emailing myself .5G of files cos I couldn’t figure it out for myself as I usually do.
The article is now updated to work with Ubuntu 10.10. Please test and confirm if it works for you too.
Alas, another careless, inaccurate, incomplete set of instructions that don’t work even after commenters correct what the author should have known before sitting down to write. Wish I had something constructive to say. Like Tom, I’m all too familiar with this outcome.
These instructions don’t work with the latest version of Ubuntu. The tutorial was made using an older version of this operating system. We are working as we speak on an update to the article which will be published in the next week or so. The new instruction set WILL WORK with Ubuntu 10.10.
it’s sudo service smbd restart
not smdb
thank you .very much.the process is running now..so wt further i have to do?
please kindly reply
As a newbie, I was really hoping this was the “holy grail” I was looking for. I’m simply trying to get a new Ubuntu box (Lucid) to “act like” one of the Windows 7 machines on the same (wireless) network.
All went well until:
sudo service samba restartThat simply returns, “samba: Unrecognized service”
Then, I read somewhere else that the command is different for Lucid, so I did:
sudo service smdb restartAnd that worked perfectly!
However, still no joy – The machine is not visible to the Windows 7 computers, and it can’t “see” them, either, and I have no idea what to do next!?
I’ve found dozens (hundreds?) of online posts about setting-up Samba on Ubuntu, and I’m discouraged in that no two are the same, bot one has been thorough, and not one has worked!?