The ASUS ExpertWiFi business lineup offers a wide range of devices, from wireless routers and mesh WiFi systems similar to those in the consumer market to more advanced networking equipment like wired VPN routers, switches, and access points. Setting up a robust network for a small or medium-sized business can be daunting, especially when lacking specialized IT expertise. To simplify the process, I've created this comprehensive step-by-step guide. Follow along, and you'll have your ASUS ExpertWiFi network up and running smoothly, ensuring your company is connected and productive in no time:
Step 1. Buying the right ASUS ExpertWiFi networking equipment
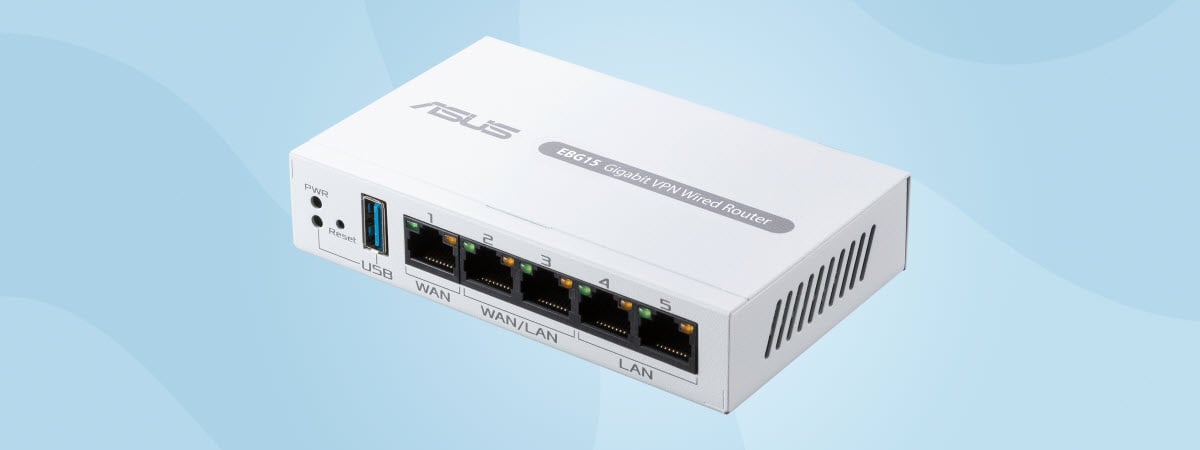
If you have a small or medium-sized business that requires a network to cover a larger area, you likely need a more complex network architecture, which includes a VPN wired router, a POE+ switch, and one or more access points. The ASUS ExpertWiFi family comprises several products, and for this guide, I’m going to use the following devices: an ASUS ExpertWiFi EBG15 (a small wired router with VPN server capabilities), an ASUS ExpertWiFi EBP15 (a smart managed switch with a 60 Watt PoE budget), and an ASUS ExpertWiFi EBA63 (a dual-band Wi-Fi 6 access point, which can be mounted on all kinds of horizontal and vertical surfaces).
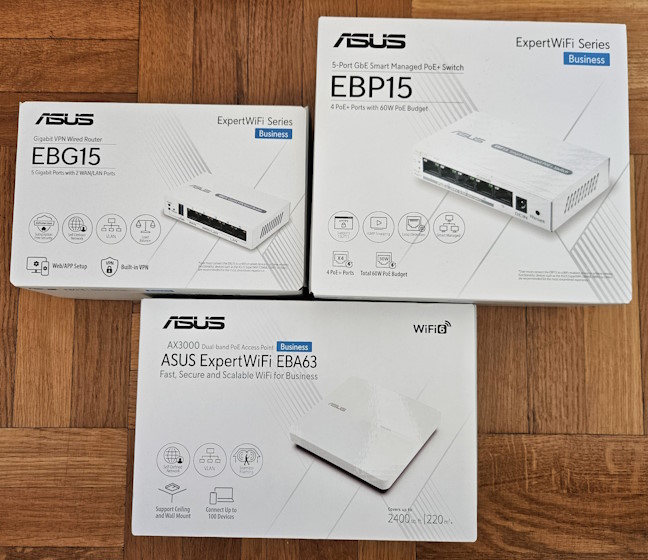
The ASUS ExpertWiFi equipment I installed
Although you may have bought different ExpertWiFi routers and access points, the steps for installing your network remain the same. To make things easier, the firmware and the user interface are identical on all ExpertWiFi products.🙂
Step 2. Install your ASUS ExpertWiFi router
The first device that you must install is the wired router. For this tutorial, I’m using the ASUS ExpertWiFi EBG15. Unbox the router from its packaging and plug it into the power outlet. Then, take the internet cable from your internet provider and plug it into the router's WAN port.
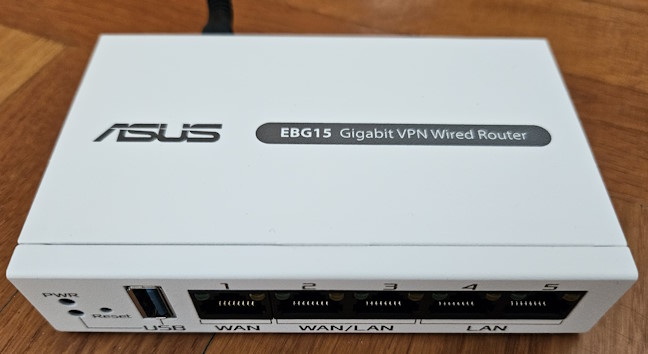
ASUS ExpertWiFi EBG15
Next, use a network cable to connect a laptop or desktop computer to the router. Open Microsoft Edge or any other web browser you prefer, and navigate to expertwifi.net.
ASUS loads the end-user license agreement for the ExpertWiFi family of products. Scroll down, read it, and then Agree to it.

Agree to the license agreement first
Next, you see the privacy notice. Again, scroll down to read the information presented by ASUS, and click or tap Agree.
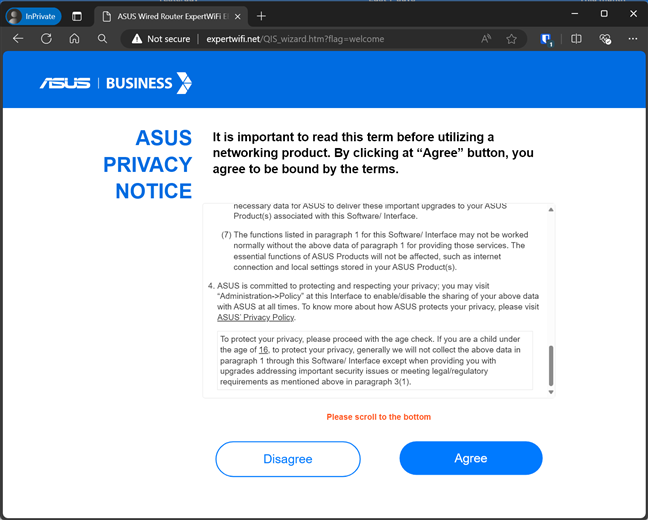
Agree to the privacy notice
You are shown a welcome message. As you can see, the user interface is in English. If you click or tap English, you can switch to any of the other available languages. Then, when you are ready to set up your network, click or tap the Create A New Network button.
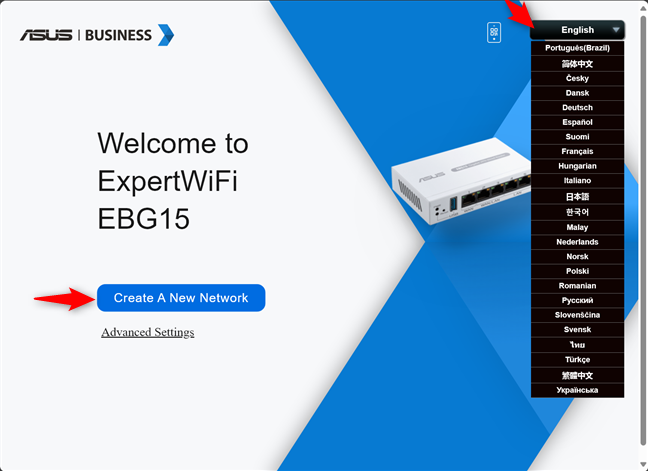
Choose your language and create a new network
ASUS ExpertWiFi asks you to set up the local login username and password for accessing the router and your network settings. It uses a default admin account with a pre-generated password that you can find on a sticker at the bottom of the router. I recommend unchecking the “Use default Local Login Password” option and choosing a new username and password. When you’re done entering the necessary details, click or tap Next.
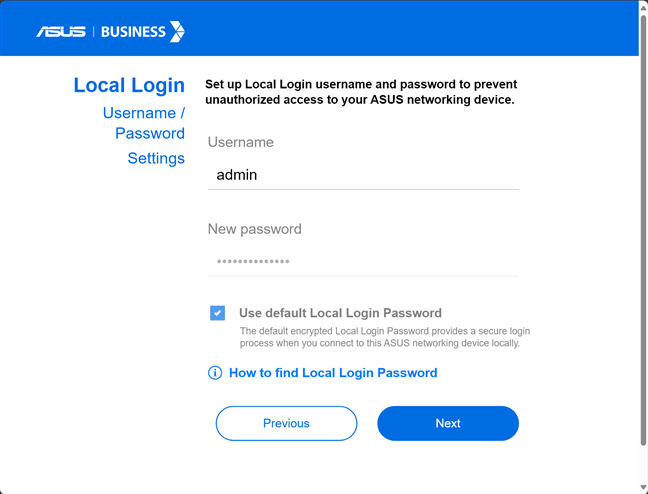
Set up your login account and password
Depending on the type of internet connection you’re using, you are asked for the necessary connection details. I’m using a PPPoE connection, so I was asked to enter the username and password for my internet connection. After entering the necessary details, click or tap Next.
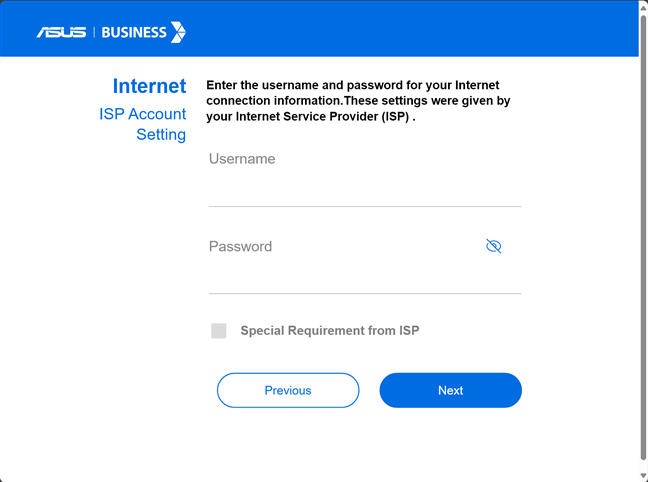
Enter the details for your internet connection
The network is now created, and the ASUS ExpertWiFi router is up and running. The setup wizard displays the Dashboard for your router, where you can add other ExpertWiFi devices to the network.
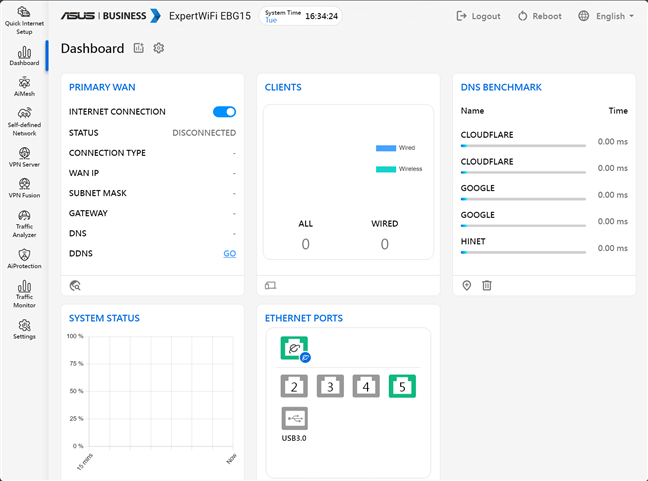
The ASUS ExpertWiFi dashboard
Keep your computer running and the web browser window connected to the dashboard above. You’ll need them for the next steps too.
Step 3. Install your ASUS ExpertWiFi switch
If you’re using a switch like the ASUS ExpertWiFi EBP15, plug it into a power outlet and connect it to the router. Wait for it to start up and light up all its LEDs.
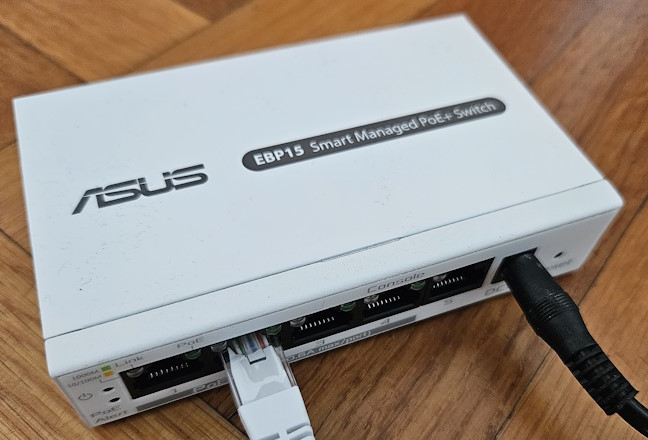
Installing the ASUS ExpertWiFi EBP15 switch
When the LEDs confirm it is working, go to the AiMesh section on the router’s dashboard and click or tap +Add AiMesh Node.
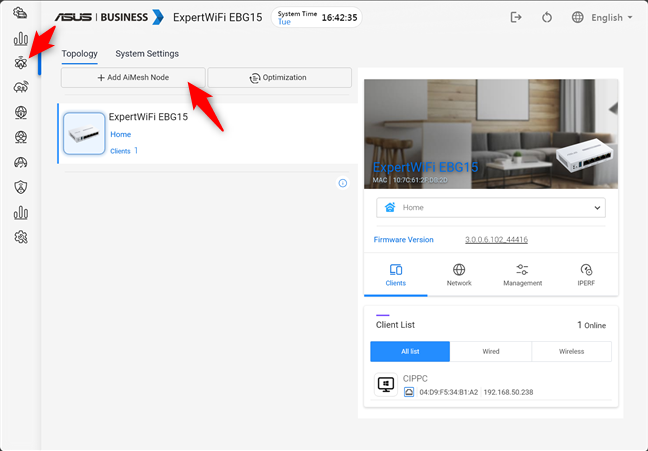
In the AiMesh section add a new AiMesh node
TIP: If you’re not familiar with AiMesh and what it means, I highly recommend this article: What is an ASUS AiMesh network?
Your ASUS ExpertWiFi router starts looking for other devices, displaying those it finds. You should see the EBP15 switch (or any other ExpertWiFi switch) listed like in the screenshot below. Click or tap its name.
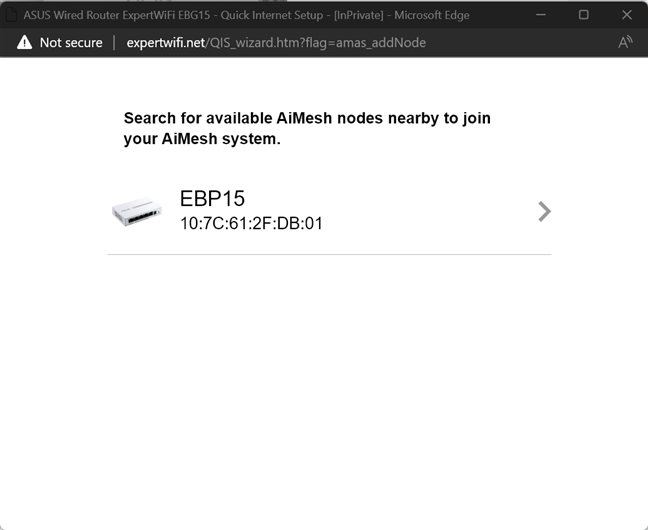
Select the switch from the list
If no AiMesh-compatible devices are found, make sure that your switch is powered on, that it is reset to its default settings, and try again.
After you select the switch, click or tap Connect.
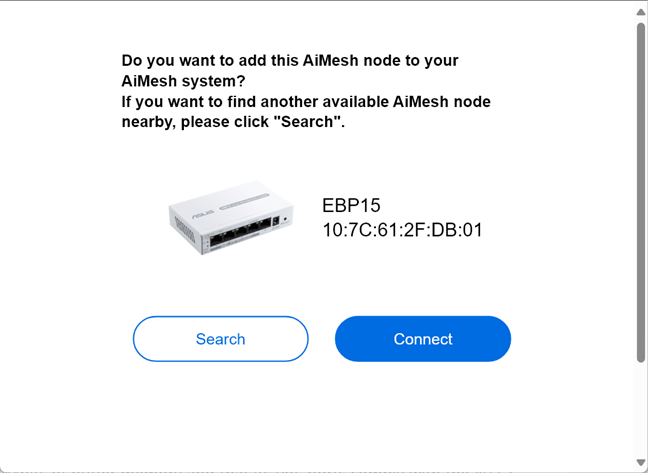
Press Connect to add the switch to the network
After a few seconds, you are informed that the switch has been successfully added to your AiMesh network. Click or tap Finished.
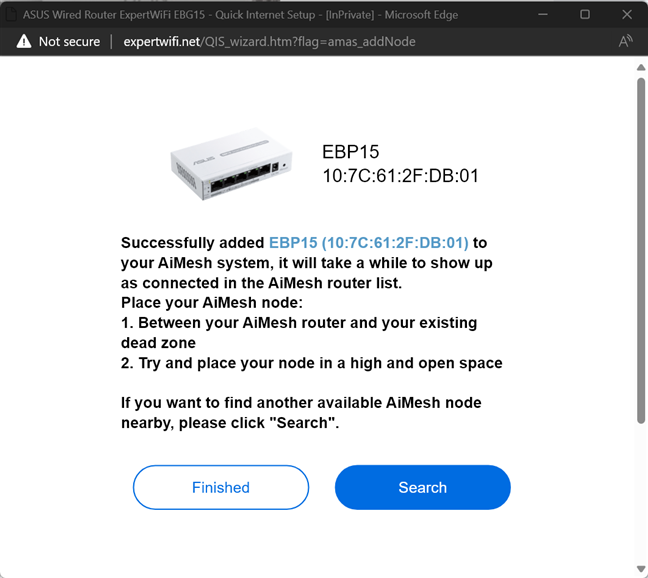
Press Finished and you can move on to the next device
You should now see the ASUS ExpertWiFi switch added to the network in the AiMesh dashboard. If you have more switches to join to your mesh WiFi, repeat the same steps until you add all of them.
Then, keep your computer connected to the router and leave the dashboard open in your web browser.
Step 4. Install your ASUS ExpertWiFi access point
It’s time to add the access point to your network. Connect it with a network cable to your PoE switch, so that it receives power from it. If you don’t have such a switch, you can connect the access point directly to the router, but you also need to use its power adapter. For this tutorial, I used the ASUS ExpertWiFi EBA63 access point pictured below.
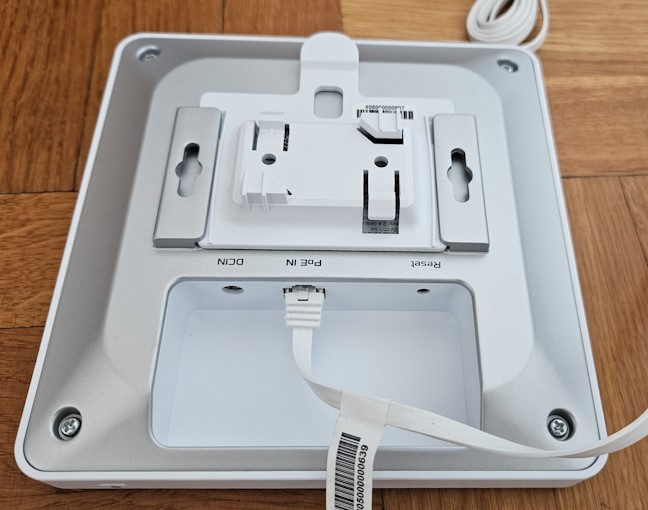
Installing the ASUS ExpertWiFi EBA63 access point
After the ExpertWiFi access point boots and is ready to use, click or tap +Add AiMesh Node in the AiMesh dashboard.
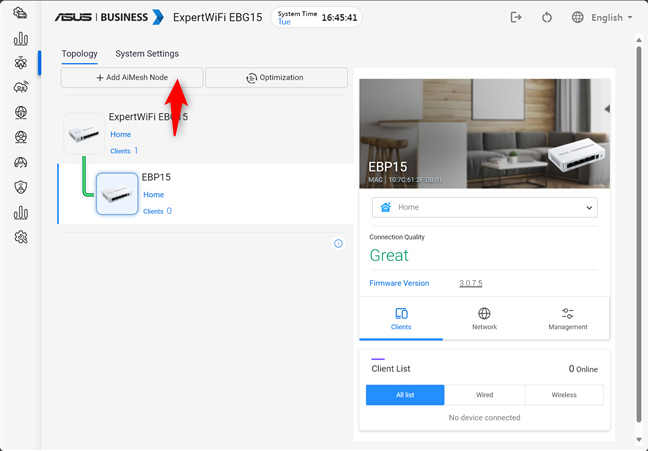
In the AiMesh section, add another node
Your router spends some time looking for available AiMesh devices to install and lists those it finds. Click or tap the name of the access point.
If no AiMesh-compatible devices are found, make sure that the access point is powered on and reset to its default settings, then try again.
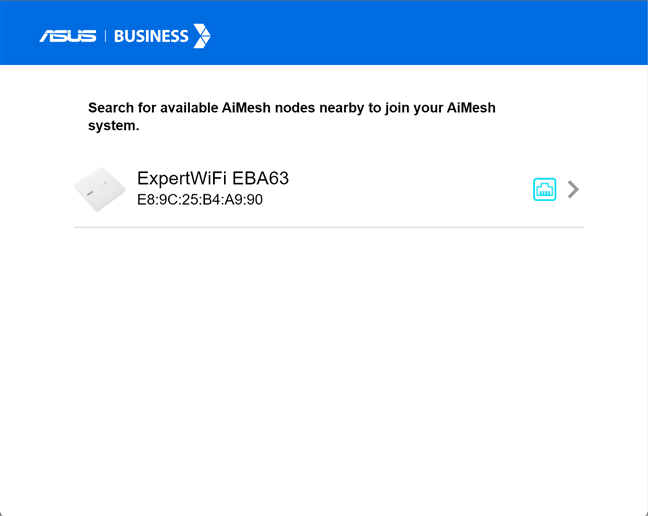
Select the access point from the list
To add the access point to the network, click or tap Connect.
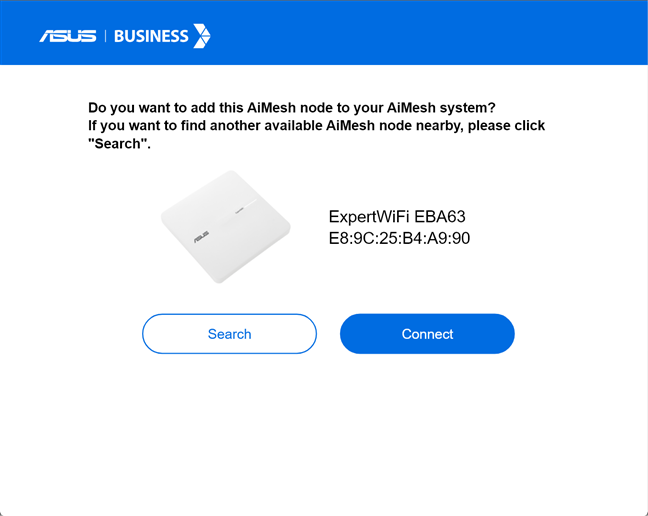
Connect to the access point
After a few moments, you are informed that the access point was successfully added to the network. Click or tap Finished.
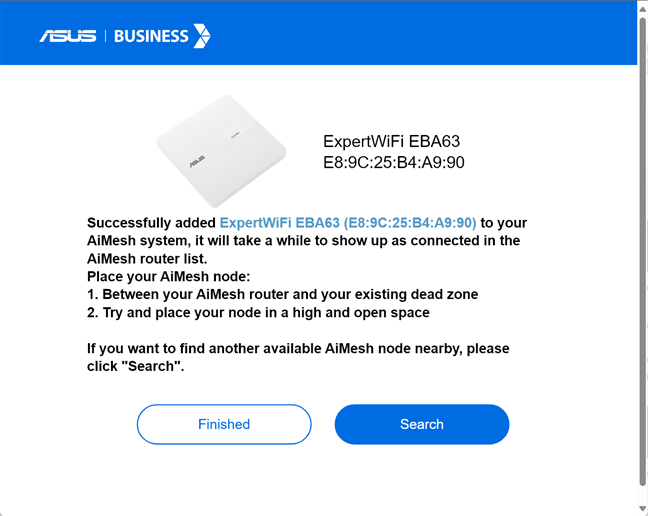
Click or tap Finished
You should now see the access point listed in the AiMesh dashboard below the router and the switch you’ve added before it.
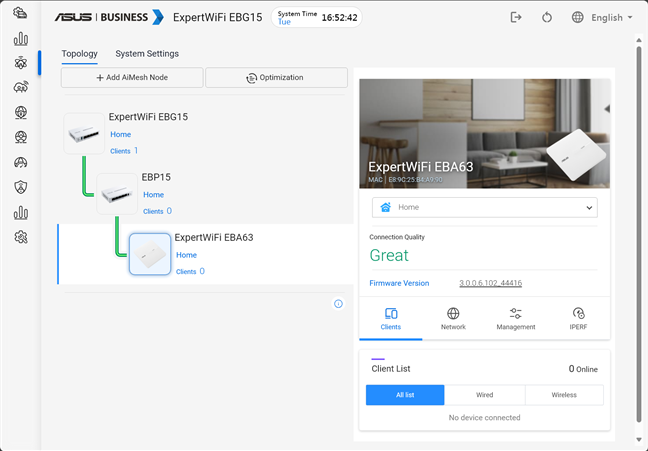
Check your AiMesh architecture
If you need to install multiple access points, repeat the same steps until you add them all.
Now it is time to configure your ASUS ExpertWiFi network
Now that you’ve added all your ASUS ExpertWiFi equipment in the AiMesh section of the router’s firmware, you can start setting up your network. Thanks to the AiMesh system, all the settings you make in the router’s admin interface are automatically replicated on all your ExpertWiFi equipment. Therefore, you can configure your network as if it were one device instead of many. Feel free to access the Self-defined Network (SDN) section of the user interface and configure the Wi-Fi you want to have inside your company’s network. And if you have any questions, don’t hesitate to ask using the commenting options below.


 28.06.2024