


Using an ELMO projector helps you display worksheets, books, and 3D objects clearly in a classroom or meeting room. Most models connect quickly with HDMI, VGA, or USB, so you can share materials with a full room from a single desk.
Step 1: Check your ELMO model and ports
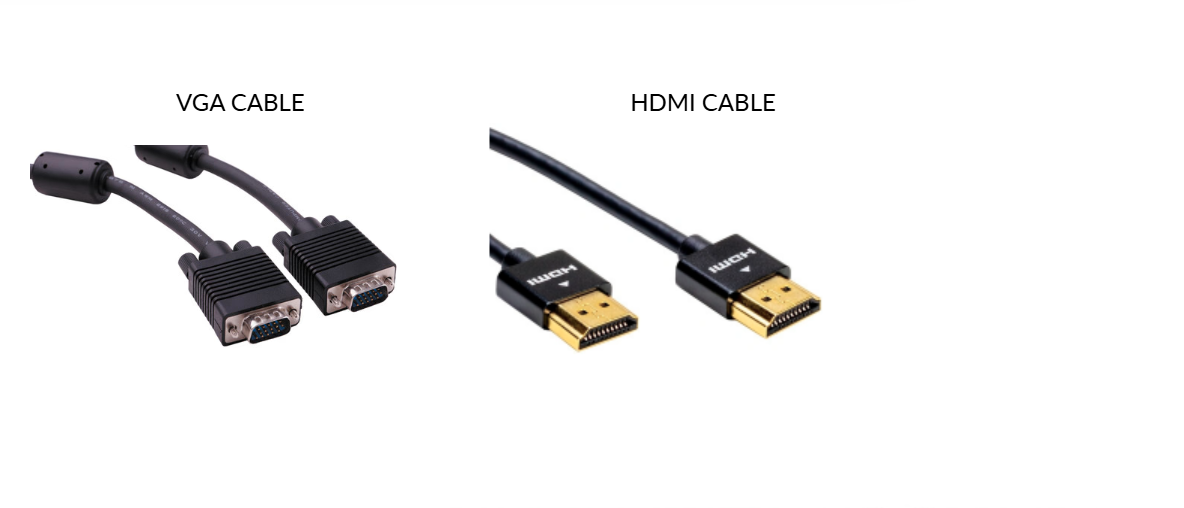
Look at the labels and ports on your ELMO before you start. When you know whether it uses HDMI, VGA, or USB, you can pick the right cable and follow the correct connection steps.
Step 2: Set up the ELMO projector hardware
Put the ELMO on a stable desk with a clear view of your materials. Plug the power adapter into a wall outlet and turn the unit on so the camera starts up properly.
Next, lift the camera arm and point the lens at the center of your document or object. Keep the arm steady and avoid bumping the base so the projected image stays sharp.

Finally, switch on the built-in lamp to brighten the stage area under the camera. Extra light improves contrast, reduces shadows, and makes small text easier to read on the screen.
Step 3: Connect the ELMO to a projector or display
Check if your ELMO uses HDMI, VGA, or USB. Depending on the input type, connect the fitting cable to the device you want to project from.
In cases of an interactive whiteboard, you can connect the ELMO using HDMI or USB, depending on the board's inputs. Once connected, you can show the live ELMO image on the board and use its tools to annotate or highlight content.
Step 4: Use the essential ELMO controls
Zoom and focus
Use the zoom buttons to enlarge or reduce the view of your material. Press auto focus so the camera sharpens the image and keeps text and details clear without constant manual adjustment.

Rotate or freeze
Press the rotate button when you switch between portrait and landscape documents so the image stays upright on the screen. Use the freeze function to lock the current image while you change or reposition materials on the stage.
Adjust brightness
Change the brightness or exposure level if the image looks too dark or washed out. A balanced setting helps your audience read text and see fine details without eye strain.
Step 5: Display materials clearly
Position papers
Place worksheets and pages flat on the stage and center them under the camera lens. Straight, flat placement prevents distortion and keeps the entire page visible on the screen.
Show 3D items
Set 3D objects slightly back from the lens so the whole item fits in the frame. Tilt the arm or rotate the object to avoid heavy shadows and show the most important angles.
Use extra lighting
Turn on the lamp if the room lights cause glare or make the image look dim. Extra lighting on the stage produces a sharper, more consistent projection.
Step 6: Use advanced ELMO features
Record or capture images
Use the record or capture buttons on the ELMO to save videos and still images. Store them on an SD card or send them to your computer so students can review lessons later.
Annotate on screen
Open annotation tools on your computer or smartboard while the ELMO feed is active. Draw shapes, highlight key parts of a diagram, or write quick notes to guide students through each step.
Use split-screen modes
Turn on split screen or picture-in-picture modes if your model supports them. These features let you compare two documents or display a live demonstration next to a static image.
Troubleshoot common ELMO problems
- No signal: Check that the ELMO and projector both have power and that the cable is firmly connected. Use the projector remote to select the input that matches the HDMI or VGA port you used.
- Blurry image: Clean the lens gently with a soft cloth and press the auto focus. Adjust zoom and brightness to match your room lighting until text and edges look sharp.
- USB not recognized: Unplug the USB cable, restart the computer, and plug it into a different port. If problems continue, close and reopen the software you use to view the ELMO feed.
- Image cuts off: Adjust the projector zoom, aspect ratio, or display mode so the whole image fits on the screen. Recenter the document on the stage so margins and corners remain visible.
Tips for better classroom use
- Use a dark background under white worksheets to improve contrast and readability
- Keep the stage area clear
- Clean the lens regularly
- Pre-position materials so switching between items feels smooth and fast.
FAQs
Can I use an ELMO with a laptop instead of a projector? Yes, you can connect the ELMO to your laptop with a USB cable. Then you display the camera feed through presentation or video conferencing software and share it on an external screen if needed.
How do I record lessons with an ELMO? Use the ELMO record button if your model supports direct recording, or record the feed through your computer software. Save the videos to an SD card or your hard drive so students can replay them later.
Why does the image look washed out? Lower the brightness on the ELMO or projector and reduce overhead glare. Turning on the stage lamp and adjusting exposure often restores a strong, balanced image.
Can I connect an ELMO wirelessly? Some ELMO models work with wireless modules or casting through a connected laptop. Check your model documentation to see whether it supports wireless features and what adapter you may need.
Summary
- Place and power the ELMO on a stable desk with a clear view of your materials.
- Connect the ELMO using HDMI, VGA, or USB, depending on the ports you have available.
- Use zoom, focus, rotate, and brightness controls to keep the image clear and readable.
- Position documents and 3D objects correctly under the lens.
- Try advanced features like recording, annotation, and split screen to enhance lessons.
Conclusion
An ELMO projector gives you a simple way to share printed pages and live demonstrations with a full room. When you set up the hardware correctly, connect it with the right cable, and learn the basic controls, you keep lessons smooth and easy to follow for your students or audience.


Discussion (0)
Be the first to comment.