One of the things that became obvious after publishing our series on how to set default programs, associate file types and set up AutoPlay settings, is that Windows 7 has limited capabilities for setting all these things. Fortunately for us, there are third party programs, such as the Default Programs Editor that allow you to do all this plus customize context menus. In this tutorial I will share where you can get this cool program from and how it works.
Download and Open the Default Programs Editor
First step is to download Default Programs Editor from here. The second is to unpack the zip file that you have just downloaded. With no installation required, open the 'Default programs Editor.exe' file. This is the starting point for every customization that you want to make in your default programs.
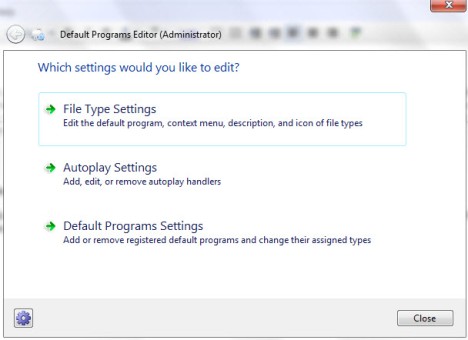
In the main program window you have several options:
- File Types Settings - allows you to change the default program, context menu, description and the icon of file types;
- AutoPlay Settings - helps add, edit or remove AutoPlay handlers;
- Default Programs Settings - allows you to add or remove registered default programs and change their assigned types.
How to Edit Context Menu Settings
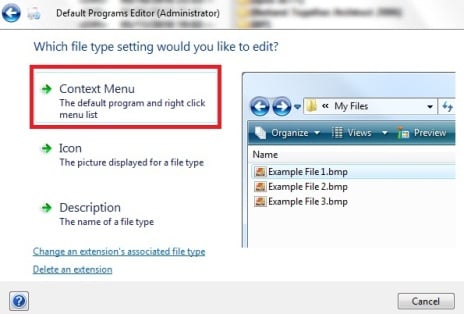
The Context Menu is the list of options that you see when you right-click on a file or folder. The Default Programs Editor allows you to customize the context menu for each file type. To change these settings, click on 'File Type Settings' in the main window and then choose Context Menu.
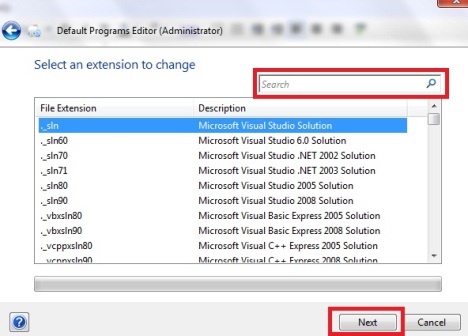
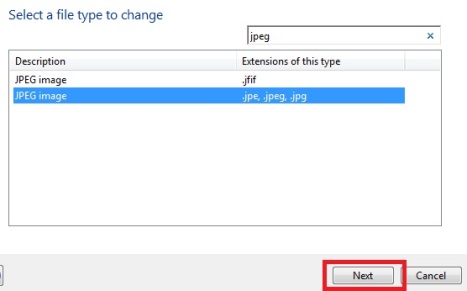
In the list of extensions, scroll down or use the search bar to find the one that you want to edit, select it and press the Next button.
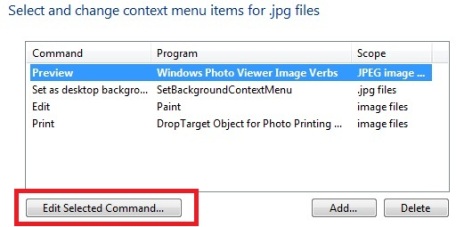
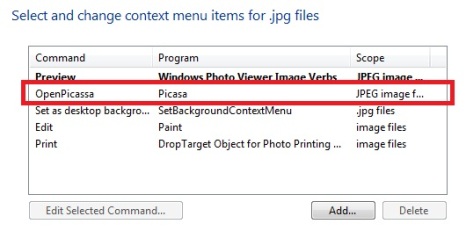
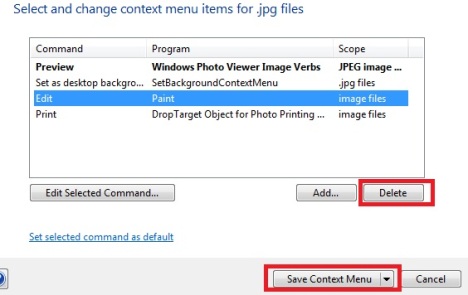
Each file type has one or more commands associated. For each command it has a program set and a scope. For example, a '.jpg' file can be previewed, set as desktop background, edited and printed. The scope of the programs can be the extensions of the file type - only a specific extension or all the extensions (all images, for example). Click on 'Edit Selected Command...' to make further customizations on that command.
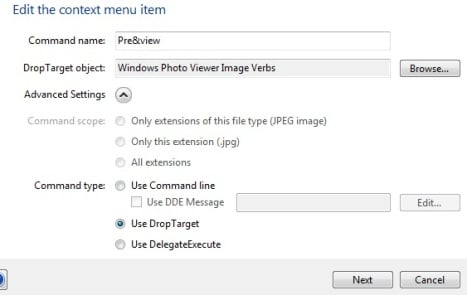
In the 'Edit the context menu item' window, you can modify the command name and the application that will execute the specific command. Click on the Browse button to search for your desired program. To expand 'Advance Settings' click on the arrow near its name.
In the Advance Settings section you can set, for some file types, the command scope and the command type. Press the Next button when you have finished.
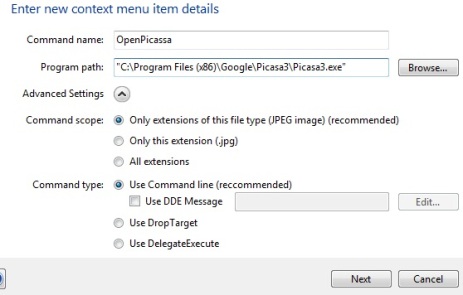
Apart from editing a command, you can also Add or Delete one. Press the Add button to enter the new context menu item details.
For example, I wanted to have an extra option of opening any JPEG image with Google's Picasa Image Viewer. To achieve this, I have set the command name to OpenPicasa and pressed the Browse button to search for the program path on my computer. In the 'Advanced Settings' section I chose as command scope 'Only extensions of this file type(JPEG image) (recommended)' and as command type I've set 'Use Command line (recommended)'. Then I pressed the Next button and now I can see my command in the list of context menu items for '.jpg' files.
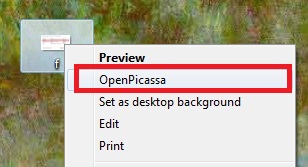
When finished making all settings, press the 'Save Context Menu' button. Now you will see the new command(s) in the context menu. For my example, when I right click a '.jpg' file I can see my command included on the list of options.
When you are in the 'Select and change context menu items' window of a specific file type, you can also delete existing commands. Select them, press the Delete button and then 'Save Context Menu'.
How to Edit Icon Settings
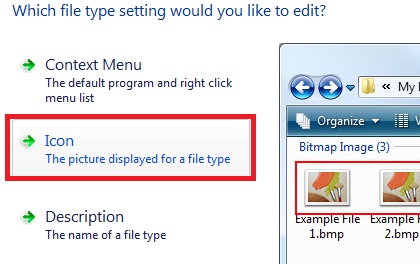
For each file type you can change the icon displayed for it. After choosing 'File Type Settings' in the main window, click on Icon. Select the extension you are interested in, by scrolling in the file types list or by finding it using the search box.
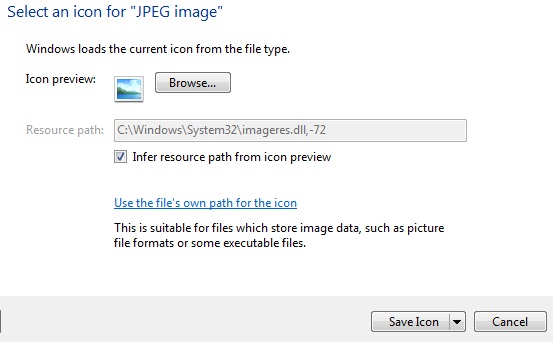
Click the Browse button to search the icon that you want to use for the file type.
By default, the 'Infer resource path from icon preview' check box is enabled. This allows the program to extract the icon from the file you have chosen. If you want to use a specific '.ico' file, then you need to uncheck this option.
When done, press Save Icon.
How to Edit The File Type Description
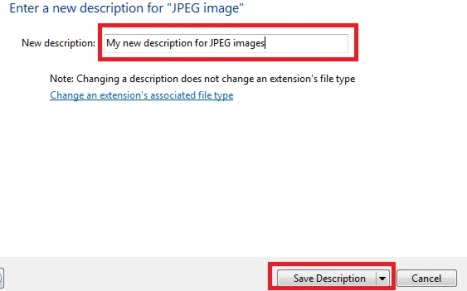
A description is the name of a file type. Several extensions can have the same description, such as 'JPEG image' is the description for the '.jpe,.jpeg,.jpg' extensions. To change the description for a specific file type, click on 'File Type Settings' in the main window and then on Description. Choose the extension you are interested in and press Next.
Write the new description in the designated text box and press 'Save Description'.
The selected file type will now have the description you've set.
How to Manage AutoPlay Settings
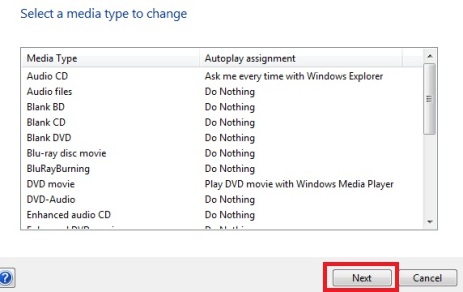
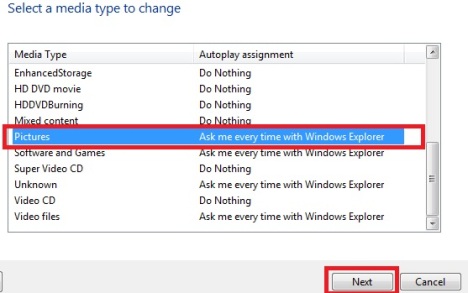
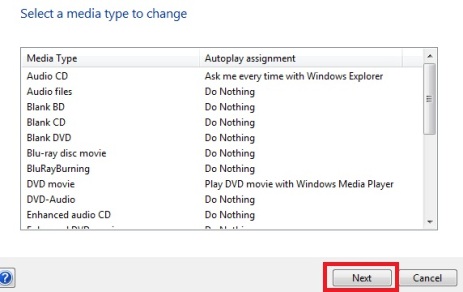
From the main window of Default Programs Editor, choose 'AutoPlay Settings' to add, edit or remove AutoPlay handlers. For each media type you will see an AutoPlay assignment. To change the AutoPlay settings for one media type, double click on it or select it and press Next.
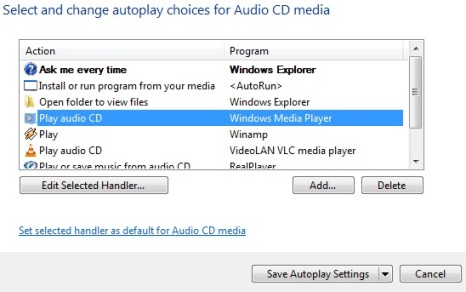
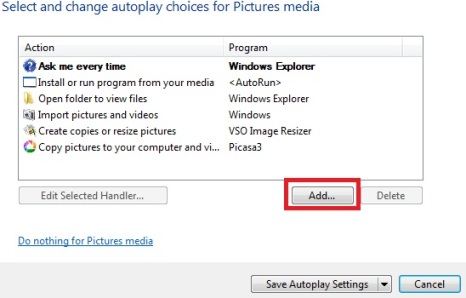
For the selected media type you can see the list of available actions and the program set to handle it.
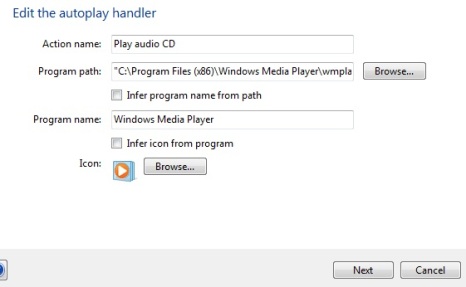
To edit one action, select it and press 'Edit Selected Handler'. You can edit the action name, set the program that handles it and its icon. Press Next when you have finished.
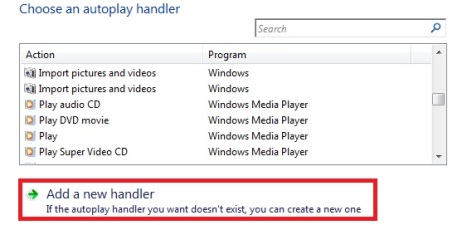
You can also add a new action by pressing the Add button. You can choose an AutoPlay handler from the existing ones or you can create a new one by pressing 'Add a new handler'.
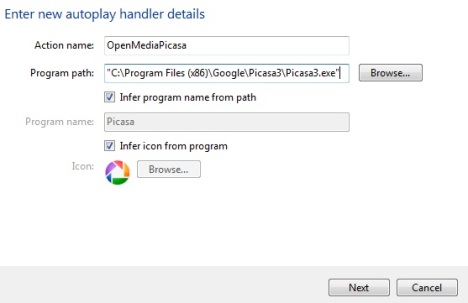
For the new handler you create, you have to set a name and the program path. The action's icon can be inferred from the program you selected or you can browse and select one. For example, if I want each picture media to be opened with Picasa, I will do the following: first, I will choose Pictures from the list of media types and press the Next button.
Then, I press the Add button in the 'Select and change autoplay choices for Pictures media' window.
In the 'Choose autoplay handler' panel, I click on 'Add a new handler'. Then, I enter all the necessary handler details: action name, program path, choose an icon. When done, I click on Next and then on 'Save Autoplay Settings'.
Now, every time I plug in a picture media device, the Picasa application will open.
To delete a handler, select it from the list of available actions and press Delete. Don't forget to click Save AutoPlay Settings when you have finished your customization.
How to Manage Default Programs Settings
To add or remove registered default programs and change their assigned types, click on 'Default Programs Settings' in the main window. You will see the list of all the registered programs with their description.
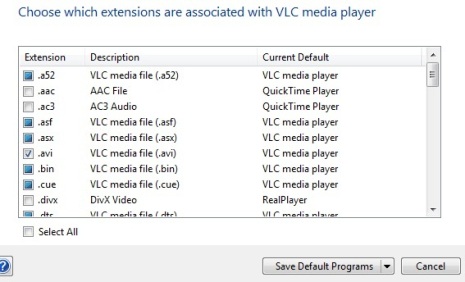
Select one of the registered programs and press Next to change its associations.
From the list of available extensions choose the ones you want to associate with the selected program. When done, click 'Save Default Programs' and the new settings will be applied.
Conclusion
As you can see from this tutorial, Default Programs Editor gives users the possibility to edit everything related to defaults (file types, programs, AutoPlay) from one place. Plus, it gives you much more control compared to the tools offered by Windows 7. We are big fans of this little program and we honestly recommend it to all Windows 7 users. If you have any additional tips on how to use it, don't hesitate to leave a comment.


 31.05.2010