14.05.2021
Folders are one of the defining concepts of Windows, as they’re one of the best ways to organize files and other folders on your computer or device. The same is also true for the Window 10 Start Menu, which can include live folders for your app tiles and shortcuts. This guide tells you everything you need to know about live folders, sometimes called tile folders or app folders, including how to create a folder in the Start Menu from Windows 10:
How to create a live folder in the Windows 10 Start Menu
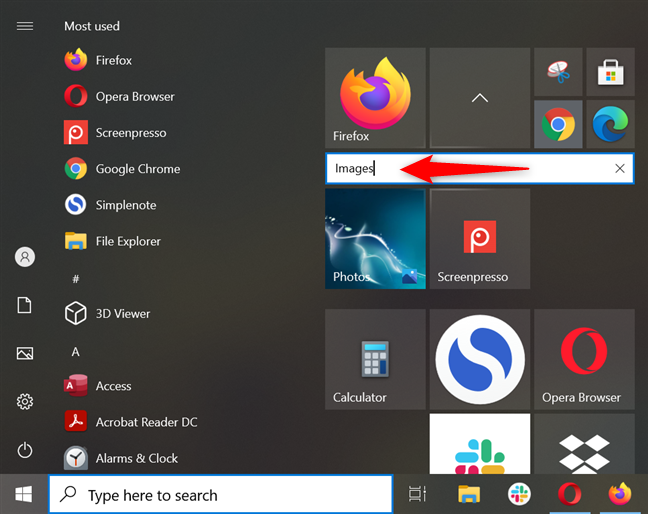
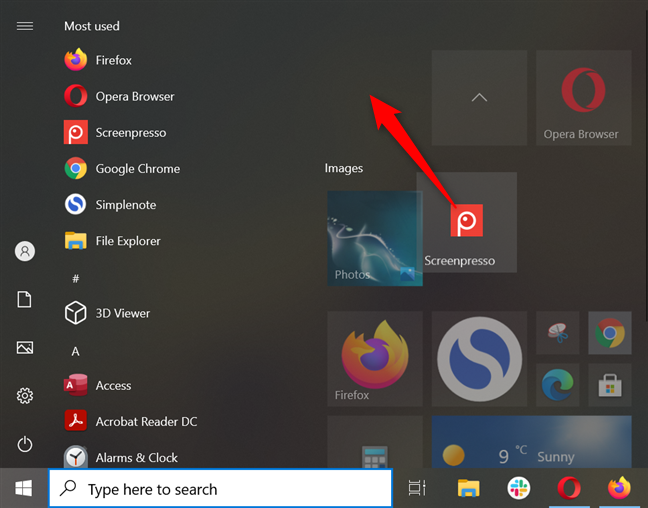
After pinning to Start everything you need, you can save space by organizing tiles and shortcuts into live folders. You need at least two tiles or shortcuts to create a folder in the Start Menu in Windows 10. Click/tap and hold on one item, and then drag and drop it on top of the other.
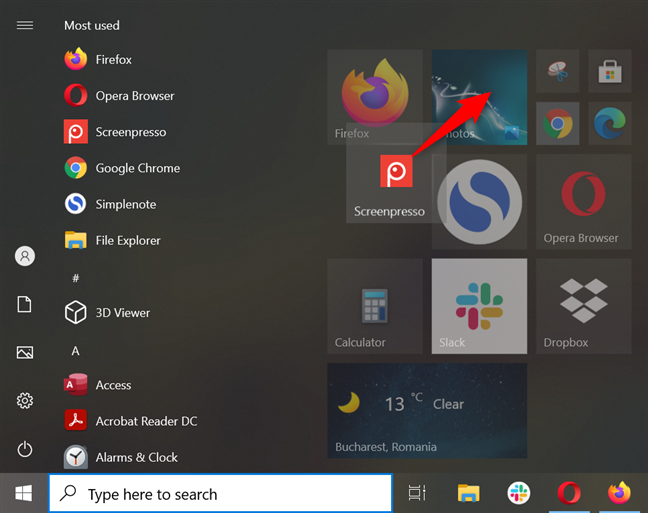
Drag and drop an icon or a tile on another to create a live folder
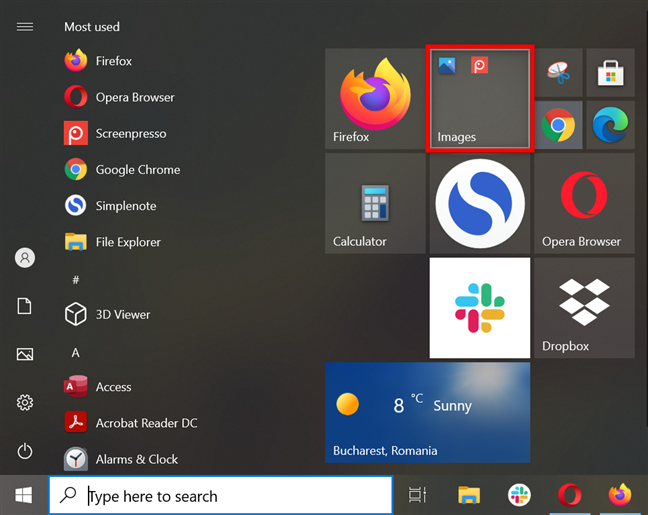
When you drop one tile or shortcut on top of another, the two of them automatically create a live folder. The folder is shown in its expanded form, pushing down other items in the Start Menu tiles section, as seen below.
An expanded live folder
To close a folder from the Start Menu, click or tap on the arrow tile shown above the expanded live folder view.
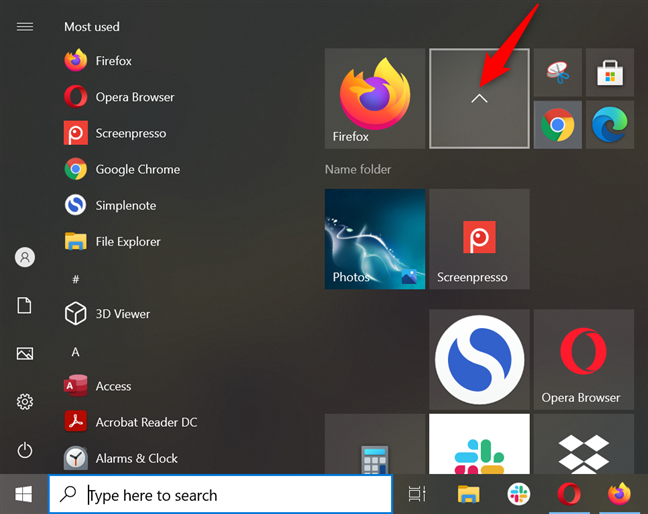
Press on the arrow tile to close the folder
A closed or collapsed live folder shows miniature icons of the apps it includes. Click or tap on a folder to open it and access the apps inside.
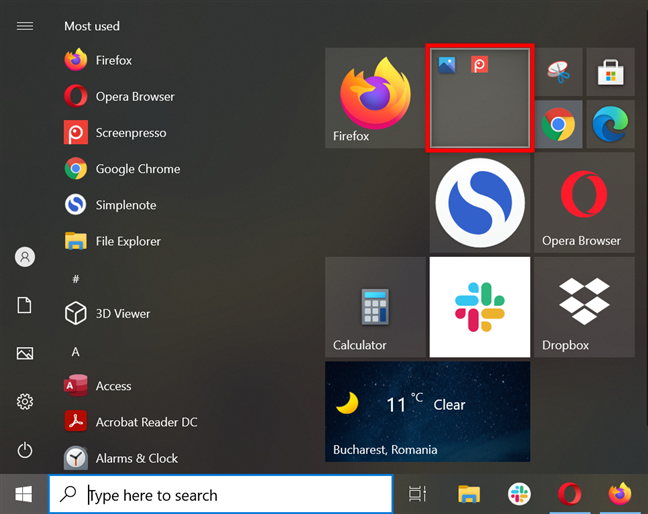
A closed live folder takes less space in the Start Menu
How to add more tiles and shortcuts to a Start Menu live folder in Windows 10
To add more tiles or shortcuts to the live folder you created, simply drag and drop them onto the folder using your mouse or finger (if you have a touchscreen).
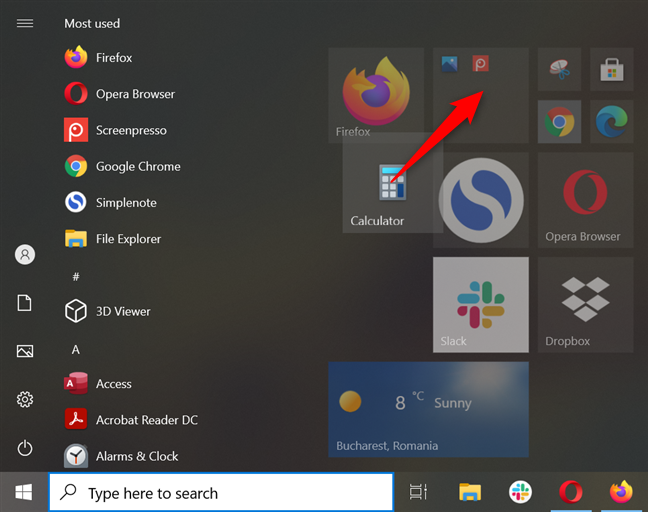
To add more items, drag and drop them onto the folder
TIP: Did you know you can also choose the folders shown on the left margin of the Windows 10 Start Menu?
How to rename a live folder in Windows 10
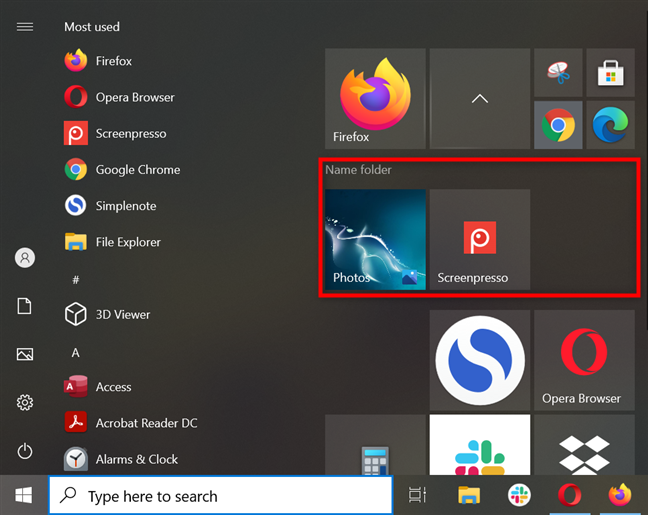
While it wasn’t possible to rename live folders when they were first introduced, you can now do that to identify them better. First, click or tap on a live folder to expand it. Then, press on the Name folder option.
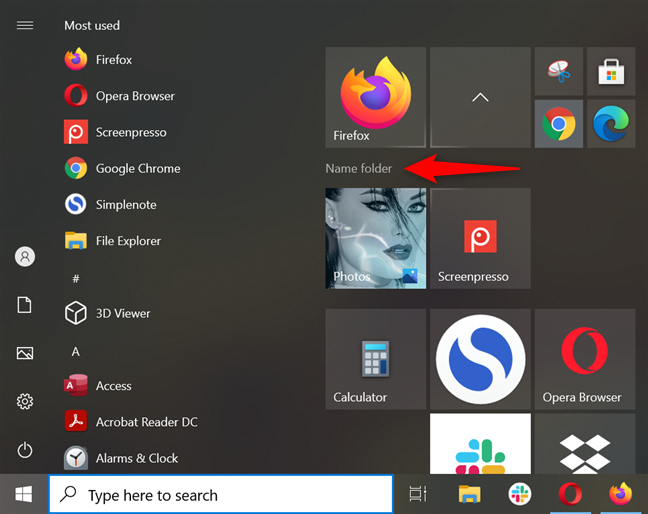
Click or tap on Name folder
Type the name you want for your folder inside the field.
Insert a new name for your live folder
To save the change, close the folder by clicking or tapping on the arrow tile or anywhere else on your screen. The new name is displayed inside the folder.
You can see the folder's name at the bottom of its tile
NOTE: The live folder’s name is no longer displayed if you change its size to Small, as shown in the next chapter.
How to resize live folders and their contents in the Windows 10 Start Menu
Live folders can be resized just like any other tile. Right-click or press-and-hold on a live folder from your Start Menu, click or tap Resize, and then choose the size you want.
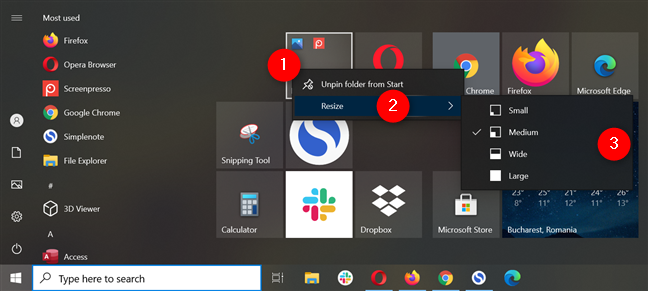
Resize a live folder in Windows 10
Our article on resizing tiles provides more details on the available sizes.
How to move a Start Menu live folder in Windows 10
Moving live folders from your Start Menu is the same as moving tiles or shortcuts. Click or tap on the live folder to grab it, and then drag and drop it where you want it.
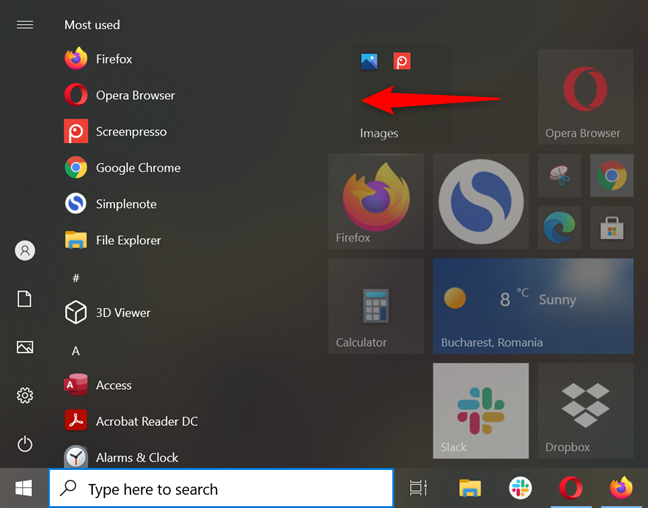
Drag and drop a live folder to move it
TIP: Did you know you can also organize Start Menu items into groups of tiles and shortcuts?
How to remove icons from a live folder in Windows 10
To remove a tile or shortcut from a live folder, expand it, and then drag-and-drop the item to another space inside the Start Menu.
Expand the Start Menu and drag away the tile or shortcut you want to remove
How to delete a live folder from the Windows 10 Start Menu
There are two ways to remove a live folder from the Start Menu in Windows 10. The first option is to remove all the live tiles and shortcuts from it, as shown in the previous chapter. Alternatively, you can also right-click or press-and-hold on a live folder to open a contextual menu. Then, click or tap on “Unpin folder from Start.”
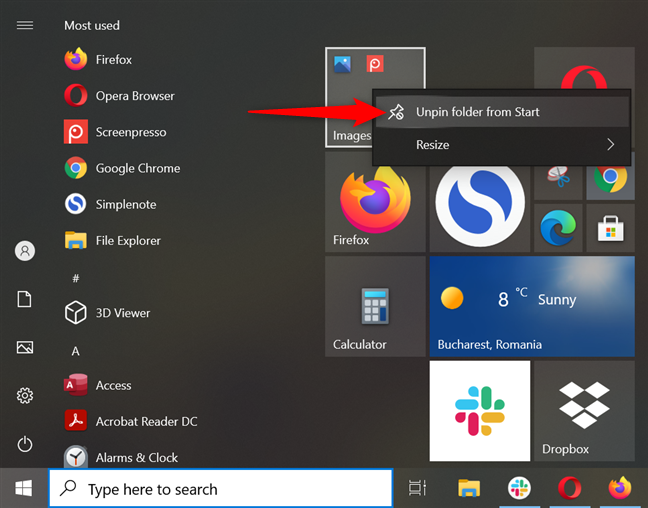
Unpin a folder from the Start Menu
The folder is immediately unpinned from the Start Menu. Keep in mind that using the second option removes the shortcuts and tiles inside your folder as well.
TIP: To further customize the Windows 10 Start Menu, check out our guide showing 10 ways to organize it and change it according to your needs.
How many live folders did you create in the Start Menu?
The live folders are a useful feature that lets you include more tiles and shortcuts in your Windows 10 Start Menu without resizing it. As you’ve seen, it’s very easy to customize the live folders according to your preferences. Before you close this guide, we’re curious how many live folders you created in your Windows 10 Start Menu. What do you use them for? Let us know in the comments section.