



Building a working prototype used to require either a lot of manual Figma work or handing off designs to a developer and waiting. Figma Make changes that. It is an AI-powered feature built directly into Figma that lets you describe what you want in plain language and get a functional, interactive prototype back in seconds. No code required, no separate tools, no long back-and-forth with engineers. This guide covers what Figma Make is, how it works, how to access it, and what you can realistically build with it.
What Is Figma Make?
Figma Make is a prompt-to-app capability inside Figma. It was introduced at Config 2025 and moved out of beta into general availability in July 2025. It lets designers and product teams turn text prompts into interactive, high-fidelity prototypes and functional web app interfaces entirely within the Figma environment.
The key difference between Figma Make and Figma's regular prototyping tools is that Figma Make generates actual working code underneath. When you use it, you are not just clicking through static screens. The output is a real, interactive experience built on React and Tailwind CSS. You can view the generated code directly inside Figma Make, edit it, and in some cases use it as a starting point for production development.
Figma Make sits alongside Figma's other 2025 product launches including Figma Sites, Figma Draw, and Figma Buzz. Together these tools mark Figma's shift from a pure design tool into a broader product development platform. Make is the piece of that platform specifically focused on closing the gap between design and working software.
How Figma Make Works
The core mechanic is simple. You open a Figma Make file, type a prompt describing what you want to build, and Figma's AI generates a functional prototype based on your description. The preview updates in real time as the AI works through your prompt.
You can start completely from scratch with just a text description, or you can paste an existing Figma design frame into the prompt box and ask Make to turn it into an interactive version. The second approach tends to give better results because Make has a visual reference to work from rather than interpreting everything from text alone.
Under the hood, Figma Make generates React-based code with Tailwind CSS. This is not throwaway prototype code. It is structured and readable, which means developers can use it as a real starting point rather than rebuilding everything from scratch after the prototype is approved.
Make also includes a point-and-edit feature. Instead of re-describing changes through text prompts, you can click directly on an element in the preview and ask Make to change just that part. This makes refinement much faster than re-running full prompts for small adjustments.
How to Access Figma Make
Figma Make is available to all Figma users, though what you can do with it depends on your plan.
Full seat users on paid plans get the most complete access. They can publish and privately share their Figma Make files, use all AI credits available to them, and import existing Figma design libraries into Make.
Starter plan users can create unlimited Figma Make files in drafts and share up to three files with their team. View, Collab, and Dev seat users can create unlimited Make files in drafts as well.
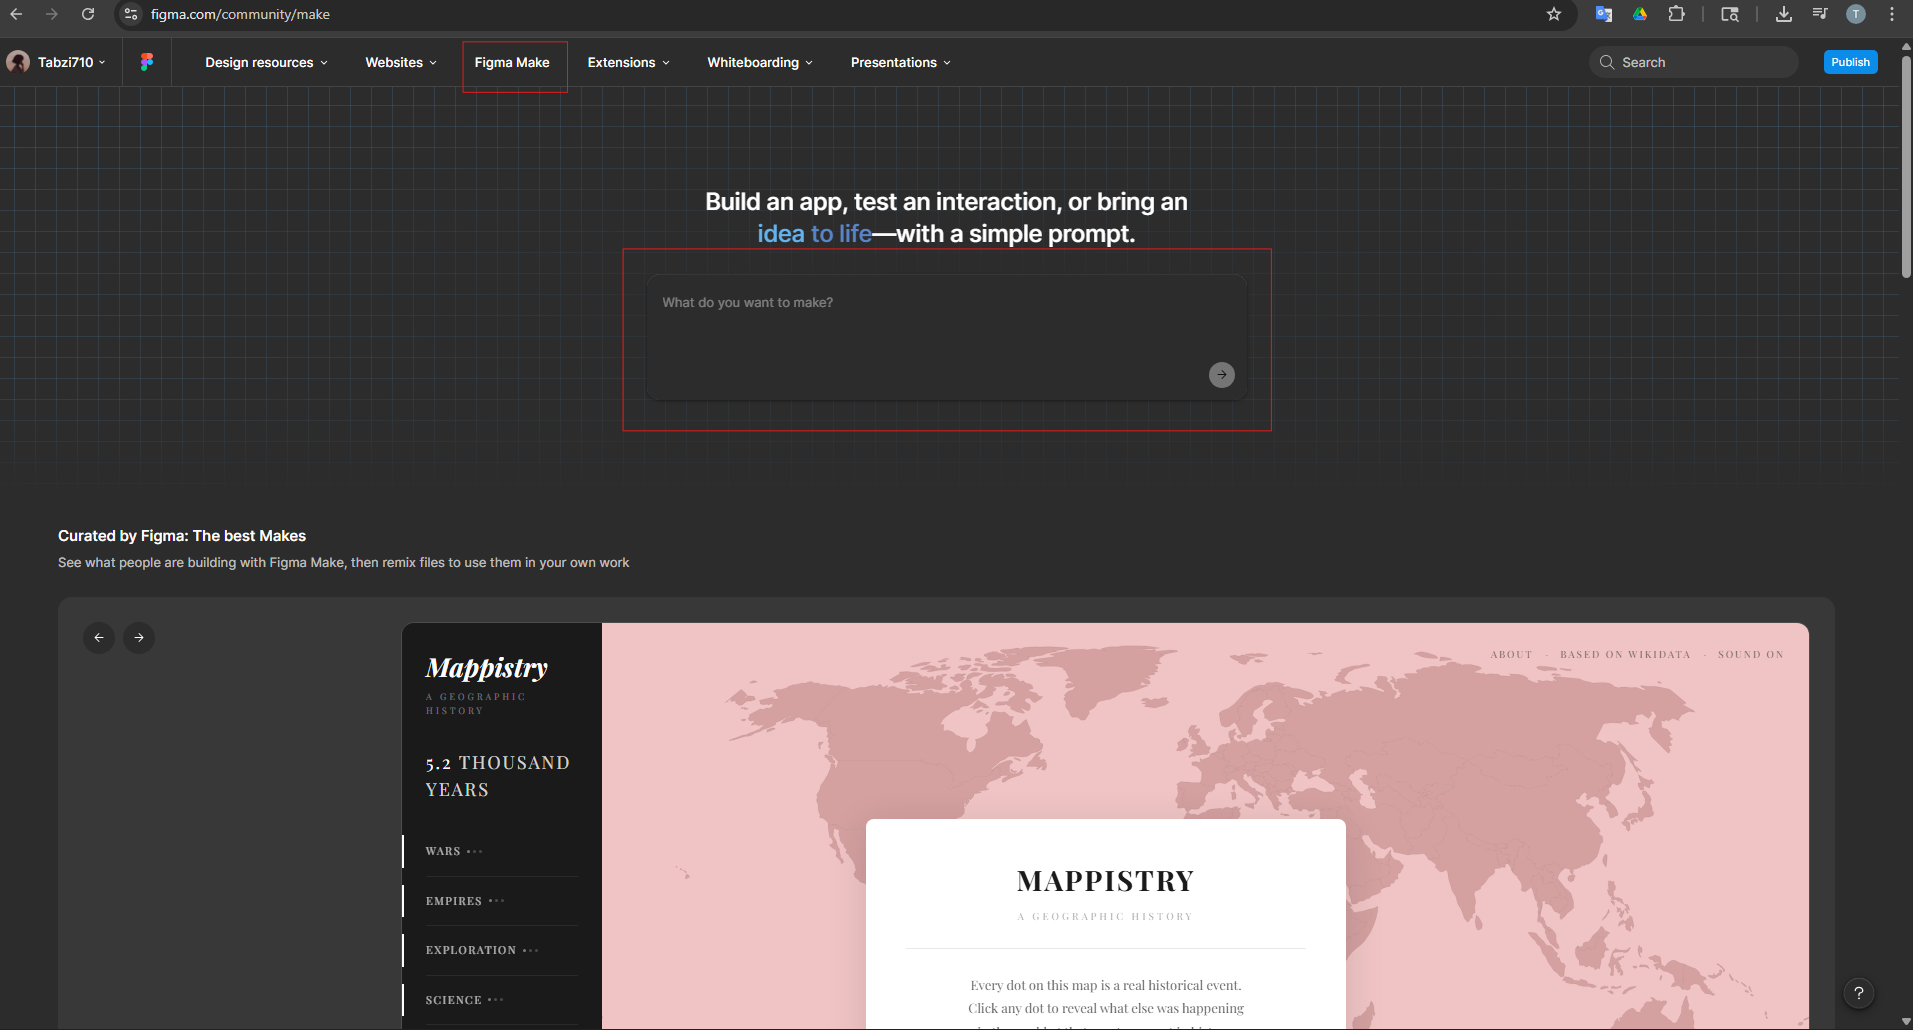
To access Figma Make, go to figma.com and look for Make in the top navigation bar. You can also create a new Make file from inside your Figma workspace the same way you would create a new design file. Once inside a Make file, you will see the prompt box at the bottom of the screen and a live preview panel that shows your output as it generates.
How to Use Figma Make: Step by Step
Getting started with Figma Make does not require any technical knowledge. The following steps walk you through building your first prototype.
Starting a New Figma Make File
- Go to figma.com and sign in to your account. In the top navigation, click Make. This opens the Figma Make environment. Alternatively, from your Figma home screen, click the plus icon to create a new file and select Figma Make from the options.
- You will see a clean workspace with a prompt input box at the bottom and a preview area taking up most of the screen. This is where everything happens.
Writing Your First Prompt
- In the prompt box at the bottom, type a description of what you want to build. Be as specific as you can. Instead of typing "make an app," try something like "Build a mobile task management app with a home screen showing a list of tasks, a button to add new tasks, and a completed tasks section." The more detail you provide upfront, the fewer follow-up prompts you will need.
- Press Enter or click the send button. Figma Make will begin generating your prototype. The preview panel on the right will update in real time as the output builds. This typically takes between ten and thirty seconds depending on the complexity of what you asked for.
Refining Your Output With Follow-Up Prompts
- Review the output in the preview panel. Interact with it directly by clicking buttons, filling in fields, and navigating between screens to see how it behaves. If something is not right, do not re-run the entire prompt. Instead, describe the specific change you want. For example, type "Change the background color of the header to dark blue" or "Add a navigation bar at the bottom with Home, Search, and Profile tabs."
- Use the point-and-edit feature for precise changes. Click directly on any element in the preview panel to select it. Then describe what you want to change about that specific element in the prompt box. This is much faster than trying to describe the location of an element through text alone.
- Continue refining with additional prompts until the prototype matches what you need. Complex projects may require many rounds of prompting. One Figma team member built a fully functional financial dashboard using over 150 prompts across multiple sessions. You do not have to get everything right in one go.
Using an Existing Figma Design as Your Starting Point
- If you already have screens designed in Figma, you can bring them into Make instead of starting from scratch. Copy a frame from your Figma design file. Go back to your Figma Make file and paste the frame directly into the prompt box. Add a text instruction alongside it, such as "Turn this wireframe into a functional screen with working navigation and interactive buttons." Make will use your design as a visual reference and generate code that matches its layout and structure.
Viewing and Using the Generated Code
- At any point, click the Code tab inside Figma Make to see the actual code that has been generated. It is written in React with Tailwind CSS and is organized in a readable structure. You can copy this code and use it directly in a development environment, or share it with engineers as a starting point for building the real product.
Copying Your Design Back to Figma
- Figma Make includes a Copy design feature that lets you turn your Make preview back into editable Figma design layers. Click the Copy design option in the Make interface and then paste the result into a Figma design file. This is useful when you want to use the generated layout as the basis for a more polished design without rebuilding it manually.
Sharing Your Figma Make File
- Once you are happy with your prototype, you can share it the same way you would share any Figma file. Click the Share button in the top right corner. Paid full seat users can publish their Make files publicly or share them privately with a link. Starter plan users can share up to three Make files with their team. Recipients can interact with the prototype in their browser without needing a Figma account.
What You Can Build With Figma Make
The range of things you can create with Figma Make is broader than it might first appear. Here are some practical examples of what teams and individuals use it for.
Interactive app prototypes are the most common use. A designer can build a working mobile or web app prototype complete with navigation, state changes, and interactive elements without writing any code. This lets product teams test and validate ideas quickly before committing to engineering time.
Proof of concept demos are another strong use case. Instead of describing a feature idea in a document or showing a static mockup, you can build a clickable, interactive version of it in minutes. This makes it significantly easier to get stakeholder alignment and engineering buy-in.
Design-to-code handoff is where Figma Make starts to close the gap between design and production. The React code generated by Make gives developers a concrete starting point that reflects the actual design intent, rather than a specification document they interpret themselves.
User testing with realistic prototypes is also possible. Because Make generates genuinely interactive experiences rather than click-through mockups, you can use Make prototypes in usability testing sessions where participants need to actually interact with the interface.
What Figma Make Cannot Do
Figma Make is impressive but it has real limitations worth understanding before you rely on it.
The AI does not always interpret your design files precisely. When you paste a Figma frame into Make, it reads the visual structure and attempts to recreate it, but it may simplify or reinterpret certain elements. The cleaner and more organized your Figma layers are before you paste them, the more accurately Make will translate them.
Figma Make is not a full development environment. The code it generates is a good starting point but it is not production-ready in most cases. Complex backend logic, database connections beyond the Supabase integration, third-party API integrations, and advanced animations are all things that will still require a developer to implement properly.
The AI credits system means heavy use of Make will consume credits. Figma AI features including Make run on credits, and depending on your plan you may hit limits if you are generating complex prototypes frequently or running many revision prompts on large projects.
Publishing files is still in beta for some plan types, which means the sharing experience may change as the feature matures.
Figma Make and the Supabase Integration
One of the more significant additions to Figma Make since launch is the Supabase integration. Supabase is an open-source database platform that works similarly to Firebase. With this integration, you can connect your Figma Make prototype to a real database backend.
This means buttons in your prototype can actually write data to a database, lists can pull real records, and forms can submit information that persists between sessions. The result is a prototype that behaves like a working minimum viable product rather than a simulation. For teams trying to validate whether a product idea works before committing to full development, this is a meaningful capability.
Importing Your Figma Design Library Into Make
Figma Make supports importing your existing Figma design library, including color palettes, typography, and core styling elements. This means the prototypes Make generates can match your actual design system rather than defaulting to generic styles.
When you import a library, Make uses your established visual language as the foundation for everything it generates. This reduces the amount of styling correction needed after generation and produces output that feels closer to your real product from the start.
Make kits, which allow you to import production-ready React design systems directly into Figma Make, are also available through an early access program. This is intended for teams that want Make to generate code using their exact production components rather than AI-generated approximations.
Final Thoughts
Figma Make represents a genuine shift in how product teams can work. The gap between a design mockup and a working prototype has always required either significant time or engineering involvement to bridge. Figma Make narrows that gap considerably. It is not perfect and it is not a replacement for developers, but for exploring ideas quickly, aligning teams around a working concept, and producing a realistic starting point for engineering, it does things that were not possible inside a design tool before. If you use Figma regularly and have not tried Make yet, it is worth spending an hour with it to understand what it can and cannot do for your workflow.
Frequently Asked Questions
What is Figma Make used for?
Figma Make is used to create interactive, functional prototypes from text prompts inside Figma. Designers and product teams use it to quickly explore ideas, validate concepts, align stakeholders, and produce working code that developers can use as a starting point, all without leaving the Figma environment.
Is Figma Make free?
Figma Make is available on all plans including the free Starter plan, which allows unlimited Make files in drafts and sharing up to three files. Full seat users on paid plans get additional capabilities including publishing, full AI credit access, and the ability to import design libraries into Make.
Do I need to know how to code to use Figma Make?
No. Figma Make is designed specifically for designers and non-technical users. You interact with it using plain language prompts. The code is generated automatically in the background. You can view and edit the code if you want to, but it is not required to create and share functional prototypes.
What kind of code does Figma Make generate?
Figma Make generates React-based code styled with Tailwind CSS. The code is structured and readable, making it usable as a starting point for real development rather than throwaway prototype code. You can view it in the Code tab inside any Figma Make file.
Can I turn a Figma Make prototype into a real Figma design?
Yes. Figma Make includes a Copy design feature that converts your Make preview into editable Figma design layers. You can paste these layers into a regular Figma design file and continue working on them as you would any other design.


Discussion (0)
Be the first to comment.