




The Snipping Tool in Windows 11 has quietly become a capable screen recording tool. It’s simple, quick to access, and good enough for everyday use.
But one limitation becomes obvious the moment you start using it regularly: all recordings are saved to a fixed default folder.
If you work with multiple projects, store files on another drive, or simply want better organization, changing that default location makes a real difference.
Where Snipping Tool Saves Recordings by Default
By default, screen recordings are saved in:
- Videos > Screen recordings
This folder is created automatically by the system. Every recording goes there unless you manually move it afterward.
For occasional use, this is fine. For frequent recording, it quickly becomes messy.
The Important Limitation (Before You Proceed)
Here’s the key point most guides skip:
The Snipping Tool does not provide a direct setting to change the save location.
There is no toggle inside the app.
So changing the default location is not done inside Snipping Tool itself. It’s done by modifying how Windows handles the folder.
Method: Change the “Videos” Folder Location
Since Snipping Tool saves recordings inside the Videos library, changing that location effectively redirects where recordings are stored.
Step-by-Step
- Open File Explorer
- Go to This PC
- Right-click the Videos folder
- Select Properties
- Go to the Location tab
- Click Move
- Choose your new folder location (for example, another drive or project folder)
- Click Apply and confirm
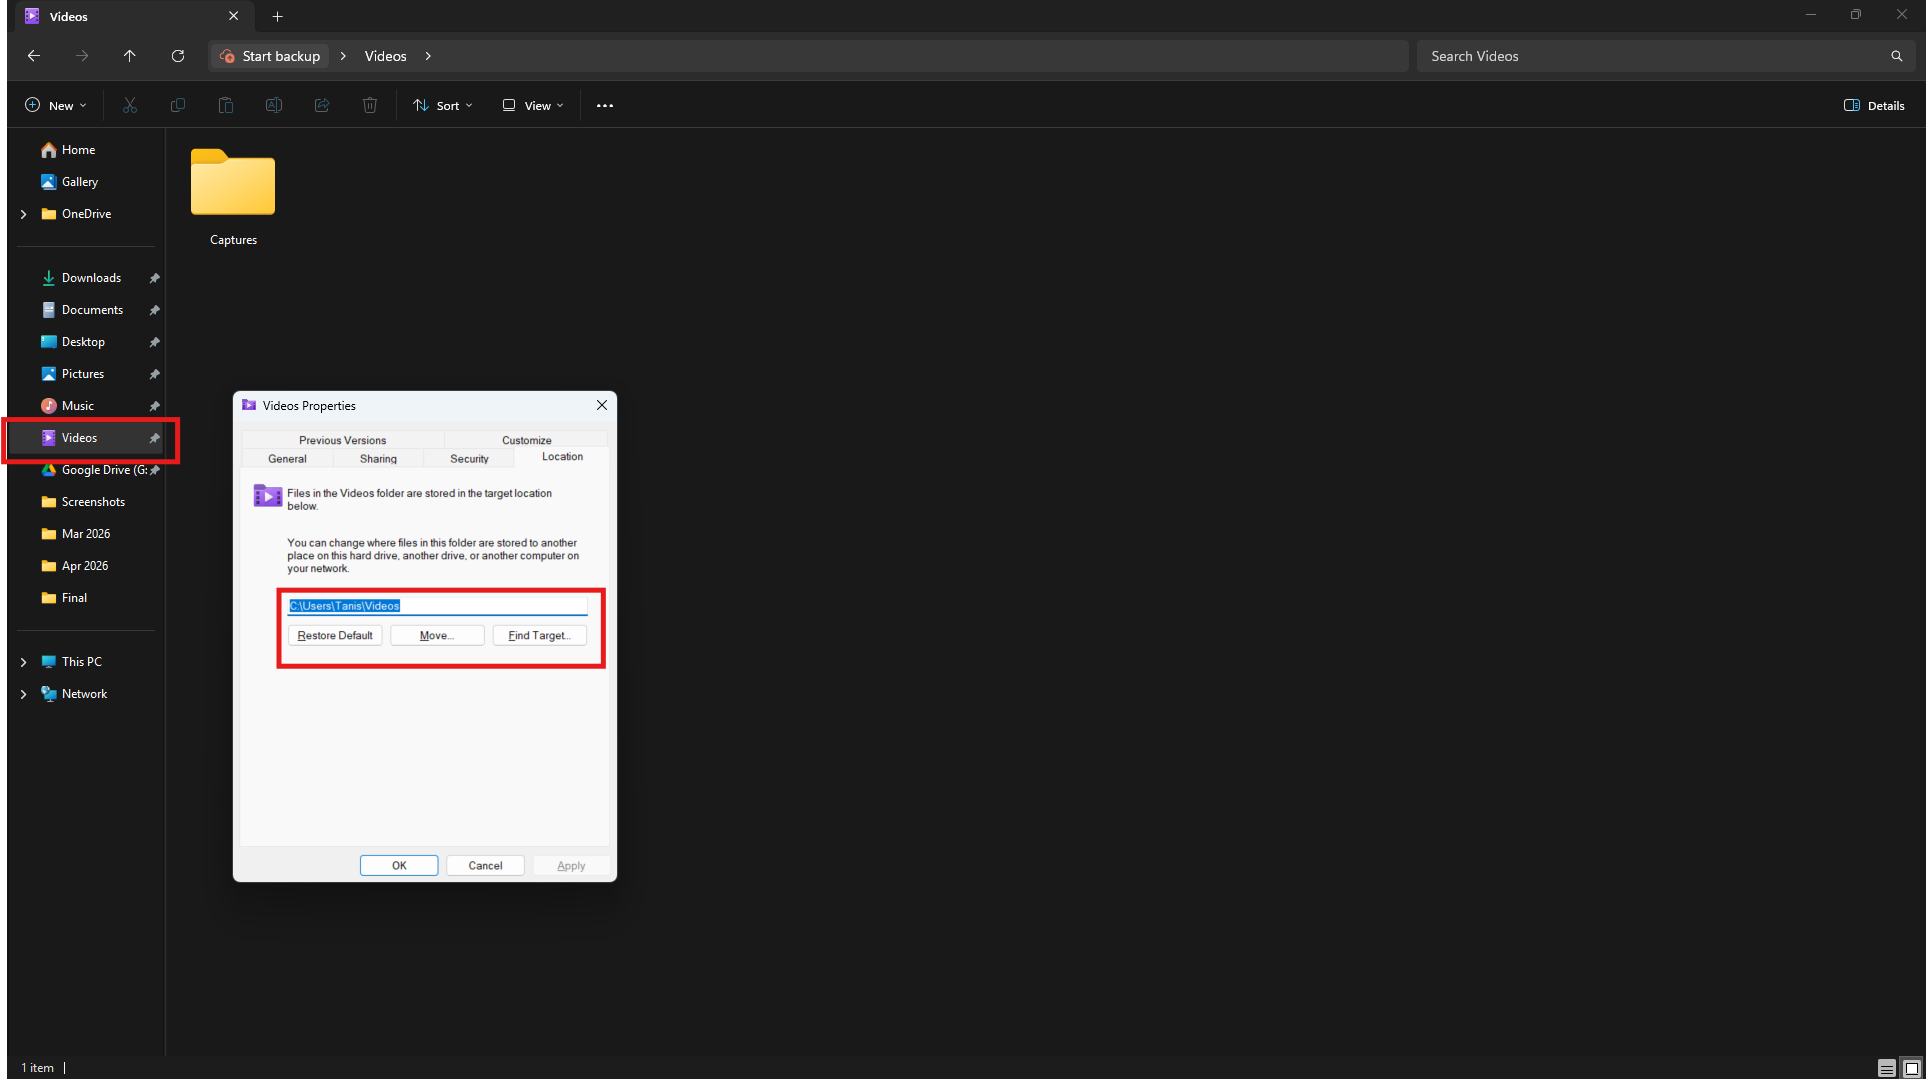
Windows will ask whether to move existing files. Choose based on your preference.
What This Actually Changes
After this:
- All future recordings will be saved to the new location
- Existing recordings can also be moved (optional)
- Other apps that use the Videos folder will follow the same path
This is a system-level change, not app-specific.
Alternative Approach: Use Shortcuts for Organization
If you don’t want to move the entire Videos folder, a more controlled approach is:
- Leave the default location unchanged
- Create shortcuts or automated workflows
- Move recordings into project folders manually or using scripts
This keeps system behavior intact while improving organization.
Real-World Insight
Most users try to “change the setting” inside Snipping Tool and get stuck because it doesn’t exist.
The correct way is to think in terms of folder redirection, not app configuration.
Once you understand that:
- The solution becomes simple
- And more flexible than a basic toggle
When Changing the Location Makes Sense
You should change it if:
- Your system drive (C:) is low on space
- You store media on a separate drive
- You organize recordings by project or workflow
It’s especially useful if you record frequently.
When You Should Leave It As Is
Keep the default if:
- You rarely use screen recording
- You prefer Windows’ default structure
- You don’t want to affect other apps using the Videos folder
Limitations to Be Aware Of
- You cannot set different locations for different recordings
- All apps using the Videos folder will follow the new path
- No per-app control exists yet
This is a workaround, not a dedicated feature.
Final Thoughts
Changing where screen recordings are saved in the Snipping Tool is less about finding a hidden setting and more about understanding how Windows 11 manages user folders.
Once you redirect the Videos folder, the behavior becomes predictable and consistent.
It’s a small adjustment, but if you record often, it makes your workflow cleaner and more manageable.
FAQs
Can I change the save location directly in Snipping Tool?
No, there is no built-in setting for that.
Where are recordings saved by default?
In the Videos > Screen recordings folder.
Will changing the Videos folder affect other apps?
Yes, any app using that folder will follow the new location.
Can I use different folders for different recordings?
No, not natively.
Is this method safe?
Yes, it’s a standard Windows feature and fully reversible.



Discussion (0)
Be the first to comment.