Computer speech recognition has been around for a long time, and many people have heard of programs like Dragon Naturally Speaking. What many people may not know is that Windows 7 includes its own, very capable, speech recognition program. We plan to cover it in detail in a couple of articles. But first, let's see how to set it up, in order for it to work.
Before you Begin
Although you can just start the program from the Start Menu and dive right in, there are some essential things that you need to know first. Microsoft recommends that you use a headset rather than other kinds of microphones, and they do that for a good reason. If you plan to use Speech Recognition for more than just experimentation, I would strongly recommend that you invest in a headset. You can get a good one from a reputable manufacturer that won't cost you an arm and a leg, and for this program it is definitely worth the time and effort. Here is a decent model suggestion: Logitech ClearChat Comfort/USB Headset H390 (Black).
I tried using an old USB headset that we already had. It worked fine for other purposes, but Speech Recognition rejected it.
I then tried using the microphone built into my (inexpensive) webcam, and while that worked, I found myself having to speak much more loudly than was comfortable and repeat everything a lot. I had the same problem with an inexpensive desktop microphone.
Buying a good headset was the answer, and the difference between the headset and what I'd already tried was like night and day. However, getting started with Speech Recognition wasn't as simple as just plugging in the headset and getting on with it. There are several things you will need to do to insure success.
How to Set Up the Headset
We have talked about redirecting the output of your sound card before here: How to Change the Default Playback & Recording Audio Device. Since I had some problems not mentioned in that article, I would like to share what I've done to solve them.
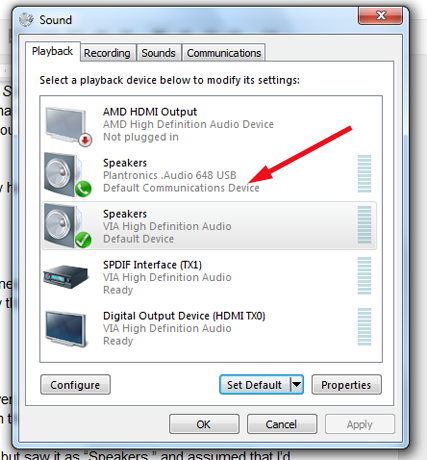
Windows 7 recognized my headset right away, but saw it as Speakers, and (not surprisingly) assumed that I'd hooked up a new set of speakers. This meant that all the computer sounds were immediately redirected to the headphones and my real speakers were cut off. It's a good thing the headset was sitting on my desk at that point, rather than on my head. The "I just recognized a new device" beep that came through the headphones was so loud that it could have caused serious problems with my already sensitive ears, and would certainly be very hard even on people with normal hearing. So don't leave the headset on your head while you get set up!
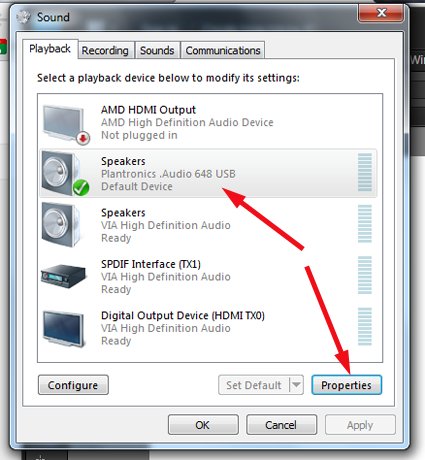
To get everything set up correctly, go to Control Panel -> Hardware and Sound -> Sound -> Manage Audio Devices. Here, you can see that my Plantronics headset has been recognized as Speakers and set as the default device. No wonder plugging it in killed my speakers and nearly killed my ears!
First of all, click on the icon that represents your speakers, and click on Set Default. From there, you want to change your speakers to the default device. A green checkmark will appear when you've done this.

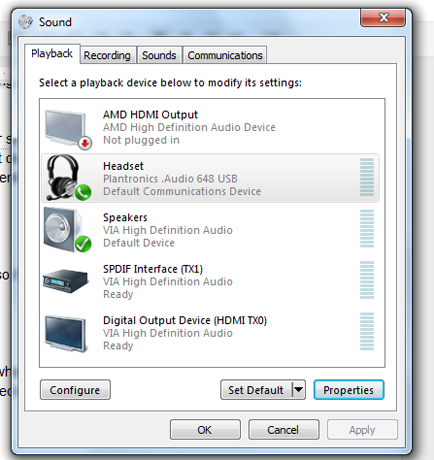
Notice that the headset (still identified as speakers) automatically becomes the default communications device.
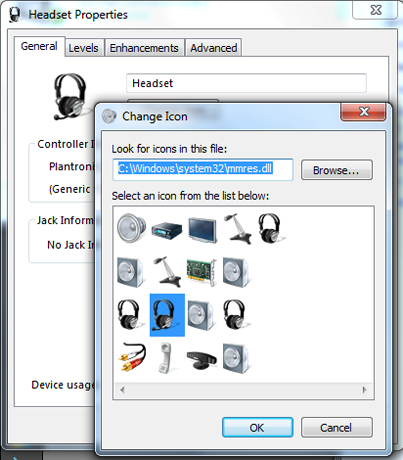
Now let's fix the name and icon of the headset so it more accurately represents what the device is. Select the headset, and click on Properties.
Now you can change the name to Headset (or whatever you wish) and change the icon to something more representative. Here I have selected the icon that looks like a headset.
And now the Audio Devices panel represents what's there.
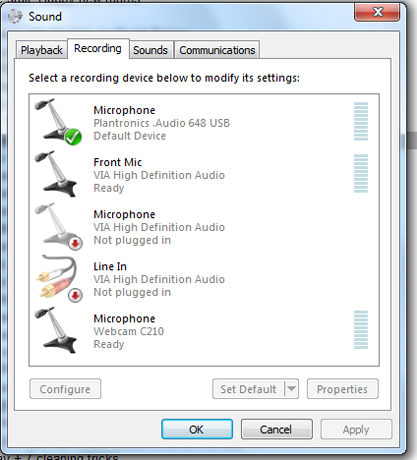
Click on the Recording tab to be sure your headset is set as the default device (it should be) and you're done with the setup.
How to Set Up the Microphone
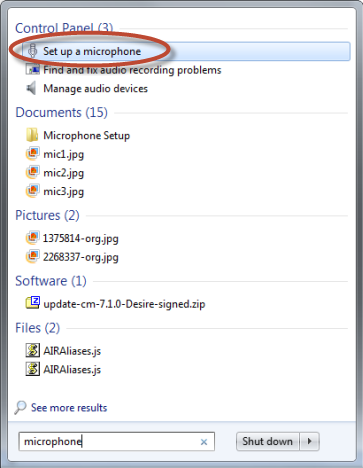
Now, make sure your microphone is set up correctly for speech recognition. To check to see how your microphone is set up, type microphone into the Start Menu search box. Click on "Set up a microphone" and it will bring up the Microphone Setup Wizard.
Just follow the instructions on your screen. If your microphone doesn't work properly the first time around, you can click the Back button in the upper left corner of the screen to try again. Speech Recognition will expect you to go through the Microphone Setup Wizard, and if you have not done this already, you will have to do it before you will be allowed to start the tutorial, so it would be a good idea to do it now.
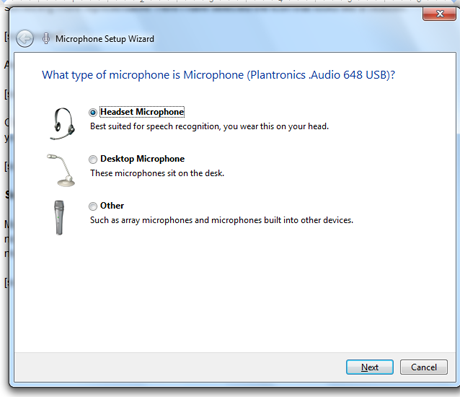
First, you identify your microphone and make sure Windows 7 recognizes what kind of microphone it is.
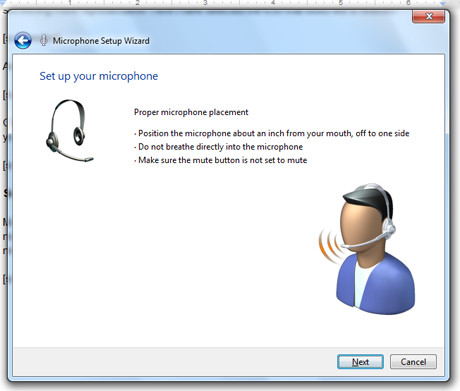
You'll get some brief instructions tailored to the kind of microphone you are using.
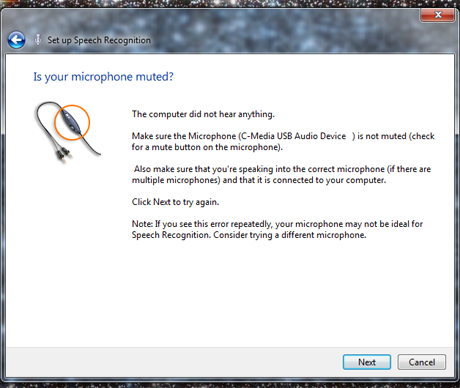
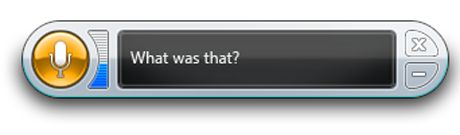
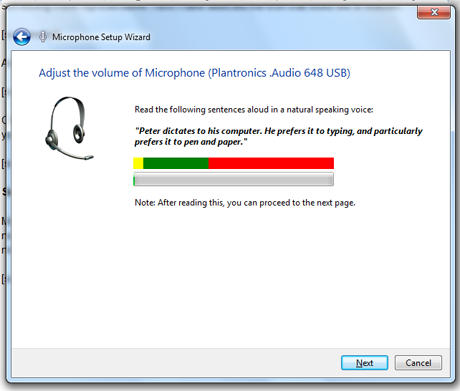
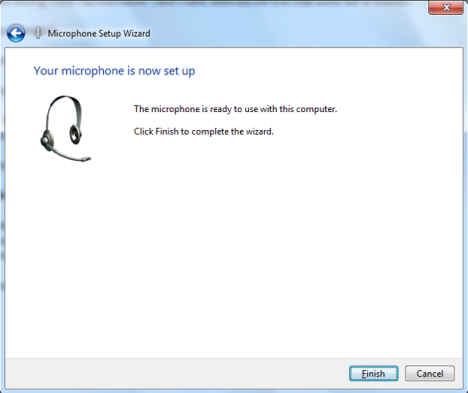
You will be asked to speak one brief phrase, to see whether Speech Recognition recognizes that someone is speaking, and whether what that person is saying is recognizable. If it doesn't work the first time, you can try again.
If it does work, you'll see this message and you can carry on.
On to the Speech Recognition Tutorial
You will definitely want to run the tutorial. You will have to learn some new syntax and learn how to speak clearly, and Speech Recognition will also be training itself to understand your unique voice.
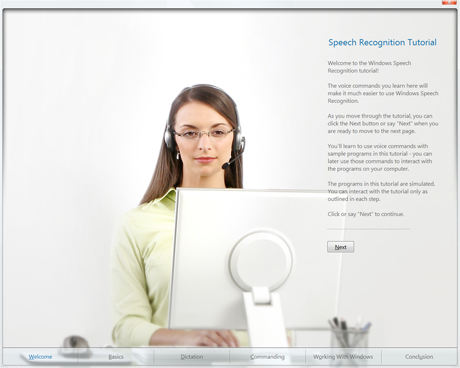
Without it things won't work well so make sure you don't skip this tutorial.
Now You're Ready
It may seem from reading this article that there are a lot of steps to go through before you can actually use Speech Recognition, but believe me, those steps are worth it. After you do the setup, your chances of success will be even greater if you take time for the tutorial. I can't improve on what Microsoft has created, so take time to go through it, till you feel at ease, and I'll talk more about what you can do with Speech Recognition in my next article.