Anyone who's taken digital photos for any length of time has hundreds, perhaps thousands, of pictures stored on their hard drive. And the more photos there are, the harder it is to find any particular one—unless you've identified them in some easy-to-search way. We've seen how to tag photos with Windows Photo Gallery, and that is one way to find the photos you want. Here, I'll explain how to use flags and ratings, which work in a slightly different way.
How to Add Flags to Your Photos in Windows Photo Gallery
Windows Photo Gallery doesn't let you add any particular information along with a flag, so why would you want to flag photos? It's just a simple way of making a note that there's something about those photos you'll want to know about. You might have photos you want to tag or edit later, or that you want to add to one of your online photo albums, or that you want to send to someone—you get the idea. You'll have to look through the photos to decide which to flag, but after that adding flags couldn't be easier.
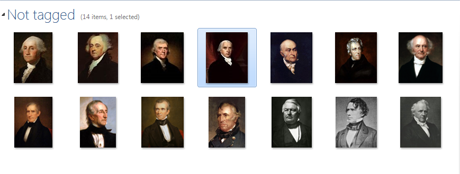
For the purpose of the tutorial, I'll use the gallery of pictures of American presidents I've shown in previous tutorials, but you are not limited to any one collection of images when you flag things. You can work your way through as many different sets of images as you like.
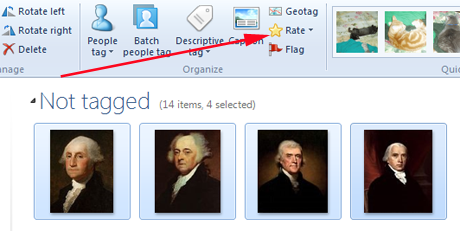
When you look at the ribbon in Windows Photo Gallery, you can see the Flag command in the Organize group of the Home tab.
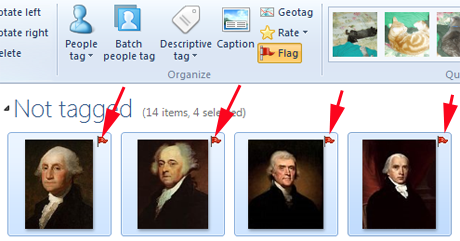
Select the photo or photos you want to flag, and then click the flag. You'll see a red flag appear in the upper right-hand corner of the selected photos.
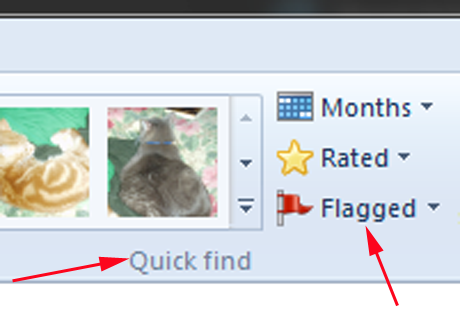
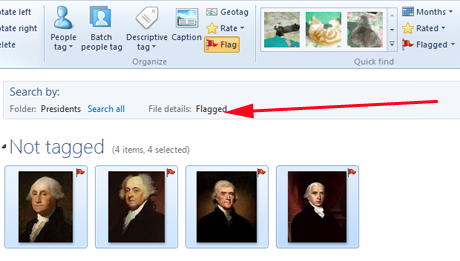
Continue flagging the photos till you've selected all the ones you wish to deal with. Now, what's the point of doing this? Take a look to the right of the Flag command and you'll see an area of the ribbon that's labeled Quick Find. One of the available choices is Flagged.
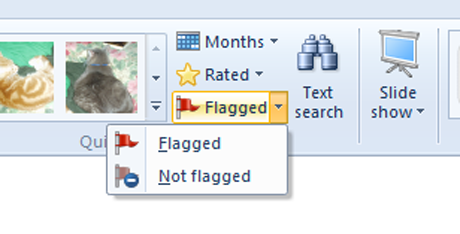
There is a drop-down menu associated with that choice. You can choose either the images that have been flagged, or the images that haven't.
Here, I've clicked on Flagged, the search detail indicates Flagged, and all the un-flagged images have disappeared from view.
And now I can do whatever I like with that group of photos. It's a very simple way of sorting things out. When you're finished dealing with the flagged photos, you can remove the flags easily by selecting all the photos you want to un-flag and clicking the Flag again. Or you can click on any individual photo and its flag will go away.
How to Rate Your Photos in Windows Photo Gallery
In any collection of photos, there are bound to be some you like more than others. You can assign star ratings to your photos just as easily as you can flag them. Just above the Flag command on the ribbon, you'll see Rate. They are found in the Organize section, in the Home tab.
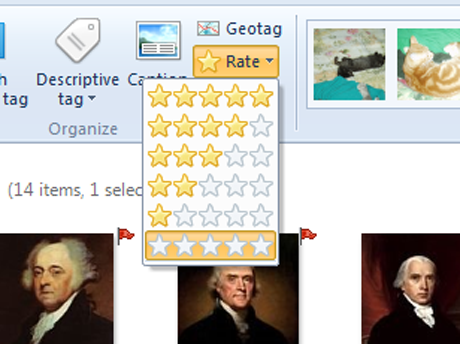
If you haven't selected any photos, clicking on this does nothing. Once you've selected one or more images, clicking Rate gives you a drop-down full of stars.
You can rate one or more photos at the same time. Select what you want, and then click on the appropriate level of stars. This assigns a rating to the selected photos, but you won't see that on the Photo Gallery screen. I have given George Washington a five-star rating. 🙂
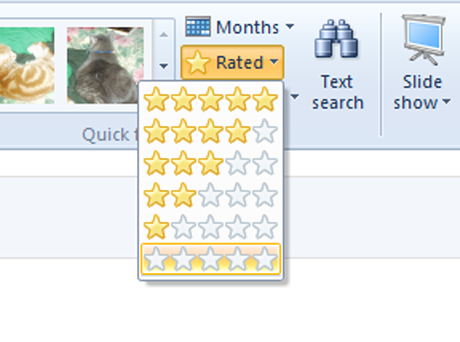
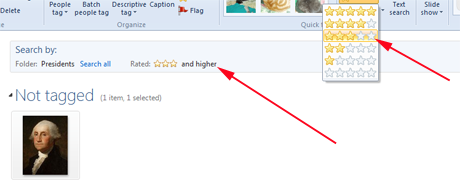
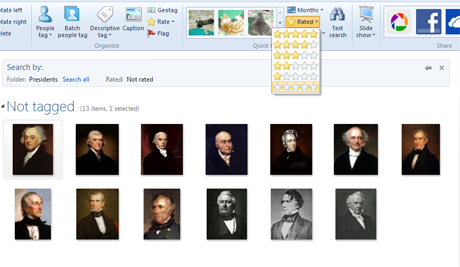
So, what's the use of ratings? Once again, go to the Quick Find area, and click Rated. You'll get the same drop-down menu of stars. Hover over each level and see what happens.
The top level, five stars, shows you only five-star photos. Hover over any of the other stars and you'll see all photos rated at that level and above.
Hover over the lowest level and you'll see the unrated photos.
So, once you've assigned ratings, you can then find all the good or bad photos in no time.
Conclusion
Flagging and rating photos takes a bit of work in the beginning. But it makes a quick search a lot easier after it's done. The two can be used together quite easily—you can flag all the photos you want to give a particular rating and then apply the rating with one click. It's an easy way to find and deal with a bunch of photos all at once.


