The Windows 10 Timeline is meant to improve your workflow by allowing you to quickly resume tasks previously started on your Microsoft account. The days of searching for those files you edited last week are over, because the Windows Timeline remembers them for you and lets you access them with one click or tap. And you can do that on any device, as long as it's connected to your Microsoft account. Read this tutorial to learn more about the Windows 10 Timeline and how to make the most of it:
NOTE: The features presented are available in Windows 10 May 2020 Update or newer. If you are using an older version of Windows 10, you might not have access to all the features. Check your Windows 10 build and, if necessary, get the latest Windows 10 update available.
What is the Windows 10 Timeline?
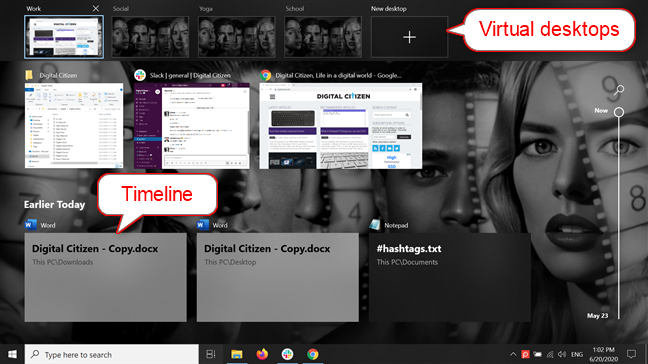
The Windows 10 Timeline is a history of your activities for the last 30 days on all the devices connected to your Microsoft account. On top of allowing you to resume work from where you left off, this feature also makes recently accessed files easier to find. For instance, you can open Microsoft Word document on your home desktop PC, close the file, and then continue working on it from your Windows 10 laptop, as long as the document is saved in the OneDrive cloud. In Windows 10, Timeline and the virtual desktops are part of the Task View, enhancing the feature and making multitasking easier, regardless of how many devices you're using.
You can use the Timeline on Windows 10 PCs, laptops, and tablets, as well as on Android and iOS devices. While the Windows Timeline doesn't log every app in Windows 10, because not all of them offer support for the feature, it does work well with the Microsoft apps found in Windows 10. We have seen it record our activities from Word, Excel, PowerPoint, Publisher, Microsoft Edge, Photos, Notepad, and VLC Media Player, but nothing from Firefox, Screenpresso, Spotify, and other third-party apps. However, the list of apps that offer support for Timeline might grow in the future.
This brings us to the main downside to the Windows Timeline: we could not find a way to stop it from monitoring a particular app. That is a negative from a privacy perspective, as some people might not want their history tracked when it comes to the videos, photos, or websites they are accessing. However, if you do not want Microsoft to know your history, you can decide NOT to turn on the synchronization of your activities across devices.
How to enable the Timeline in Windows 10
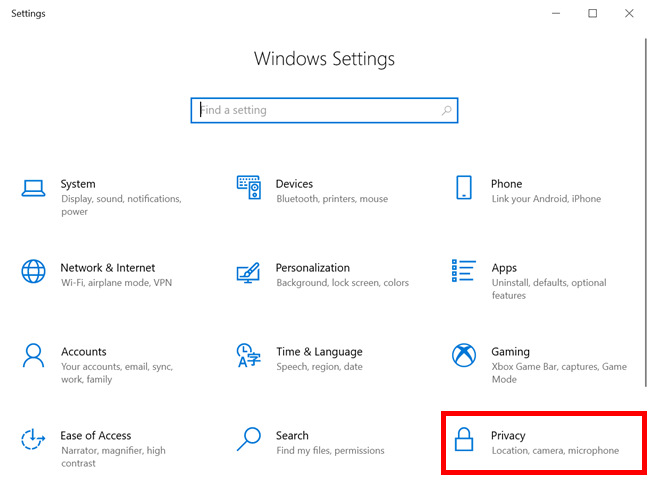
The Timeline should be enabled by default in Windows 10. If that is not the case for you, or if you want to check its status, open Settings and click or tap on Privacy.
On the left side of the window, select the Activity history tab, and you can see Timeline related settings displayed on the right.
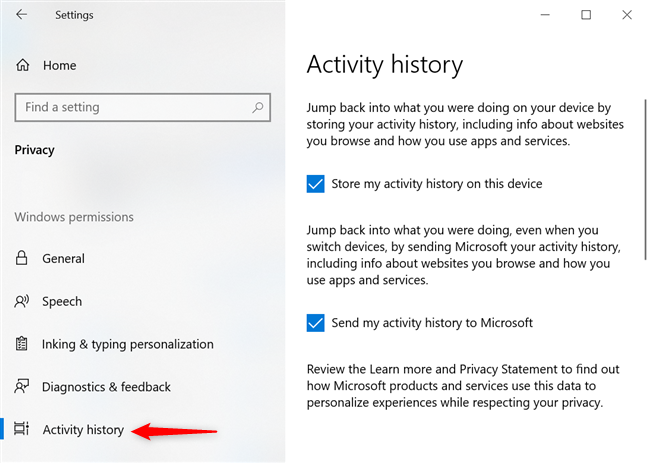
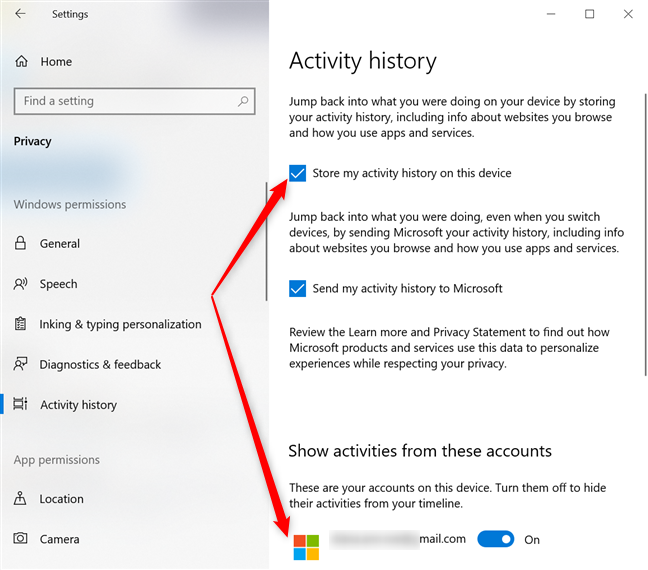
To use the Timeline feature on your Windows 10 device, you have to check the box next to the "Store my activity history on this device" option.
Then, further down, in the "Show activities from these accounts" section, turn On the switch next to the account(s) whose activities you want to be displayed in your Windows Timeline. You have to select at least one user account from the ones available on your device, and the Timeline records and shows your activities while connected to that account.
To learn more about the settings on this page and turn off the feature, read our article on disabling Timeline in Windows 10.
How to turn on Timeline syncing on multiple devices
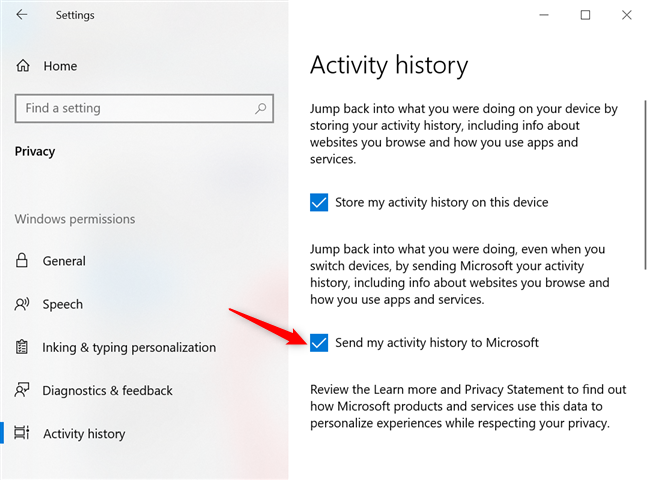
Timeline helps you continue the work started on your Windows 10 computer on another device by syncing your activities. If you want apps and windows from the PC you are currently using to be shown on your other Windows 10 devices, check the box next to the "Send my activity history to Microsoft" option.
How to access the Timeline in Windows 10
The Windows 10 Timeline is integrated with the Task View. There are more ways to access the feature, and we go through all of them in our tutorial What is Task View in Windows 10 and how to use it, but we find it easiest to use the keyboard shortcut Windows + Tab. The Task view screen opens, and you can see an Earlier Today section under your open windows - you might have to scroll down to reveal it. This is where the Timeline starts.
How to browse through your Timeline and past activities in Windows 10
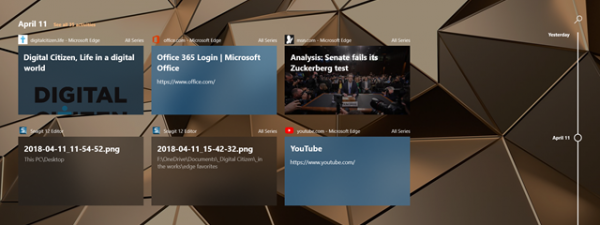
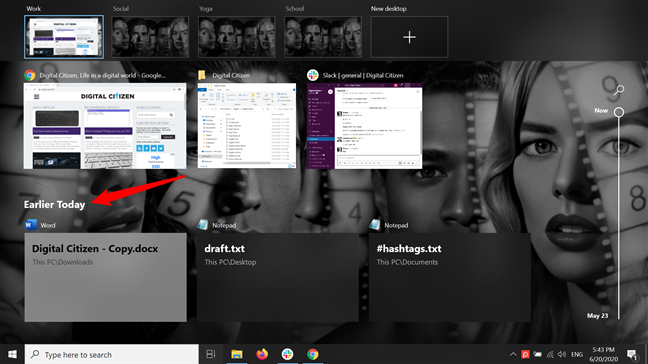
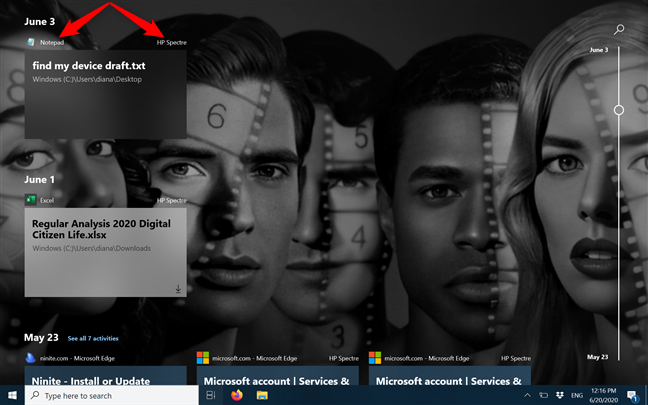
The Timeline shows a history of your past activities, both on your current Windows 10 computer and on other synced devices. Your past activities are displayed as tiles, and their covers are either file titles or screenshots from the corresponding files, documents, or apps. The app used for an activity is displayed in its top-left corner, while, on the upper-right, you can see the device that accessed it - if it's a different one from the computer you're on right now.
Use the mouse wheel or the scrollbar on the right side to navigate your Timeline (or swipe up and down, if you're using a touchscreen). The scrollbar is annotated with the dates of your recorded Timeline activities, facilitating access to the items logged on a specific day.

If you prefer the keyboard, the arrow keys let you move through the activities in your Timeline. Press on any of the arrows to navigate your activities, highlighting items as you browse.
If you scroll through the Timeline, you can see your activities are shown in reverse chronological order.
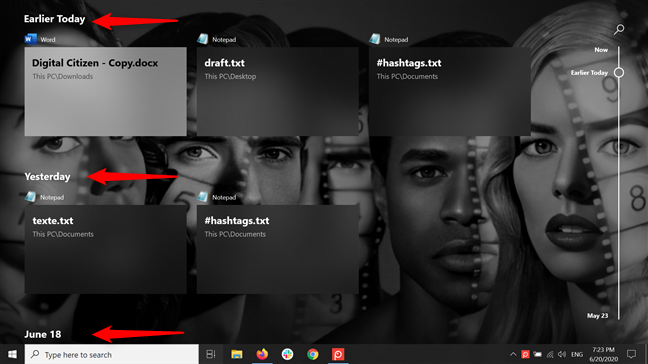
After the Earlier Today and Yesterday sections, the Windows Timeline starts using date headers to organize your activities.
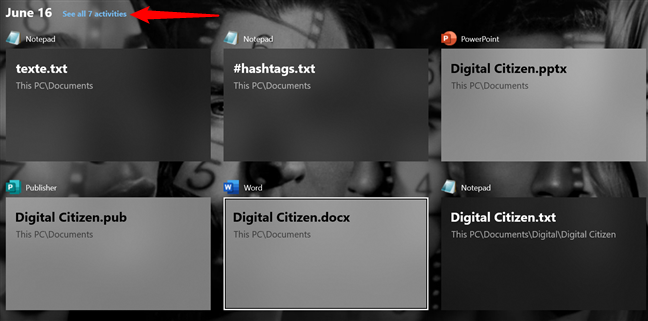
As you scroll down, you can see up to two rows of activities displayed for each day on your Timeline, but the number of items depends on your screen size. If there are more than two rows of items logged for a certain day, Timeline shows the most relevant ones - top activities, displaying a "See all X activities" link next to the date, where X is the actual number of events tracked then. Click or tap on the link.
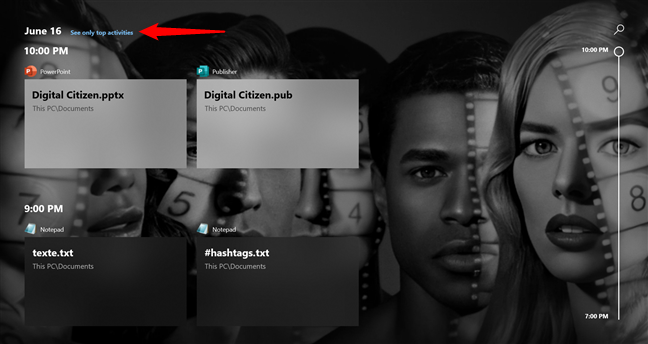
This opens a log of all the activities for that day, organized by hours, also in reverse chronological order. Clicking or tapping on the "See only top activities" link at the top of the screen returns you to Timeline's default view, where you can continue from the day you chose to expand.
How to search for past activities in your Timeline
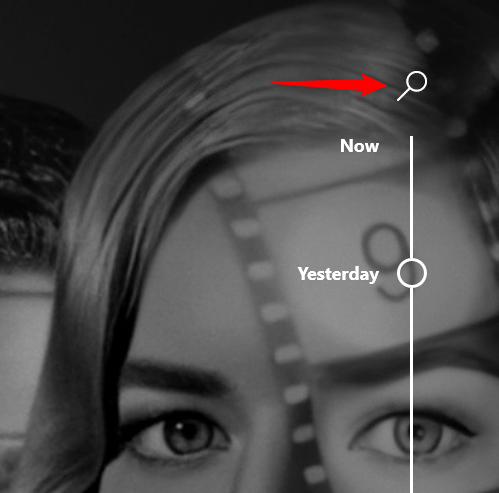
The Windows 10 Timeline also lets you search for past activities. If you're looking for a document or a file from the past, but you're not sure about the date, it can be easier to search for it. Click or tap on the magnifying glass Search button in the upper-right corner of the Timeline, on top of the scrollbar, or press Ctrl+F on your keyboard to start looking for an activity.
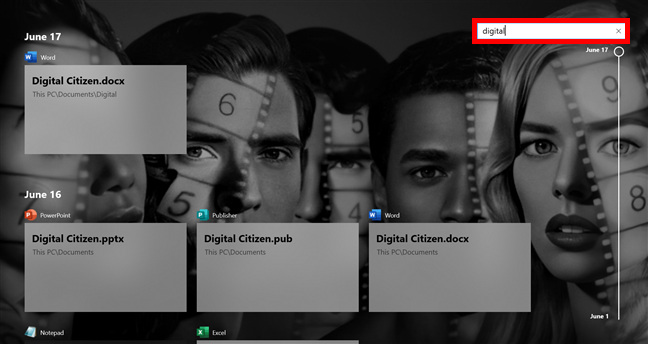
This opens the search box, where you insert the name or part of the name of the activity you want to find. If you can't remember the file's name, type in the app used for the activity to help narrow down the search. The results are displayed on the left side of the screen, grouped by the dates when you worked on that file or document.
How to open an activity from the Windows 10 Timeline
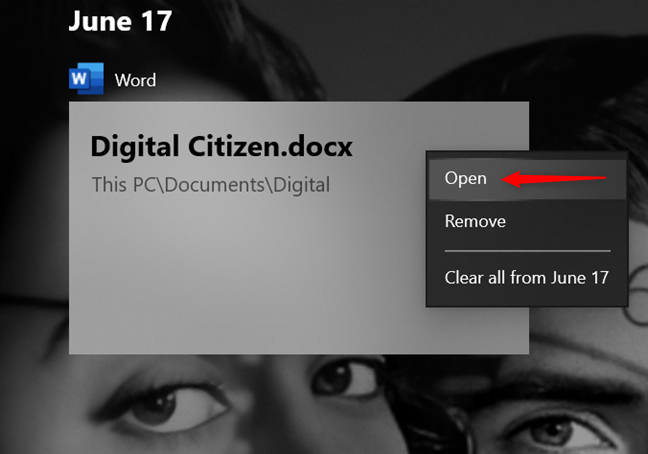
Once you locate the activity you want to continue, it's easiest to click or tap on its tile to access it. You can also select an item with the arrow keys and press Enter on your keyboard to resume it. Another alternative is to right-click or press-and-hold on the activity to reveal a contextual menu, and then click or tap on Open.
Windows 10 reopens the corresponding application and loads the same content, letting you resume your activity from where you left it.
How to remove an activity or a group of activities from your Timeline
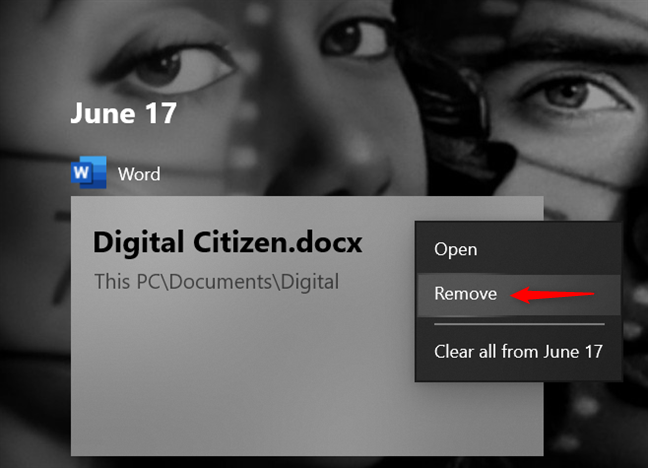
Sometimes, perhaps for privacy reasons, you might want to remove a particular activity or even a whole group of activities from the Windows 10 Timeline. Right-click or press-and-hold on any event to open a contextual menu, and then press Remove.
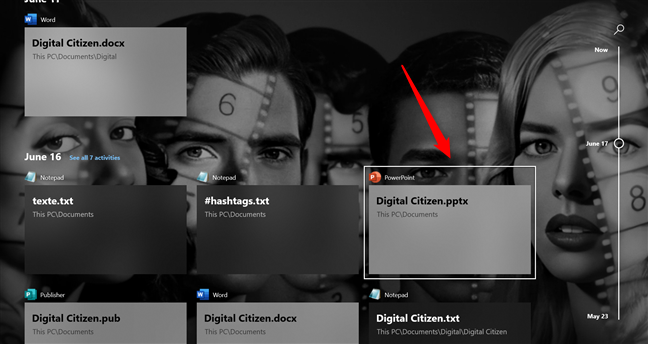
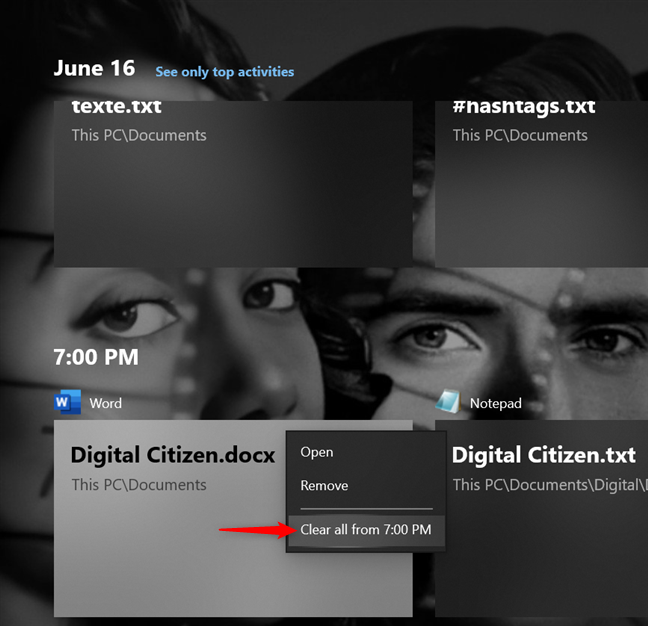
To remove a whole group of activities from your Timeline, navigate to that group, right-click or press-and-hold on any activity in it, and then click or tap on the "Clear all from [group name]" option at the bottom. You can do that for specific days, as seen in the screenshot above - "Clear all from June 17," - to remove everything from that date. On top of that, if you like to micromanage your numerous activities, you can expand a day to see activities sorted by hour, and then clear all the items from that specific time, as seen below - "Clear all from 7:00 PM."
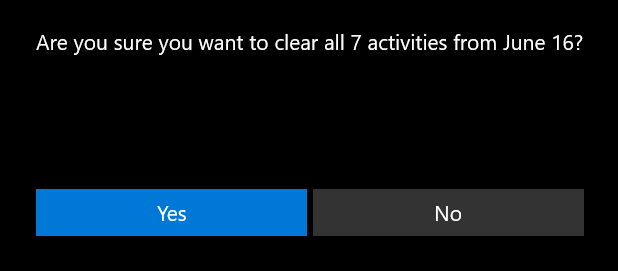
This option removes many of your activities at once, so you are asked to confirm your choice before your activities are cleared from the Windows 10 Timeline.
Removing an activity from the Timeline does not affect in any way the file or the application associated with it. The item is simply removed from the list of activities displayed.
Is the Windows 10 Timeline useful to you?
Timeline can save you precious time if you use multiple devices and want to seamlessly continue your projects. It's also a great way to find a file you misplaced and get back to previously opened documents or websites. However, it still has a long way to go: to really boost productivity, we would like to see the option to log activities from more apps, while the ability to disable the tracking entirely for the apps we choose would help address our privacy concerns. What do you think? Do you find the Windows 10 Timeline useful? Are there any improvements you'd like to see? Let us know in the comments below.