If you’re using Windows, you know that it adds a separate and distinct shortcut for OneDrive to File Explorer, one that you can't remove. The same happens with Dropbox if you install it on your Windows computer or device. However, this doesn't happen with Google Drive, at least not by default. Suppose you use Google Drive regularly and want to install its desktop app on your Windows PC. What if you also want to add Google Drive to File Explorer, both as a Quick access link and as a distinct shortcut in the navigation pane? For instructions on how to do all that, read this guide:
Introductory notes on adding Google Drive to File Explorer or Windows Explorer
This tutorial has been updated for the latest version of Google Drive’s desktop app, called “Google Drive for desktop.” This new app replaces the old “Google Backup and Sync” app. Although you can download and use either of them right now, starting with October 2021, only the new “Google Drive for desktop” will remain available.
The first chapter of this guide works for all versions of Windows. This shows you how to add Google Drive to File Explorer’s Quick access, to Windows Explorer’s Favorites, and as a regular drive in both file managers.
The second chapter of the tutorial shows you how to add Google Drive to File Explorer (as a separate entry in its navigation panel) in Windows 10 and Windows 11. However, it does not let you add Google Drive to Windows Explorer in Windows 7.
How to install and add Google Drive to File Explorer (or Windows Explorer)
To add Google Drive to Quick access and as a drive in File Explorer, you must first download and install it on your Windows PC or device. Use your favorite web browser to go to the app's download page and click or tap on the “Download & install Google Drive for desktop.” Then, press the “Download for Windows” button, as seen below.
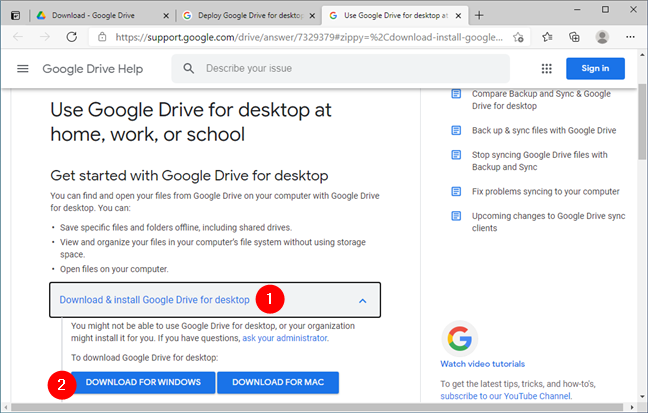
Download Google Drive for desktop
When your web browser asks you what you want to do with the downloaded file, choose to save it somewhere on your PC. The desktop is fine, for example. Then, double-click or tap on it to launch the installer.
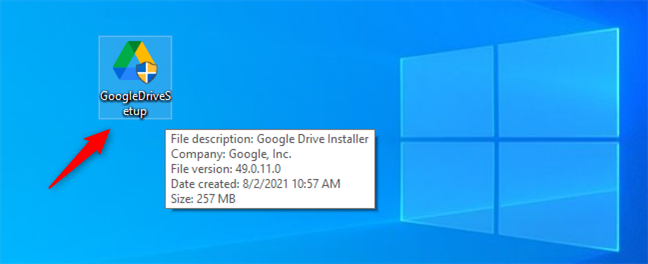
The GoogleDriveSetup.exe installer file
Approve the installation when Windows asks your permission. Note that you need to use an administrator account to do that.
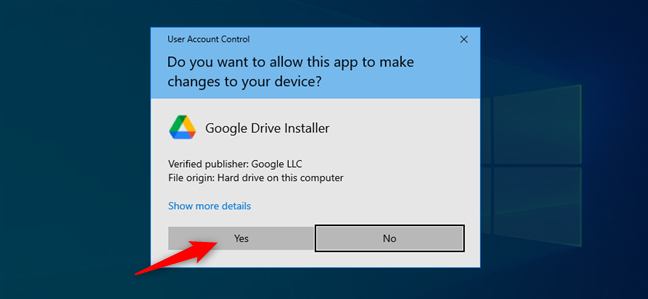
Approving the installation of Google Drive for desktop
Choose whether you want to add shortcuts for Google Drive, Google Docs, Sheets, and Slides to your desktop. Then, click or tap Install.
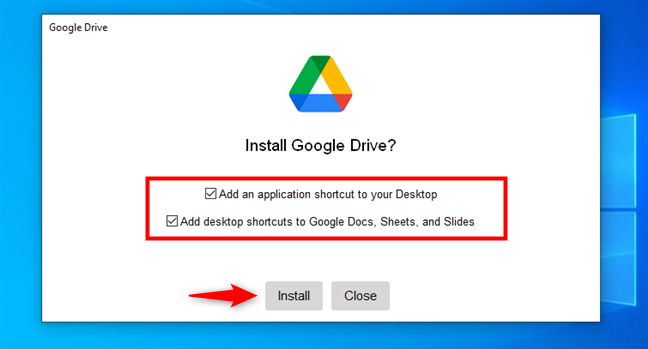
Choosing whether and where to add shortcuts to Google Drive for desktop
Wait for “Google Drive for desktop” to install. When done, you can Close the installation dialog. Then, click or tap on the “Sign in with browser” button from the “Sign in to Google Drive” window.
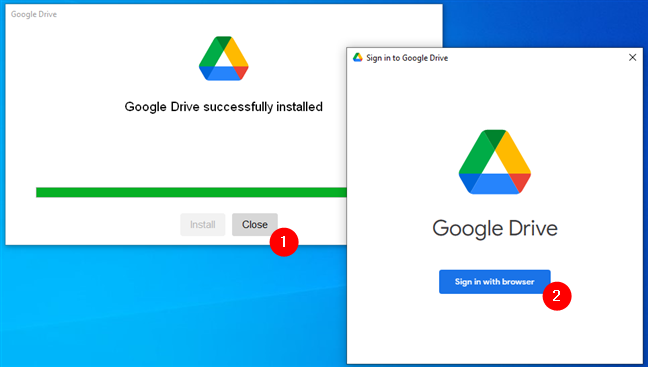
Google Drive was installed and now you need to sign in to your Google account
The previous action launches your default web browser and takes you to the Google sign-in webpage. On it, enter your Google Account email address and press Next.
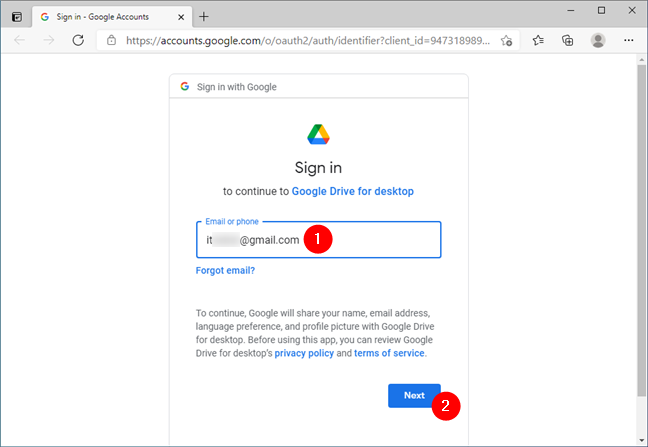
Entering the Gmail address
Now, type in the password of your Google Account, and then press Next once more.
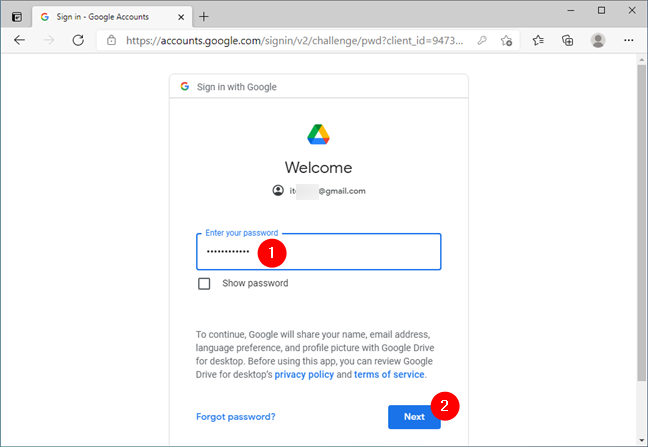
Providing the password of your Gmail account
NOTE: If you enabled 2-Step verification for your Google Account, you must also approve the sign-in using your smartphone.
If you entered your Google credentials correctly, you are now asked to confirm that you downloaded the “Google Drive for desktop” app from Google. If you’ve followed the steps shown in this tutorial, you did, so click or tap on Sign in to confirm.
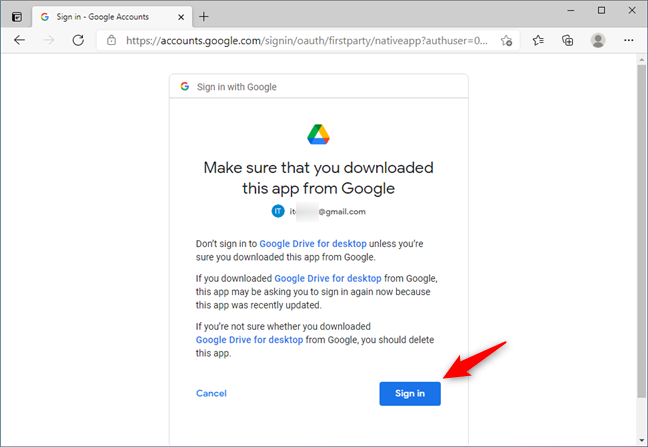
Confirming that you've downloaded Google Drive for desktop from Google
Once you are authenticated, Google tells you that “You’ve signed into Google Drive.” You can now close the browser window and start using “Google Drive for desktop” on your Windows PC.

You've signed in to Google
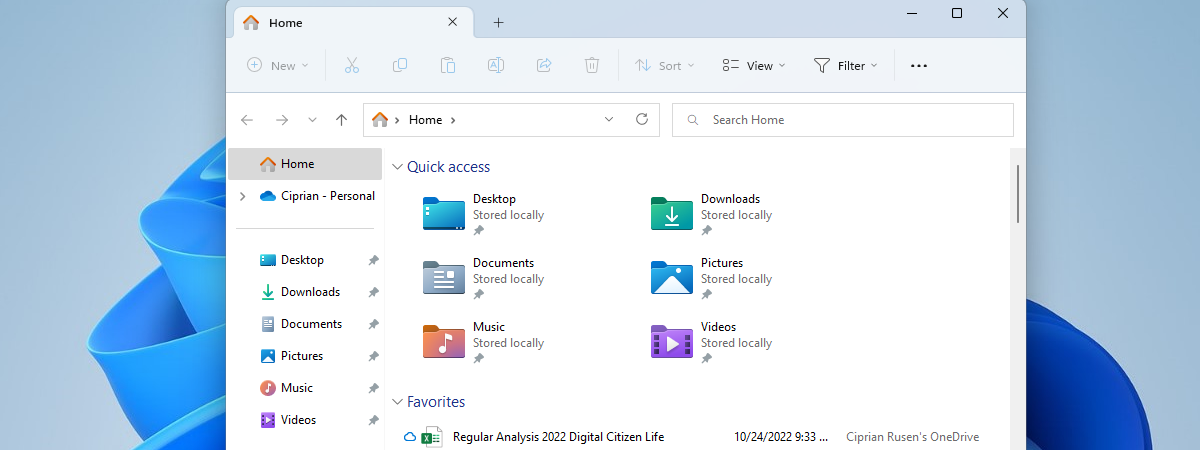
Open File Explorer. You should now see your Google Drive listed both in the Quick access section of the navigation panel (left side of the window), as well as a regular drive listed in the “Device and drives” section of “This PC.”
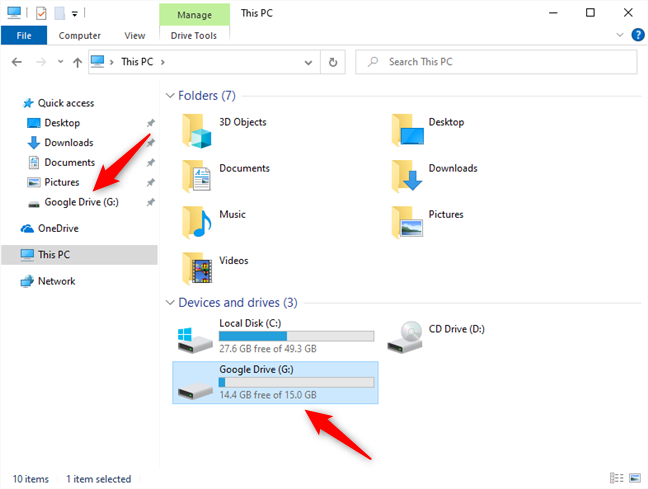
Google Drive in File Explorer listed in Quick access and as a regular drive
Excellent! You've successfully added Google Drive to File Explorer.
But what if you want to add Google Drive to File Explorer as a separate entity in the navigation panel, just like OneDrive or Dropbox? For that, read the next part of this tutorial:
How to add Google Drive to File Explorer's sidebar (just like OneDrive or Dropbox)
You've installed the “Google Drive for desktop” app on your Windows PC. However, to make it show up as a distinct entry in File Explorer's navigation panel, like OneDrive or Dropbox, there are a couple more things you have to do:
Use a web browser to go to this GitHub webpage and download the Google Drive ZIP archive (press Code, then select Download Zip).
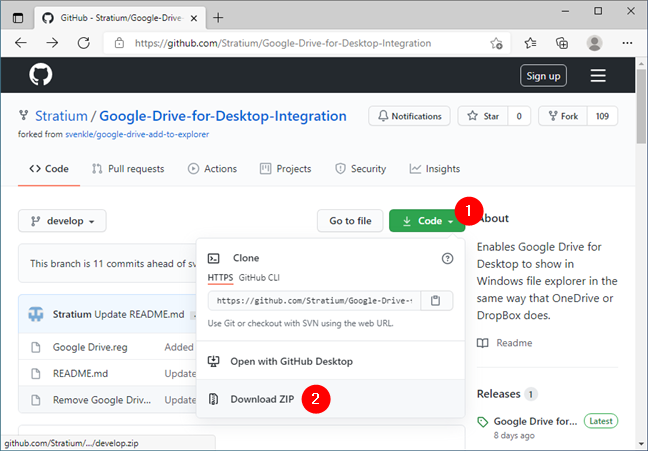
Downloading Google Drive for desktop integration files
Locate the ZIP file on your Windows computer and extract its contents. You should get this:
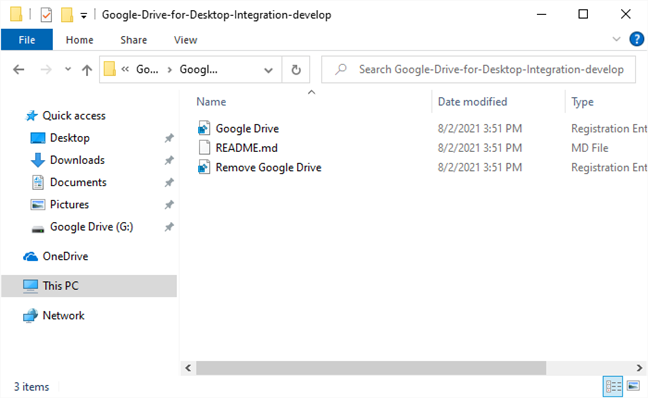
The files you need for adding Google Drive to File Explorer
Open the Google Drive.reg file using your favorite text editor. Notepad will do just fine, for example.
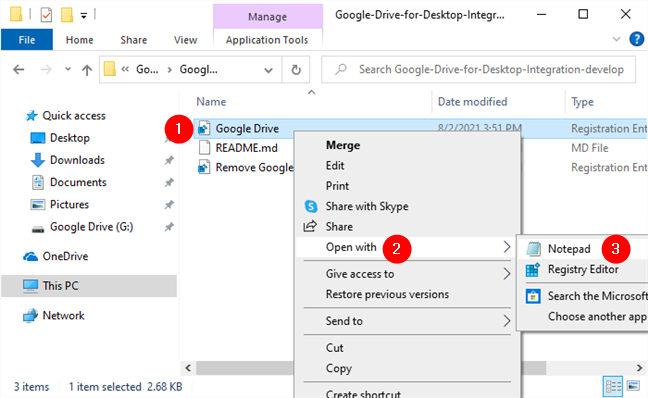
Opening Google Drive.reg in a text editor
You should see something like the screenshot below. For now, just leave Notepad (or the editor you used) open. You can minimize it, but don’t close it, as you will need to make a couple of changes inside it after you gather some additional information from File Explorer.
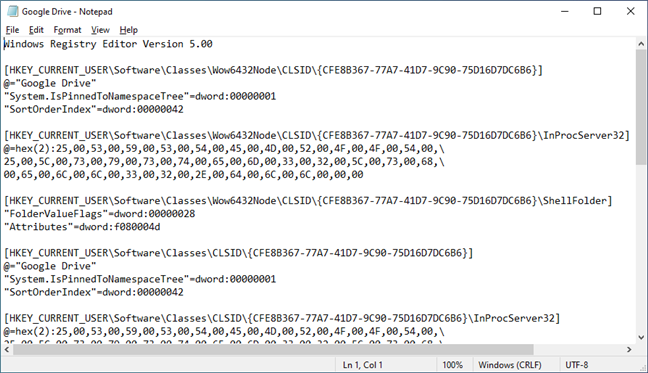
What the Google Drive.reg file looks like
Next, you’ll need to find the exact path to the “Google Drive for desktop” app on your PC. To do that, open File Explorer and navigate to “C:\Program Files\Google\Drive File Stream.” Inside, there’s always a folder bearing a numerical name such as 49.0.11.0, which is the version number of the “Google Drive for desktop” app installed on your PC. Open it.
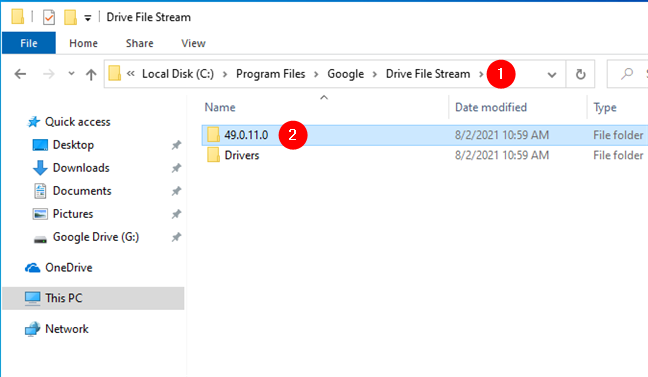
Finding where Google Drive for desktop was installed on your PC
Copy the full path to the folder.
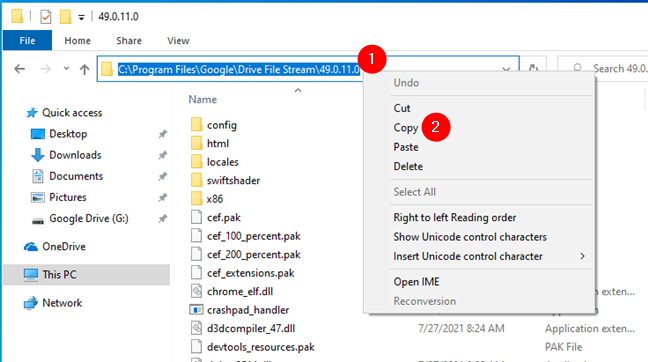
Copying the full path to the Google Drive for desktop app folder
Go back to Notepad or the text editor you chose to use. Inside the Google Drive file you’ve opened earlier, search and replace all the text that says "C:\\Program Files\\Google\\Drive File Stream\\49.0.9.0" with the exact (full) path to your “Google Drive for desktop” app installation folder. That’s the one you copied earlier in File Explorer. Make sure you use \\ (double-backslash) in the folder path structure.
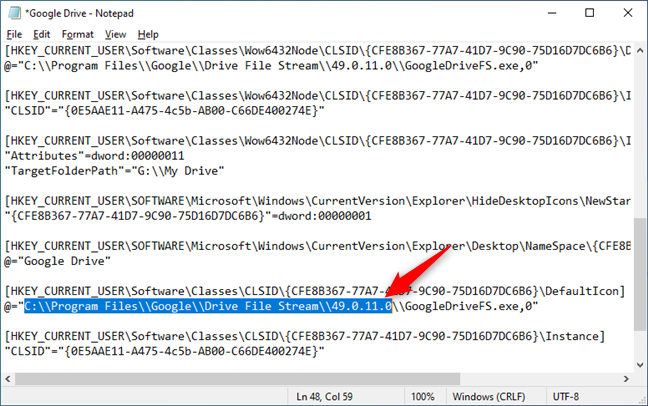
Updating the Google Drive for desktop path in the Google Drive.reg file
Next, change all the TargetFolderPath values to "G:\Google Drive.” Note that G: is the drive letter used by our Google Drive. In your case, it might be different, so make sure you check it in File Explorer. Also, just like in the previous step, be careful to use \\ (double-backslash) instead of \ (single backslash) in the folder structure.
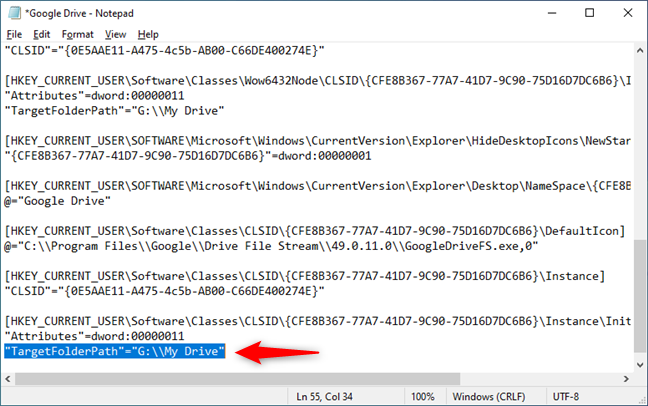
Updating the Google Drive storing location in Google Drive.reg
When you finish replacing every instance of TargetFolderPath values, save the Google Drive.reg file and close your text editor. Double-click or double-tap on the Google Drive.reg file to run it. Say Yes when you see the UAC prompt to let the new information be added to your Windows Registry.
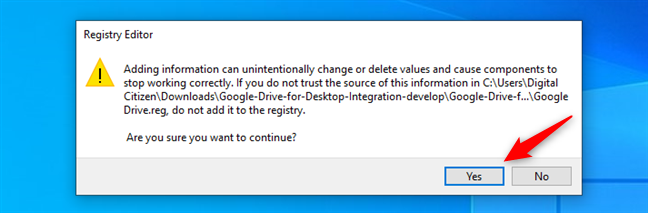
Let Windows add the new information in its Registry
Press OK when the Registry Editor tells you that the new keys have been added to your Windows Registry.
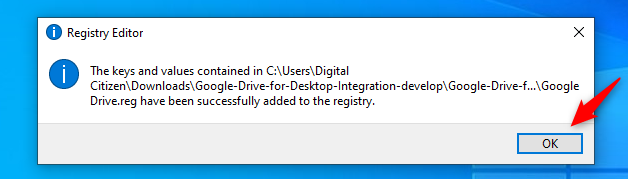
The new Google Drive data has been added to the Windows Registry
Now, open File Explorer. You should see that Google Drive is now listed as a separate entity in its navigation panel, just like you wanted. Neat, right? 🙂

Google Drive is now shown as a separate entity in the navigation panel from File Explorer
That's it!
NOTE: If you change your mind and no longer want Google Drive to show up as a separate shortcut in File Explorer, all you have to do is run the Remove Google Drive.reg file that you extracted earlier.
Do you know other ways to add Google Drive to File Explorer?
As you've seen, it's relatively easy to add Google Drive to File Explorer, as long as you're OK with having it in the Quick access section and as a regular drive in File Explorer. But if you want Google Drive to show up as a distinct option in File Explorer's navigation pane, just like OneDrive or Dropbox, things are a bit more complicated but doable nonetheless. Did you manage to do it? Do you know other ways to add Google Drive to File Explorer? Share them with us in the comments below, and we'll update this tutorial as soon as possible.