If you want to change the way your mouse cursors look, you have two options. The easy one is to install a mouse cursor scheme that changes all the pointers from Windows. The other one is to set a specific pointer for each mouse cursor manually. If you want to know how to install mouse cursors in Windows 10 and Windows 11, read this guide. It is easier than you might think:
NOTE: Installing a new mouse cursor scheme is very similar in Windows 11 and Windows 10. If you don’t know what Windows you’re using, here’s how to tell what Windows you have (11 ways). The method for Windows 10 should work on older Windows versions as well.
1. Download the custom scheme and extract it
The first thing you need to do is download the custom cursors that you want to use on your Windows PC or device. That usually means getting a custom mouse cursor scheme from somewhere on the internet. To get you started, here are some cool cursors that we like: Download the best mouse cursors for Windows.
Use a web browser to download and save your favorite mouse cursor scheme somewhere on your PC, like on your desktop or Downloads folder. Note that mouse cursor schemes usually come packed inside an archive to make it easier and faster to download.
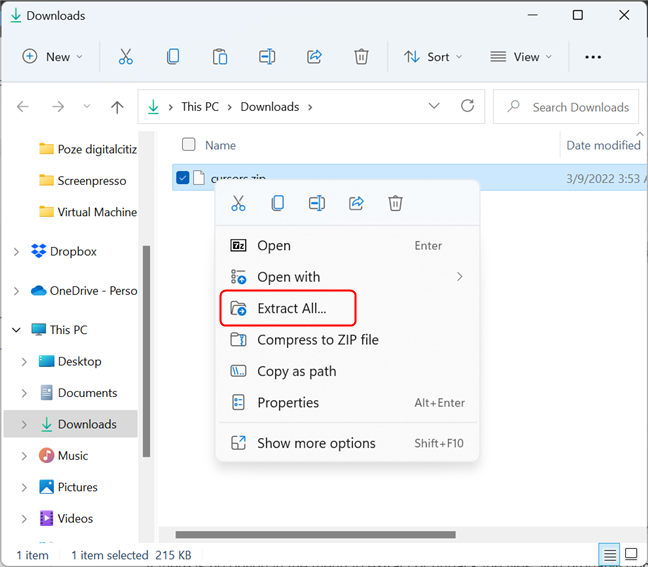
Once you have downloaded the mouse cursor scheme file on your Windows PC, you need to extract its contents. Right-click or press and hold on it and, in the contextual menu, click or tap the option that says “Extract all”.
Extract the mouse cursors (only works with certain archive types)
If there is no option in the menu to extract the files, the archive is in a different format, not supported by File Explorer. To solve this issue and unpack the archive, you need a file archiver app. Install one and then try again. One of the best is called 7-Zip, and you can download it from here: 7-Zip. Here are the next steps if you install 7-Zip.
In Windows 11, once you install the app, right-click or press and hold again on the archive that contains the cursors, then click or tap on Show more options, and you should see the classic right-click menu (this step is not needed in Windows 10, as right-clicking the archive displays the classic contextual menu directly). In the contextual menu, you should see a 7-Zip entry. Click or tap on it, then click or tap on Extract to “archive name\” (where archive name is the name of the actual archive - in our case, Cursors).
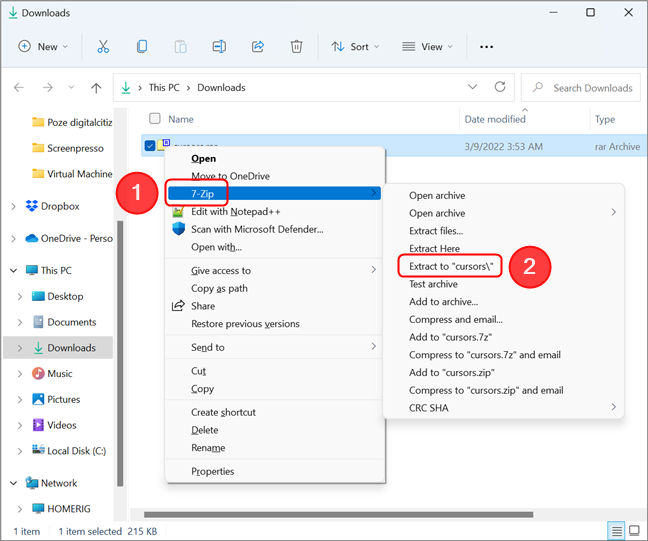
Use 7-Zip to extract the archive contents in the same folder
This action unpacks the archive contents in a folder with the same name as the archive, placed in the same location.
2. Install the cursor scheme
Next comes the most important step: finding and running the install file from inside the custom mouse cursors folder. Open the newly created folder. Inside, you should find many files that contain the pointers used by the mouse scheme. Among them, there should also be a file that ends with the INF file extension. It’s usually called install.inf, but the name can differ depending on the mouse cursor scheme that you want to install.
Right-click or press and hold on the INF file. Next, in Windows 11, click or tap on Show more options. As before, this step is not required in Windows 10. Finally, select Install in the contextual menu.
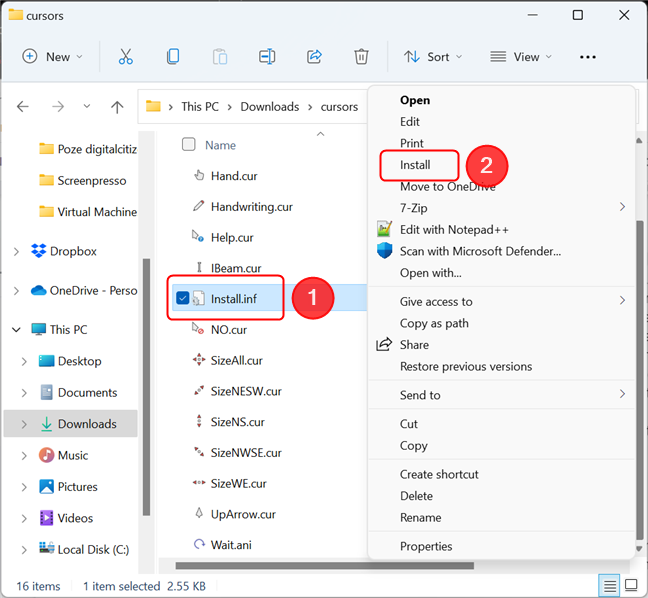
The Install option is found in the classic right-click menu
Windows then opens a UAC (User Account Control) prompt where it asks you to confirm that you want to install the new mouse cursors. To be able to continue, your account must have administrative rights on your PC. Press Yes or type the password used by an admin account.

UAC prompt to confirm the installation of the new custom mouse cursors
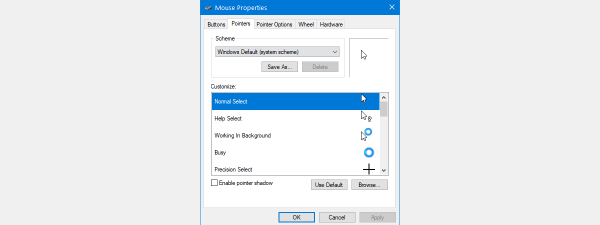
After Windows installs the custom mouse cursors, it automatically opens the Mouse Properties window and selects the Pointers tab. Click or tap on the Scheme field.
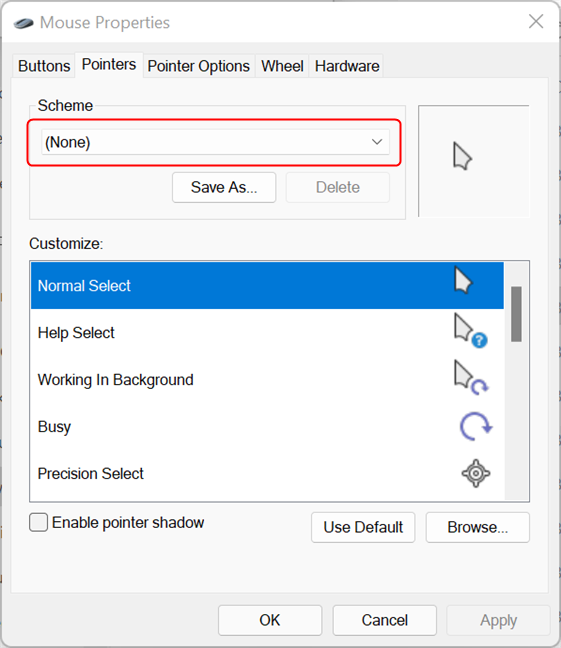
Open the Scheme drop-down menu
Select the new custom mouse cursor scheme from the drop-down list at the top. In the Customize cursors list, you can see a preview of all the pointers used by that mouse cursor scheme. If you like the preview and want to proceed with applying the mouse cursor scheme, click or tap on the OK button. Then, you can enjoy your new custom mouse cursors!
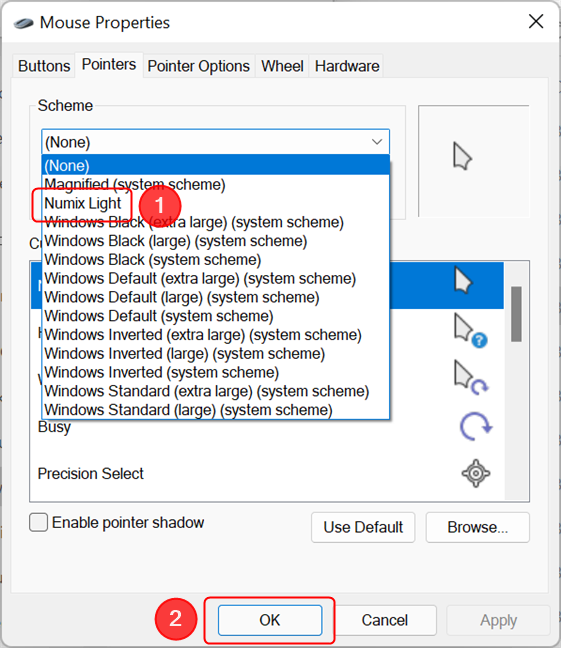
Select the new pointer scheme, then press OK
NOTE: In the example above, we used the excellent Numix Light scheme, available here: Numix Cursors by alexgal23 on DeviantArt.
What if there's no INF file in the custom mouse cursors folder?
If the mouse cursor scheme you have downloaded does not have an installation INF file inside, then you have to install the mouse pointers manually. That means that you must assign a cursor for each mouse action, by hand. You can find instructions on how to do that in this guide: How to use custom mouse cursors and pointers in Windows.
What’s your favorite custom mouse cursors scheme for Windows?
Now you know how to install custom mouse cursors on your Windows computer or device. As you've seen, it is a relatively easy task for anyone, and there are only minor differences between installing custom mouse cursors on Windows 11 and doing it on Windows 10. We hope that this guide was concise and clear enough for you to know what to do. However, if there is something that you did not understand, leave a comment below, and we'll try to help as best as we can.