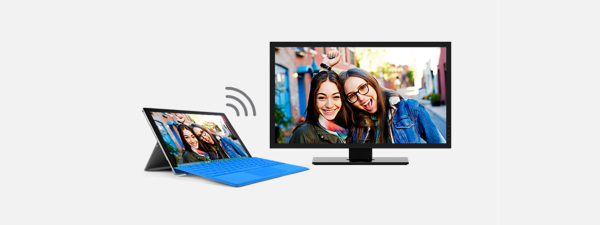
Do you have a Windows 10 laptop, tablet, or hybrid device and want to mirror your screen to a Smart TV? You can do that with ease, using the Miracast technology built into many modern devices, including Smart TVs from all the major brands (Samsung, LG, Sony, Phillips, etc). Here’s how to connect to a TV wirelessly from Windows 10 and project your screen onto it:
How to connect to a wireless display from Windows 10 through Miracast
Don’t forget to first turn on your Smart TV, and then go to your Windows 10 laptop, tablet, or hybrid device. The wireless connection can be made from the Connect side panel. To access it, you can open Settings and go to System > Display. On the right, scroll down to Multiple displays and click or tap on the “Connect to a wireless display” link. Then, you see the Connect panel on the right side of the screen.
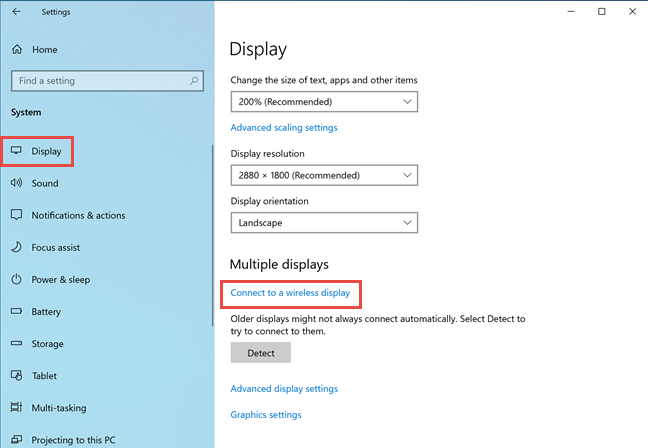
In Windows 10 Settings, click or tap on Connect to a wireless display
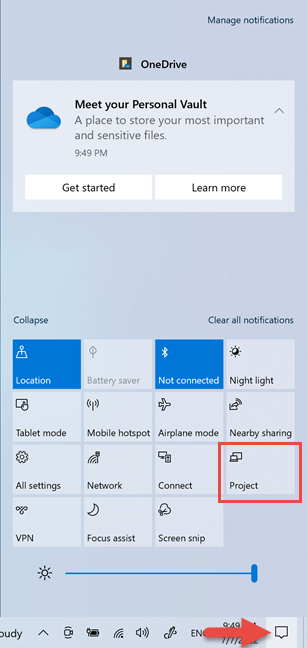
Another way to access it is from Quick Actions: press Windows + A on your keyboard or click or tap the Notifications icon in the bottom-right corner of your desktop. Expand the list of Quick Actions and click or tap Connect.
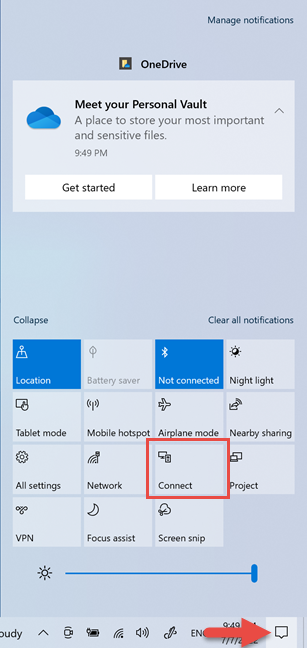
In Quick Actions, choose Connect
You see the Connect panel on the right side of the screen. You can also press the Windows + K keys on your keyboard to get to the same place. In the Connect panel, there’s a list of all the TVs and devices you can connect to wirelessly. Click or tap on the name of the TV you want to cast to.
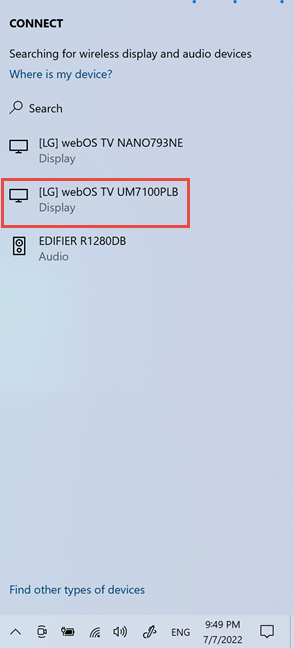
Click or tap on the name of your Smart TV to connect to it
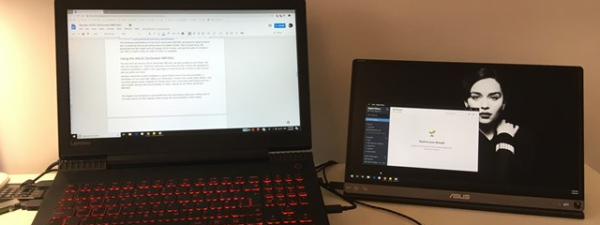
Windows 10 spends a couple of seconds connecting to the TV and then displays a connection toolbar at the top, changing the TV's status to Connected.
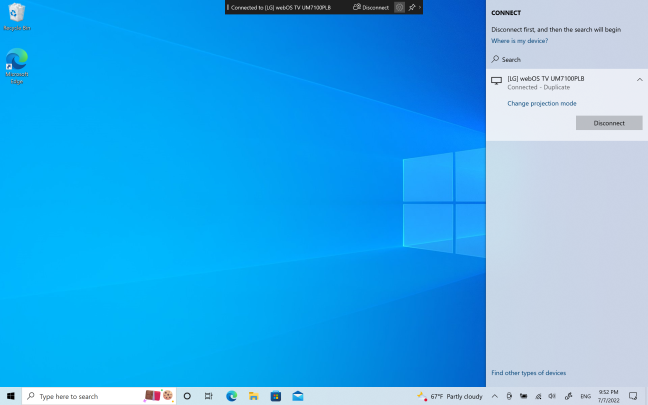
You're connected to the Smart TV
Change how Windows 10 projects the image to your TV
By default, Windows 10 mirrors your screen to the chosen Smart TV. However, this behavior can be changed by either pressing Windows + P on your keyboard or opening Quick Actions, expanding them, and choosing Project.
In Quick Actions, choose Project
In the Project panel, choose one of the following options:
- Disconnect - stops the connection to your TV, and the image is shown only on your Windows 10 device.
- Duplicate - mirrors the image from your Windows 10 device to your Smart TV. This is the default behavior for casting wirelessly from Windows 10.
- Extend - extends the image to the TV, turning it into a secondary display. You can then move windows from your Windows 10 laptop to your TV and the other way around.
- Second screen only - disables the display on your Windows 10 device and uses your TV as the only available screen.
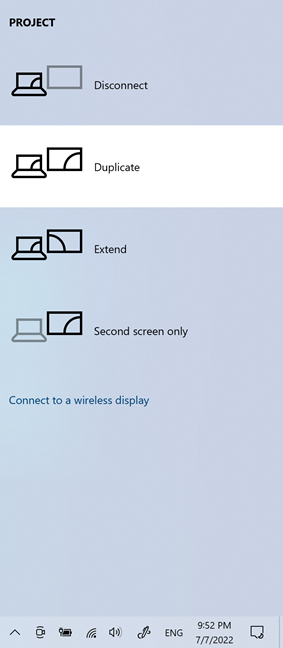
Choose how you want to project the image to the TV
How to disconnect from your TV and stop projecting wirelessly
When you’re done projecting wirelessly to your TV, there are two ways to disconnect from it:
- Click or tap the Disconnect button on the connection toolbar shown at the top of your screen
- Press Windows + K to bring up the Connect panel and then the Disconnect button next to your TV.
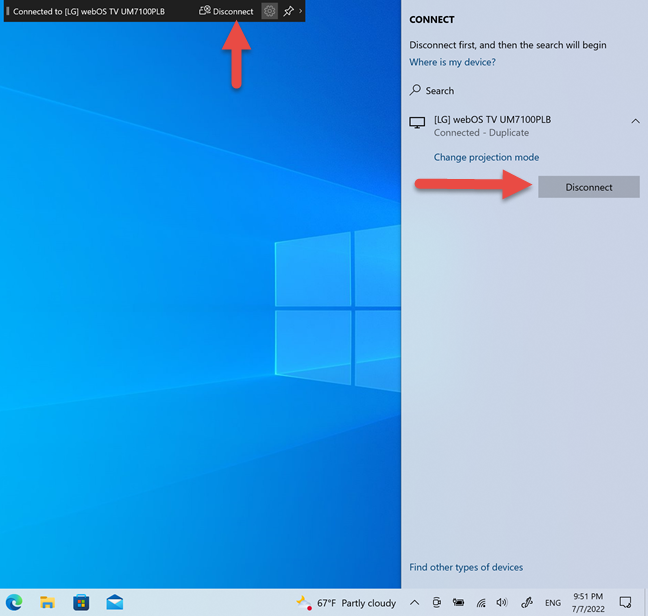
Disconnect from your Smart TV
Your Windows 10 device is immediately disconnected from your TV.
Troubleshooting: Windows 10 doesn’t see my TV as a wireless display
There are times when your Windows 10 laptop or tablet can’t “see” your TV and wirelessly project to it. On older TVs, this happens because you need to enable the Wireless Display feature manually. Unlike modern Smart TVs, they don’t have this service turned on automatically. Therefore, use the TV’s remote to browse its menus and select Wireless Display or something similar as its input source.
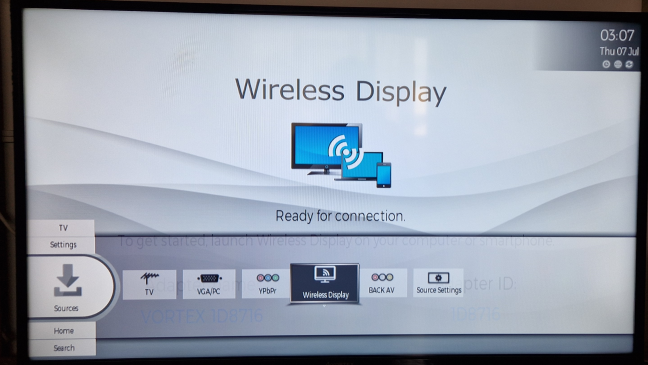
Enable the Wireless Display input on your TV
Your TV should now be visible as a wireless display you can connect to.
Bonus: How to turn your old TV into a wireless display
If you don’t have a Smart TV, but your TV does have an HDMI port and a USB port on its back, you can turn it into a wireless display with a Microsoft Wireless Display Adapter (we will receive a commission if you purchase it using this link).

The Microsoft Wireless Display Adapter can turn any TV into a wireless display
Buy it from Amazon or some other shop, plug the adapter into the back of your TV, and then cast to it using the same steps shared in this guide.
IMPORTANT: Miracast is not available on most desktop PCs
Wireless projection is not available on many Windows 10 desktop PCs because they do not have a wireless network card with Miracast support. This chip is usually available for laptops, tablets, and convertible devices. Therefore, on a PC, when you access the Connect panel, you will probably see a message informing you that “Your PC or mobile device doesn’t support Miracast, so it can’t project wirelessly.”
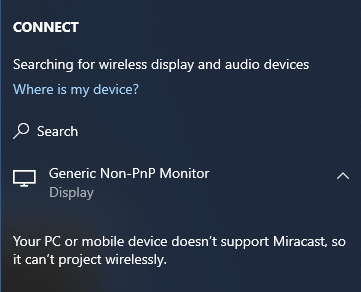
Many desktop PCs can't project wirelessly
However, there are exceptions on PCs with premium motherboards that include Wi-Fi, Bluetooth, and Miracast wireless connectivity.
Did you successfully connect to your TV?
As you have seen in this guide, it is not difficult to connect to your smart TV wirelessly and mirror the screen from your Windows 10 laptop or tablet. If you encountered problems with the procedure described above, don’t hesitate to leave a comment and share details about what happened. Thanks for reading this guide and don’t hesitate to check out the articles recommended below for more interesting content.